[79FT]: Building Things |
 |
Alternator Pivot Arm Bracket
lots of grinding
| On: | Aug 31, 2019 |
| In: | [Chickenhouse Charger] Electrical Rebuild |
| Time logged: | 14.5 |
| Tags: | 6781G, MA5 Charger, alternator, 4130, fabrication, drilling, CAD, SWX |
With baffle support bracket done, the next step on the path to alternator happiness was the pivot arm.
The Problem
... was that the default B&C's pivot arm did interfere with the front baffle hookup brackets.
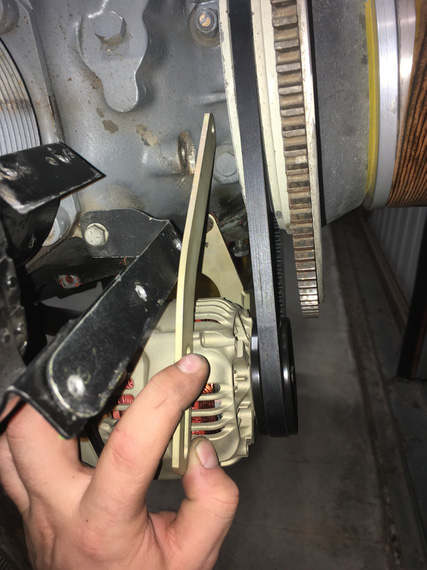
Interference!
That did actually make me pay attention to the very unusual old pivot arm.
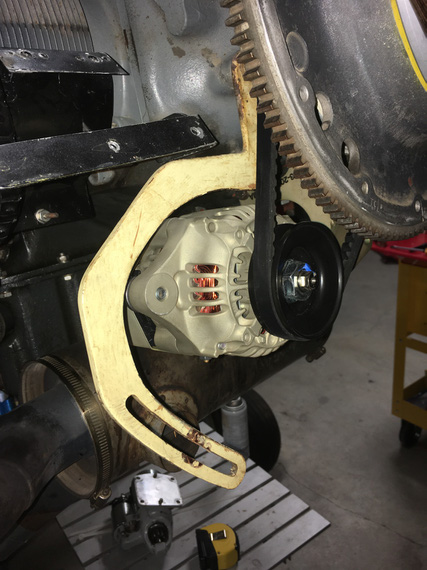
Old one
Nice dogleg, isn't it?
Well, this bracket did not involve any bending, just needed to make the correct one to fit around all the other stuff there on the nose.
Hmm... so how do we do that? Well, first, we need...
The Template
This is not the real template, because (.. read on ;) ). It's the template for the Template.
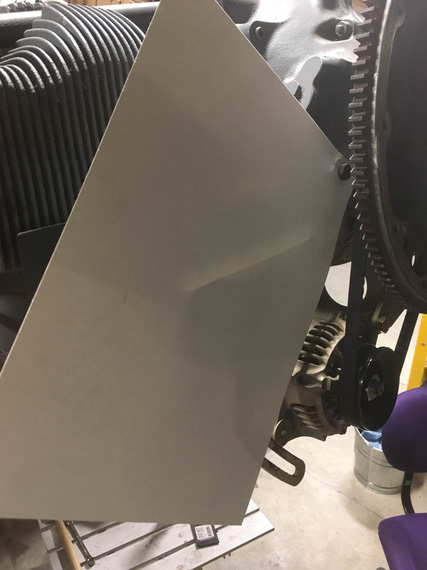
Start with a piece of heavy paper
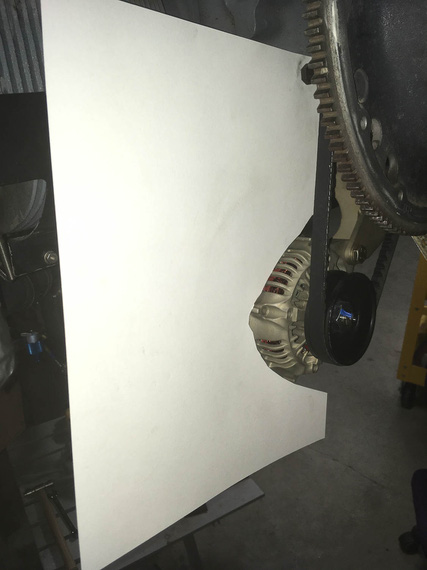
Cut around the alternator
All we need to do with this template is show the location of the hookup hole (top hole, the one that attaches the bracket to the motor); the location of the slot for the alternator to hook up to, and the general outline of the alternator
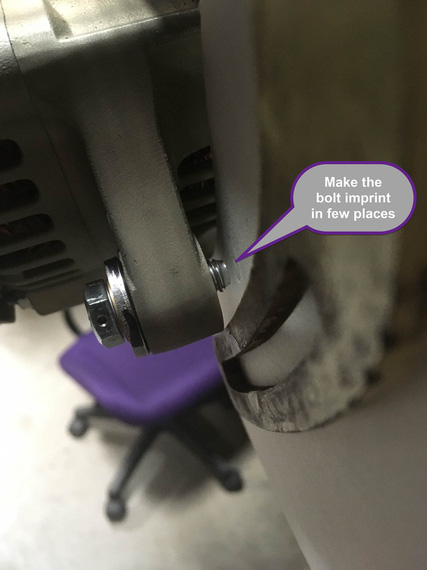
Alternator bolt location is being marked
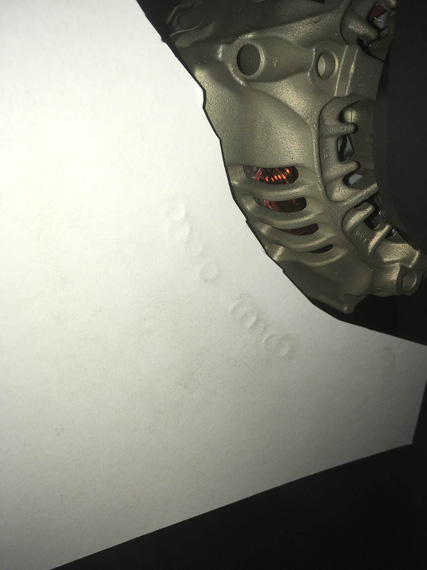
Bolt imprints along the "pivot arc"
..and finally, some more "no go" zones to prevent interference with other brackets there:
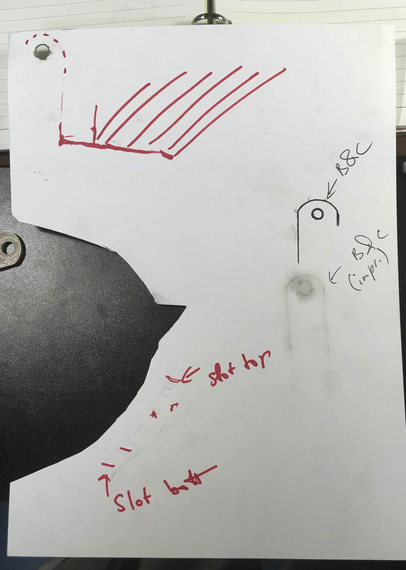
Done!
Notice I also added some "imprints" of the B&C-supplied pivot arm in there, just in case I'd need them.
Okay. I'm lying to you. This template is not the one I used. It was done with the long belt that ended up not working out, so I had to redo the template (thanks God, just the template). The new one was done in the same manner as the one I described above.
Here it is:
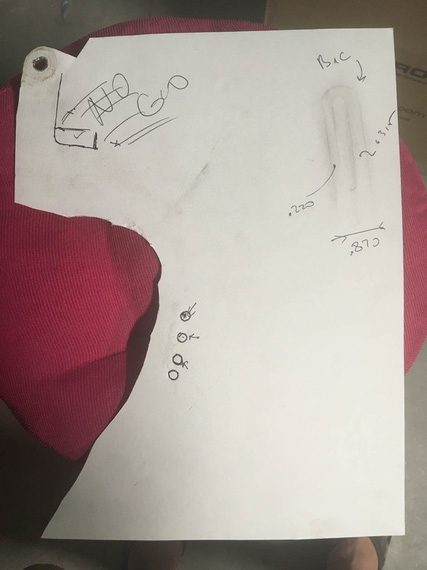
The *actual* template used
Okay. So now, we know critical locations of things and where not to go - so, cue in...
Solidworks!
It's magic, I keep telling people.
So, we take our template, and scan it on a scanner, along with a little metal ruler to give us physical dimensions. Then, we go to Solidworks, start a sketch, and insert the scan as "sketch picture". Using the image of the ruler that was scanned in, we tell Solidworks what "one inch" on this picture is. Boom! The image is now dimensionally accurate.
Then, we start drawing around it.
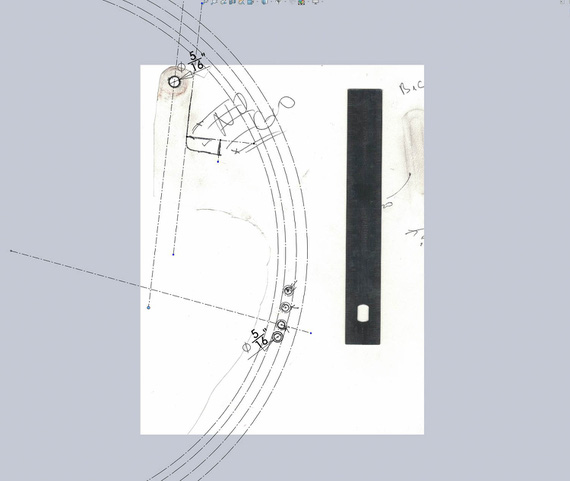
Initial sketch
Above, I positioned the top hole, and the four 5/16" holes around bolt imprints. I then sketched a large circle and made it tangent to three out of four of those holes - it defines the "pivot arc". Then, offsetting it 5/16th gives me the other "side" of the slot; and offsetting it more gives me the "sides" of the bracket in the "pivot arc" area.
I also started sketching the "no go" lines around the top portion of the bracket.
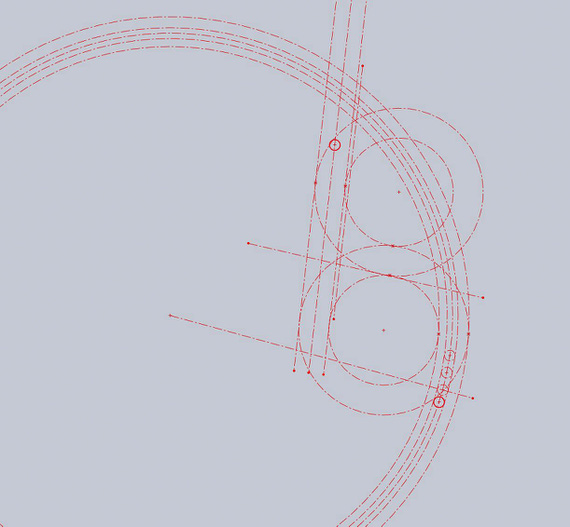
More circles
More circles and lines are added, and off-set. They are not positioned or dimensioned - just made tangent to "no go" lines. You can almost see the outline of the pivot arm, yes? ;)
Now, we take this master sketch; and add arc elements with real lines that we care about.
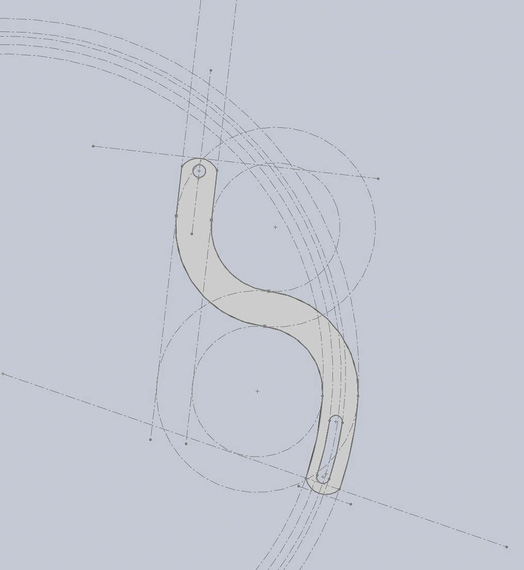
The arm!
Tada! We got the Solidworks Part.
By the way. How do you "measure" the round over of the B&C arm? Radius gauge? Calipers? Hmmm.. Or...
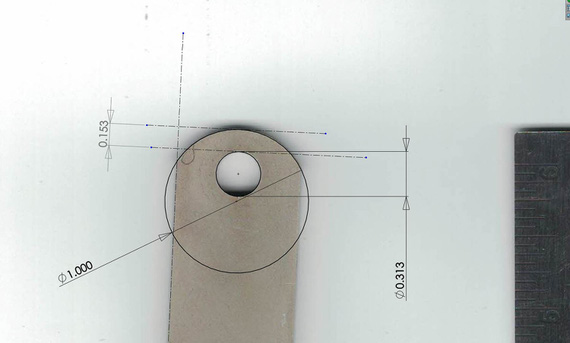
Measuring with Solidworks
Nice, isn't it?
Next, we print the drawing of our new part; making sure our holes' centers are marked (we'll use that later to drill them)
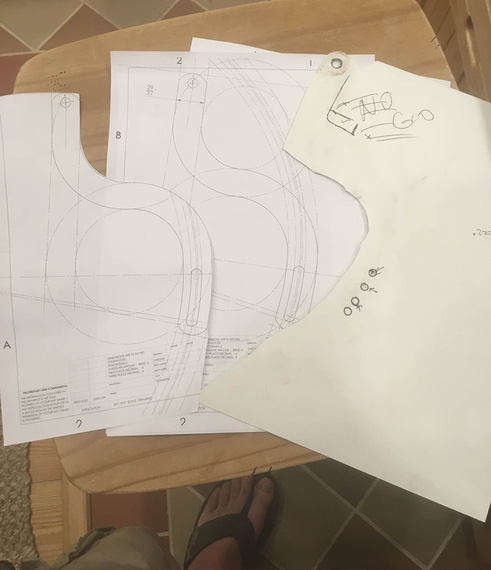
Done!
And, we got ourselves the actual template!
Now, the final test (Many thanks to USPS for providing material for this test)
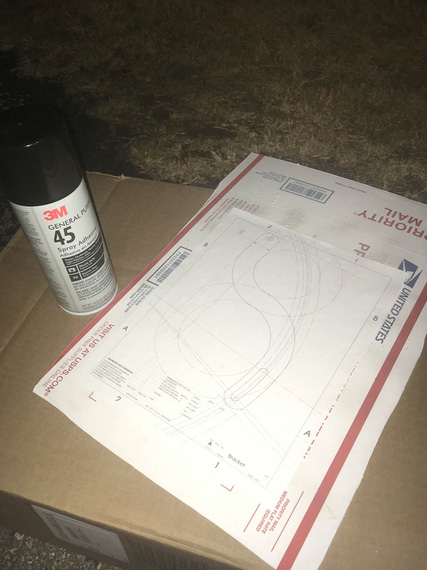
Spray glue and cardboard
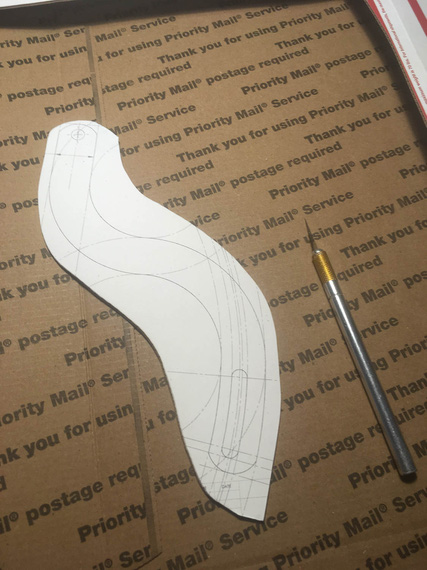
I wish I could cut 1/8" steel with X-Acto...
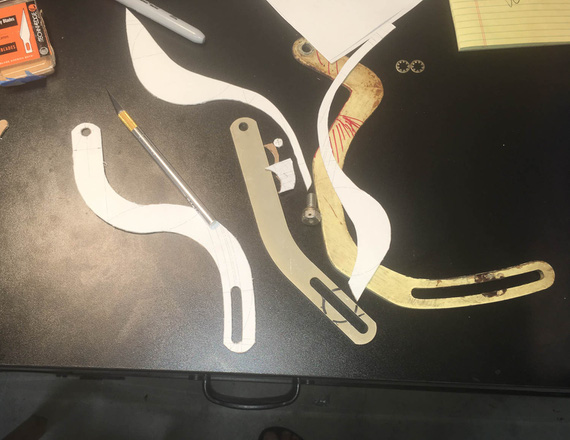
The mockup
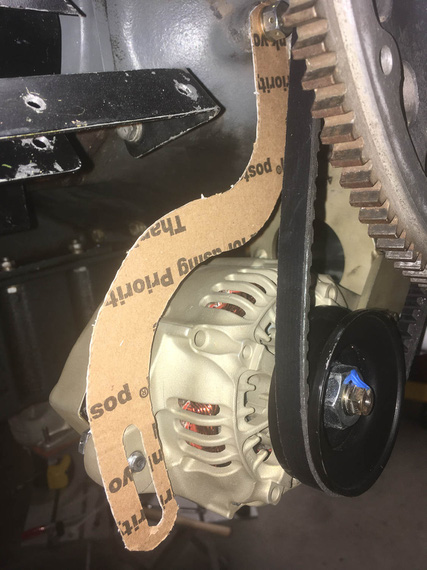
Tadaa!!
Okay, we have the real template now, and we know it'll work. And now, comes...
The Grind
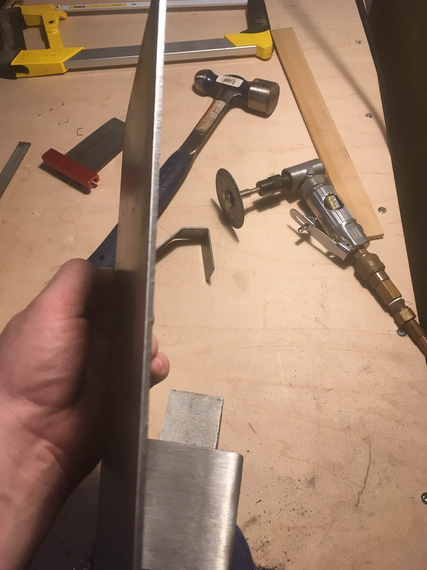
1/8" steel is no joke
Nice little sheet of 1/8" 4130 showed up from Spruce some time earlier... I used spray glue to put the print out of the bracket on top of it.
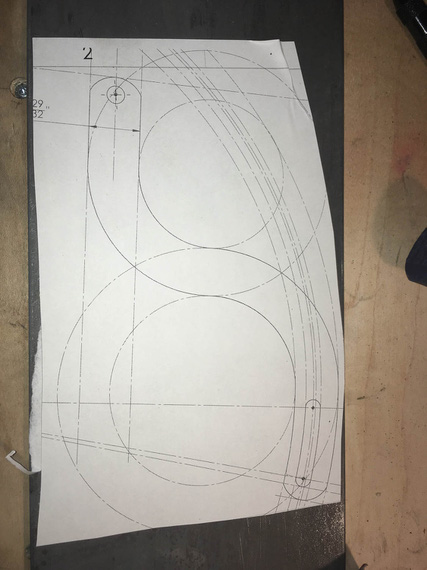
Template on steel
First, all the holes had to be drilled. The drill press I have at the moment is severely underpowered, so I had to step-drill them in four steps.
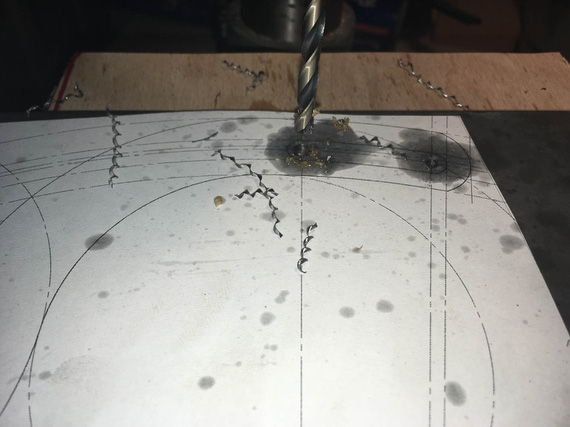
Curlies!
I got to admit, I am starting to become very fond of pretty steel curlies made by nice drill bits.
Also, lesson number one learned: drilling oil (I used TapMagic) gets under the template, and messes up the glue (and unglues it). I need to figure out a better glue.
I drilled the slot's "start" and "end" holes slightly undersized, and reamed the main attachment hole to 5/16ths exactly.
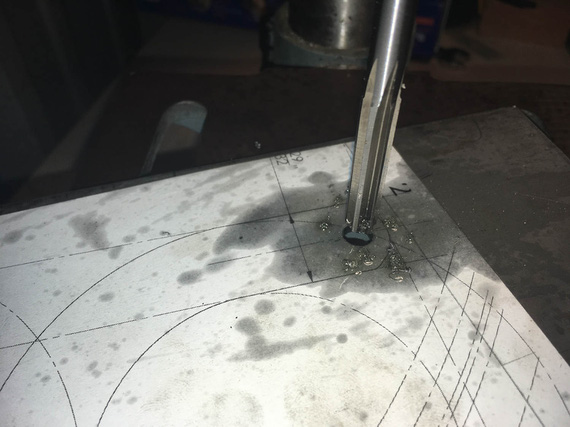
Reamer!
Next, the slot... I rough-drilled small holes around it's perimeter, thinking that a 1/8" shank carbide burr in an air die grinder (basically, Dremel) would work... Ha! It did... for a second ;)
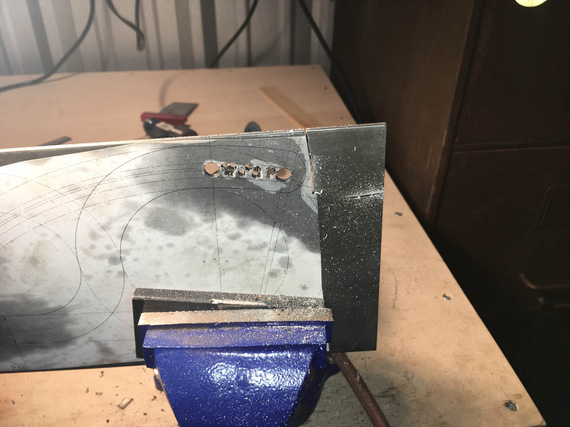
Slot in the making
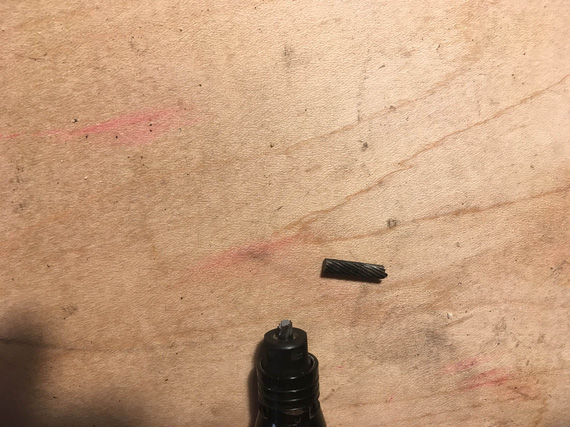
Boo!
Okay, time to go old school... where's that...
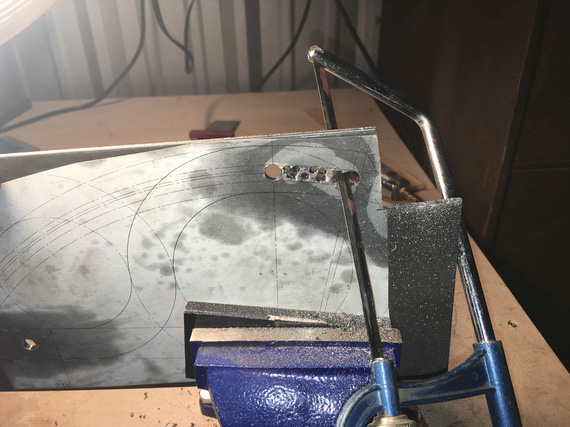
Hacksaw!
I cut it out, and cleaned it out with a bastard file.
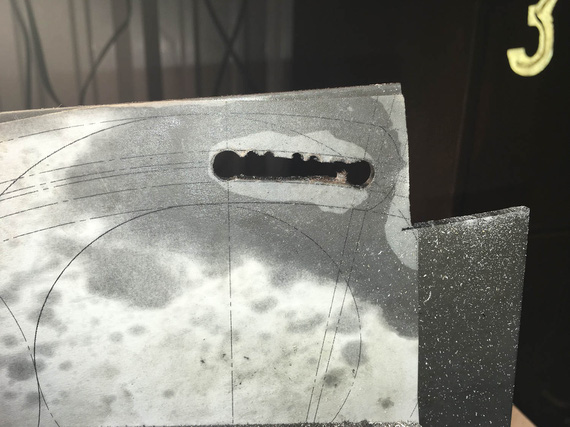
Cut out
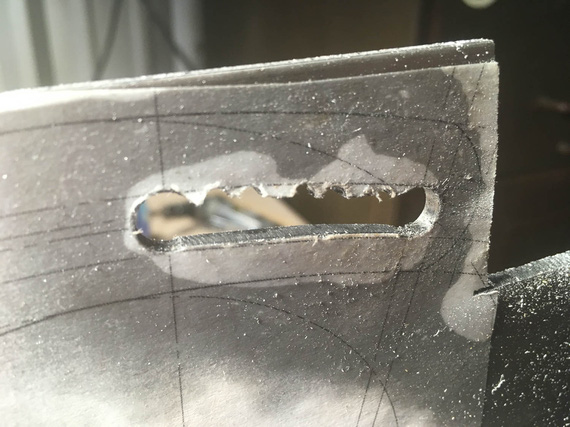
.. and cleaned up
And then, more and more hacksaw...
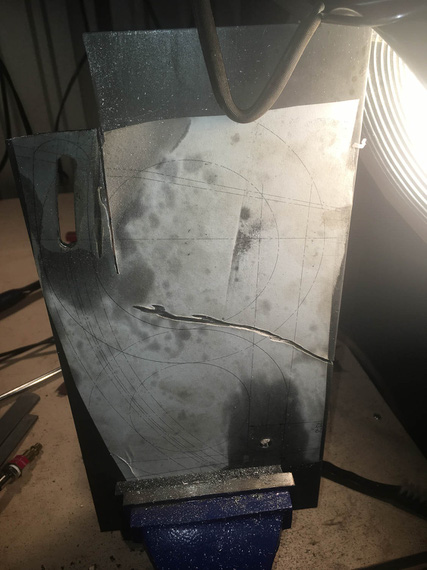
.. my right arm
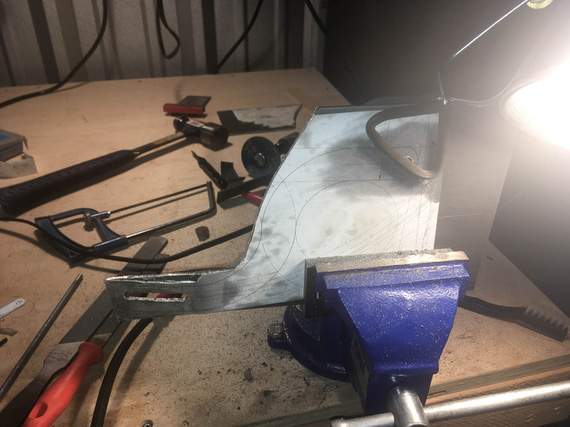
.. is beginning to feel...
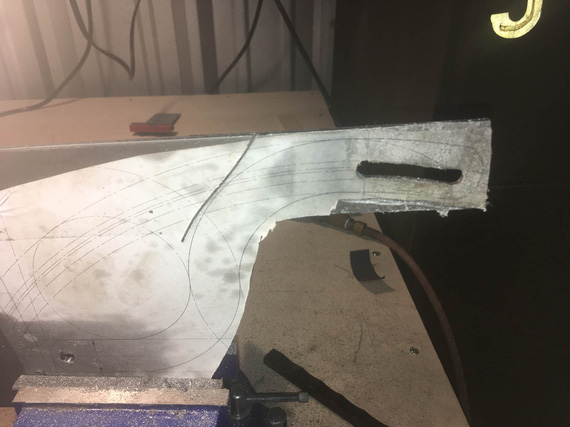
.. it ..
Yeah. The last few inches, I gave up, and used the jig saw. It did cost me 3 blades, but I was too ... done with the hacksaw. I figure, about a blade per 1 inch of cut in 1/8" 4130 with a jigsaw...
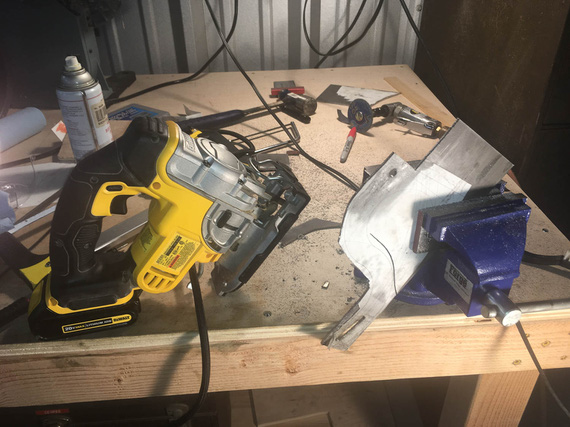
.. gave up.
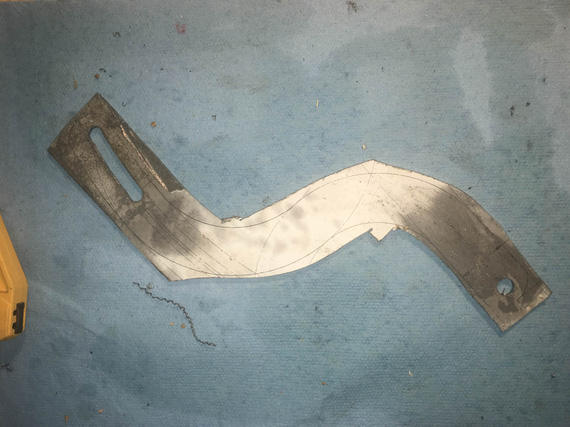
Cutting done.
Looks very ugly, right? Well.... to the grinder!
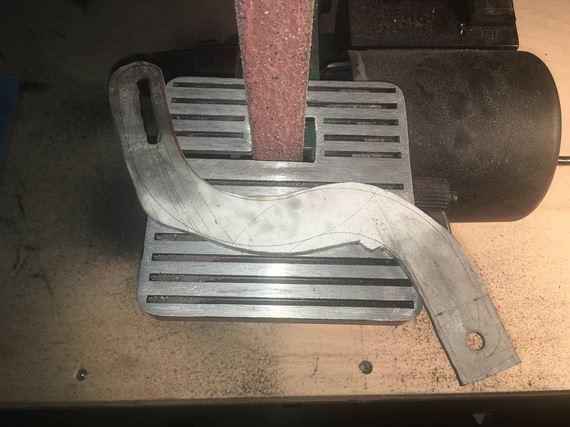
Grind...
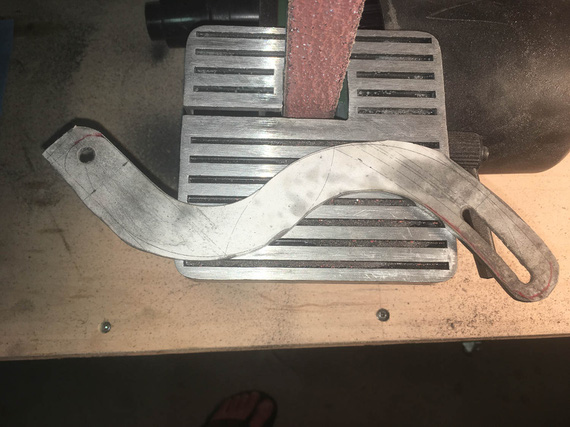
.. grind ..
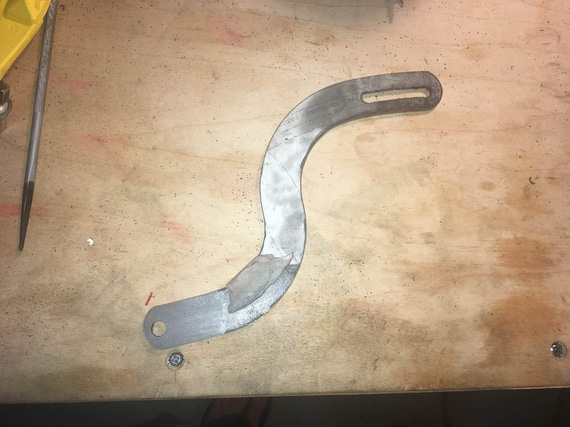
.. grind away ..
Three belts I believe is what it took.
Well, now, the final cleanup on the slot. Yes, Dima, I used the rotary file here :).
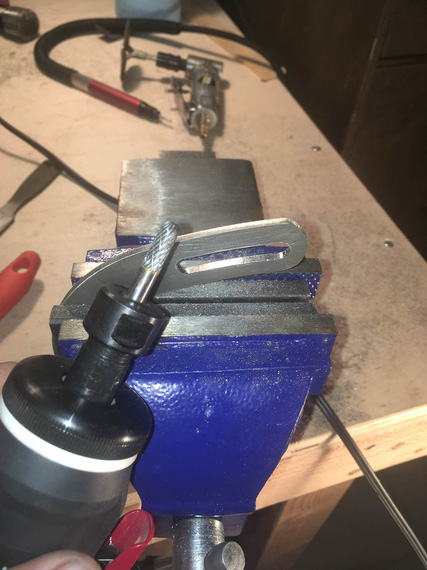
Cleaning up the slot
..and, test fit
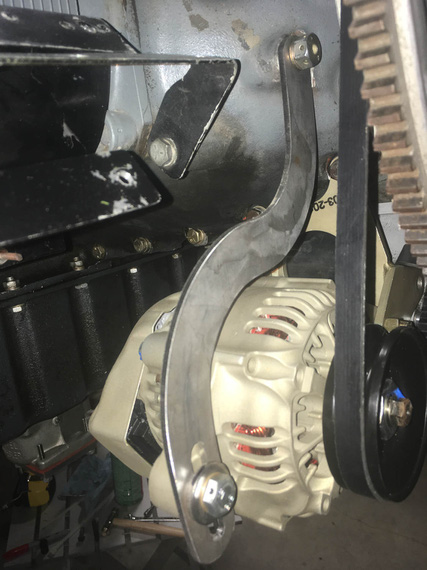
Tadaa!
That was two evenings, folks; but I wasn't done.
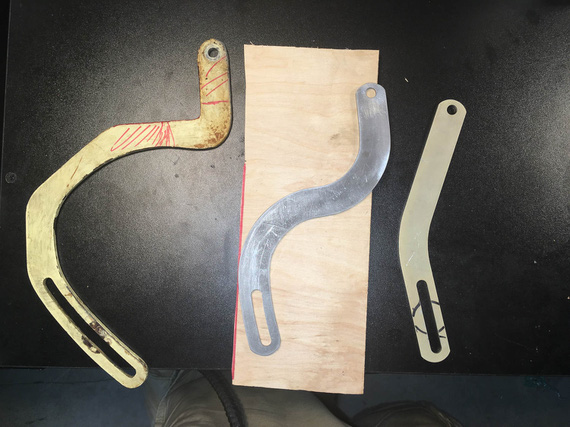
The Three Brackets
Next, I had to prep the edges and sand out all the scratches, and paint. A deburring wheel on a bench grinder helped; and the most nasty marks were filed out and then polished out with the deburring wheel.
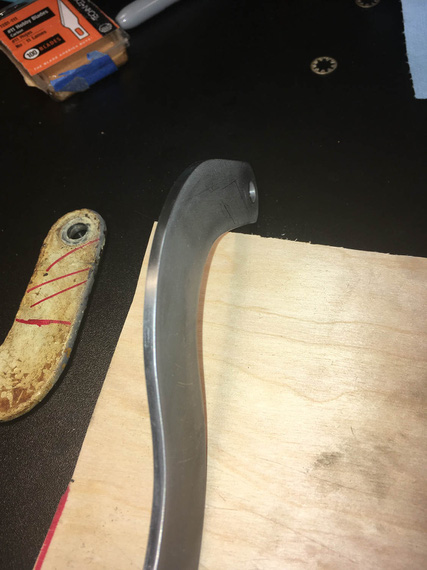
Clean edge
It has to be done because every scratch is a stress riser - on fittings, every edge needs to be rounded over, and polished.
Finally, to....
Paint
Every airplane "paintjob" I've done so far was in my makeshift "paintboots". Like this one.
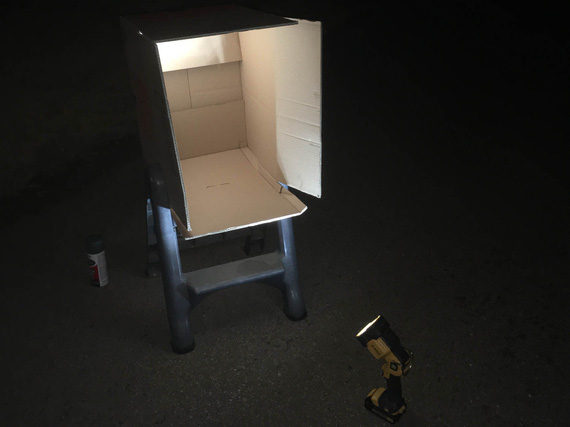
Paintbooth!
I sprayed both the pivot arm, and the baffle support bracket I made earlier, with self-etching primer, and some Rustoleum paint. White will make cracks more visible, if they show up.
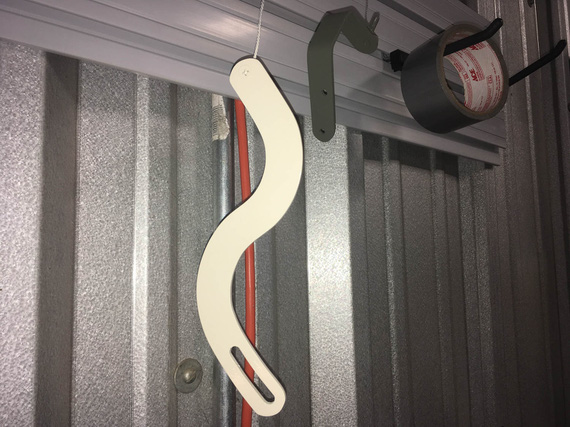
Painted!
So there we go. With this done, I can now install the alternator. Just measly 30 hours to get ready to install the damn alternator! ;)
"Citation 123, if you quit calling me center, I'll quit calling you twin Cessna."
-ORD ATC
Up ↑
Rack-o-Ribs
lotsa hours
| On: | Nov 23, 2014 |
| In: | [Skybolt] Wings |
| Tags: | CAD, lower wings, ailerons, ribs |
No posts about the Skybolt doesn't mean that there was nothing done :). Yessir!
I was redrawing pretty much everything I did in the first few months of modeling the lower wing; and that ate up a bunch of time and didn't actually produce anything to show. But damn, did it suck up time!
I ended up re-doing:
- Spars
- All ribs
- Full wing assembly (now it's clean and easy to tweak)
- A lot of compression plates
- Complete aileron assembly
Especially with ribs, the problem was that I did them while learning SolidWorks -- which led me to sketching them in AutoCad first (I used to hate doing curves in SWX.. now I hate Autocad, but that's another story :)). That made them virtually un-tweakable; and "tweaking" the verticals, which I had to do after confirming drag wire interference, proved to be virtually impossible.
So, I decided to clean it all up. Oh yeah, and I have moved that interfering vertical.
The brand-spanking new set of ribs:
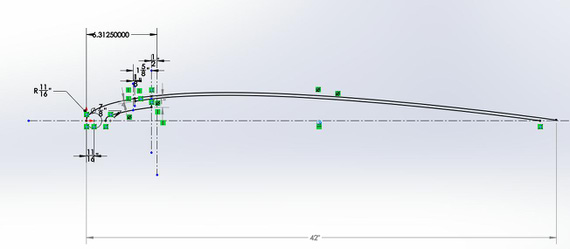
Master sketch, off of which everything else was derived

Butt Wing Rib

Typical Wing Rib

One of the many sketches that go into a rib
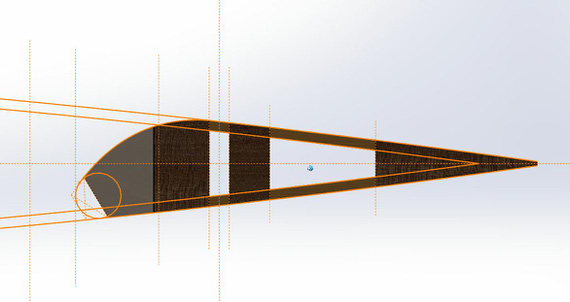
Aileron rib

Rrriiibbzzz!! Oh, wait...
And then, only then, I could go on to finishing the tip rib and the aileron tip rib.
For tip rib, I used the positioned tip bow to project the cuts onto the surface of the nose block. I'll explain this technique in a bit with aileron as illustration.

Tip rib, with all the cuts that will match the bow perfectly

Tip, and other ribs, on the spars, and tip bow
And then there's the aileron, it's bow, and tip rib.
I started with a "placeholder" that was the inboard (full size) butt rib. Then, using the tip bow, I drew a couple of "guide curves" and projected it on a couple planes, corresponding to ribs, giving me two different profiles.
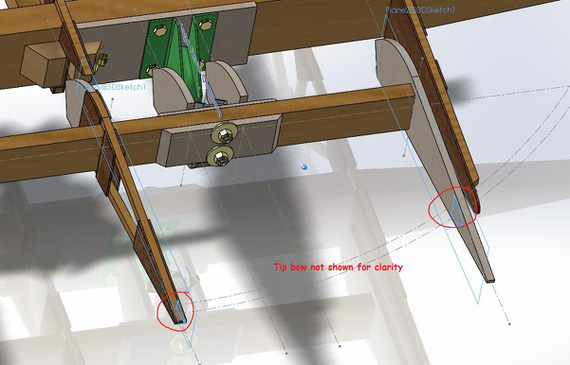
Projections, and helpers
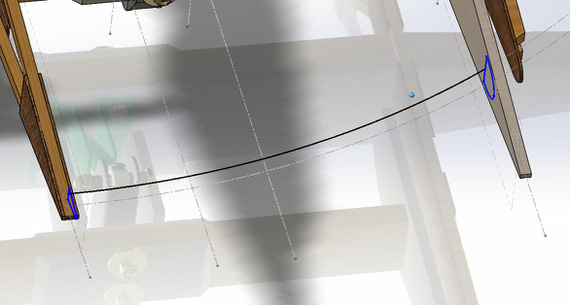
Guide curve and loft profile
Then, I set up my loft, and voila!
After that, I drew the butt rib. In the previous post, I said that it is supposed to be a touch larger profile than the tip wing rib; but that ended up not being the case -- in fact, it's a touch smaller and somewhat "hides" in the aileron well area. I decided not to mess with that...
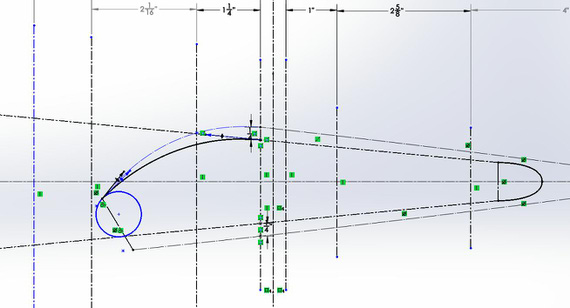
Tip rib sketch, derived from the "regular" rib, and the tip bow "intersecting" with it
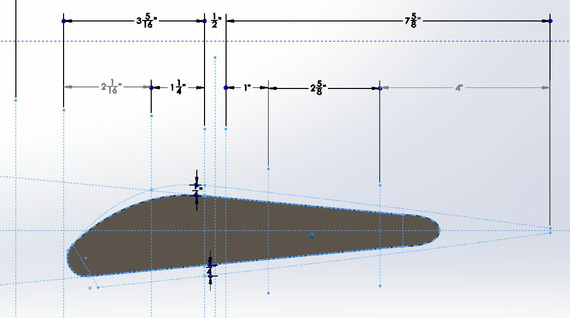
Aileron tip rib model
And here it is, in all it's glory, with the bow, tip rib, with everything matching perfectly. Note how the tip bow of the aileron changes shape along it's length -- that will be a hard one to hand-shape when making it...
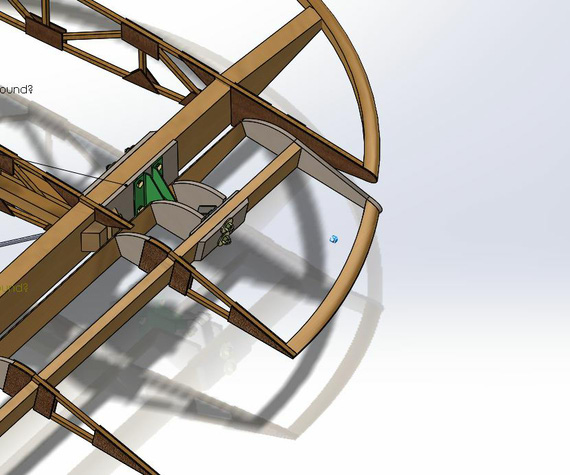
Aileron on the wing
Always remember you fly an airplane with your head, not your hands.
Up ↑
Drag Wires, Aileron, et al
completing and refining
| On: | Sep 01, 2014 |
| In: | [Skybolt] Wings |
| Tags: | CAD, lower wings, ailerons |
Another week and a half. Did a ton of little things; each one of which took a ton of time, with seemingly little result... I guess, devil's in the details.
It's constant tweaking and tuning of things that takes a bunch of time. But, at this point, most of the rough things are in, and it's that tweaking and tuning that's left to do...
Oh well.
Drag Wires: done.
Finished all the drag wires. Initially I did an incorrect layout from the standpoint of which wire passes over which (or under which, depends on how you look at it). Apparently, I came across a definition of drag/anti-drag that's exactly the opposite of how the plans define them... Sigh.
Wires have to cross inside the drag wire blocks and inside the spar; so one has to go over and one under, like this (lots of transparency here):
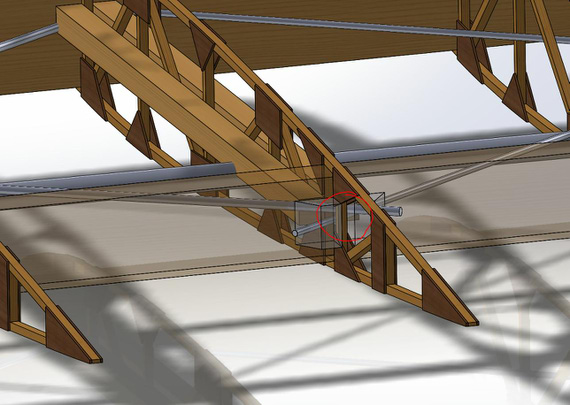
Drag/Anti Drag Wires Crossing
That's the pattern I did wrong; causing some interference with the bellcrank and heavy interference with rib diagonals.
Thanks to my original post on drag wire blocks interference in the aileron bay, and the picture Ward posted in that thread, I figured the wires pattern out. Switching it around made for much better clearance!
Also, my original problem with aileron interfering with the drag wire blocks is apparently no problem at all - I'll just relieve them (rasp, file, sandpaper, whatever) to provide clearance.
So, here's what the wing looks like right now:
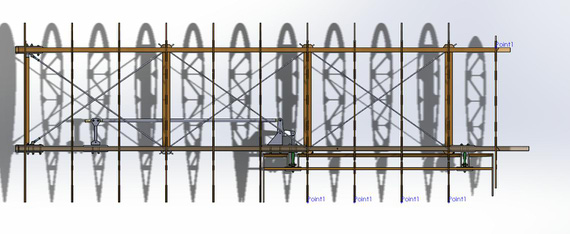
Latest wing with all the drag wires
Aileron Bay and Drag Wires
... and then, something I spent quite a number of hours on. You see, I want to sheet the inside of the aileron bay with curved piece of 1/16th plywood, supported on braces joining ends of the ribs together.
A few pictures below show the idea:
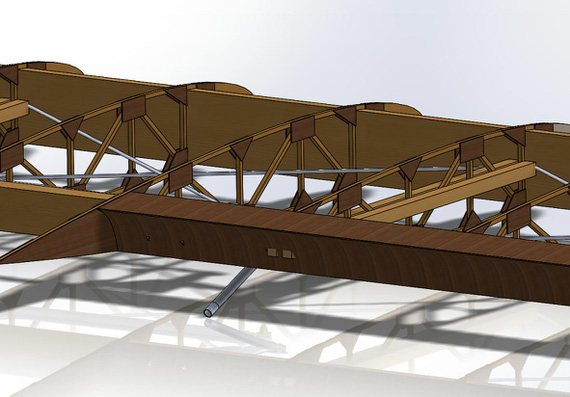
Aileron Bay Sheeting. Grain orientation is off, I know :)
This shows the support brace between ribs, just one for now.
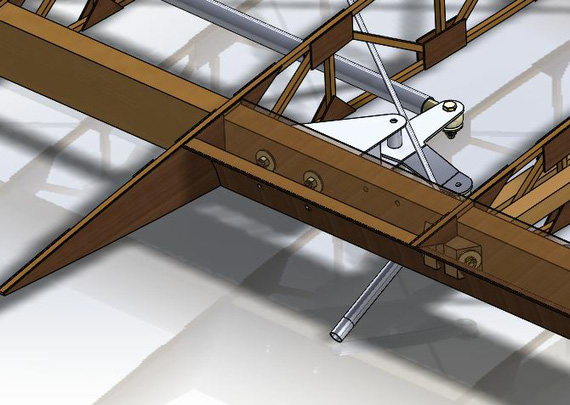
Aileron Bay Sheeting, showing the support brace.
This is all very rough. The problem though was this.
Here's how it looks from the wing tip side:
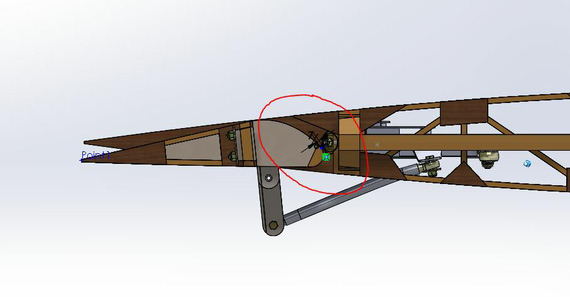
Aileron Well, looking from the tip, zoomed out
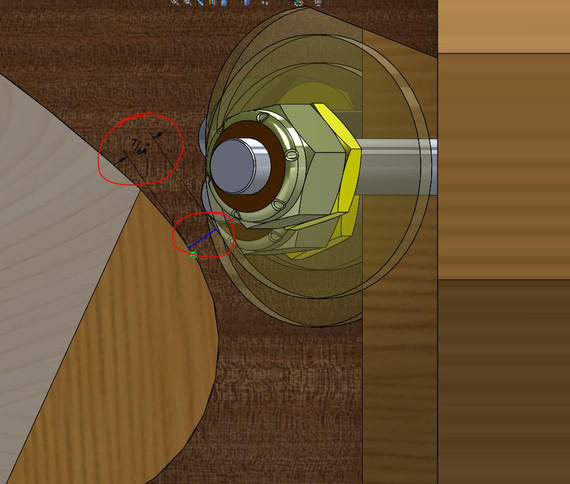
Aileron Well, zoomed in.
See that clearance??? 7/64ths between the aileron tip and the nut! So even before I started figuring out the best spline curve for that sheeting, it was obvious that it won't clear... 1/16th ply + 1/16th gap is already a 1/8th, or 8/64ths!
Asked the Biplane Forum folk in the same thread... And, separately, actually figured it out - it was suggested to use two thin jam nuts there instead of a thin + regular nyloc.
That cleared a lot of space up!
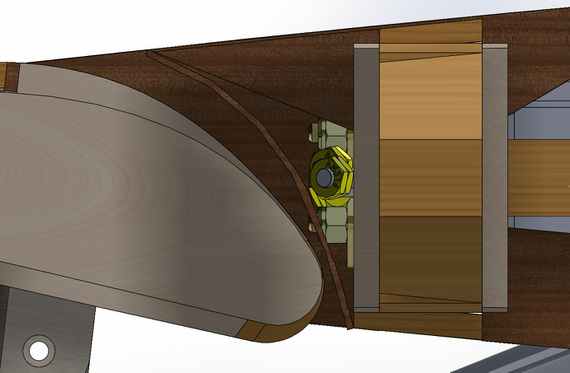
Finally, some clearance!
I was thinking about modifying the tails of the wing ribs in the bay area to support this sheeting.. But, even with thin jam nuts, the bay is still very tight. Given that I won't be able to build exactly to perfect dimensions, I finally decided not to bother, and just build in place (and then we'll see what clearance I really will be able to get :)
Backup plan? Have some drag wire hardware protrude into the bay, and sheeting be not "in front of it", but somewhat behind it (closer to the main wing spar). Something like this.
And with that, I moved on to
Cleaning a lot of things up
Added all the hardware to the aileron hinges. Cleaned up most of the compression plates (doublers) to go around the compression struts and drag wires.
Oh, and apparently, my aileron hinges were drawn a bit wrong (and had that unsightly early model of Fafnir rod end I have thrown together). Fixed that. Made them pretty green color to celebrate the occasion :).
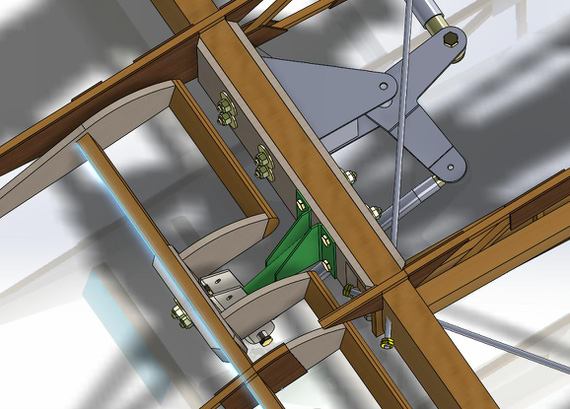
All pretty and correct hinges with HW
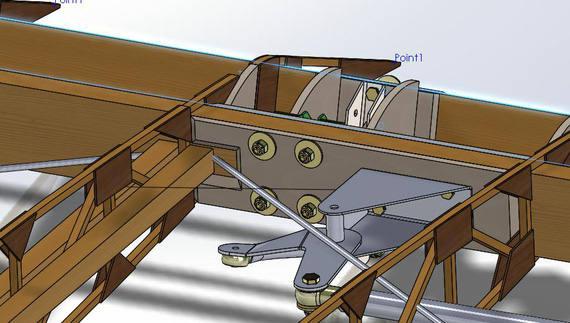
Compression plates relieved for the struts and drag wires
Interference
As I expected. Drag wires don't clear rib's diagonals in some places.
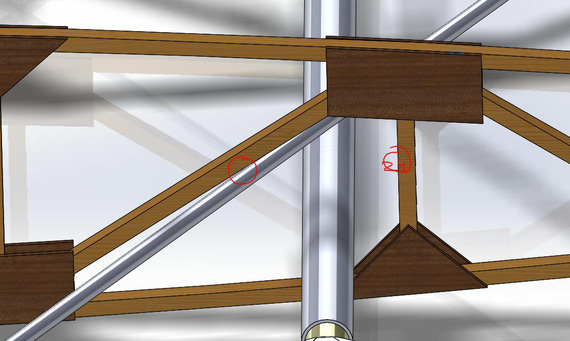
Station 24 vertical and diagonal interference.
Hale Wallace in his notes suggested to relocate station 24 vertical to 23 3/4, 1/4 inch forward (or "left" in the above picture). This will make the diagonal more steep, and clear the drag wires. I'll have to do that.
Another nasty. I was ready for this, and, sure enough, the bellcrank/idler pushrod doesn't clear the compression struts. The idler will have to be made lower; Steen bends them downward and I will see if I can avoid that by just moving it down a bit (and moving the idler arm down on it's bushing).
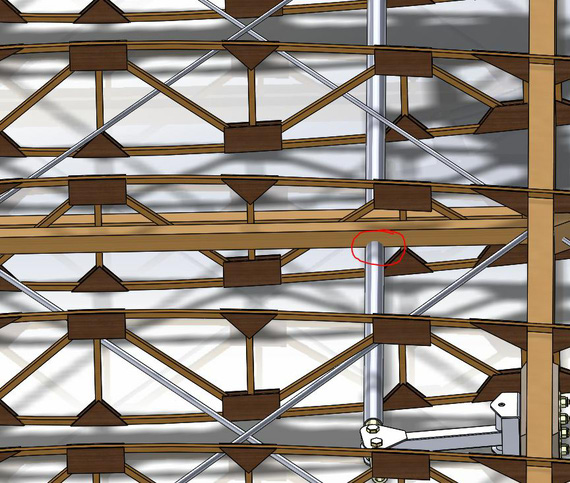
Pushrod not clearing compression struts.
Ribs
So, I started looking at relocating that vertical first.
My ribs' models are the first ones I did in Solid Works; and they suck. They are made off of sketches created from converted AutoCAD files, with lots of ugly things in them. They are practically unmodifiable. Back then I thought it was easier to draw things in AutoCAD and import them to SWX - oh, what an idiot I was :).
Also, while looking at things, it became clear that they also are not sitting right on spars (not symmetrical to spars' center plane basically).
It feels like I will end up re-drawing them from scratch, and doing them as proper assemblies this time. We'll see.
It might well be that the problem I was having with aileron-to-other-ribs-alignment will go away, and no holes will need to be relocated...
It's annoying, but at this time I am so much better with SWX than back a year ago when I was doing ribs. Still, Le Sigh.
Aileron Tip Rib, Wing Tip Rib, and Tip Bow
I've been putting this off, since those tip ribs are not dimensioned on the plans, and aren't a standard airfoil. They're supposed to create a nice transition from the main wing panel into the tip bow, creating some nice curvature.
I had the wing tip rib drawn up approximately, just as a placeholder.
Yesterday, I did an approximate aileron tip rib as well. Cutting it out of the plan and super-imposing two patters on one another helped! Plans are off (dimensions marked on them are not matching the dimensions measured off of them), but at least they're off uniformly within one sheet; allowing me to do this. It shows what's where.
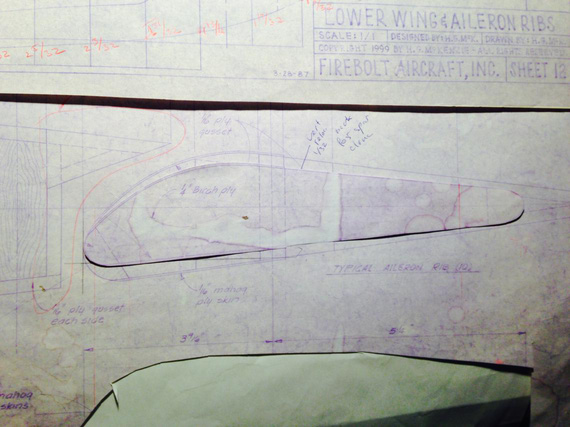
Tip Rib, cut out - finally, some physical work on the "plane"!
Well, for one, it became obvious that the top aileron skin on the leading edge will have to create a compound curve going to the tip rib.
Searching thru the Forum, and reading things showed that apparently it's not that big of a problem. Gradual gluing and lots of clamping pressure should solve that one. :)
And then, there's the overall tip rib shape.
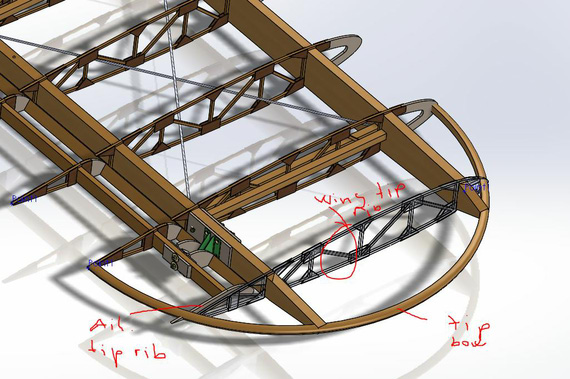
Overall setup.
This is all very early with no "trimming cuts" made, obviously.
If you think about it, the aileron tip rib is supposed to be a bit "beefier" ("taller") than the wing tip rib. The tail of the aileron tip rib in the place where it's touching the bow should be 3/4 inches tall (so that it's flush with the bow).
All that will create nice smooth "flow" of curves from the last "full size" airfoil section (created by the wing rib and the aileron rib) into the tip ribs and tip bow.
So, first thing I'm not sure about is how good my tip rib (wing rib that is) is. I think the aileron tip rib should "play off" the wing tip rib's shape... In fact, if you lay a straightedge between the tip rib and the aileron rib with aileron positioned at 0 degree deflection, moving that straightedge should define the form of the aileron tip rib. I will do just that, later, lofting the surface that will "cut" the aileron tip rib out (and use a real straightedge with some sandpaper glued to it to shape the actual aileron's tip rib). I love it how CADing makes you think about these things!
But! That requires me to have a nice wing tip rib. Which I don't have. So to that task then, first.
Skybolt plans have the general outline and no grid on them. It's not a standard airfoil. Hmmm...
Last time I did it, I took dimensions off of plans. It turned out a bit off shape-wise if compared visually to the plans, so I tweaked it a bit. I still don't like that tip rib.
To the Firebolt!
Firebolt, by the way, is Skybolt, "improved" (and by that I mean added weight). Fuselage is a few inches longer, and hardware is all different; but basic wing design and overall things are the same. It makes it a great reference to read thru and see how things are done there.
Firebolt's wing tip rib is located at the same station as Skybolt's. That gives me some hope :).
Firebolt plans are also off (print dimensions not matching actual on sheets), but at least they have the grid -- amount of error accumulated over 1 inch of measurment hopefully is negligible. We'll have to see.
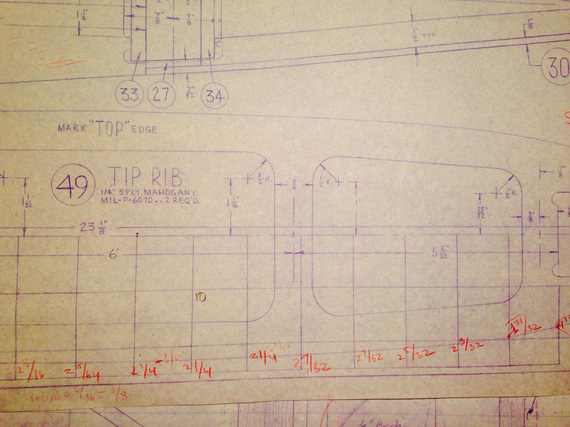
Dimensioning the Firebolt plans
And after going thru about half of that dimensioning, I decided that it's actually time to write this B-Log post, and take a break :).
I'll be bending some more sheet metal tomorrow. Post on that coming up!
You can land anywhere once.
Up ↑
Drag and Anti Drag Wires
the beginnings
| On: | Aug 21, 2014 |
| In: | [Skybolt] Wings |
| Tags: | CAD, lower wings |
Past few CAD sessions were drag wires and compression struts...
Typical wire blocks look like this:
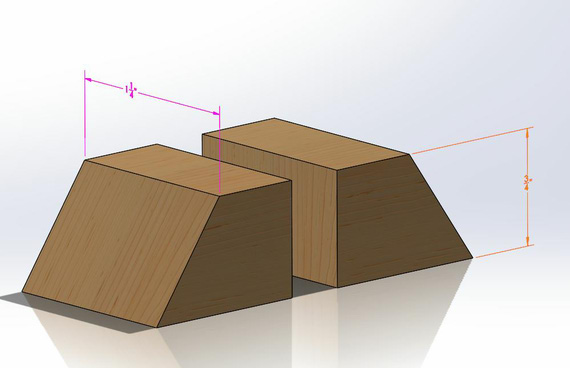
Drag / Anti-Drag Wire Block
One interesting thing is that those interfere with aileron's leading edge in the aileron bay if left as is...
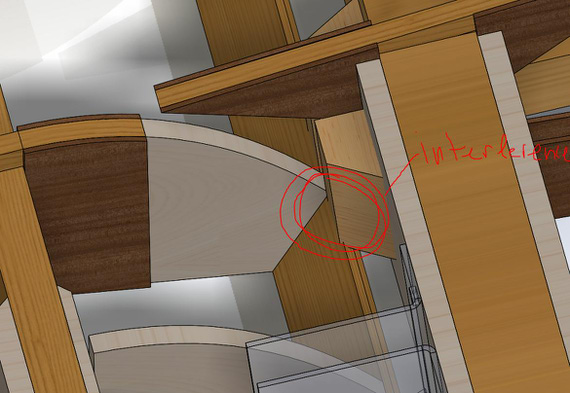
Block interference in the aileron bay
Again, asked guys on the Forum. Looks like just relieving them should work.
It's also clear that they interfere with the control system. Well, Ill have to adjust that when I finish the wires' models.
Meanwhile, added all the compression struts and working on the drag / anti-drag wire alignment and layout (they have to cross in the middle of wing bays, so I have to figure out what goes on top and what goes on the bottom). HFW did a good starting layout in his addendum to Plans, so going off of that for now.
Not much more to tell, so Ill just post two more pictures :).
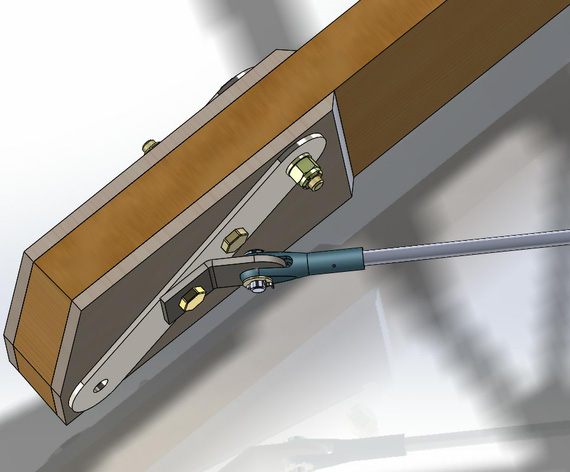
Drag / Anti-Drag Wires hardware
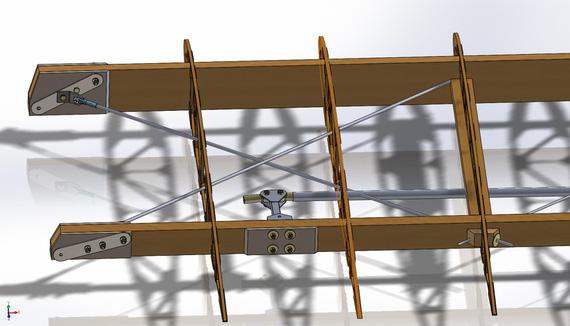
Drag / Anti-Drag Wires in the first wing bay. Second bay is being modeled
Navy pilots regards Air Force formation flying skills:
“Same way, same day.”
Up ↑
Wings and Control System
done..! Well, almost
| On: | Aug 12, 2014 |
| In: | [Skybolt] Wings |
| Tags: | CAD, lower wings, ailerons, control system, fittings, fuselage |
Ahh.. Finally. One week for a business trip, nothing done. One week and three days for Oshkosh. Nothing done (or rather, other stuff done :) ). And many more hours of fighting Solid Works; I finally have something to log! :)
Incidence and Fittings: Finishing Up
First, the incidence. Last time, I was trying to figure out how to deal with vertical fittings having to align with spars angled at 1.5 degrees up (incidence). A good discussion on the Forum ensued, and I figured (aside from me having to buy a +/- .0001 Precision Axe), to drill the hole at 1.5 degree angle in the front fitting, and forget about the little gap that shows up there, and weld the rear fitting in place. So something like this (you're looking at the fitting pair from the side, the CL is the hole centerline).
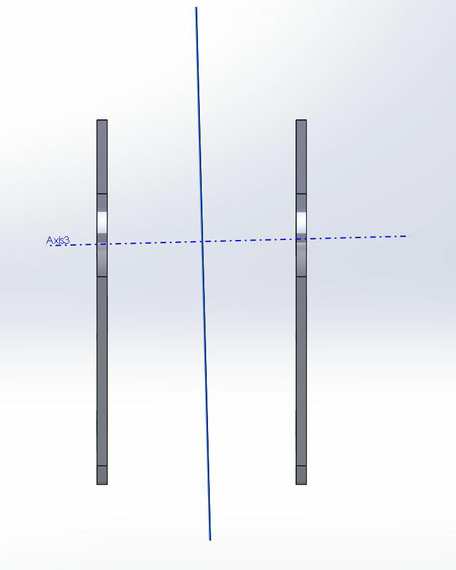
A pair of fittings, with the hole drilled at an angle
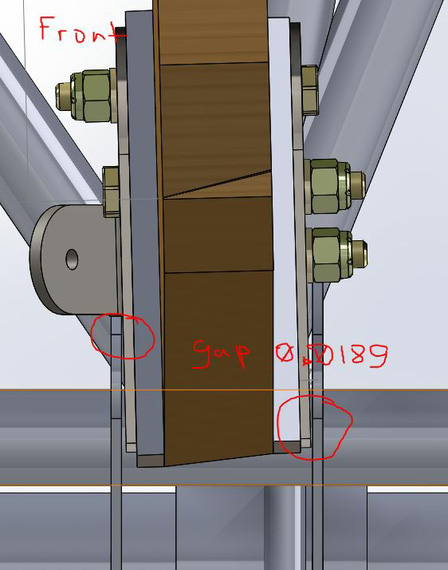
Gap that shows up when fittings are vertical, and hole is at an angle.
Note to self: When building / finish welding, I might reconsider and bend the tops of that fitting 1.5 degrees back to make everything flush. I probably will.
Back to the Control System
Next item on the list was bellcrank-to-aileron pushrod, which is tricky. See, if it's straight, it doesn't clear all the hardware.
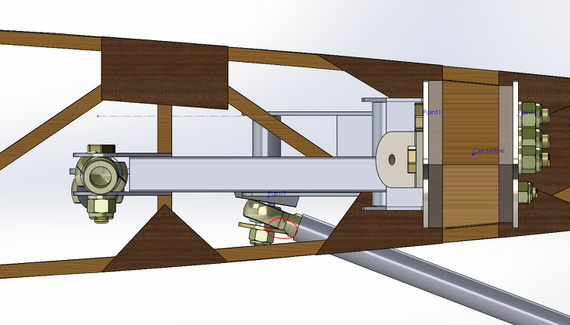
Pushrod is not clearing hardware if straight
So it had to be slightly bent to make the bellcrank side rod-end a bit more "horizontal", if you will, while not "horizontal" enough to hit the spar above.
This sounds easy; and probably is -- but tweaking splines, checking, re-checking and tweaking again while checking for full range of aileron's motion took up most of the time here.. I think I spent a good 10 hours or so just tweaking that one pushrod... And finally, here it is -- notice a slight bend in it. Just a touch less bend and it hits the washer under the bellcrank side rod end, just a touch more, and it gets dangerously close to the spar.
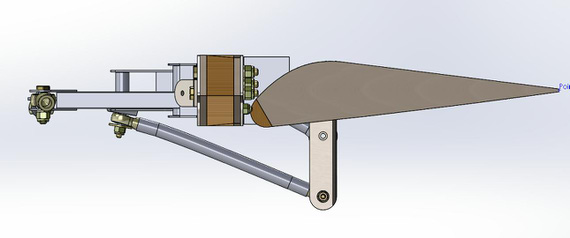
Aileron pushrod, tweaked to fit
Finally, I was able to move the aileron linkage on the wing model and check the idler - bellcrank pushrod for ribs' verticals clearance. It clears! There's another clearance issue though - by the looks of it, it won't clear the compression struts (3/4 x 3/4 inch struts go in the middle of the ribs, forming wing bays along with drag/anti-drag wires) by the looks of it. So struts and wires it is, next, amongst other things..

Control system looking from the wing butt: won't clear the compression struts
Fitting Wings To the Fuse
For some reason, Solid Works gods decided to start hating me here. Remember the note about angled hole in the front wing fittings pair? Assuming that pair is mated to the fuse (lower longeron); front spar butt hole (ha.. ha ha.. haha..) mated to that angled hole in the fittings' pair should produce correct incidence; and dihedral can be set with wing spar centerline mated to, say, one of the fuselage's crossmember's centerlines, at required 1 degree angle? Ha! Yes; that worked -- but for some reason, would cause all kinds of shenanigans the moment I would make the SWX assembly flexible (== allowing me to move control surfaces of the wing sub-assembly as a part of the overall assembly).
Yeah-right. -3 hours of my life until I gave up.
Instead, I made a virtual "jig" -- another sub-assembly containing planes at correct dihedral and incidence angles. Wing's "Top" plane would mate to the "wing" plane of the "jig"; latter ("wing" plane) would be at 1.5 degree incidence / 1 degree dihedral. That worked.
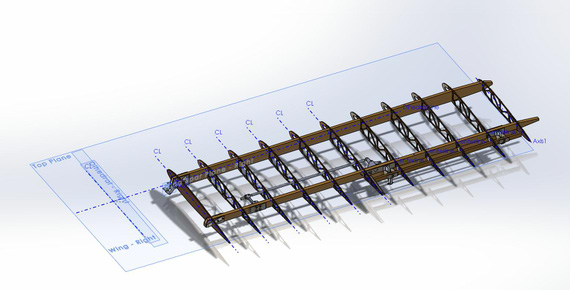
The virtual "jig" made of planes.

Dihedral of the lower right wing
That same "jig" assembly contains fittings mated to the wing spar -- and then, that "jig" subassembly is mated to the fuse via fittings - to - longerons mates.
That, for whatever reason, worked. After that, 10 more minutes of making one final pushrod connecting idler to Actuator Arm on the Torque Tube, and..
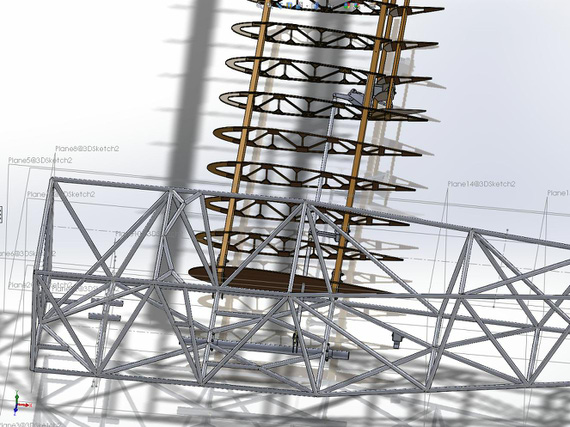
Control system all hooked up and working!
Happy me, making virtual airplane noises moving virtual torque tube moving virtual control system actuating virtual ailerons... Who says CAD isn't fun? :)
Now, back to those compression struts, only to find out that the pushrod does NOT clear... Le sigh.
The main thing is to take care of the main thing.
Up ↑
Fitting Lower Wings To The Fuse
in search for missing bends
| On: | Jun 17, 2014 |
| In: | [Skybolt] Fuselage |
| Tags: | CAD, fuselage, lower wings, fittings |
Today, ended up messing around with putting the lower wing and the fuselage together...
Lower wings are set up at 1.5 degree incidence, 1.0 dihedral.
Started with that I realized that I mis-positioned the hole on the front spar and gear fitting. Simple fix :)
Next, came a lot of thinking and reading. Here's the problem.
The plans position fittings perpendicular to the longeron.
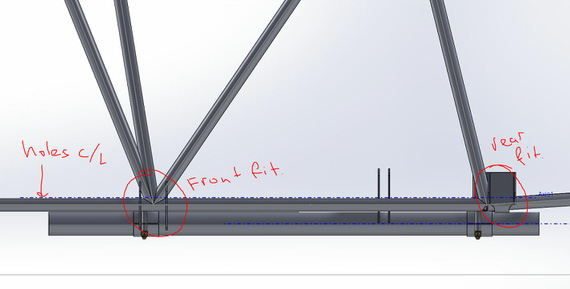
Fittings on the lower longeron
Holes are co-linear, and incidence is achieved because of the stagger in the attach holes on the spars. Airfoil chord, tilted up 1.5 degrees make these holes come together.
The problem is that spar sides then become non-coplanar with the fittings' faces; possibly introducing bad fit, play, misalignment, and whatever problems I can't think of.
Here's how the spars go 'into' the fittings. I circled the rear spar, since Ill use that for illustrating the problem.
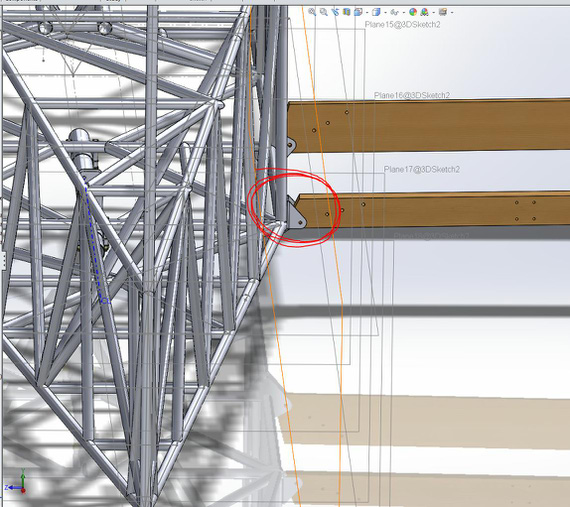
Spars on fuse (rest of wing hidden from view not to obstruct
Now, looking at it from the tip of the spar towards the fuselage, you can see the angle between the fitting and the spar. That's because of 1.5 degrees of incidence.
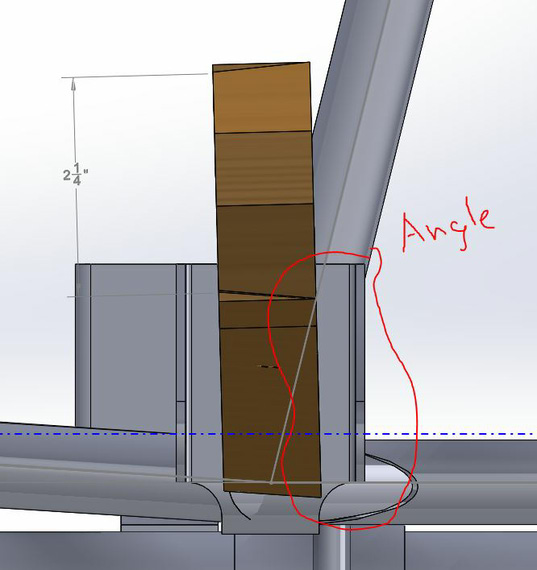
Angles don't match == no fit.
This problem caused about an hour and a half worth of research with no results...
Firebolt and Pitts plans explicitly state either bending, or welding fittings to longerons at correct angles. Not Skybolt though...
Ended up posting on the Forum. Let's see what the folks say....
On a more positive note; I can see an outline of an airplane in this now ;) Made some virtual, mental airplane noises :)
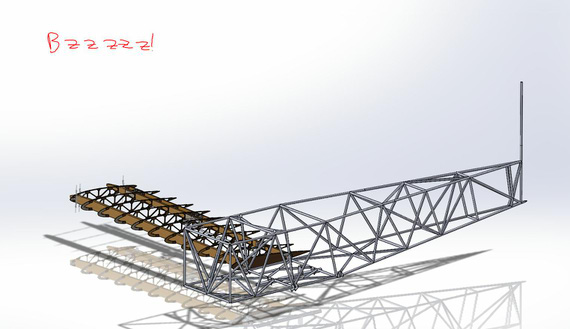
Airplane!!!!
"You got him on TCAS? Great. When you're seven in trail, resume normal speed and call Chicago Center on 120.12."
-ORD ATC
Up ↑
Lower Wing Fittings and Torque Tube
cleanup, and more bending
| On: | Jun 16, 2014 |
| In: | [Skybolt] Fuselage |
| Tags: | CAD, fuselage, torque tube, control system, ailerons, elevator, lower wings, fittings |
For starters, cleaned up the torque tube; added all the hardware (thanks cwilliamrose again for AN hardware models!) and proper mates. Was a nice warm-up, and came out real well.
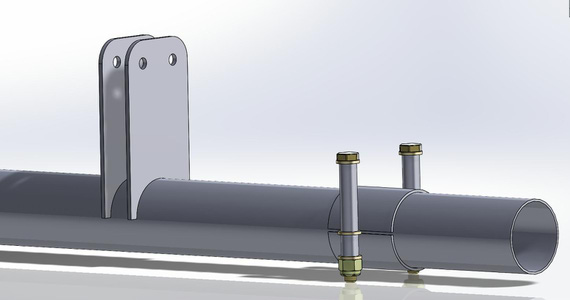
Torque Tube, Cleaned Up with HW
After that, added the lower wing front fittings to the fuse. Piece of cake! :)
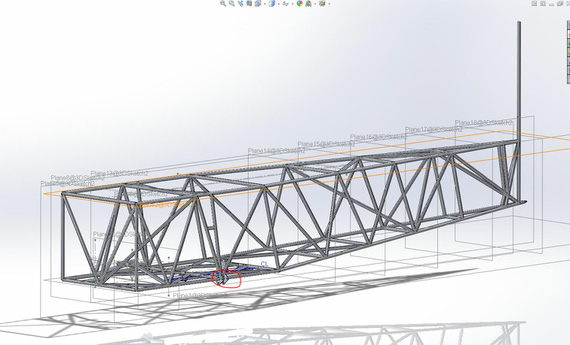
Lower wing front and gear rear fittings
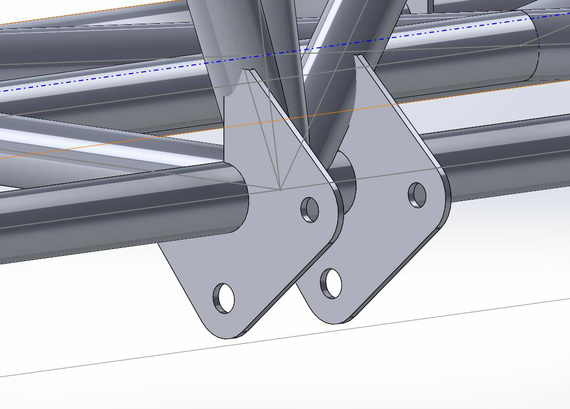
... and zoomed in.
Notice on the above picture how they interfere with the tubes of the fuse truss (geometry penetrates one another). There are a couple ways to fix that; plans just call for 'trimming in place'. Note to self: figure out if the weld should only be around the bottom longeron; or if to weld the top of the fitting to the vertical too?
The cool thing about SW is that I can "cut" in place; add a bit of margin on the real pattern for the fitting, and make it to fit without constant trial and error.
And then, lower wing rear fitting.. that one is tricky due to the way it's dimensioned on the plans (it makes sense plan-wise, since it maintains clearances between longerons and spar butts, etc; so hole positioning takes metal thickness into the account). Can't believe it took me 2 hours and a few tries to figure out how to model this right. Learning curves be damned :)
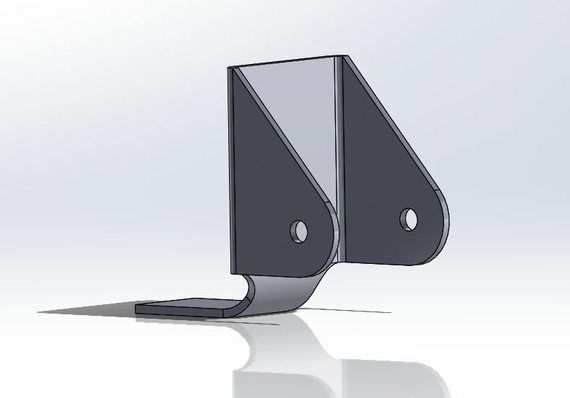
Lower wing rear fitting
Now, the reason for all that trouble is that getting the flat pattern out of that is just 1 mouse click!
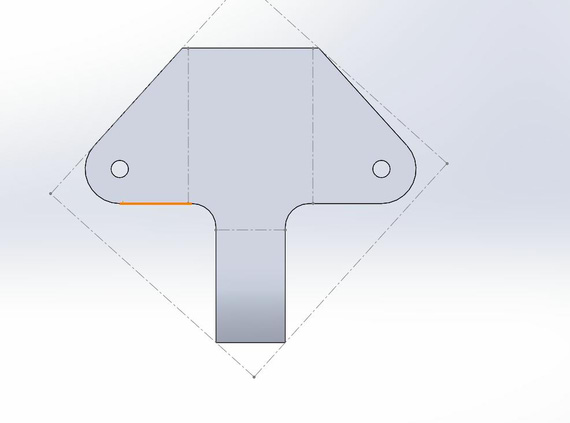
Lower wing rear fitting
I think this was a great day. :)
It only takes two things to fly, airspeed and money.
Up ↑
Torque Tube Basics
for now, just the bare minimum
| On: | Jun 15, 2014 |
| In: | [Skybolt] Fuselage |
| Tags: | CAD, fuselage, torque tube, control system, ailerons, elevator |
Started modeling just the very basics of the torque tube. The idea is to hang it on the fuse, attach the aileron pushrods to it, and check clearances in the wings (and finally get to start making them! :)).
Just a few screenshots today. Lots of time spent reading plans (haven't paid as much attention to Fuselage / Control Stick setup as I did to the wings).
Gladly, I had the truss model from way back when (I did it to learn SolidWorks Weldments feature).
Anyways, pretty pictures below.
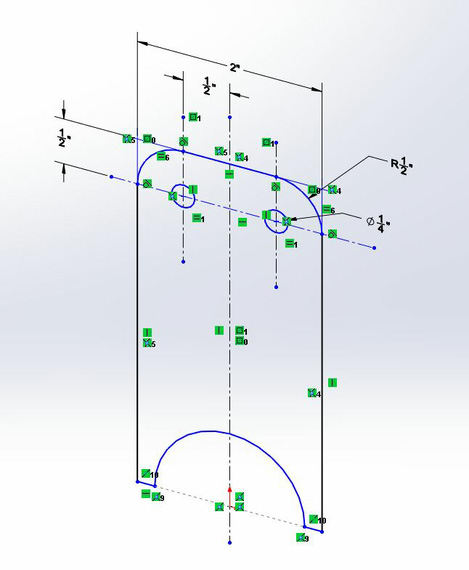
Aileron Actuator Arm Sketch
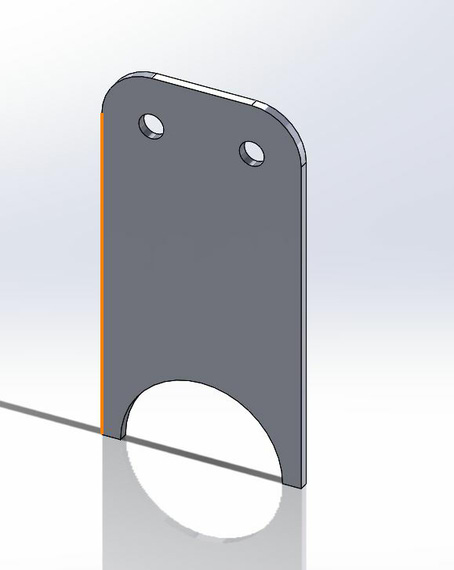
... and model.
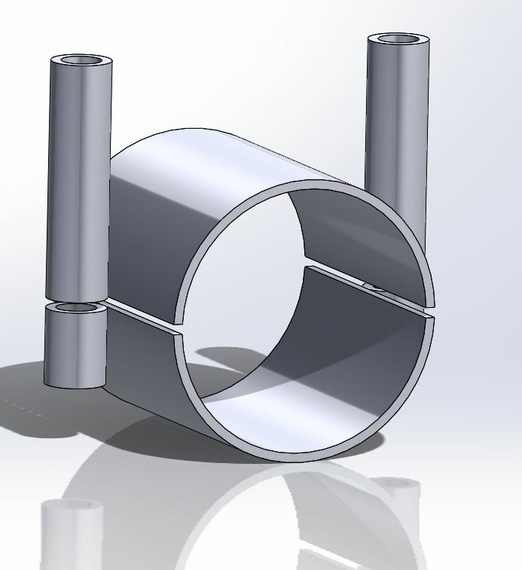
Torque Tube Collar
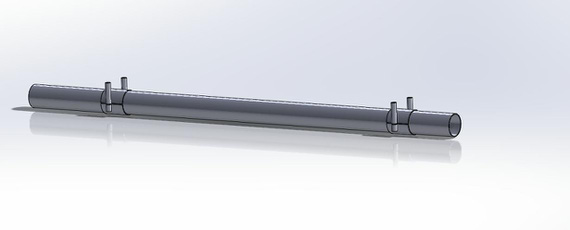
Very basic model of the Torque Tube (but all I need right now, minus the aileron arms)
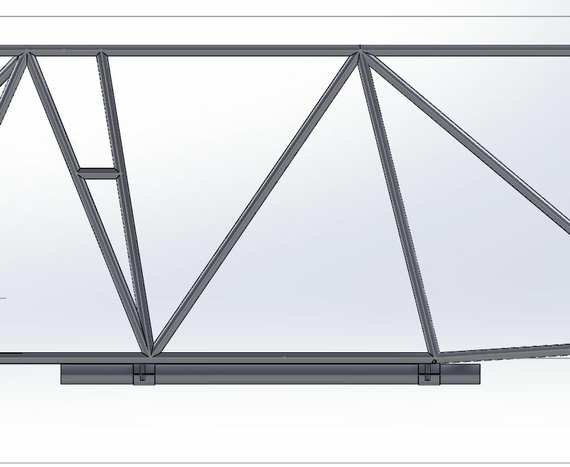
Torque Tube on the Fuselage
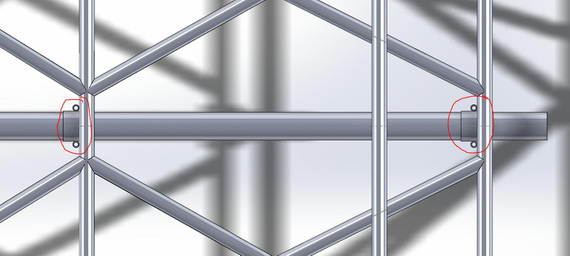
And eyeball alignment check - fits!!! :)
Remember, you’re always a student in an airplane.
Up ↑
Pushrods, bearings, and clearance
slowly getting there
| On: | Jun 09, 2014 |
| In: | [Skybolt] Wings |
| Tags: | CAD, lower wings, control system, ailerons |
In the past couple of evenings; have continued hanging virtual control system on the virtual wings.
Thanks to CWilliamRose from Biplane Forum, I now have quite a bit of models of AN / MILSPEC bearings.. REP3H5 included, but he didn't have REP4H6, so that had to be done first..
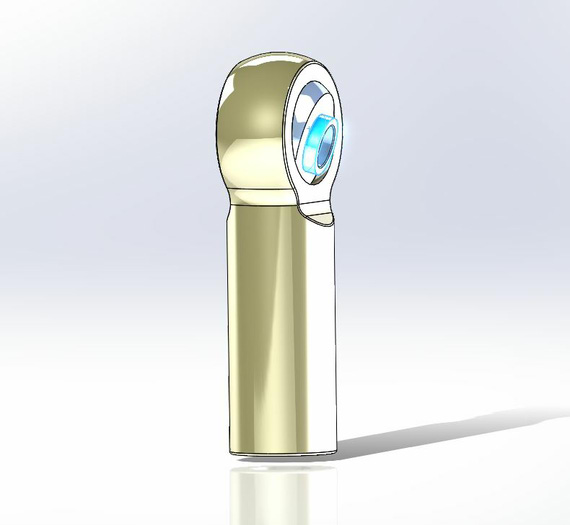
REP4H6 bearing model
Couldn't find a few dimensions; but my rationale is as long as the basic eye height / bore / shank are there, and the ball 'rotates', that's good enough for the purpose of my alignment checking, for now at least. Ill revisit if I start getting into tight corners.
Next, hung the Idler, bearings, cleaned up the model (funny, lower wing assembly is technically my first serious SolidWorks model, so I keep cleaning it up as I go, killing stupid things I did back when I didn't know any better).
Sigh... I will need to hang the wing onto the fuselage model to make sure the pushrod doesn't hit verticals -- clearance is there, but might not be enough.
Here's the wing model with the pushrod:
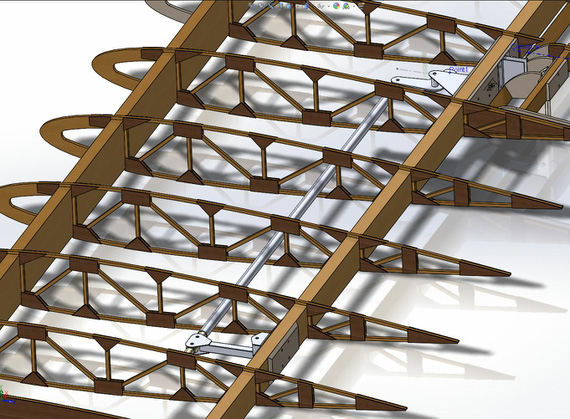
Idler, bellcrank, and pushrod -- there is clearance, but is it enough?
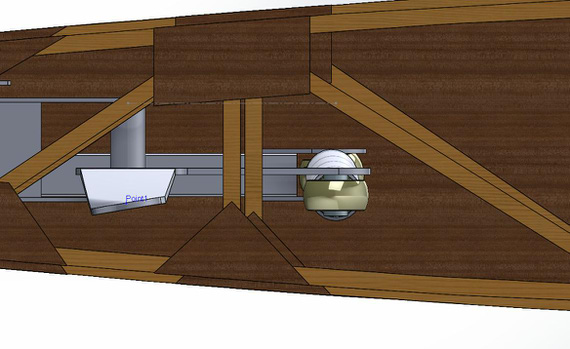
Here, it's looking at the rod from the tip, the rod is that white thingie right of the rib verticals
So, I guess, to the wing fittings and control stick assembled with fuse models tomorrow.
And to finish today off, here's the full zoomed out picture of the lower wing, as it is right now.
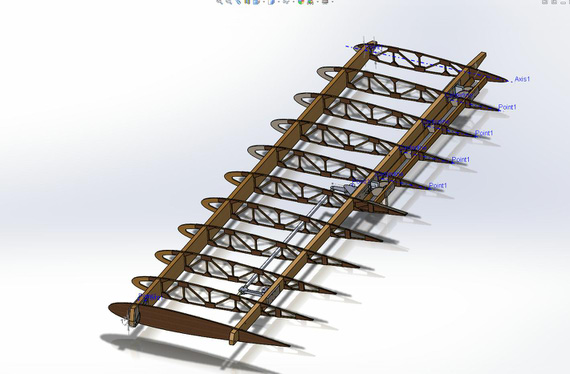
The wing
Unofficial grading standards for low level navigation:
You can't be lost if you don't care where you are.
Up ↑
Bellcrank and Idler
Bending and twisting virtual metal
| On: | May 22, 2014 |
| In: | [Skybolt] Wings |
| Tags: | CAD, lower wings, control system, ailerons |
It's almost 5 am and Im finally done with the bellcrank alignment! Phew.
By the way, sheet metal stuff in Solid Works is amazing! You give it the bend lines, radii, and a couple more parameters; and it automatically creates both the bent item; as well as the flat pattern. Print the pattern, glue, and start bending -- it will show you which line, how many degrees, and in which direction to bend. Ill post one of those final drawings later, when I get around to printing them and bending some actual metal :).
Anyway...
The night started quite jolly with me whipping out the idler arm with it's bracket. Looks pretty neat, eh?
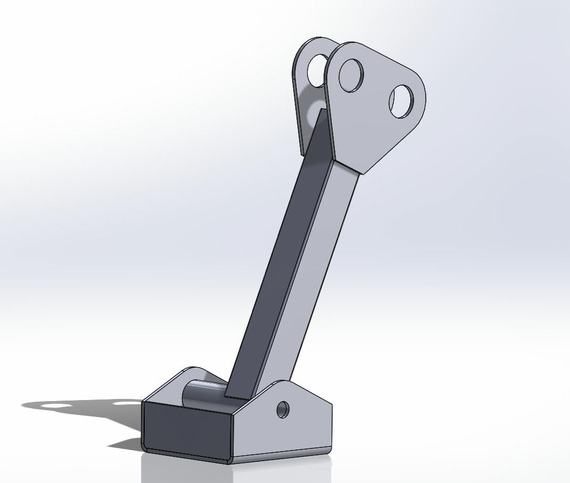
Aileron Idler Arm and Bracket
And then, back to the bellcrank hell. I had it modeled back in the days, and the "jog" bend 1/2 inches down made. Here's how busy the sketch with all the radii and holes looks BTW; pre-bending.
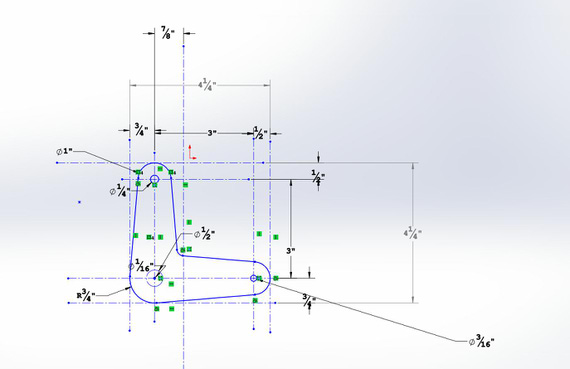
Bellcrank layout
Anyway, with all the sheet metal awesomeness SolidWorks doesn't know how to twist. You can twist a model by using deformation, but at that point all kinds of shenanigans begin to happen. For example, all faces of the model stop being planar faces (meaning nothing can be sketched on them, and sketch is how you start defining a feature (part of the model)); for some reason I wasn't able to put a reference point into the center of one of the holes, etc. (I ended up drawing that point finally by projecting that hole's centerline onto one of the faces; that did work for whatever the weird reason Solid Works gods must have).
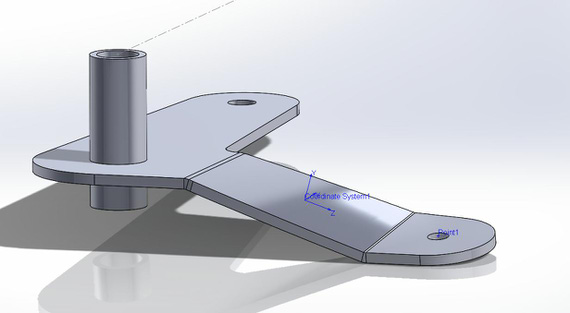
Bellcrank, bent and twisted
And after fiddling with it for about an hour, I was finally able to position everything. The plans don't specify where the bracket should be, so my educated and logical (yes, mr. Spock?) guess was that it should be so that the aileron pushrod connecting bellcrank to the alieron hinge is aligned and straight in the "aileron neutral" position. So I used the aileron hinge center as the reference; squared the bellcrank and aligned it that way. Note the blue line (that's actually a plane bisecting the aileron hinge), and the Point1 (that's that wretched point on the twisted surface that took me so long to figure out). That's what I used for alignment.
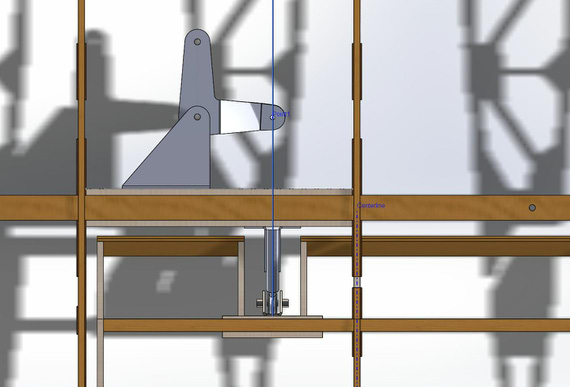
Bellcrank mated and aligned with aileron hinge
Coming up, putting in the idler, all the pushrods, and checking clearances with rib truss throughout the full range of motion. I strongly suspect that I will need the control stick's model on the fuse to do that, since that's what the other end of that pushrod attaches to. Oh man... gotta love those dependencies. That just means that I will have to do that model earlier than planned. Oh well. I like Solid Works anyways...
Tomorrow's the Shop Day! Gotta clean and put that compressor together.
OK 5:11 AM; time to go get some sleep :)
Flying is the perfect vocation for a man who wants to feel like a boy, but not for one who still is.
© Copyright "79FT". All rights reserved. Feel free to cite, but link back to the pages cited.
This website only shows how I did things in my various projects. These pages are for information and personal entertainment only and not to be construed as the only way, or even the perceived correct way of doing things. You are responsible for your own safety and techniques.