[79FT]: Building Things |
 |
Skookum Choocher
... aka The Mean Beast
| On: | Mar 21, 2020 |
| In: | [Blog] |
| Tags: | Texas, smoking, bbq, brisket |
I've had a problem.
Well, two problems to be precise.
Problem number one: being an alien Texan, I had to ensure that I stay on the good side of our local BBQ police. Did you know that if you move to Texas, you get deported if you can't pull off a passable brisket on an offset stick burner? You probably didn't!
My other problem was 20 inches wide, 40 inches long, and had a 3" stack.
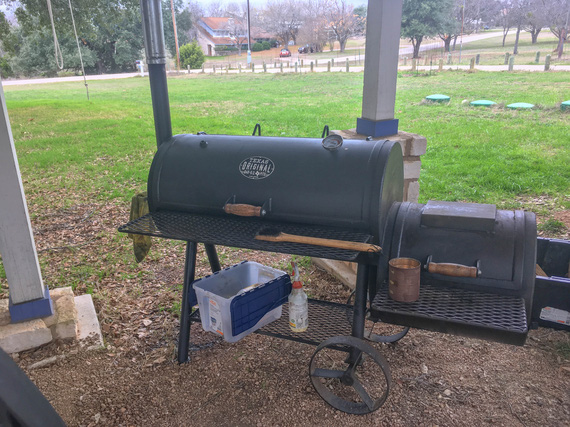
My Other Problem
It was too small, which resulted in inability to make more than one brisket...
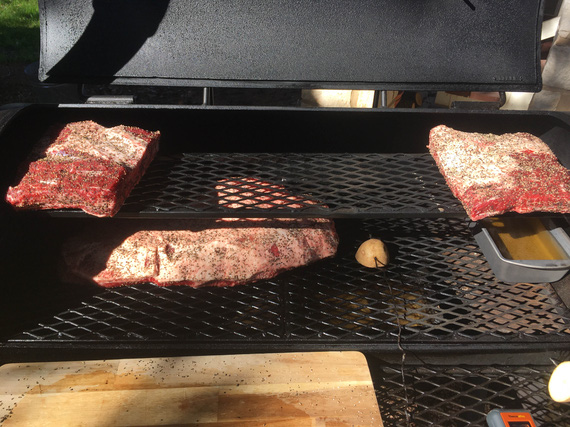
Loaded to the brim
That's one brisket and some ribs - and they all are in suboptimal spots on the pit. It's just too small!
My son's fourth birthday I had to admit defeat and get a couple cooked briskets at Brett's Backyard BBQ. Nothing wrong with Brett - his briskets are grand; but I need to cook for my son's birthday!
On top of that, that pit was all choked up, with such a small stack that it couldn't handle any real size firewood. I ended up having to fiddle with the fire every 10-15 minutes, and feed it with kindling.
So, after going thru all the smoking for New Years; I decided that I outgrew my pit, and had to upgrade.
The usual suspects - Klose, Gator, and JJ were all on the list. They're all in Houston, and I was gonna make a trip on January 2nd, and talk to each one of them. I was thinking about 24x48, and possibly talking about getting a 30x48.
I considered a Lang for a while; but decided against it - I kinda like the simplicity and basic-ness, if you will, of a straight pit.
And in parallel, I was browsing Craigslist. Hey, if someone was dumping a good sized pit, I would've taken it off their hands.
And that's how I found...
Tim
There was a pit for sale that looked basic; but was everything I needed, and for just 1800 bucks. A lot? Well, a 20x40 Klose sells for more, and this one was 24x60, I think; and on a trailer. It was.. dirt cheap.
It seemed that the guy selling it was in the business of making them. He had a website, and there he said that he can custom build. Hmmmmm... I gave him a call.
... we met the same day. Mr. Tim turned out to be a rancher, welding pits up out of propane tanks as a side gig. "Helps me feed the cows", he said. They started as a group of buddies and helped each other make their pits; and then decided to make this into a paying side gig.
Tim's approach was simple and easy; and he was very open to tolerating my obnoxiousness and making a pit for me. We bounced ideas back and forth, and none of those seemed to scare him too much.
That evening, I went home way over-excited, and started mocking things up ...
The Design
Just to make sure to illustrate what I wanted from Mr. Tim, I drew the key parts of the pit up in SWX and sent it over to him. We did a few rounds of back and forth...
I wanted a baffle between the firebox and the cooking chamber that was adjustable from the outside; because I felt like with that, I wouldn't need to tune it with tuning plates, which are much more annoying to deal with in a hot smoker (moving them around in a hot smoker is no joke). I played with a baffle a lot on my old smoker, and wanted it easily adjustable on this one too.
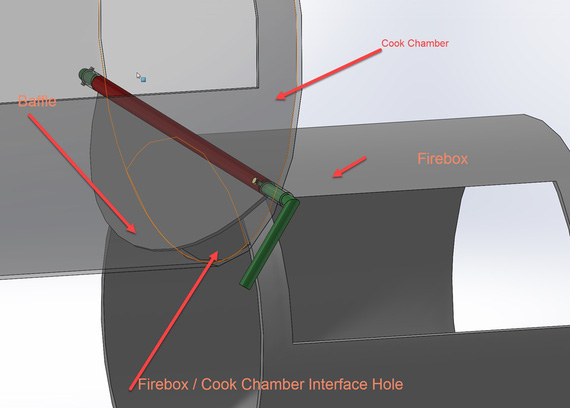
Baffle
I wanted a "Franklin Style Collector Stack". Like this:
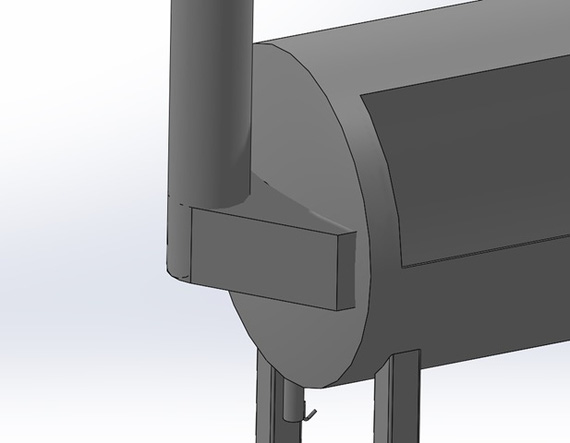
Franklin Style Stack
I wanted a base on casters and leg levelers. See, I wanted it permanently installed - but I had to install it first; and a monster pit is no joke weight-wise.
So the idea was, to have casters to move it around, and then remove the casters, and level it with leg levelers in place. So I designed a funky base arrangement:
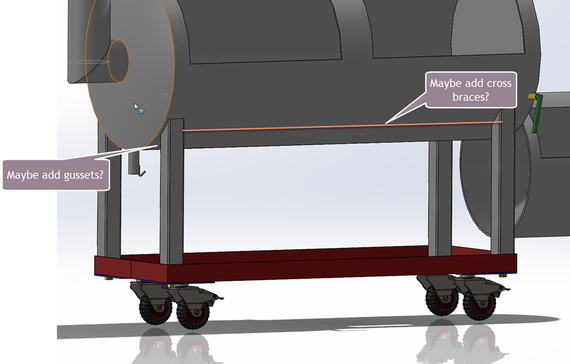
Base
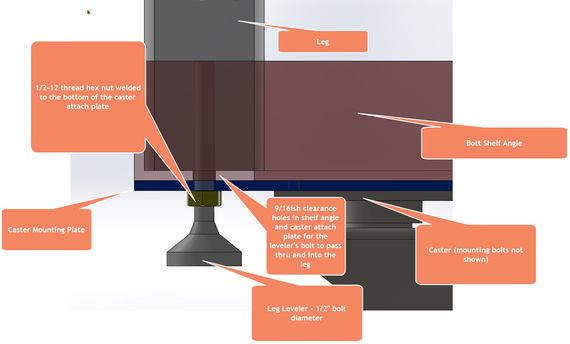
Levelers and base detail
Mr. Tim was fine with all of those after asking some very pointed, and very good, questions, and offering a lot of suggestions and detail and his take on things.
We settled on the final design, I put up the deposit, and Mr. Tim proceeded to ...
Build
He took about 2 months, which, given that he's a one-man, part time, show, was blazing fast. He was feeding me a good diet of pictures :).
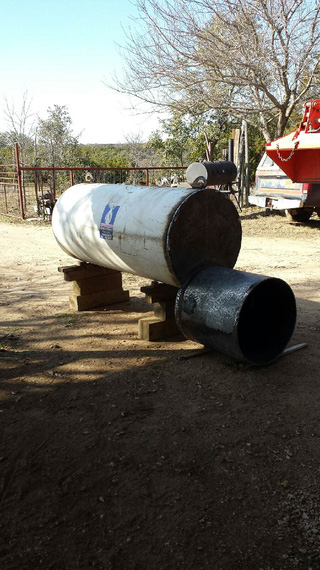
Tank, and firebox
I asked him if he could not paint the tank. He wanted to make sure I wasn't making a mistake. The paint is ugly, he said. Am I sure, and very sure, he inquired? I said, I thought it was beautiful!
At some point he said that it's the wife who needs to approve, and a wife would not generally approve of an old propane tank in the backyard being an eyesore.
Well, my wife thought it looked great! :).
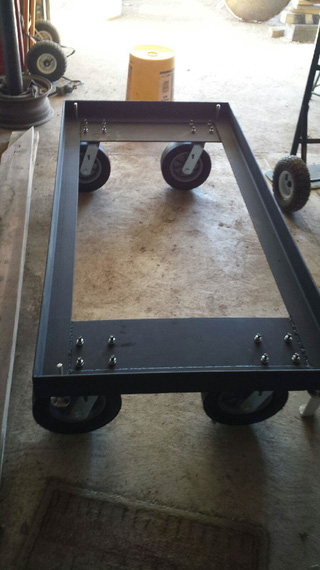
The base
Mr. Tim thought that doing A-style legs would be better. I agreed! I wanted the A-frame type legs initially, but decided against it given all the funky geometry involved - but he offered! Of course!
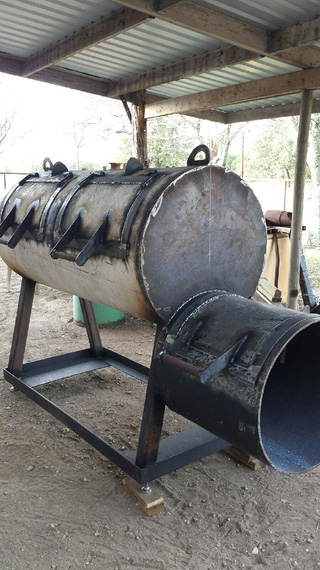
On legs
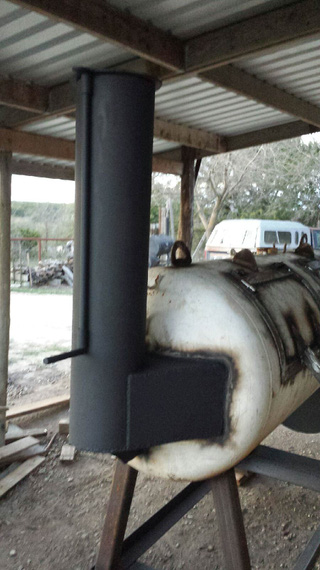
Stack on
It was progressing steady. That funky adjustable baffle was the last bit; and I made a visit to Mr. Tim's ranch and we poked around the pit a bit discussing options on how to hook it up.
He said, he might be ready in a week. I got very excited!
And then, exactly in a week,
The Delivery
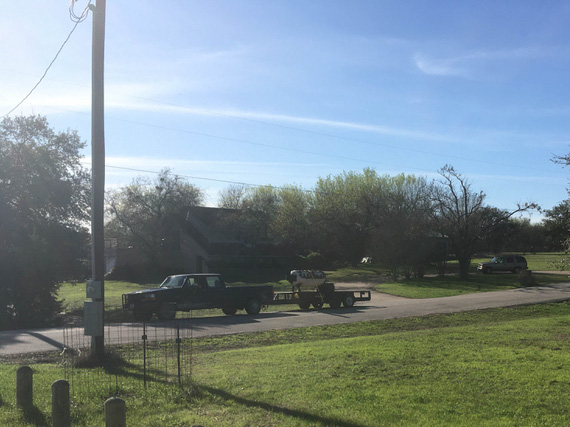
What's that far out?
He showed up Friday evening.
We spent most of the rest of the daylight having fun unloading the Beast.
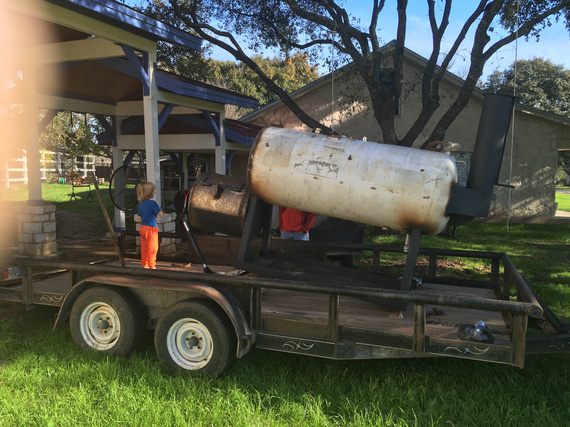
Jacking to put the casters on
A little come-along winch, a jack, three guys, and a four-and-a-half-year-old is all that's needed to maneuver a pit that's heavier than my biplane!
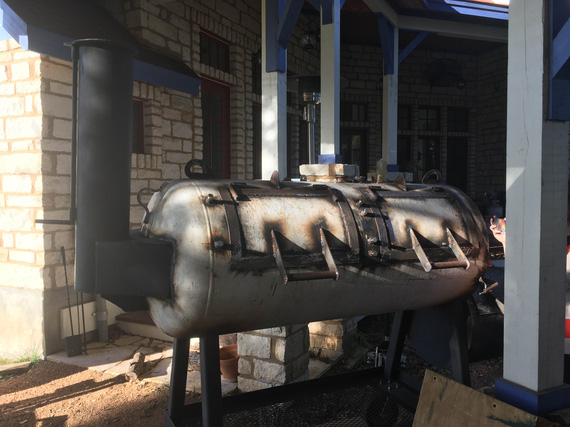
Off the trailer, now to turn and slide in...
We rolled it to it's final spot, raised one side, dug some holes in the dirt, and put pavers down to have a solid footing for leg levelers. Then, we took that side off the casters.
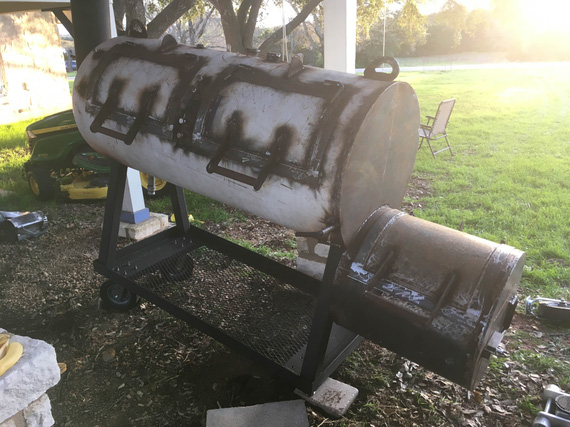
Setting up on pavers
The other side then got the same treatment. We used the levelers to level it then, and confirmed with running water inside the cook chamber. It's very important to level the pit right, so that all the grease won't go into the firebox and light on fire!
Next morning, I took an angle grinder to the pit to knock some rust off. Then, lots of soap, scrubbing, and hosing down. I hurt the day after BTW!
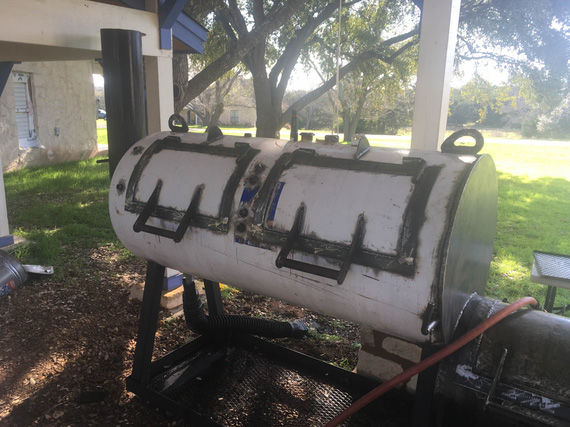
She cleaned up nice!
And then, the moment we all have been waiting for...
The Fire!
I oiled the firebox and lit a blaze to burn off all the bad smell.
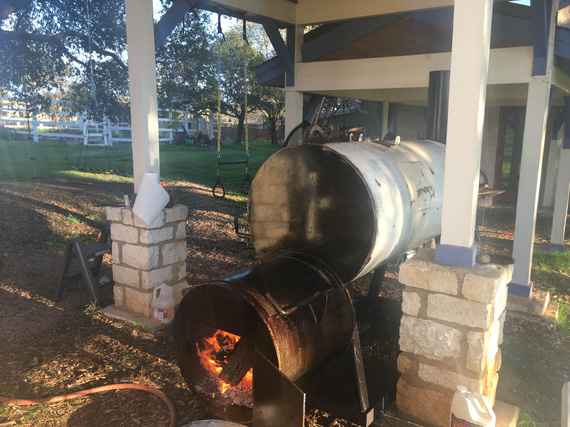
First fire!
Once the pit started coming up to temp, I was just rolling on layers and layers of peanut oil everywhere on the outside to burn it on.
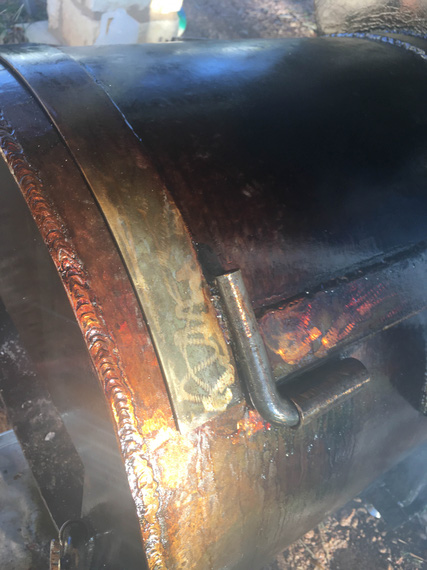
Oil patina on the firebox
That yellow is no rust - it's oil burnt on. Kinda like a cast iron skillet.
I burnt the fire for as long as I could and as hot as I could.
Man, this pit drew! I could throw anything at it. 5-6 large logs? No problem! No choking. It just gets hotter and hotter! Man, what a beast!
I kept her at about 450-500 for a few hours, and let it die down overnight.
The next morning, I washed the insides out of all the soot from the first fire, oiled the insides, and now went slowly. Now, it was the time to season the insides with oil, and to do a quick check of temps.
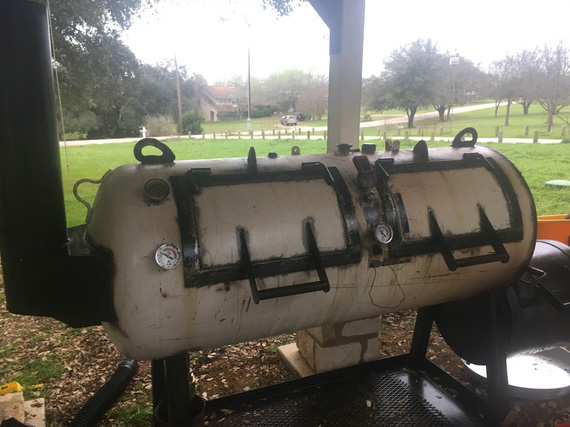
Oiled and pretty
My TelTru gauges I've installed into 1/2 NPT ports we welded onto the pit in strategic places were dancing around a happy 250-275. The top shelf in the middle was hotter with the baffle full open, but the pit evened out when I closed the baffle down a bit to deflect incoming hot air from the firebox down. It worked! No tuning plates and I'm within 40ish degrees everywhere! Wow. Just.. wow.
I wanted to probe various parts of the pit closer to the firebox. I stuck in my thermocouple probe.... 350. What the hell? Too close?
I was messing around with it, with thermocouple showing me numbers that didn't agree with TelTrus at all. Finally, I did this test.
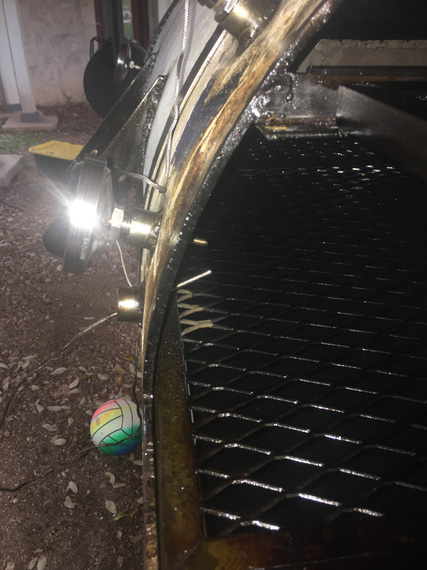
Two probes
The top is a TelTru mechanical gauge. The bottom is the thermocouple. They're within 1 inch of each other. 250 on the TelTru. 330 on the thermocouple. At least one of them is lying. But which one?
Hmm... how does one test a thermometer...? hmm.. aha! Boiling water! That's a nice reference.
Pulled all the 4 TelTrus and my thermocouple, and stuck them in the pot. All of then shown.. 212?! What the hell?
Weird cosmic rays affecting thermocouple crossed my mind, I admit. I talked with Ben. I talked with Alex, and Nick. No ideas.
Dammit!
I had a hunch then. Maybe, just maybe, the stick-out on the mechanical TelTru's was not long enough? To confirm, I did a couple things.
First of, I became somewhat of a aficionado of the Mad Scientist BBQ channel, thru which I found out about Fat Stack Smokers. I checked how long were their stems. They used 4 inch TelTru's. I was using 2.5 inch ones.
Second, well.. I could confirm which gauge was lying by using paper thermometers - those little strips of paper with squares that turn black in 10 degree increments.
I ordered some strips, and some 4 inch stemmed TelTru gauges - and meanwhile, decided to do another test - the biscuit check!
That's a fun one. You fire a pit, and fill it with frozen biscuits. You let them sit, and watch the rate at which they brown - to figure out where the smoker's running hotter, and where it was colder.

The Biscuit Test
With the baffle tuned to where I thought it'd be in the right spot, the test showed almost perfect results! The hottest spot was the middle of the top shelf. The coldest was the middle shelf near the smokestack. Center middle and top near the smokestack were almost the same, and all biscuits were reasonably evenly cooked - with crispier side to the firebox. That's the perfect offset distribution!
You see, brisket is thick on one end and thin on the other. The way I feel about it, you want one end to be hit by more heat than the other. I actually like this temp gradient - if you have the smoker full, bigger pieces can go into hotter spots, and smaller pieces can go into the colder ones; or you can rotate to cook everything roughly the same amount of time. I feel like that gives one more options rather than an oven-like perfect environment. One of the reasons I didn't want a Lang BTW.
Those frozen biscuits turned out to taste like baking soda, by the way :(. Oh well. They were dirt cheap.
The following weekend, I set up the temp test with temp strips.
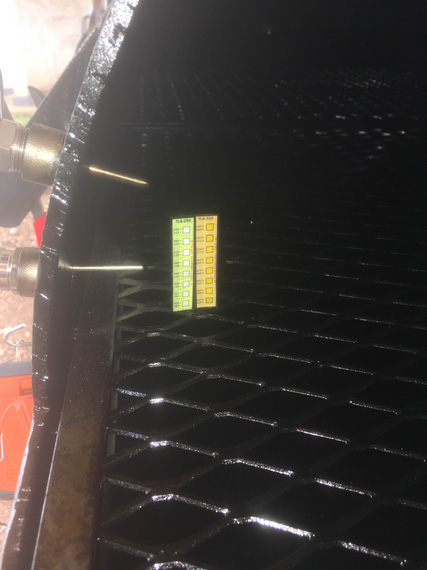
The Temp Strips
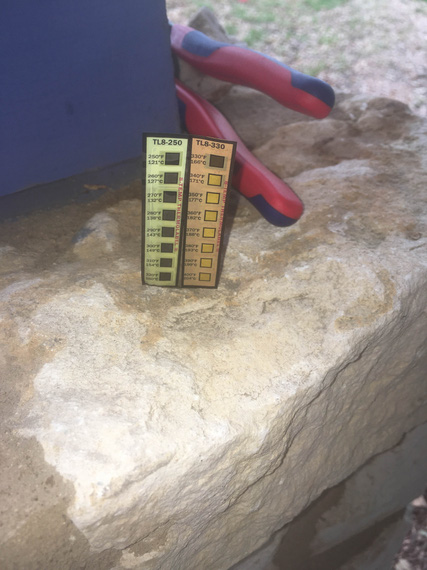
The results
330! So, it was the TelTru that was lying. My long-stem ones showed up, and I installed them to find perfect indication now.
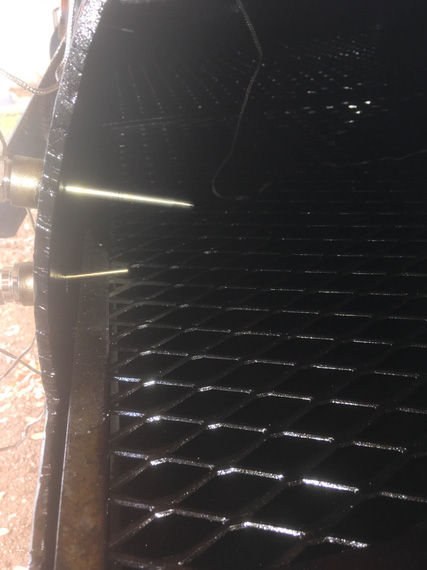
4 inch stem on the top
Now, they agreed within 5 degrees or so. Notice how much further the top, TelTru, probe now protrudes.
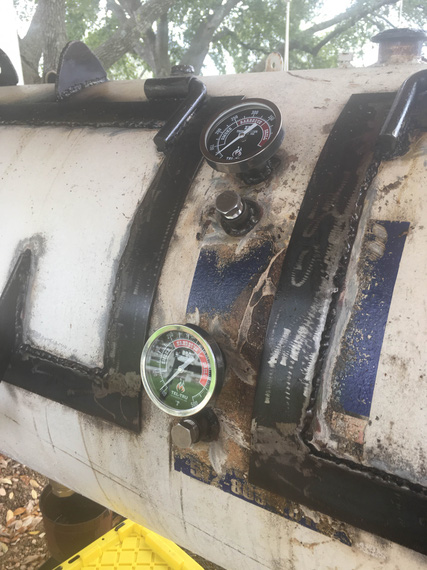
The TelTru Gauges, in their final spots
And so, now, the only thing that's missing is the first cook. Which, by the irony of circumstance, might turn out to be a high-pressure one. My neighbors' daughter's wedding caterer ditched them, and I very well will very much likely end up cooking for that wedding. Fingers crossed!
Flying is not Nintendo. You don't push a button and start over.
Up ↑
Harbor Freight Hydraulic Crimper
... the answer is: solder!
| On: | Sep 07, 2019 |
| In: | [Blog] |
| Tags: | tools, electrical |
Doing the electrical rebuild on the Charger, I needed to terminate quite a few of heavy wires with large lug type Amp terminal rings.
I had a Harbor Freight hydraulic crimper lying around that I got to crimp a couple wires when I was installing CRG-30P on the Cheetah, and was planning on using it; though the type of crimps produced by it kinda bugged me.
After doing a few crimps, I decided to burn a few terminals and do a proper test.
The Crimper
Normally, crimpers for large size terminals are super expensive; but Harbor Freight, as usual, sells a hydraulic crimper with large dies for just about fifty bucks.
Here it is, in it's full glory.
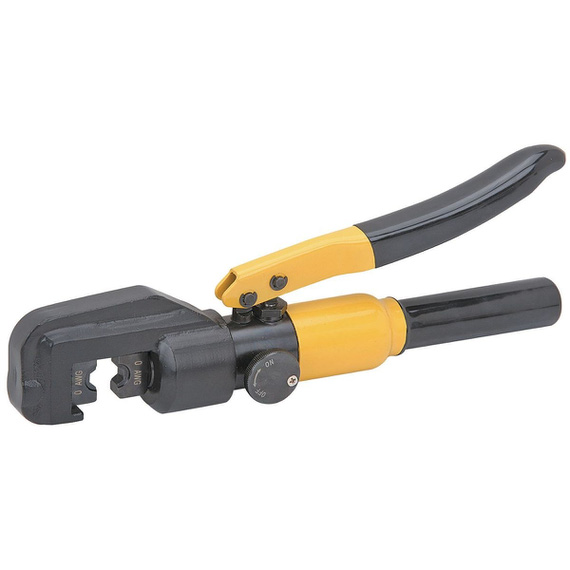
Crimper
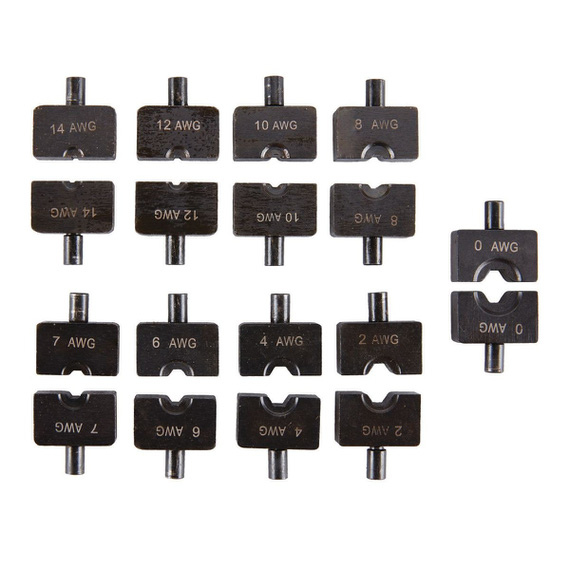
Dies
Technically, the way it's designed is it's supposed to produce these nice hexagonal crimps. Or at least, I think that's what they were trying to do.
But those familiar with crimpers know that the key is in good dies; and that's were most of the money is. Damn, "regular" stripping dies for StripMaster are what, $10; while milspec dies are what, $150? Now; of course there's diminishing returns there - in the case of StripMaster, regular dies work just fine for most applications.
Here's the problem with HF Crimper dies. The holes in them are severely undersized, which makes them produce "flat", rather than hexagonal crimps. We can't know if this is by design. What I tried to do is to research what others are doing, and to run a few "is this a good crimp" tests.
The Test Setup
I was crimping chunks of 8 AWG MIL-W-22759/16 wire into AMP Battery Terminals.
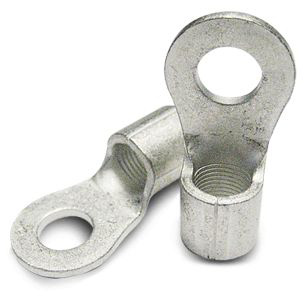
The Terminal
After crimping, the terminals were hacksawed in the middle of the crimp, and polished to see if there were any voids or visible wire strands. A good crimp must be "gas tight". In other words, all the metal has to be pushed together hard enough to become a single piece of metal for all intents and purposes.
Using 8 AWG dies
For baseline, I used the HF die marked for 8 AWG.
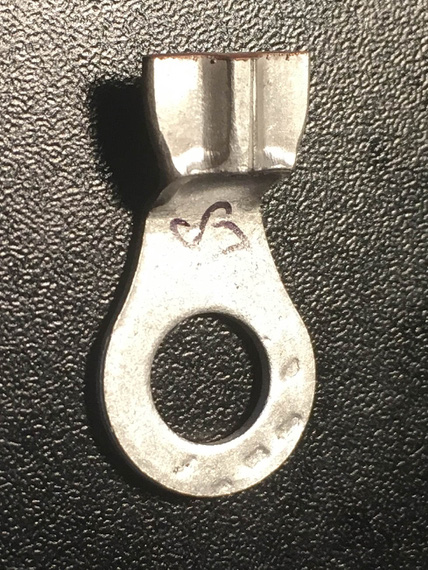
8 AWG die / crimp
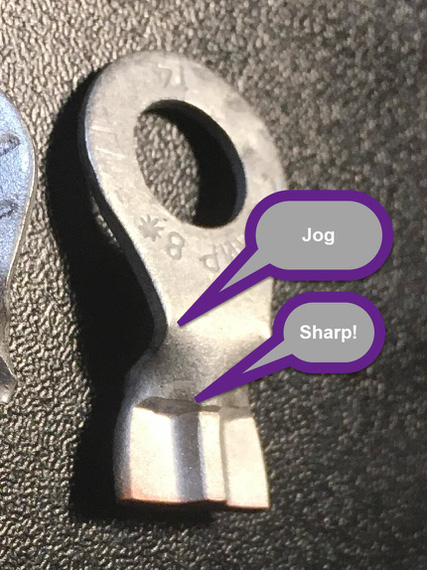
8 AWG die / crimp
As you can see, using the "nominal" die produces this weird, flattish-with-a-bulge crimp. What's worse is it adds this strange "jog" to the terminal lengthwise, and scrapes the metal inward where the crimp starts. That's lots of stress risers.
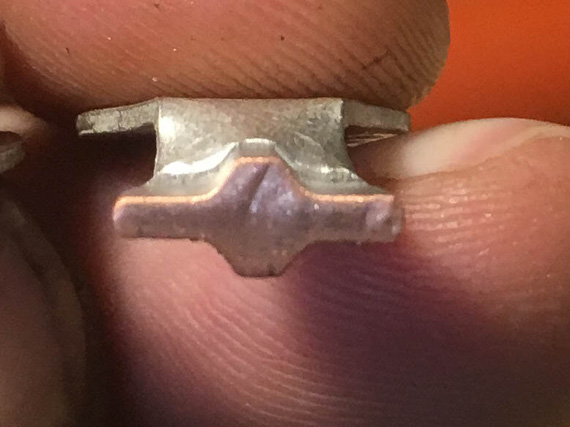
8 AWG die / cutaway
The crimp quality is good though. There are a few specks of shavings I didn't clean off - those are not defects.
Using 6 AWG Dies
I went next size up, to dies marked for 6 AWG. That produced the same crimp as for 8 AWG, but with "wings" being thinner - almost paper-thin. I also didn't like how it mangled the terminal even more.
Somebody online mentioned that they rotated the crimp 90 degrees and did it again to "push the wings in" and I tried that.
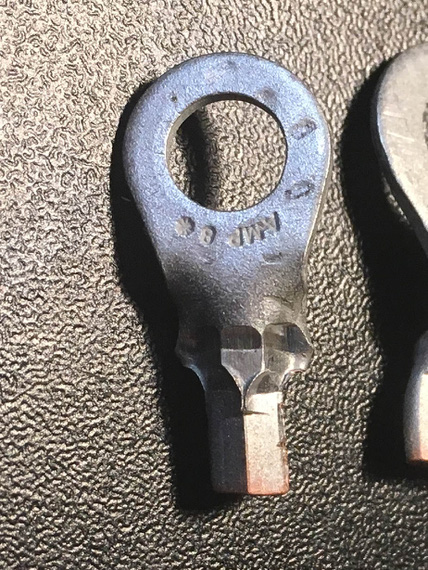
6 AWG die / crimp
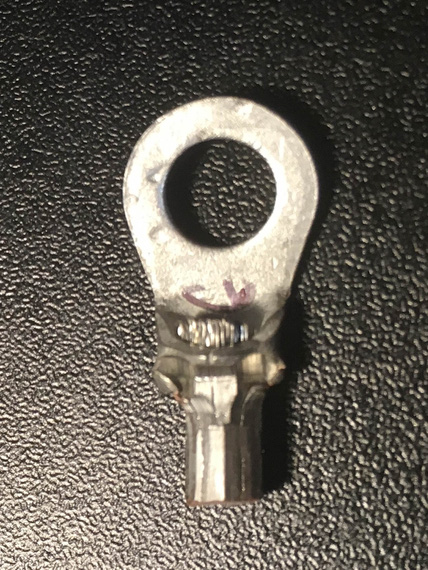
6 AWG die / crimp
I think the resulting crimp, while tight, is too rough to be acceptable. It almost feels tortured.
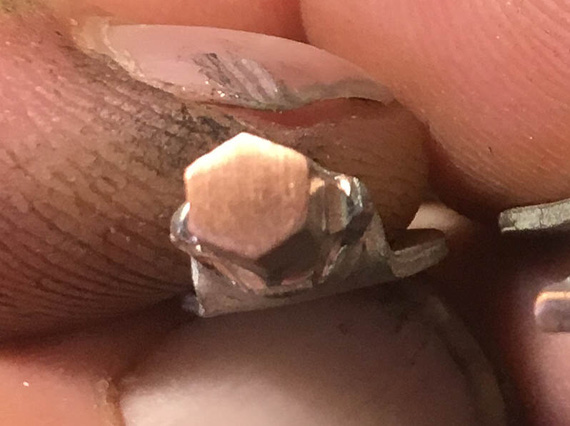
6 AWG die / cutaway
Inside though, it's all nice and compressed.
Using 4 AWG Dies
Finally, I tried 4 AWG dies.
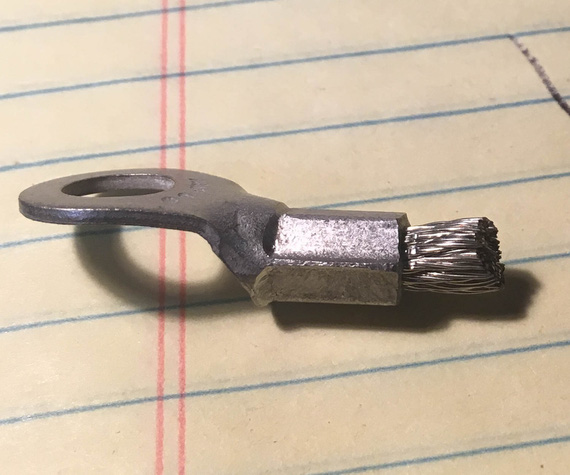
4 AWG die / crimp
This crimp almost looks good. The jog is almost not there, and it has nice hexagonal shape. "Wings" are almost not present.
However, the dies closed fully and it felt to me that the metal was not compressed enough (I recall the resistance I felt in the crimper doing the previous two tests, and the resistance I felt on this one was much less).
The cutaway confirmed that.
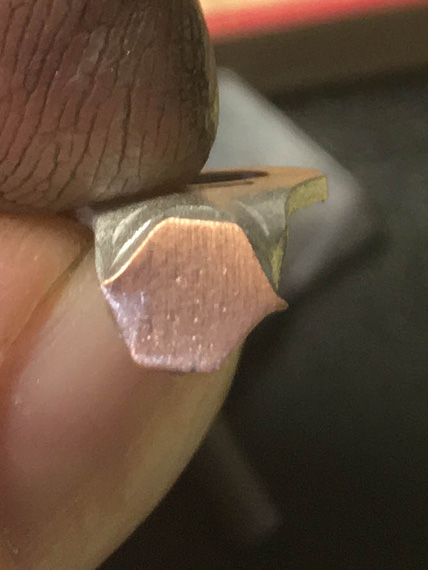
4 AWG die / cutaway
Those imperfections on the cutaway are voids left from not enough compression force applied.
Conclusion
Well, it's a sad one really. If you want to use the HF tool, then you probably should use dies that make those "winged" style crimps (like the one produced in my first test), and suck up the jog and other imperfections.
I have posted my findings on AeroElectric list, and the conclusions seems to be supported - the dies are horrible, and to make them real good one would need to rework them significantly.
Or, alternatively, just solder them (here's a nice howto by Mr. Nuckolls) , which is what I am seriously considering.
Update - October 2019
After trying and failing the soldering approach, I have devised a technique of using this crimper to achieve good results. Musings linked in the previous sentence, and here's the jist:
- Given wire gauge of, say, 6
- Use die 2 sizes up - so, die marked for #2 wire
- Put the wire in the terminal. Start by squeezing the terminal turned 90 degrees (so "side to side" rather then "top to bottom"). Just give it a gentle oval shape
- Now, turn it 90 degrees and squeeze until the jaws close
- At this point, you will have a somewhat undercrimped joint, as I described in my notes on the crimper; but it's shape will be a perfect hex.
- Now, go 1 size "down" (so, dies marked for #4 wire). Squeeze.
- Stop when you feel it's done shrinking.
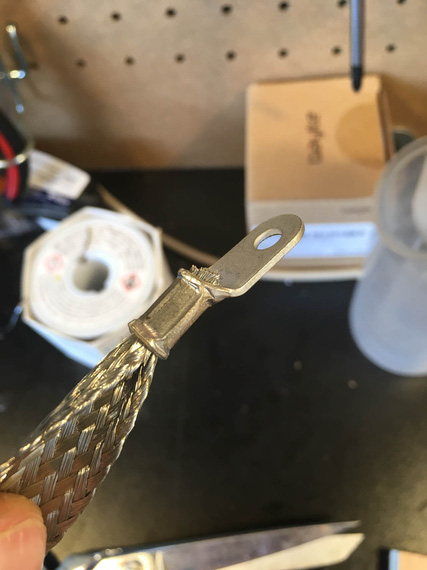
Pretty!
"Don't anybody maintain anything.
-ORD ATC
Up ↑
Back from Three Years of Silence...
... [crickets]
| On: | Sep 26, 2018 |
| In: | [Blog] |
| Tags: | house |
So, the last entry was in July 2015. It's September 2018 now. No, previous entry doesn't count: I have written it 2 hours ago :).
What took me so long? Mostly, the damn house!
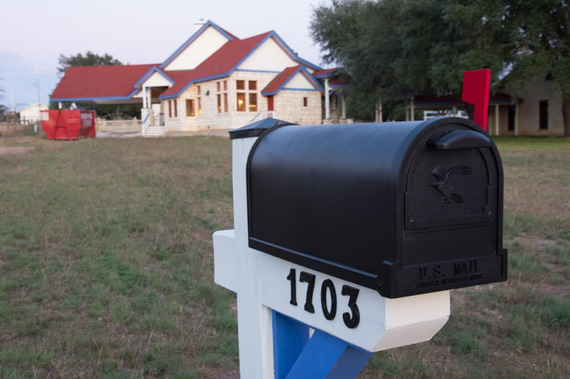
The House
Yes, seems like I pulled the wrong set of plans... again, and instead of building an airplane, ended up building a house.
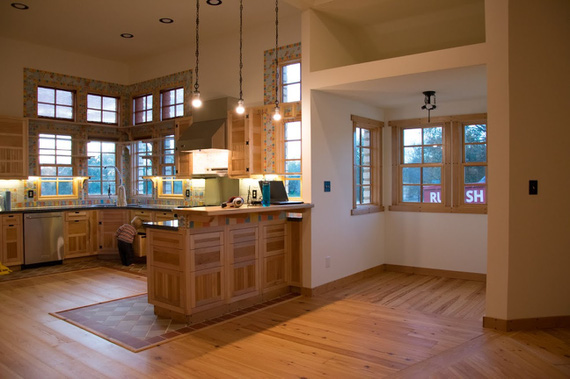
The Kitchen
Damn. Need to sort thru my plans a bit better next time.
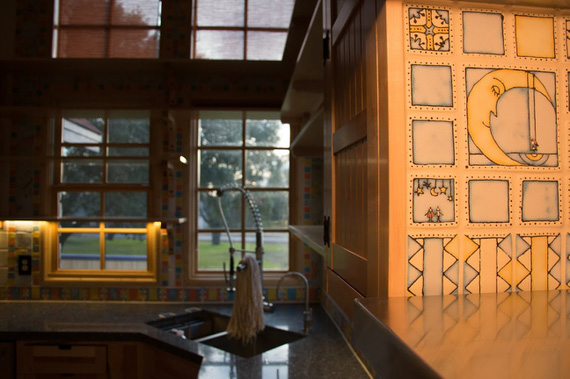
The Tile (each handmade by my kick-ass wife - ~3000 total)
So while we wait for the next project to solidify to the point of having something interesting to write about (it's gonna be The Dream Shop)..., well... I guess, we wait.
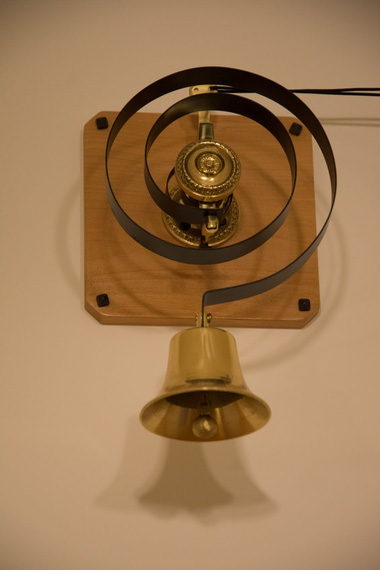
The Door Bell (which still works when power goes out)
If it ain't broke, don't fix it; if it ain't fixed, don't fly it.
Up ↑
Metal Pickles
Russian autumn tradition
| On: | Oct 07, 2014 |
| In: | [Blog] |
| Tags: | engine |
No posts for 1 month and 5 days! Holy cow.
That's all been eaten up by a couple projects. One of them ended up being a complete redraw of all airfoil sections on the lower wings on the Skybolt; and nothing to write about (no pretty pictures, very routine work). Just lots and lots of cleanup.
Another one... was me following an old Russian tradition.
You see, during long winter months Russians' desire for fruit and vegetables (and mushrooms) is satisfied with pickled everything. Cucumbers, tomatoes, cabbage, grape leaves, dill (!), apples, garlic, fish (haha :) ), and other things which I don't know English words for.
My genes are calling. It's fall, and I had to pickle me something.
It was.. a disassembled Lycoming for the Skybolt!
Some weeks ago, a gentleman posted on the Forum about him selling an O-360-A4M, all overhauled, yellowtagged, and such, by Superior; with higher compression pistons from ECI, with everything needed to put it together minus the sump and accessories, for a very attractive price.
Best part was, it was disassembled, so I am to get all the fun putting it together without the disassembling and sending parts out for overhaul (and well, paying for that too :)).
In short, it was a great deal.
The problem? Well, I will not need it for quite a while. 10 years maybe, if I go with the speed I'm currently going at.
I figured, assembling and pickling it after would be a bad proposition. A much better one would be to pickle it part by part.
As usual, started with a thread on the Biplane Forum.
At the end of the day, I ended up using three things.
- Phillips Anti-Rust Oil
- STP
- Cortec CorrShield VpCI-368

Phillips 20W-50 Anti-Rust Pickling Oil

Good' Ol' STP
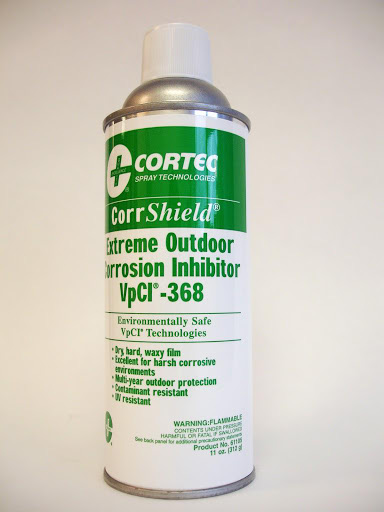
Cortec CorrShield VpCI-368
This latter substance is amazing. It's mineral spirits soluble, moisture displacing spray-on stuff that can protect up to 2 years in outside (!!!) storage. I'm storing the engine parts inside my house, so I figured it will do very good for a much bigger number of years.
It sprays on, and then dries over a couple days to consistency of candlewax. A bit sticky, but very tough. They claim it's scratch resistant.
Just in case I missed something or ended up scratching it off; I decided to also put a thick layer of Aeroshell grease on everything that's covered with CorrShield. Just in case.
And then...
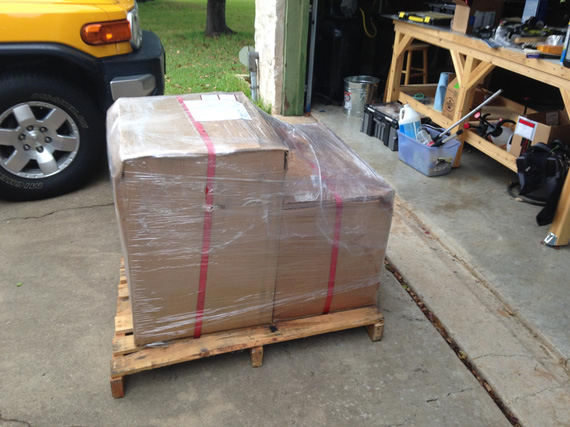
It showed up!
For smaller pieces, I first wanted to put them in sealed sandwich bags, with some STP / Oil 50-50 mix, and squeeze all the air out.
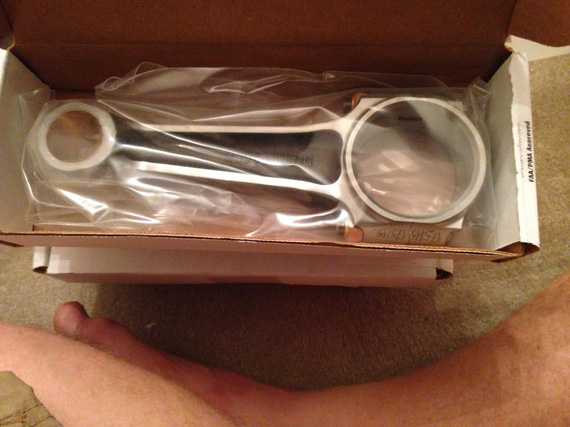
New connecting rod
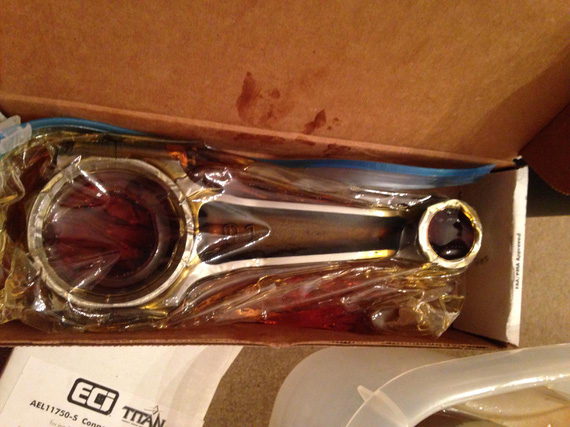
Now in the baggie with STP/Oil Mix
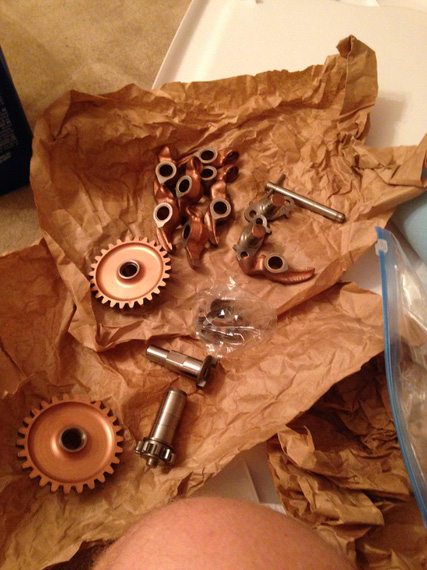
Gears and bits
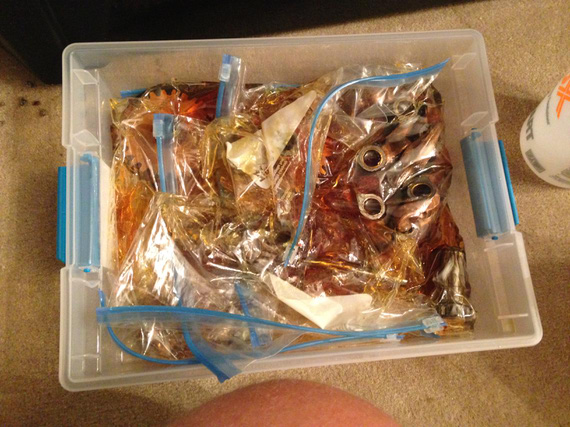
.. all bagged up
But after them sitting like that for a couple days, I didn't like how all the oil drained to the bottom of the baggies. So instead, I submerged everything in 2 oil/STP baths.
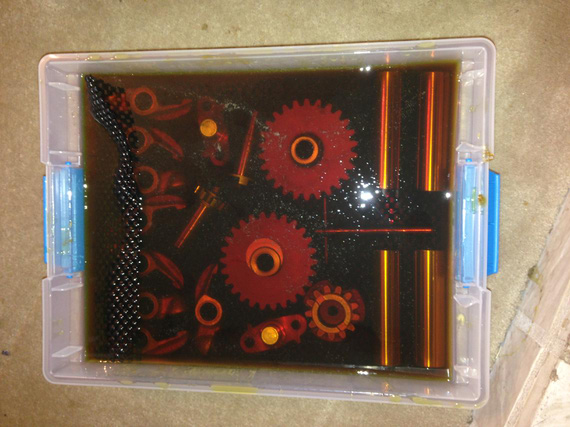
Piston pins, gears, rocker arms, misc accessory case things in oil/STP bath
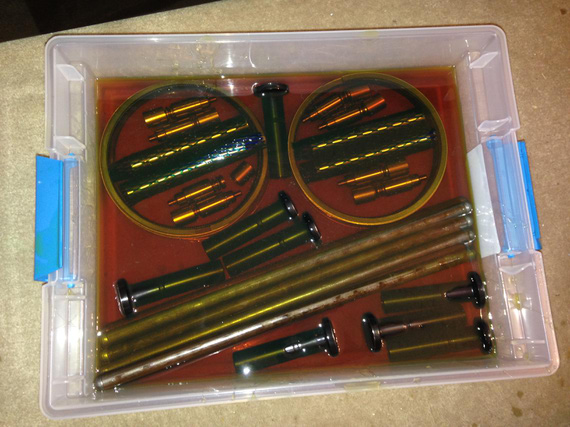
Pushrods, piston rings, tappets, etc in oil/STP bath
At this point, I ran out of oil and STP... And I had too much of CorrShield and grease -- and, after playing for some time with CorrShield and seeing how tough it is, I decided to use it on everything that didn't get into oil baths; even on smaller parts.
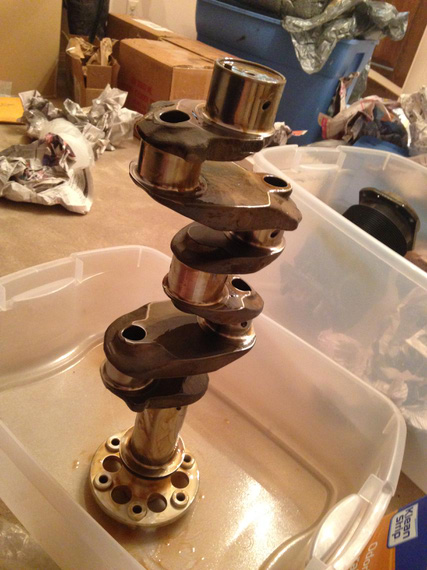
Crank
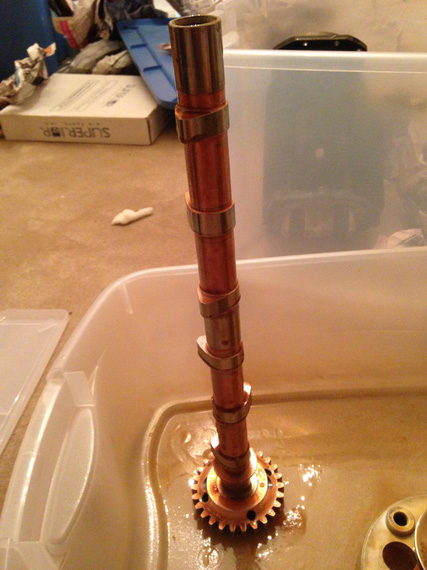
Cam
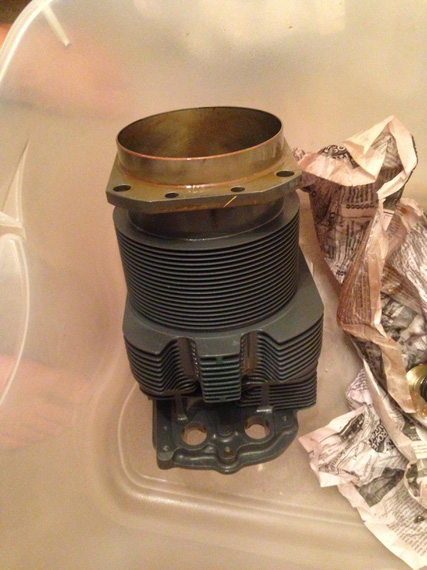
One of the jugs
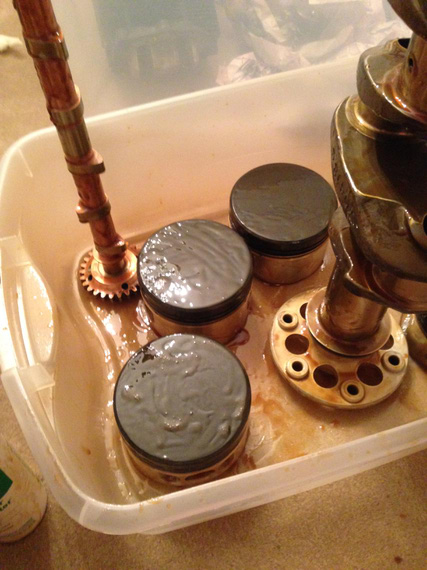
Pistons
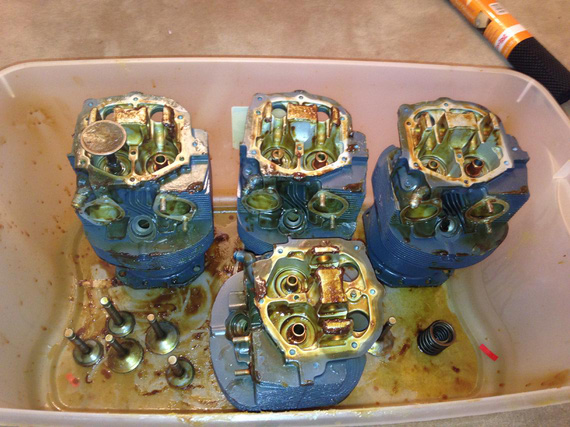
Jugs, right side up and tops CorrShielded and greased.
Some more small pieces stored "dry", covered in CorrShield and grease.
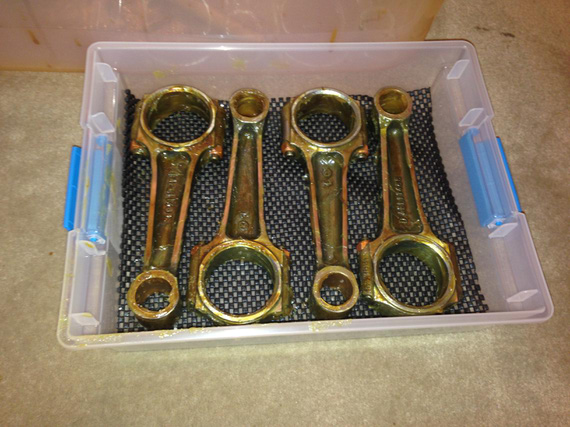
Connecting rods
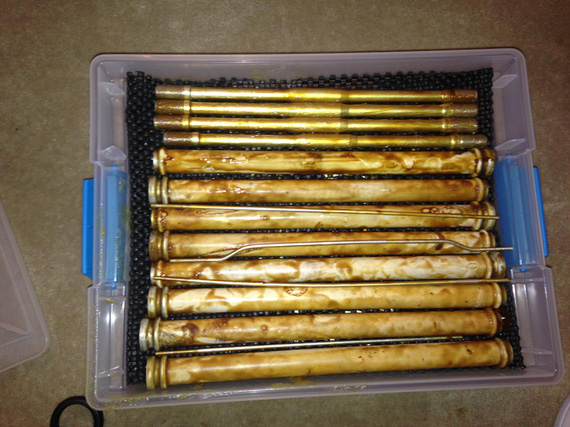
Thru studs and pushrod tubes
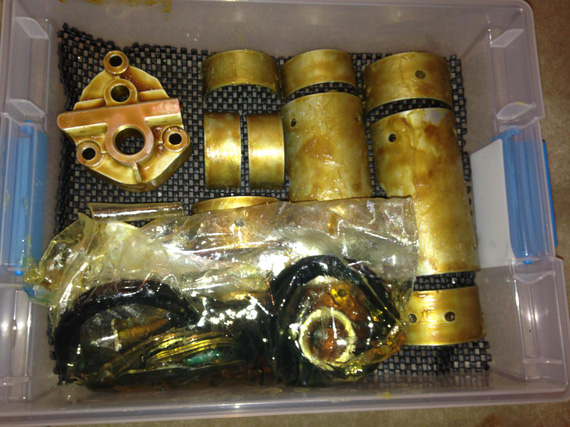
Bearings, oil pump housing and minor pieces
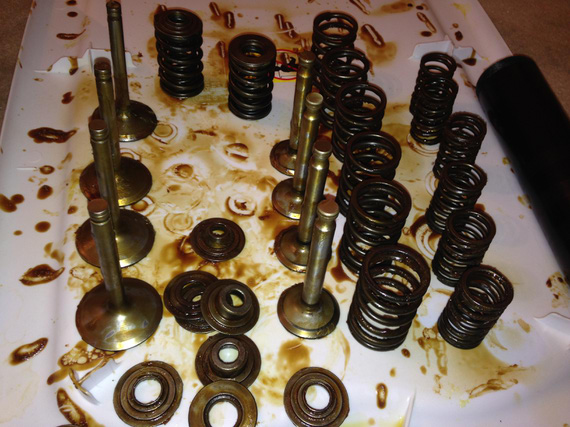
Valves.
This project took a couple weeks worth of evenings; and now my inner Russian is completely satisfied with his stash of pickles!
It's best to keep the pointed end going forward as much as possible.
Up ↑
SolidWorks Models
commonly used items
| On: | Aug 28, 2014 |
| In: | [Blog] |
| Tags: | tools, software, website, SWX |
Thanks to Bill Rose of the Biplane Forum fame, I have a lot of SolidWorks models of various hardware and other common airplane things.
I just recently have set up a page where you can grab all of them. Models are hosted on GitHub, so you will always get the most recent version.
The page is going to be linked in the Resources menu on the left. Click here to go straight to it.
Enjoy!
It is said that two wrongs do not make a right, but two Wrights do make an aeroplane.
Up ↑
Rant 1: On Building
why's, and such...
| On: | Jul 14, 2014 |
| In: | [Blog] |
| Tags: | rant |
I decided not to post current progress on the aileron linkage.. Too much work into it, and too little to show. It was mostly cleanups, and modeling a few missing pushrods. Still need to put more things up until there's anything to talk about.
So instead, I present you...
The Rant
Originally posted as a reply to a hundred (or so) year old question of "why" in yet-another-thread-on-the-topic on the Forum.
Me and Ben; both Grumman fans and AA5-B aficionados, are sitting in a $100 burger place called Props at Ben's home field, chatting hangar talk. A really slick taildragger pulls up to the pump. "Oh; that's an RV-8. It's a homebuilt" - says Ben.

One of RV-8s based in Watsonville
I've heard about that some crazyfolk build planes in their garages before, but, being a fresh-off-the-rolls pilot with ~3 months of ticket behind me, never given it thought. My very first instructor's primary words were 'follow the procedure, checklist, certification, standards' (sidenote: I am not against following procedures, Im against instruction-without-explanation-of-why). Glad I ditched that guy 1/2 into my training... But you get the gist.
So, back to RVs. What a beautiful machine! Looks almost like a Grumman.. but slicker, newer, cleaner... And it's easy to build! And .. and ... and.
That times, I didn't have much background building stuff. I built some simple furniture with hand tools (think circular saw and trim router). I did some stuff in my mom's house back in Russia, primarily designing and building electrics and plumbing, when I was a teenager. I built office networks (15 1-inch holes in 3ft thick brick walls, anyone? Russian buildings are BIIG). I never really truly fabricated anything... Building computers was another one, but that one didn't involve any fabrication either, just making sure you put a cable right side in (anyone remember AT-style motherboard power connectors? "Black-To-Black", I will never forget ).

My experience level...
But I was always into tinkering with stuff.
So anyway, the whole idea of building a plane didn't scare me, and I was excited, but I wanted something with lots'a support, good kit, and such - because the idea of fabricating stuff scared me, at least somewhat. I also wanted something fast. The plan was, we move out of state (I was in CA back then, and that's the whole other story), I sell my share in my Tiger, add money, and build an RV. I really wanted an 8; but ended up deciding on a 10, because I like having more than one victim in my plane every now and then.

My dream plane.. back then.
I just wanted a Grumman Tiger, Improved; costs wouldn't allow me to get and some other things repulsed me from Cirrus, Columbia, and a-likes.
I was on Van's forums, reading technical details, articles, and such.
I was studying intricacies of how to connect Dynons with a 430 and make it a certifiable IFR EFIS with GPS. I was almost about to start my IFR ticket training, BTW.
I was dead set.
And then, that same Ben got me a ride in a Stearman with his buddy Jerry. That guy never ever flew a nosewheel, BTW; that day I caught Ben convincing Jerry that he has to get in Ben's Tiger and learn nosewheel finally ("yeah.. it's the same as a Stearman.. just never wheel it!" - Ben was sagely saying to Jerry at Props), and then Ben went "Oh Fidot, that's great you're here - we gotta put you in a Stearman". And they did.

That Stearman
That day, in that first loop on the top side, my world was upside down, quite literally. I did IFR before; Drew, my second instructor, was a professional torturer (and great one at it; Im yet to see an instructor that comes even close to Drew). He made me do DME arks and shoot ILS approaches as a part of my VFR training, Because He Could (and we got that nasty marine layer in Oakland every now and then). I never did acro; not even spins though.
But That Loop... that was something completely out of a different world. The difference between never flying an airplane and flying a ratty Cessna 172 for the first time during the misleadingly cheap "demo flight" was probably less than the difference between having ~150 hours in nosepushers as a 'Private Pilot, ASEL', and doing a loop in a Stearman.
That caused a lot of thinking; a bunch of reading; and a ton of soul-searching.
As a result, my IFR money went into basic acro training (that I couldn't finish because I ended up moving out of state, after all, and there's no good acro schools around where I am right now).
As a result, RV-10 that flies dozens of pounds of electronics was ditched for a biplane. And open cockpit. And a 2 seater ('cause I like victims!!).
And most importantly, came a realization. You have to build an airplane to experience building an airplane. You can't build one 'cause you want one cheap, or you just Want One. Man, you can pick up an oldish Cub or a Citabria for about 30 grand; and a Yankee for about 25. Hell, you can pick up the homebuilt you want for less money than it's gonna cost you to build, if you're patient enough (and even if you have to wait for a year for one to pop up, you will still spend less time than putting together a kit (2-weeks-to-taxi et al excluded)).

Yeah.. Ill build THAT instead.
And 'cause I wanted to build to Build, I had to do it the right way. So, plans-built it was. I got the plans about a year and a half ago, and went thru mood swings between 'damm this is awesome' and 'damm Ill not fly for 10 years or will have to buy components or cut corners'.
There was, and is, a problem, and a hard one for me. Im addicted to flying. I did ~190 hours in the Tiger over a year and a half I owned that share in before moving out of state.

That Tiger; BTW...
But Im also addicted to building.
So I ended up deciding for myself that Im gonna do both. And I am. And I couldn't be happier. I don't need That Plane Im Building right now, I have something to fly. I decided not to rush, and just Take My Time; just make sure to not take multi-month breaks. 10 years, whatever. Im not in a rush.
Plus, my thinking is that works our real well with $$. You don't have to give tens of Ks of Presidents' Portraits to Vans or anyone else all at once. You pay as you go, and you build as you go. Got a bonus? Put it aside for an engine. Don't have one? Get some tubing and burn some holes in metal. Hey, I bet you can get cutoffs for dirt cheap or free at you local metal yard or whatever. Don't have any money? Do some reading, drawing, learning, and such. Hell, learn mechanical engineering. Aerodynamics. Structural analysis. 3D CAD (that's my current gig ). Hang out and help other folk in your chapter build things.

President's Portraits
Bottom line, Build to Build, and To Learn, not to Fly, or to Have an Airplane For Cheap.
Fi.
Rule one: No matter what else happens, fly the airplane.
Up ↑
The Shop Day
... and how it turns into two weeks
| On: | Jun 07, 2014 |
| In: | [Blog] |
| Tags: | tools, shop |
So, originally it was supposed to be the shop day. I was gonna clean and put together the compressor I picked up off a gentleman on Craigslist, and set up the air hoses, filters and such - and then, back to CAD. And then..
See, I was looking for a bandsaw. I wasn't in a rush, so I was gonna pick up a good used one; so I was watching Craigslist and such, waiting and waiting. After doing that for about 6 months and after I got tired of not having one; I finally said "screw it" and bid on one on Ebay.
I won it on Friday around 4pm; paid, and went home. Well; there, in my Gmail's Inbox, was a notification from CraigWatcher saying that yet another bandsaw ad was posted... I opened it up; and couldn't believe my eyes.
Someone was selling.. an 18 inch Grizzly saw for 250 bucks! I couldn't pass on it; and next morning was driving back with a 300 pound beast in the back of my car....
... and then, spent a week and a half cleaning it up. I polished the rust out of the table; changed some bearings, re-cut threads on the blade tensioning rod, added a 4 inch dust port (for whatever weird reason, Grizzly decided not to put a dust port on this particular model).
It also ran on the 220, so I had to add a 220 outlet to the shop... Decided to go all out; and added a 6 gauge run with 50 amp breaker, so that I can run a TIG welder off of it when I get one.
So now; I own two bandsaws :).
Here's the perpetrator:
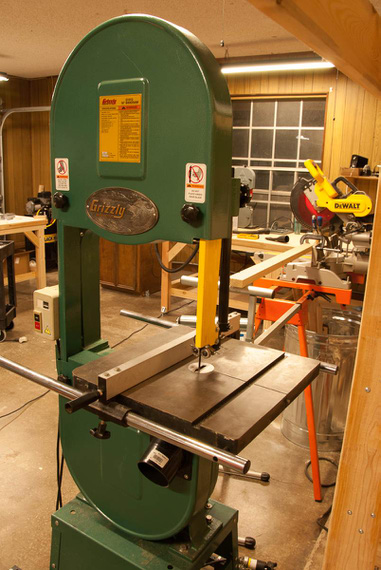
The Bandsaw
Since we're talking shop....
Right now Im set up in the garage of the old house we bought about half a year ago. Dash (my beautiful wife) is working on designing a new house we're gonna build; and that one is going to have a good sized shop. We will build that house first and then demo the old house; so I could start setting up earlier than I thought I would be able to; which is certainly nice.
But; Im dealing with 40 year old electrical; and other fun stuff..
Here are some pictures of that garage, ordered historically, as I was setting up.
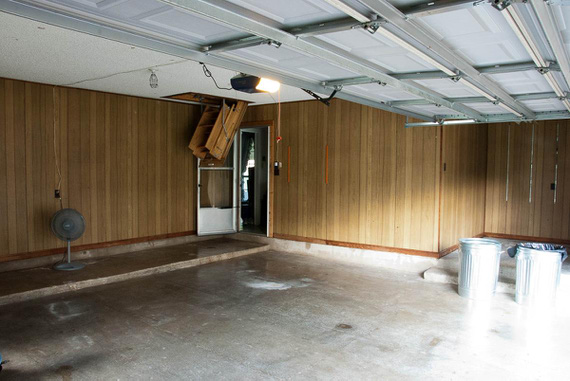
Just after washing everything with a pressure washer...
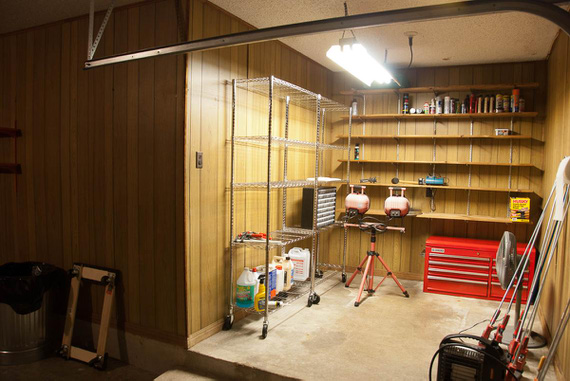
The beginnings of the storage spot
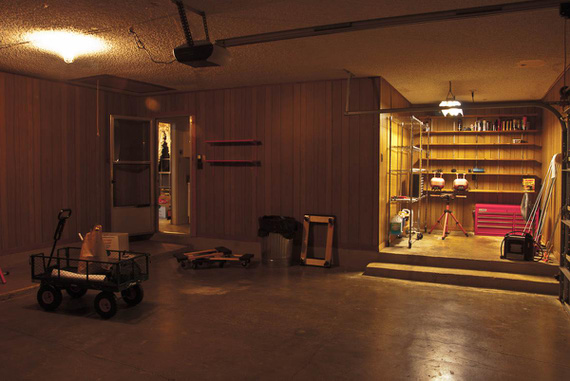
.. all that empty space :)
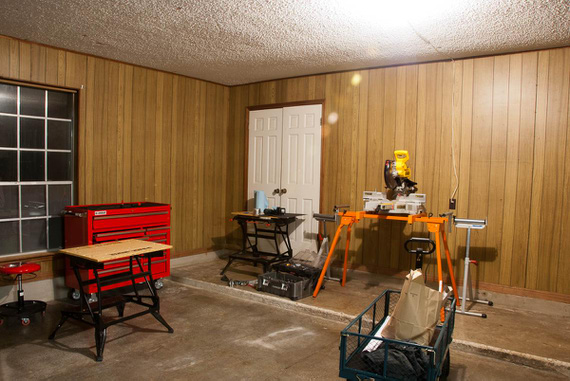
That's pretty much all my tools before I moved (the big red chest is new)
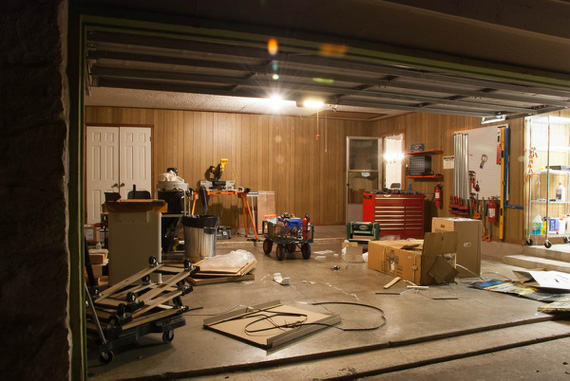
First batch of stuff - table saw, jointer, planer, drill press. Excited!
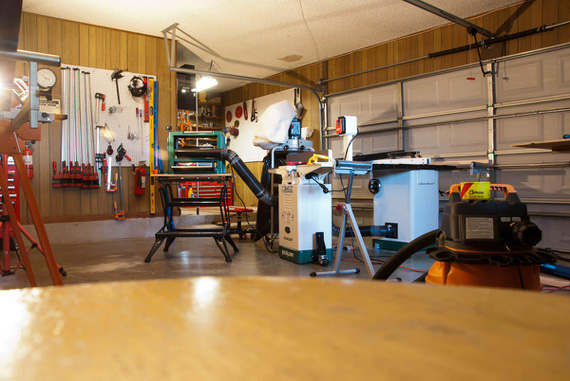
.. and set up!
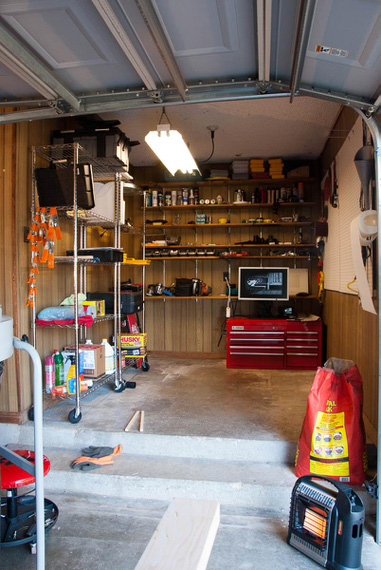
Storage's getting a bit more crowded
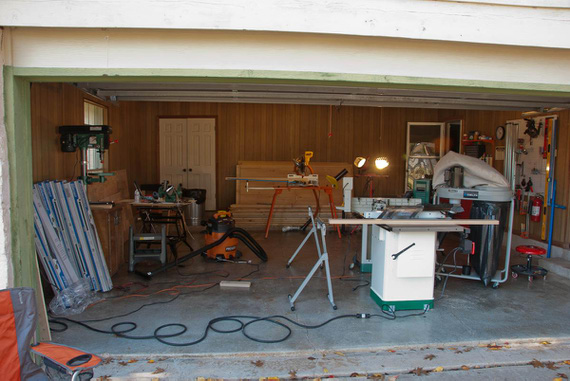
Setting up lighting. All that wood is for the benches.
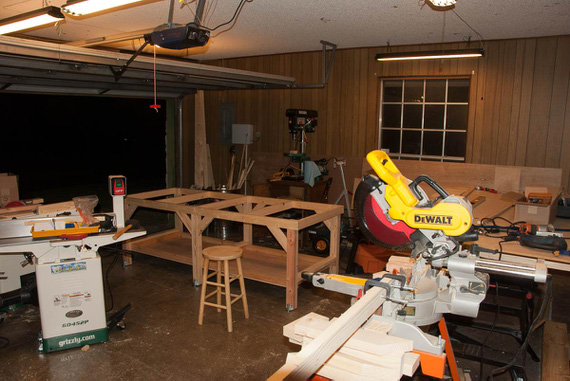
First bench - the frame is ready.
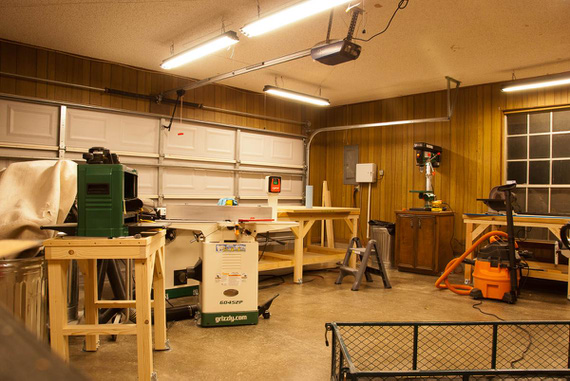
The benches are up - and this place is starting to look like a shop!
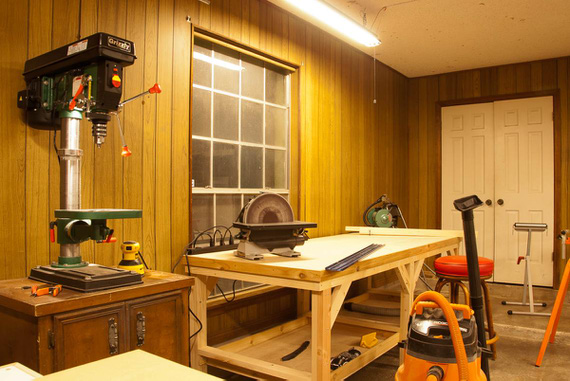
.. yep
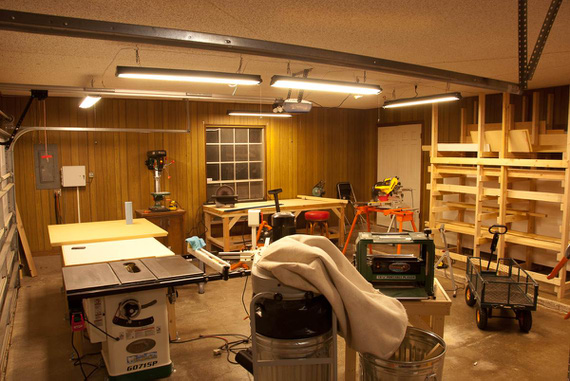
Next, some 2x4s put together into a material rack. Cleared a lot of space!
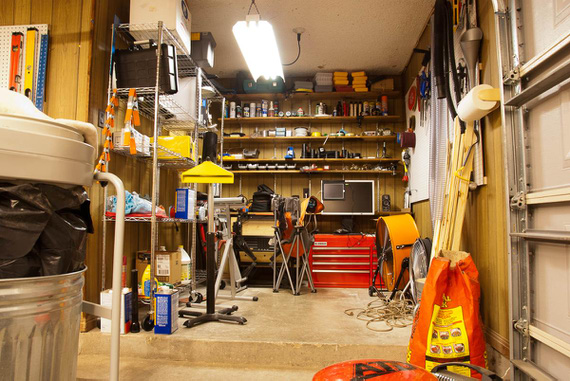
Storage again
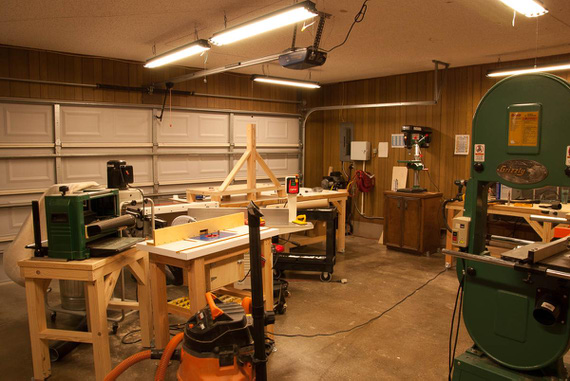
Air setup, router table, and The Bandsaw
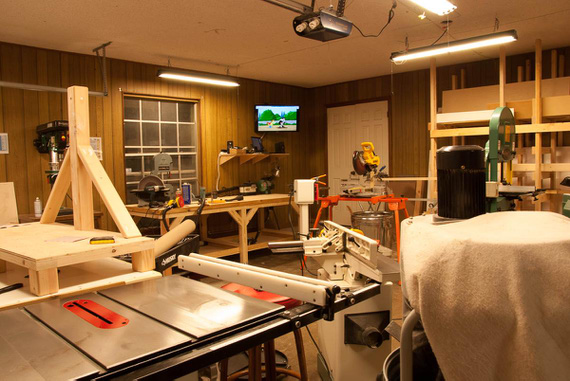
Added some entertainment :) Also, the little Delta bandsaw on the bench
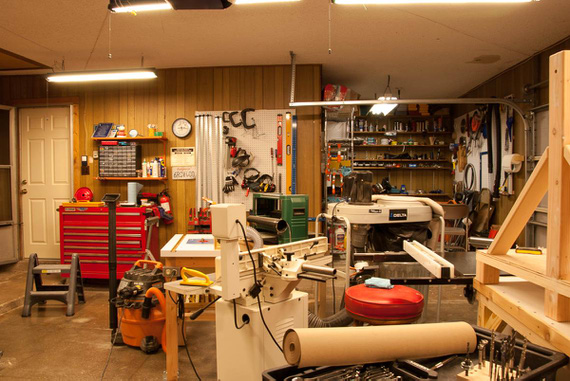
I like how this looks!
And here are a couple pictures of the tools...
Air setup is very simple, a compressor with a shutoff directly into an air filter, regulator, and 25 feet of hose on a reel. That reaches pretty much everywhere.
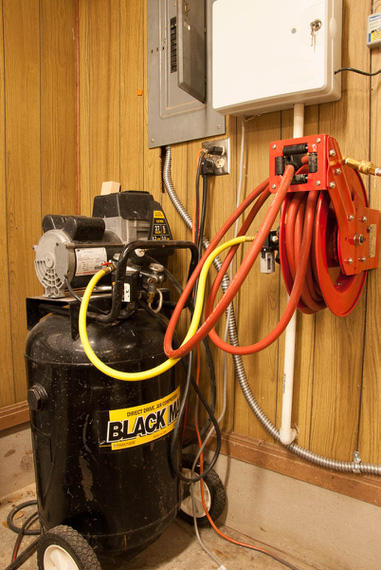
The Air Setup (very simple for now)
At some point; I measured the runout on the drill press -- got around 10 thousandths - no wonder why it was all vibrating when drilling deep holes!
Grizzly includes very cheap chucks and arbors with their presses... Gladly, the bearings have no play though. I ended up picking up a used Jacobs chuck on Ebay, and boy, what a world of difference! Used a SouthBend arbor picked up on Amazon.
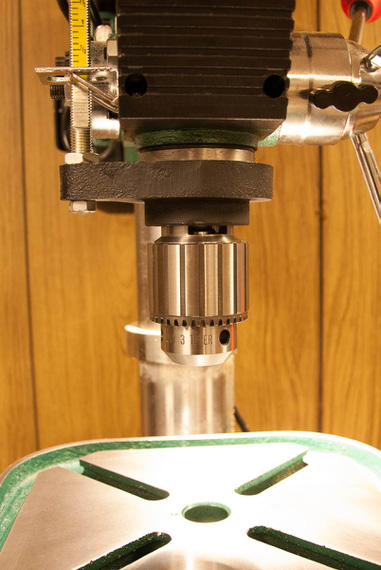
The Jacobs Chuck
I wanted a router table; but didn't want to pay around a grand for the one I like (and cheap ones are just.. crap, honestly); so I built one.
Top is two sheets of 3/4 MDF, laminated together. White Formica is laminated on top, bottom, and sides. All done with DAP Weldwood contact cement.
I bought the insert plate (though in hindsight, I should've just bought a hunk of aluminum and made it myself).
It still ended up being a bit out-of-flat, so I built a leveling system into the base (two bolts on each side are pulling the top "down", screwing into holes in the top with threaded inserts; and there are two screws pushing up on the top in the center of each long frame side. All that allows me to work out any non-flatness out of the top.
Fence is 3/4 ply; and the router sits in the box under the table. The box has 4 inch dust fitting epoxied on it on the other side (and the fence dust collector feeds into that fitting too).
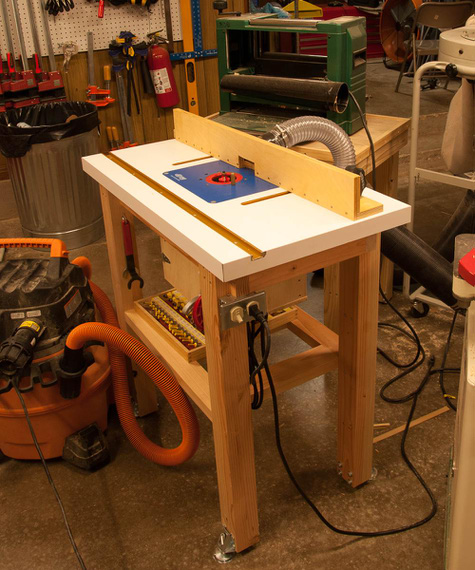
The Homebuilt Router Table.
"Sure you can have eight miles behind the heavy...there'll be a United tri-jet between you and him."
-ORD ATC
© Copyright "79FT". All rights reserved. Feel free to cite, but link back to the pages cited.
This website only shows how I did things in my various projects. These pages are for information and personal entertainment only and not to be construed as the only way, or even the perceived correct way of doing things. You are responsible for your own safety and techniques.