[79FT]: Building Things |
 |
Harbor Freight Hydraulic Crimper
... the answer is: solder!
| On: | Sep 07, 2019 |
| In: | [Blog] |
| Tags: | tools, electrical |
Doing the electrical rebuild on the Charger, I needed to terminate quite a few of heavy wires with large lug type Amp terminal rings.
I had a Harbor Freight hydraulic crimper lying around that I got to crimp a couple wires when I was installing CRG-30P on the Cheetah, and was planning on using it; though the type of crimps produced by it kinda bugged me.
After doing a few crimps, I decided to burn a few terminals and do a proper test.
The Crimper
Normally, crimpers for large size terminals are super expensive; but Harbor Freight, as usual, sells a hydraulic crimper with large dies for just about fifty bucks.
Here it is, in it's full glory.
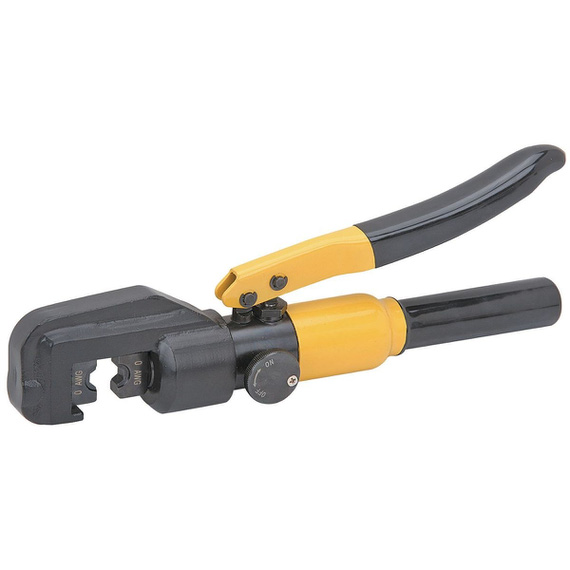
Crimper
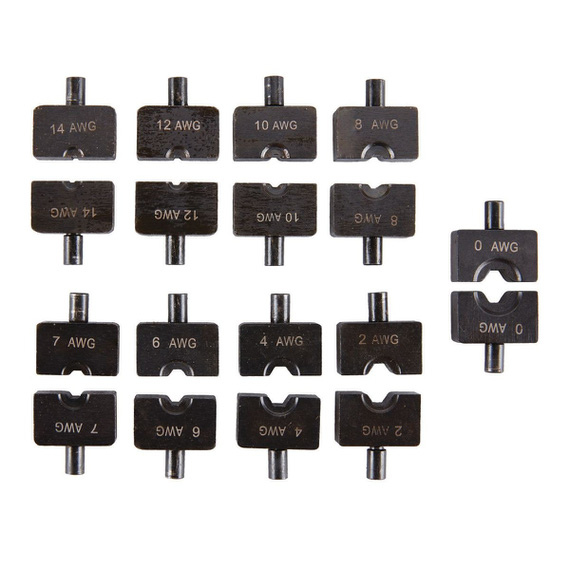
Dies
Technically, the way it's designed is it's supposed to produce these nice hexagonal crimps. Or at least, I think that's what they were trying to do.
But those familiar with crimpers know that the key is in good dies; and that's were most of the money is. Damn, "regular" stripping dies for StripMaster are what, $10; while milspec dies are what, $150? Now; of course there's diminishing returns there - in the case of StripMaster, regular dies work just fine for most applications.
Here's the problem with HF Crimper dies. The holes in them are severely undersized, which makes them produce "flat", rather than hexagonal crimps. We can't know if this is by design. What I tried to do is to research what others are doing, and to run a few "is this a good crimp" tests.
The Test Setup
I was crimping chunks of 8 AWG MIL-W-22759/16 wire into AMP Battery Terminals.
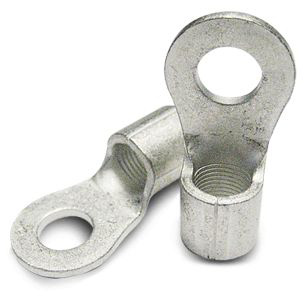
The Terminal
After crimping, the terminals were hacksawed in the middle of the crimp, and polished to see if there were any voids or visible wire strands. A good crimp must be "gas tight". In other words, all the metal has to be pushed together hard enough to become a single piece of metal for all intents and purposes.
Using 8 AWG dies
For baseline, I used the HF die marked for 8 AWG.
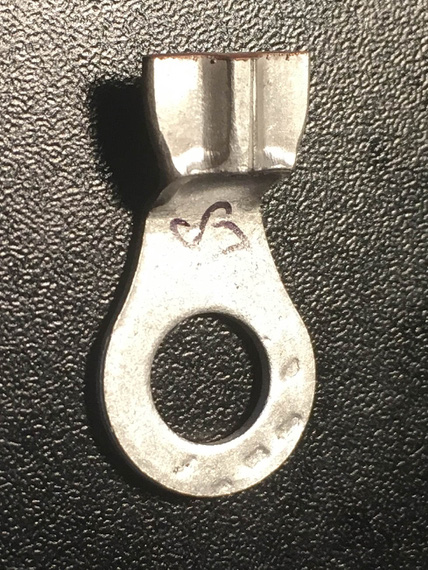
8 AWG die / crimp
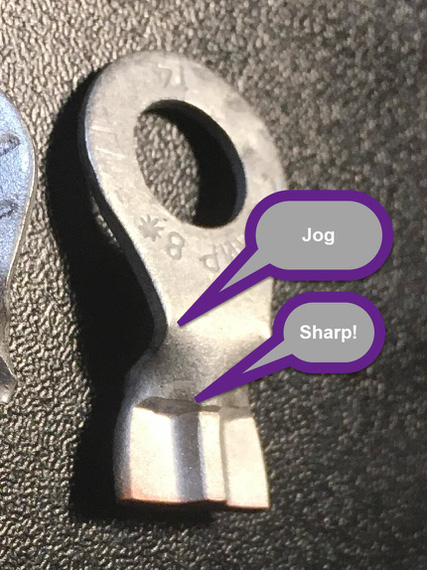
8 AWG die / crimp
As you can see, using the "nominal" die produces this weird, flattish-with-a-bulge crimp. What's worse is it adds this strange "jog" to the terminal lengthwise, and scrapes the metal inward where the crimp starts. That's lots of stress risers.
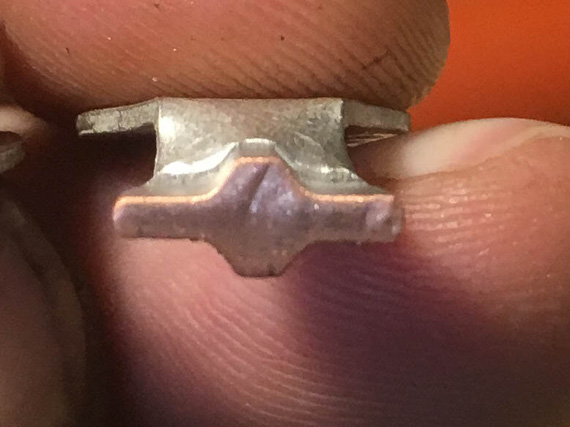
8 AWG die / cutaway
The crimp quality is good though. There are a few specks of shavings I didn't clean off - those are not defects.
Using 6 AWG Dies
I went next size up, to dies marked for 6 AWG. That produced the same crimp as for 8 AWG, but with "wings" being thinner - almost paper-thin. I also didn't like how it mangled the terminal even more.
Somebody online mentioned that they rotated the crimp 90 degrees and did it again to "push the wings in" and I tried that.
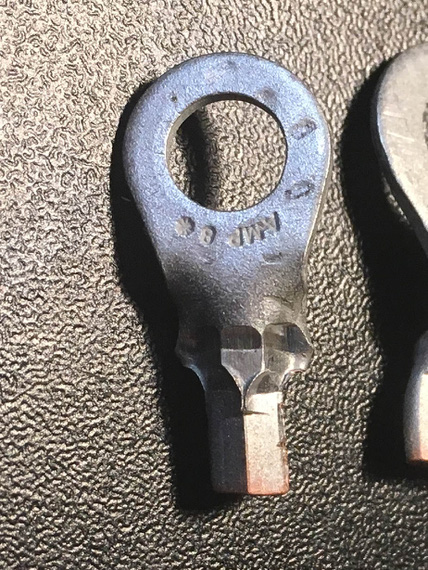
6 AWG die / crimp
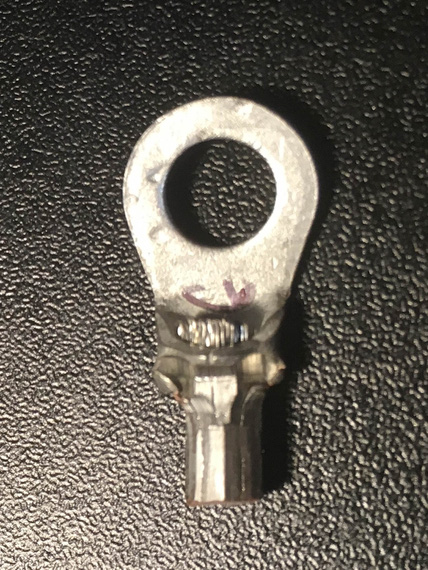
6 AWG die / crimp
I think the resulting crimp, while tight, is too rough to be acceptable. It almost feels tortured.
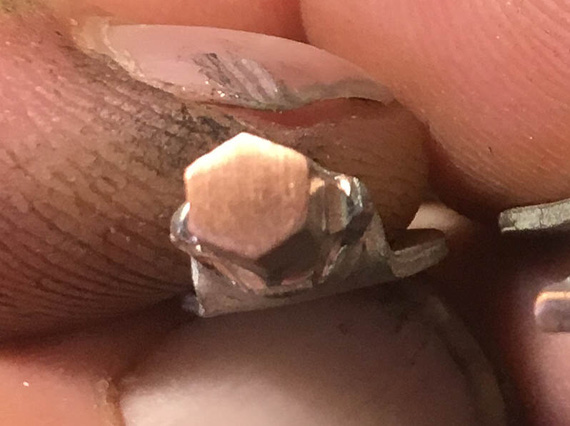
6 AWG die / cutaway
Inside though, it's all nice and compressed.
Using 4 AWG Dies
Finally, I tried 4 AWG dies.
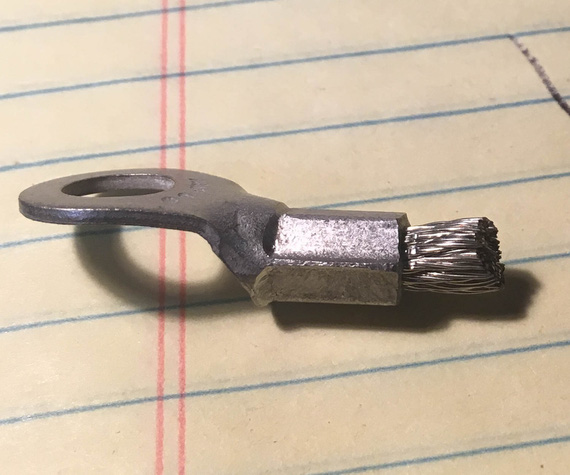
4 AWG die / crimp
This crimp almost looks good. The jog is almost not there, and it has nice hexagonal shape. "Wings" are almost not present.
However, the dies closed fully and it felt to me that the metal was not compressed enough (I recall the resistance I felt in the crimper doing the previous two tests, and the resistance I felt on this one was much less).
The cutaway confirmed that.
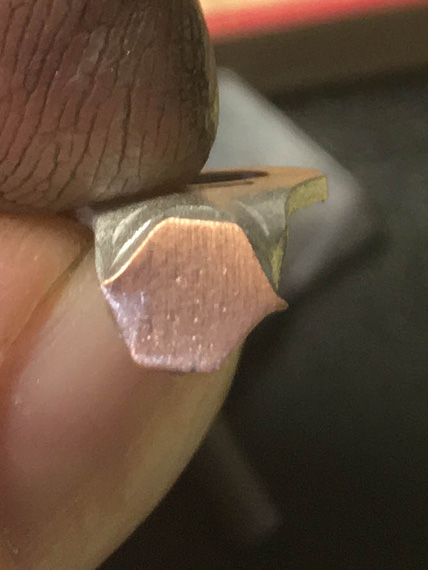
4 AWG die / cutaway
Those imperfections on the cutaway are voids left from not enough compression force applied.
Conclusion
Well, it's a sad one really. If you want to use the HF tool, then you probably should use dies that make those "winged" style crimps (like the one produced in my first test), and suck up the jog and other imperfections.
I have posted my findings on AeroElectric list, and the conclusions seems to be supported - the dies are horrible, and to make them real good one would need to rework them significantly.
Or, alternatively, just solder them (here's a nice howto by Mr. Nuckolls) , which is what I am seriously considering.
Update - October 2019
After trying and failing the soldering approach, I have devised a technique of using this crimper to achieve good results. Musings linked in the previous sentence, and here's the jist:
- Given wire gauge of, say, 6
- Use die 2 sizes up - so, die marked for #2 wire
- Put the wire in the terminal. Start by squeezing the terminal turned 90 degrees (so "side to side" rather then "top to bottom"). Just give it a gentle oval shape
- Now, turn it 90 degrees and squeeze until the jaws close
- At this point, you will have a somewhat undercrimped joint, as I described in my notes on the crimper; but it's shape will be a perfect hex.
- Now, go 1 size "down" (so, dies marked for #4 wire). Squeeze.
- Stop when you feel it's done shrinking.
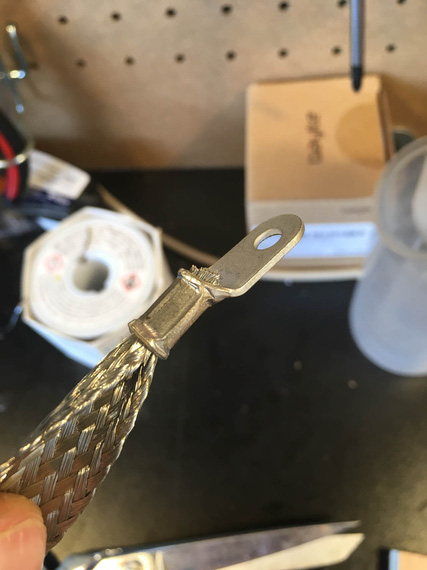
Pretty!
There are two types of tailwheel (or retractable gear) pilot, those who have ground-looped (landed gear up) and those that will.
Up ↑
© Copyright "79FT". All rights reserved. Feel free to cite, but link back to the pages cited.
This website only shows how I did things in my various projects. These pages are for information and personal entertainment only and not to be construed as the only way, or even the perceived correct way of doing things. You are responsible for your own safety and techniques.