[79FT]: Building Things |
 |
Skookum Choocher
... aka The Mean Beast
| On: | Mar 21, 2020 |
| In: | [Blog] |
| Tags: | Texas, smoking, bbq, brisket |
I've had a problem.
Well, two problems to be precise.
Problem number one: being an alien Texan, I had to ensure that I stay on the good side of our local BBQ police. Did you know that if you move to Texas, you get deported if you can't pull off a passable brisket on an offset stick burner? You probably didn't!
My other problem was 20 inches wide, 40 inches long, and had a 3" stack.
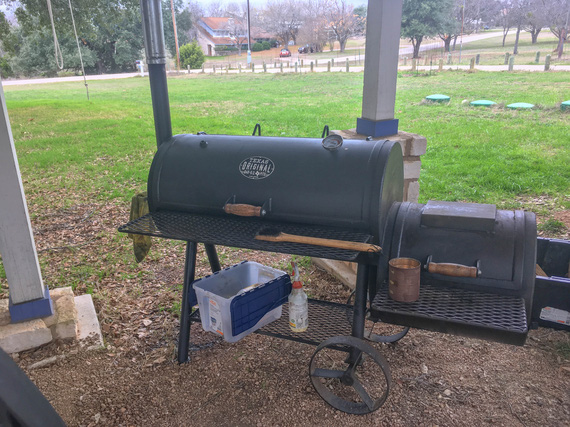
My Other Problem
It was too small, which resulted in inability to make more than one brisket...
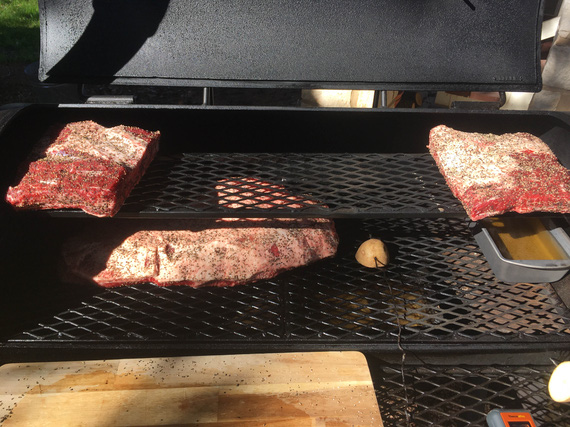
Loaded to the brim
That's one brisket and some ribs - and they all are in suboptimal spots on the pit. It's just too small!
My son's fourth birthday I had to admit defeat and get a couple cooked briskets at Brett's Backyard BBQ. Nothing wrong with Brett - his briskets are grand; but I need to cook for my son's birthday!
On top of that, that pit was all choked up, with such a small stack that it couldn't handle any real size firewood. I ended up having to fiddle with the fire every 10-15 minutes, and feed it with kindling.
So, after going thru all the smoking for New Years; I decided that I outgrew my pit, and had to upgrade.
The usual suspects - Klose, Gator, and JJ were all on the list. They're all in Houston, and I was gonna make a trip on January 2nd, and talk to each one of them. I was thinking about 24x48, and possibly talking about getting a 30x48.
I considered a Lang for a while; but decided against it - I kinda like the simplicity and basic-ness, if you will, of a straight pit.
And in parallel, I was browsing Craigslist. Hey, if someone was dumping a good sized pit, I would've taken it off their hands.
And that's how I found...
Tim
There was a pit for sale that looked basic; but was everything I needed, and for just 1800 bucks. A lot? Well, a 20x40 Klose sells for more, and this one was 24x60, I think; and on a trailer. It was.. dirt cheap.
It seemed that the guy selling it was in the business of making them. He had a website, and there he said that he can custom build. Hmmmmm... I gave him a call.
... we met the same day. Mr. Tim turned out to be a rancher, welding pits up out of propane tanks as a side gig. "Helps me feed the cows", he said. They started as a group of buddies and helped each other make their pits; and then decided to make this into a paying side gig.
Tim's approach was simple and easy; and he was very open to tolerating my obnoxiousness and making a pit for me. We bounced ideas back and forth, and none of those seemed to scare him too much.
That evening, I went home way over-excited, and started mocking things up ...
The Design
Just to make sure to illustrate what I wanted from Mr. Tim, I drew the key parts of the pit up in SWX and sent it over to him. We did a few rounds of back and forth...
I wanted a baffle between the firebox and the cooking chamber that was adjustable from the outside; because I felt like with that, I wouldn't need to tune it with tuning plates, which are much more annoying to deal with in a hot smoker (moving them around in a hot smoker is no joke). I played with a baffle a lot on my old smoker, and wanted it easily adjustable on this one too.
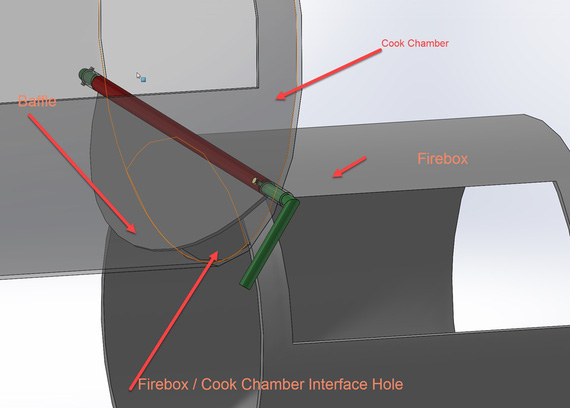
Baffle
I wanted a "Franklin Style Collector Stack". Like this:
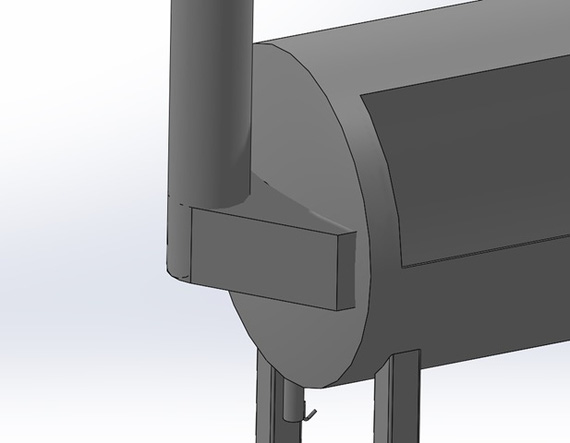
Franklin Style Stack
I wanted a base on casters and leg levelers. See, I wanted it permanently installed - but I had to install it first; and a monster pit is no joke weight-wise.
So the idea was, to have casters to move it around, and then remove the casters, and level it with leg levelers in place. So I designed a funky base arrangement:
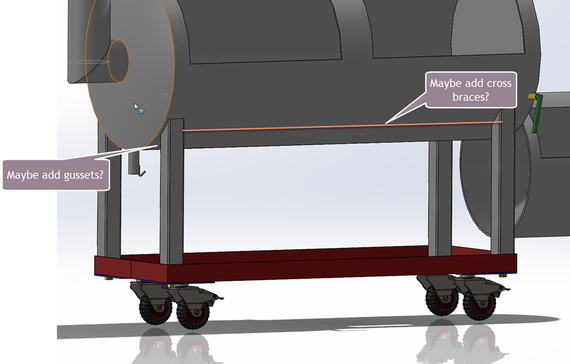
Base
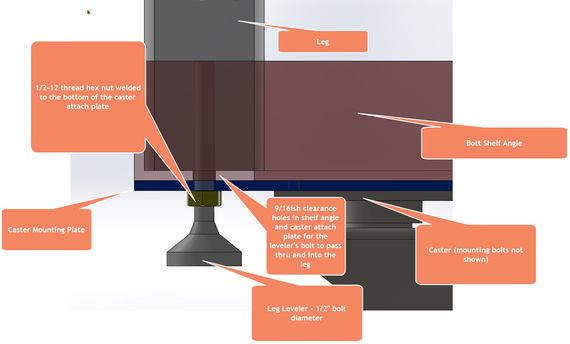
Levelers and base detail
Mr. Tim was fine with all of those after asking some very pointed, and very good, questions, and offering a lot of suggestions and detail and his take on things.
We settled on the final design, I put up the deposit, and Mr. Tim proceeded to ...
Build
He took about 2 months, which, given that he's a one-man, part time, show, was blazing fast. He was feeding me a good diet of pictures :).
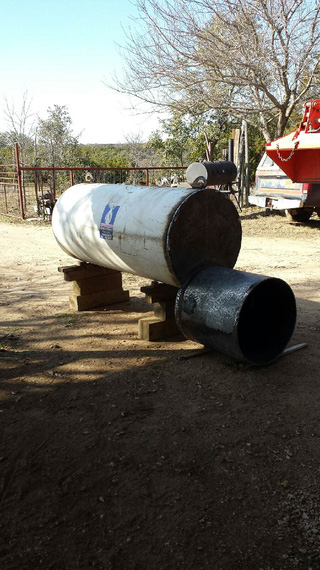
Tank, and firebox
I asked him if he could not paint the tank. He wanted to make sure I wasn't making a mistake. The paint is ugly, he said. Am I sure, and very sure, he inquired? I said, I thought it was beautiful!
At some point he said that it's the wife who needs to approve, and a wife would not generally approve of an old propane tank in the backyard being an eyesore.
Well, my wife thought it looked great! :).
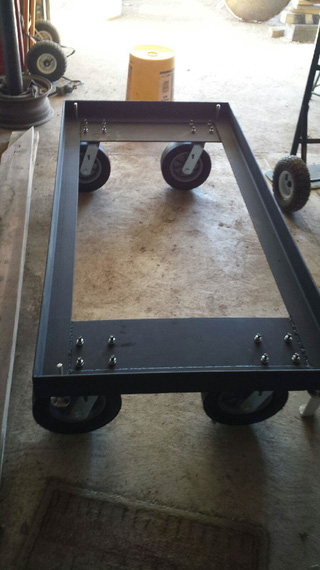
The base
Mr. Tim thought that doing A-style legs would be better. I agreed! I wanted the A-frame type legs initially, but decided against it given all the funky geometry involved - but he offered! Of course!
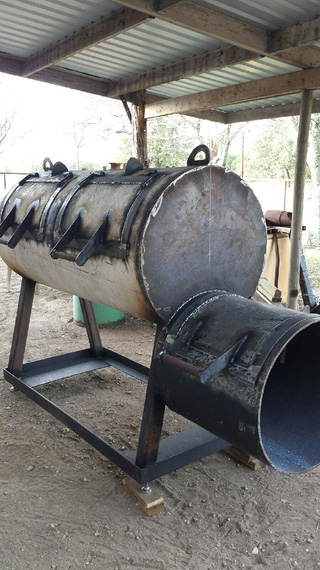
On legs
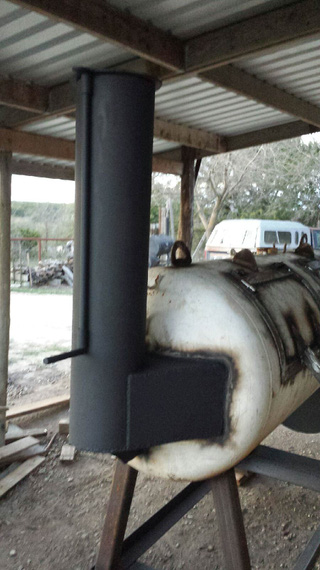
Stack on
It was progressing steady. That funky adjustable baffle was the last bit; and I made a visit to Mr. Tim's ranch and we poked around the pit a bit discussing options on how to hook it up.
He said, he might be ready in a week. I got very excited!
And then, exactly in a week,
The Delivery
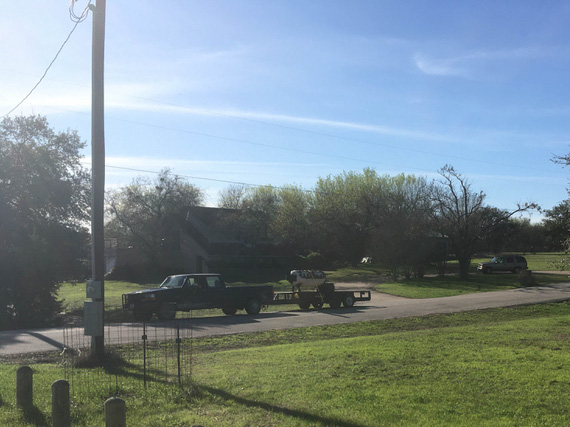
What's that far out?
He showed up Friday evening.
We spent most of the rest of the daylight having fun unloading the Beast.
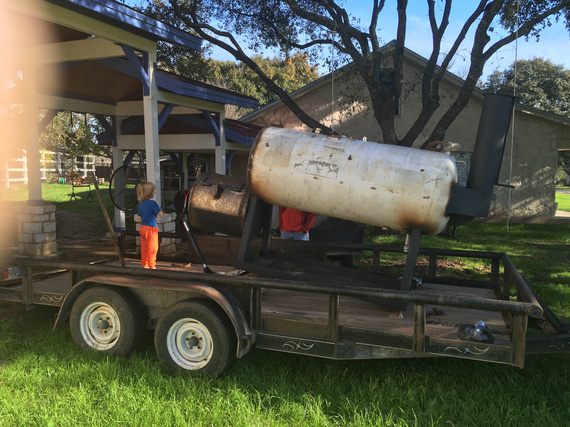
Jacking to put the casters on
A little come-along winch, a jack, three guys, and a four-and-a-half-year-old is all that's needed to maneuver a pit that's heavier than my biplane!
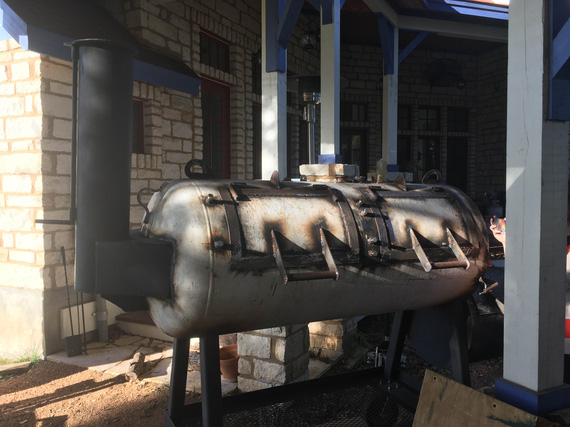
Off the trailer, now to turn and slide in...
We rolled it to it's final spot, raised one side, dug some holes in the dirt, and put pavers down to have a solid footing for leg levelers. Then, we took that side off the casters.
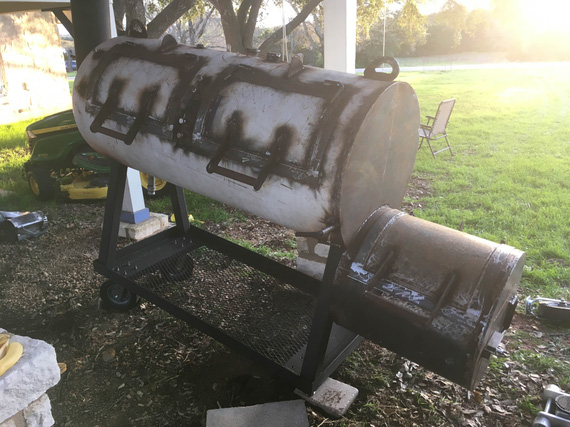
Setting up on pavers
The other side then got the same treatment. We used the levelers to level it then, and confirmed with running water inside the cook chamber. It's very important to level the pit right, so that all the grease won't go into the firebox and light on fire!
Next morning, I took an angle grinder to the pit to knock some rust off. Then, lots of soap, scrubbing, and hosing down. I hurt the day after BTW!
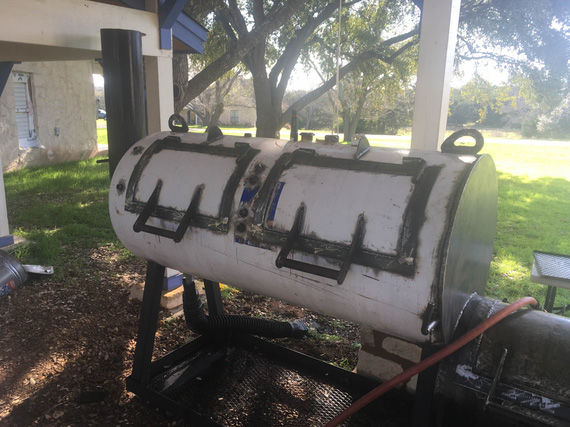
She cleaned up nice!
And then, the moment we all have been waiting for...
The Fire!
I oiled the firebox and lit a blaze to burn off all the bad smell.
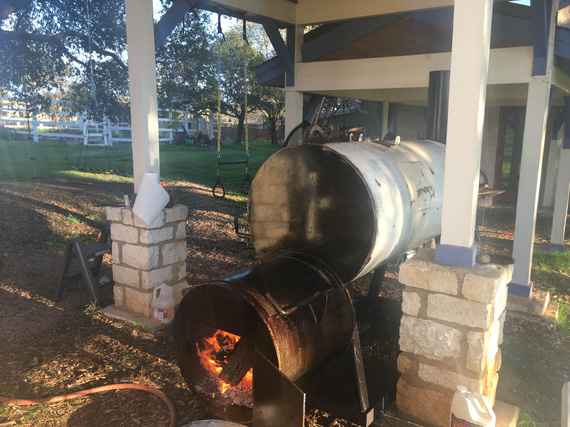
First fire!
Once the pit started coming up to temp, I was just rolling on layers and layers of peanut oil everywhere on the outside to burn it on.
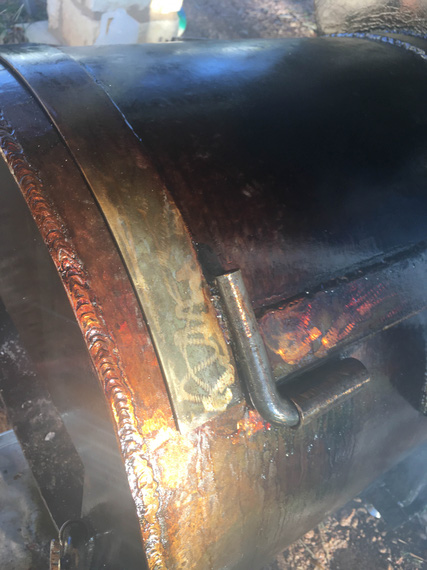
Oil patina on the firebox
That yellow is no rust - it's oil burnt on. Kinda like a cast iron skillet.
I burnt the fire for as long as I could and as hot as I could.
Man, this pit drew! I could throw anything at it. 5-6 large logs? No problem! No choking. It just gets hotter and hotter! Man, what a beast!
I kept her at about 450-500 for a few hours, and let it die down overnight.
The next morning, I washed the insides out of all the soot from the first fire, oiled the insides, and now went slowly. Now, it was the time to season the insides with oil, and to do a quick check of temps.
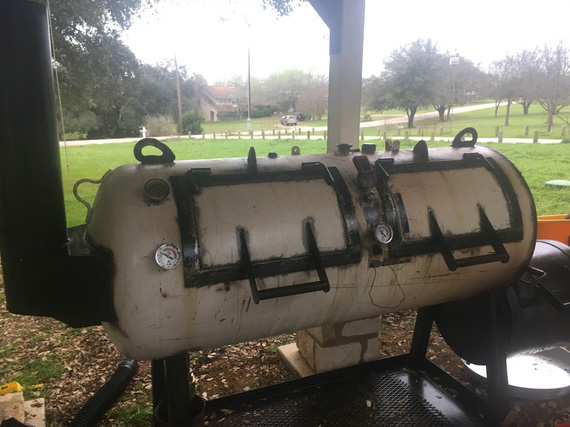
Oiled and pretty
My TelTru gauges I've installed into 1/2 NPT ports we welded onto the pit in strategic places were dancing around a happy 250-275. The top shelf in the middle was hotter with the baffle full open, but the pit evened out when I closed the baffle down a bit to deflect incoming hot air from the firebox down. It worked! No tuning plates and I'm within 40ish degrees everywhere! Wow. Just.. wow.
I wanted to probe various parts of the pit closer to the firebox. I stuck in my thermocouple probe.... 350. What the hell? Too close?
I was messing around with it, with thermocouple showing me numbers that didn't agree with TelTrus at all. Finally, I did this test.
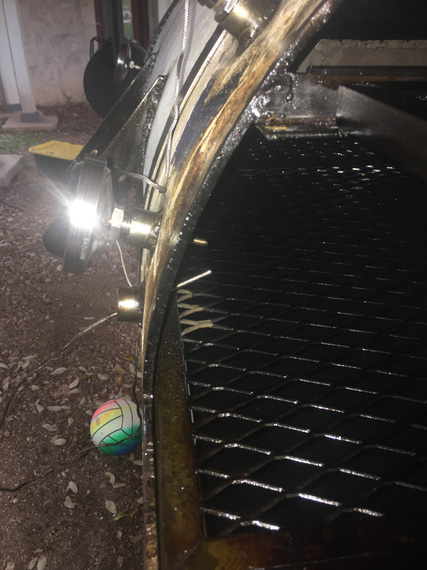
Two probes
The top is a TelTru mechanical gauge. The bottom is the thermocouple. They're within 1 inch of each other. 250 on the TelTru. 330 on the thermocouple. At least one of them is lying. But which one?
Hmm... how does one test a thermometer...? hmm.. aha! Boiling water! That's a nice reference.
Pulled all the 4 TelTrus and my thermocouple, and stuck them in the pot. All of then shown.. 212?! What the hell?
Weird cosmic rays affecting thermocouple crossed my mind, I admit. I talked with Ben. I talked with Alex, and Nick. No ideas.
Dammit!
I had a hunch then. Maybe, just maybe, the stick-out on the mechanical TelTru's was not long enough? To confirm, I did a couple things.
First of, I became somewhat of a aficionado of the Mad Scientist BBQ channel, thru which I found out about Fat Stack Smokers. I checked how long were their stems. They used 4 inch TelTru's. I was using 2.5 inch ones.
Second, well.. I could confirm which gauge was lying by using paper thermometers - those little strips of paper with squares that turn black in 10 degree increments.
I ordered some strips, and some 4 inch stemmed TelTru gauges - and meanwhile, decided to do another test - the biscuit check!
That's a fun one. You fire a pit, and fill it with frozen biscuits. You let them sit, and watch the rate at which they brown - to figure out where the smoker's running hotter, and where it was colder.
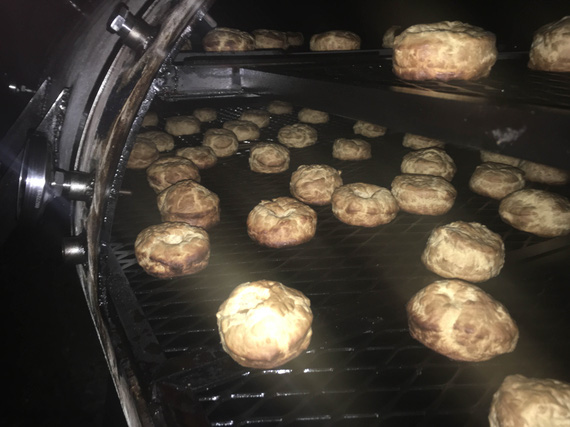
The Biscuit Test
With the baffle tuned to where I thought it'd be in the right spot, the test showed almost perfect results! The hottest spot was the middle of the top shelf. The coldest was the middle shelf near the smokestack. Center middle and top near the smokestack were almost the same, and all biscuits were reasonably evenly cooked - with crispier side to the firebox. That's the perfect offset distribution!
You see, brisket is thick on one end and thin on the other. The way I feel about it, you want one end to be hit by more heat than the other. I actually like this temp gradient - if you have the smoker full, bigger pieces can go into hotter spots, and smaller pieces can go into the colder ones; or you can rotate to cook everything roughly the same amount of time. I feel like that gives one more options rather than an oven-like perfect environment. One of the reasons I didn't want a Lang BTW.
Those frozen biscuits turned out to taste like baking soda, by the way :(. Oh well. They were dirt cheap.
The following weekend, I set up the temp test with temp strips.
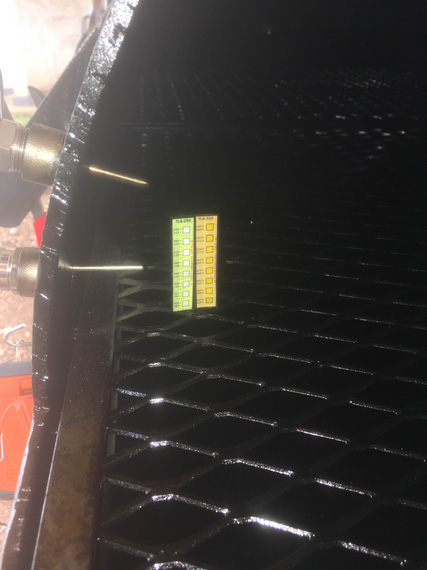
The Temp Strips
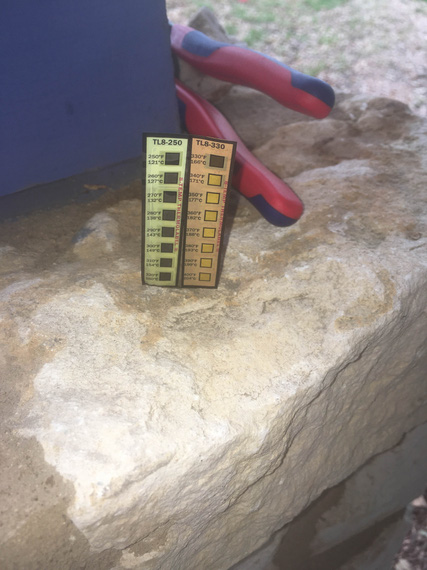
The results
330! So, it was the TelTru that was lying. My long-stem ones showed up, and I installed them to find perfect indication now.
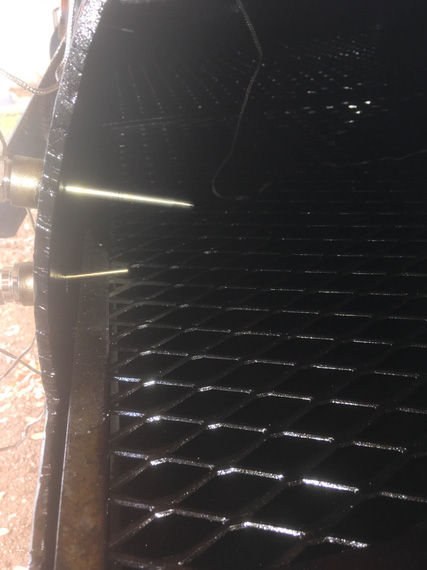
4 inch stem on the top
Now, they agreed within 5 degrees or so. Notice how much further the top, TelTru, probe now protrudes.
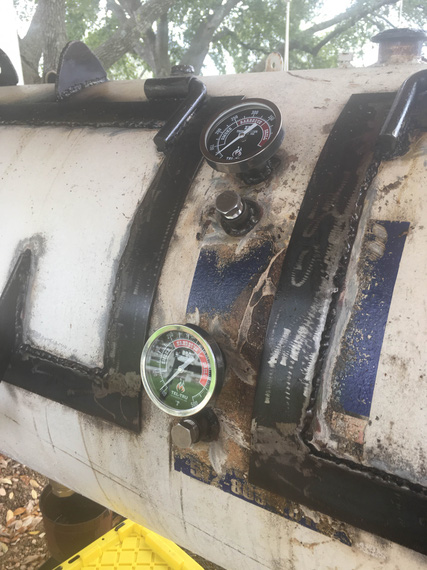
The TelTru Gauges, in their final spots
And so, now, the only thing that's missing is the first cook. Which, by the irony of circumstance, might turn out to be a high-pressure one. My neighbors' daughter's wedding caterer ditched them, and I very well will very much likely end up cooking for that wedding. Fingers crossed!
Flying is not Nintendo. You don't push a button and start over.
© Copyright "79FT". All rights reserved. Feel free to cite, but link back to the pages cited.
This website only shows how I did things in my various projects. These pages are for information and personal entertainment only and not to be construed as the only way, or even the perceived correct way of doing things. You are responsible for your own safety and techniques.