[79FT]: Building Things |
 |
Placards for Switches
...the biplane way
| On: | Nov 23, 2019 |
| In: | [Chickenhouse Charger] Electrical Rebuild |
| Time logged: | 20.7 |
| Tags: | 6781G, MA5 Charger, electrical, placards, etching, SWX |
This is all your fault, you know who!
...
Way back, when working on the new layout for switches on the panel, I was thinking about how to re-label them.
I had a nice Brady label maker, and was thinking about just printing and sticking some tags over existing, painted, lettering, on the switch placards.
One of the nights, when I was tired enough to do anything useful, I was playing with the stickers, and posted this picture here:
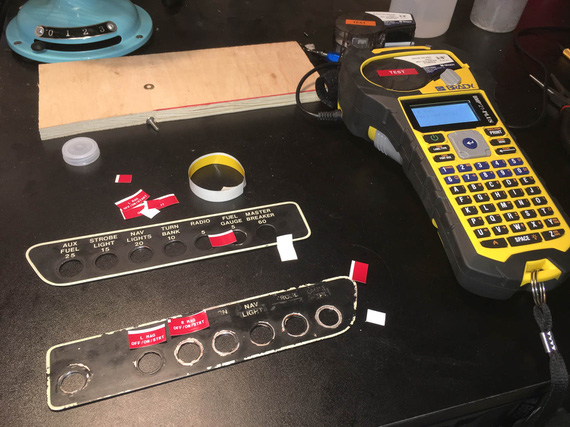
Playing with placards
The you-know-who-you-are, of course, wasn't happy (this gentleman is an actual friend of mine, not a silly voice in my head). "They will fall off", he said. "Can't you do something a bit more professional"? "Can't you draw them up, and order them to be custom made"?
Order?
Ha!
No. This whole exercise in airplane handling is to put yourself thru as much misery as possible. So the placards had to be made, not ordered. I mean, I could've ordered my electrical redone too, right? :)
I recalled that I read somewhere on Vintage Machinery that someone figured out a neat way to restore old data plates on old lathes and such. Looking it up, I remembered.
Etching!
The idea is basic - make a mask, transfer it to a piece of metal, soak it in acid, paint, sand - your recessed (etched) areas will keep paint, while the elevated (masked out) areas will sand out. This way, you get metal-on-paint look, and it's nice and pretty.
So, it has been decided - I will etch out my switch placards!
First, though, I had to figure out...
The Process
Obviously, SolidWorks would be instrumental in making the actual pattern. I wanted to make the placards out of brass, so that lettering would be yellow, and I'd paint them black, for the yellow on black final result.
First, the mask.
Searching around, it seemed that the most reasonable way to go about it would be to use Toner Transfer technique. Laser printer toner (at least on a good subset of laser printers) is basically powdered plastic. Printer warms it up, which makes it sticky - and toner then fuses itself to paper. It can be re-softened (and made sticky again) by a normal household iron or a laminator. I had both - an iron, obviously; but we also had a great "office grade" laminator in the office.
A lot of folks had success with glossy paper (glossy paper doesn't absorb melted toner, it sticks, but stays on top), but I, looking around, found a lot of good reviews of the PCB Fab in a Box system.
Not only the guy makes a very nice toner transfer paper which "releases" the toner when soaked in water (it works just like your model decals in plastic models, you soak the paper, and the top layer comes off), he also seems to have researched and cleaned up the process to minutia. For example, the toner itself is porous (indeed!) so he uses an extra layer of plastic to "fuse" the micro-gaps between toner granulas as transferred with another layer called "TRF Foil". He also did a lot of research into printers, toners, application techniques and such - and published a great handbook. Just for that alone, I wanted him to have my money.
So, I ordered the transfer paper (the one you print your mask on), and tried the first step - transferring it to a small strip of brass in a laminator.
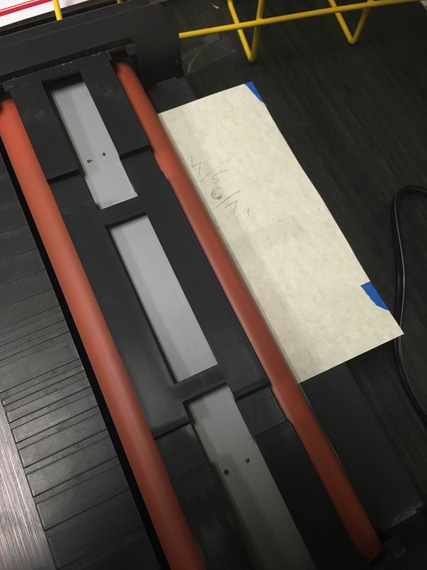
Laminator with envelope with the workpiece
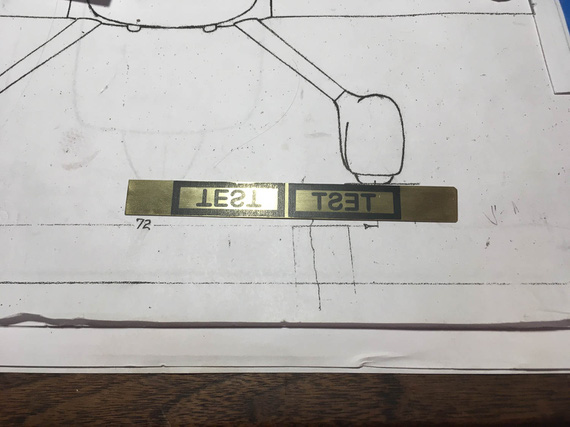
Transferred!
What's wrong with that picture? Riiight! I forgot to mirror the pattern :). Damn.
I messed around quite a bit with density, too. Just default settings were crap, obviously. Bumping up the density to max didn't help much. I installed a new toner cartridge, and that improved the density dramatically - while not perfect, it would've been workable, hopefully, with the addition of the TRF foil (and, if I saw any obvious holes, I could fill them with a sharpie).
Okay. But the basic test worked! The pattern transferred nicely.
Second time, I threw together another test mask with a couple of different fonts about the size I'd want on the placards - I was gonna transfer those to a small chunk of brass bar stock, and try etching.
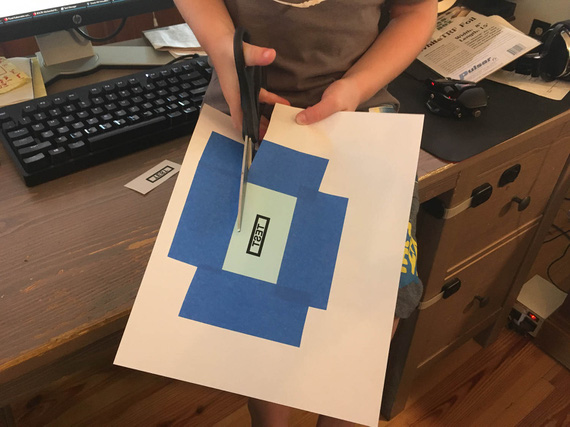
Second pattern
With the help of child labor, patterns were cut out, and transferred successfully to the brass bar stock. I then applied the green TRF foil (that stuff that fuses the pores between toner's grains) to it.
Side note: the process manual from PCB Fab in a Box notes explicitly that Brother printers have a kind of toner that requires much higher than usual laminator's temps to melt. I have a Brother printer, but since I was able to do my first transfer successfully, I kinda decided to not bother - it worked, so I must be the lucky one right? Though I admit, I did entertain an idea of a new printer... ;)
On one of the evenings, I had a block of a few hours, and the weather was nice. I had all my chemicals (ferric chloride PCB etching solution and boxes of baking soda to neutralize it afterwards), so I decided to try the actual etching process.
I hooked up the test plate to a piece of closed cell foam (to float it on top of acid)...
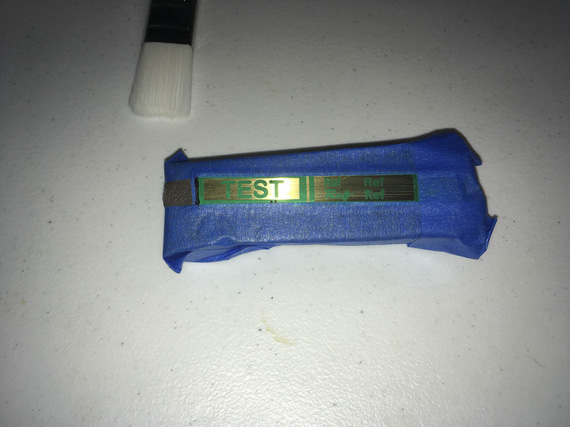
Brass with mask hooked up
...set up a small plastic table outside the hangar...
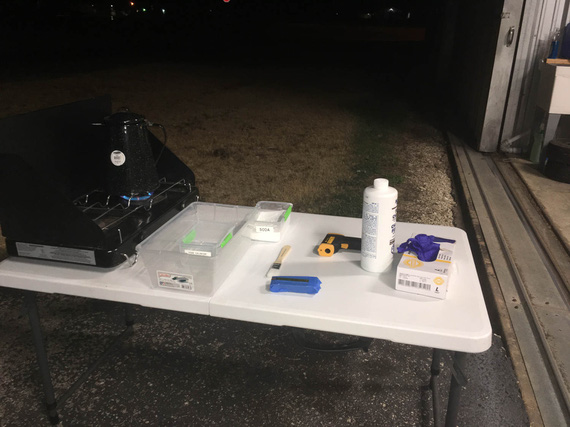
The setup
...and went to town.
The idea was to try to get the ferric chloride to about 100 degrees F to speed up the process, so I did a hot water tub (hence, the little camp stove in my setup).
I'd have a large tub with hot water, and a small tub with etching solution in it, with the workpiece floating on top, hooked up to the foam.
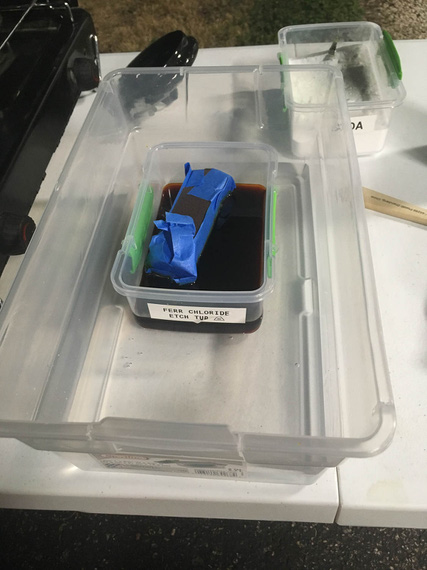
Etch, etch away!
It took about 40-50 minutes, I think, till I was comfortable with the depth of etching. Every 10ish minutes I'd pull the piece out, and brush it with etchant to clear the debris that, I thought, would collect in small nooks and crannies (I saw a guy do that on one of the videos I watched).
After a decent etching depth was achieved, I pulled it out, and dunked it in soda to neutralize the acid.
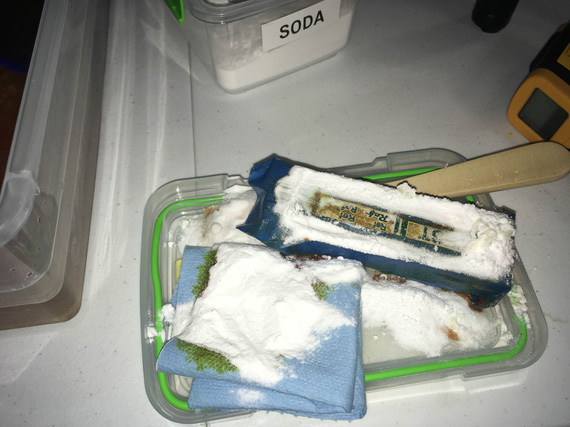
Neutralizing
Then, lots of rinsing, while catching water into a tub. Acid, even neutralized, will contain dissolved copper, and just dumping it is not good. I was planning to keep the tub and let water evaporate, at which point I could just wipe off the powdery residue.
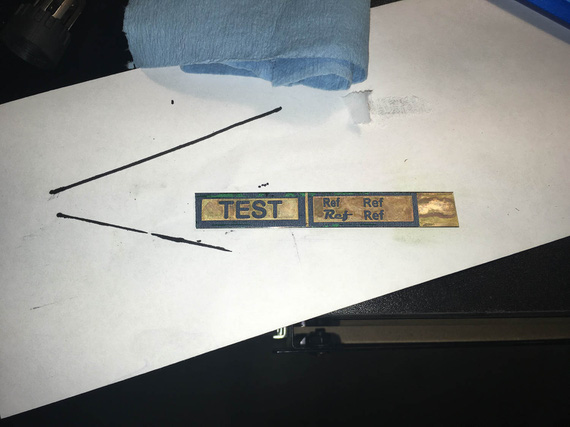
All cleaned up
After that, a rag with acetone wipes off the mask, and...
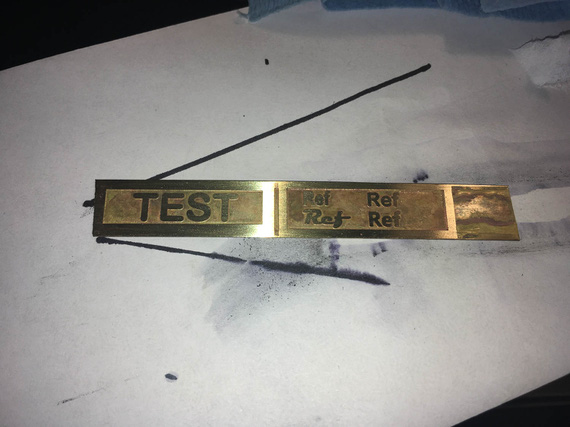
Etched!
The edges on the letters (basically, the edges of the mask) are very rough there. On these test ones, I started with a maroon pad, but quickly went to a 120 grit non-woven deburring wheel, which cleaned it up nice (and of course, messed up the letters - well, lesson learned, I won't use that aggressive a method on the real thing).
Later, when painting, I noticed that the mask was still porous, letting some acid in (I had some tiny "cavities" in random spots). It looked pretty good when applied. This would become obvious later, when I started adding color. I suspected the old drum, and decided to get a new drum for the printer - though in hindsight, I think this is, after all, the problem of me having the Brother printer (read on ;) ). Meanwhile, I ordered a new drum and a new cartridge.
And then, the paint.
I wanted "golden" letters on "black" background. I wanted to make the whole piece black, and then sand it on a flat surface - everything that was masked would have the black sanded off, and the rest would keep it, achieving the effect.
I wanted to try a couple different "make it black" approaches. One would be forced oxidation with something like a gun blueing acid, and the other would be plain paint. I had two test areas, which would allow be to try both at the same time.
So I blued one side....
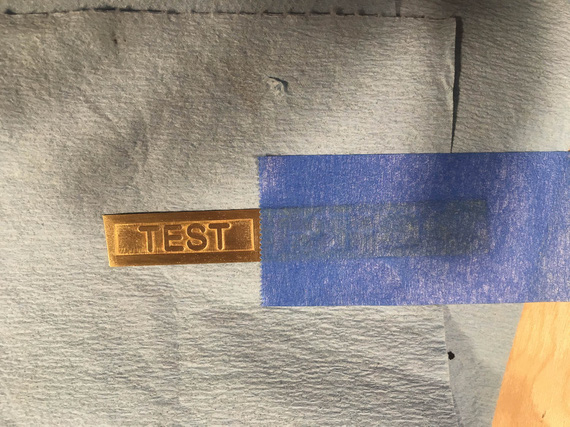
Masked
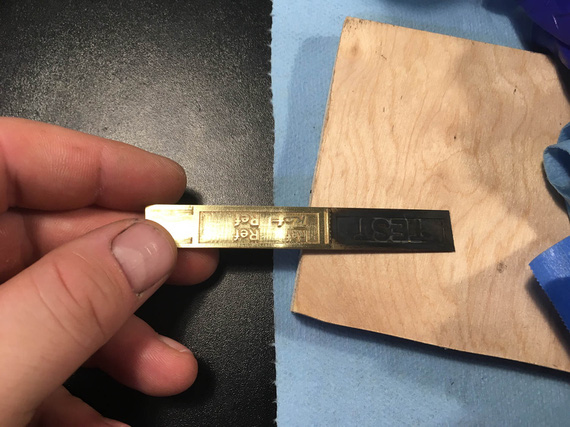
Blued with Brownell Oxpho-Blue
... and sanded it down.
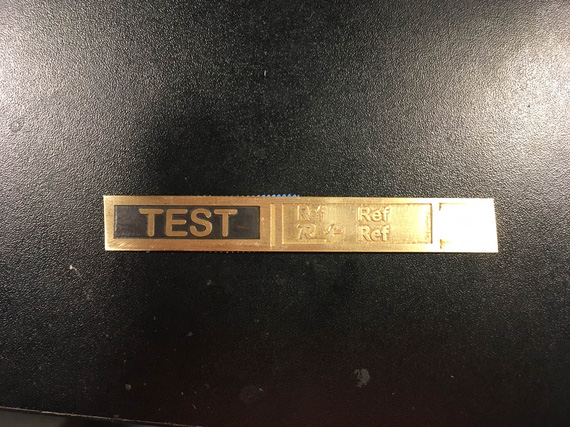
Sanded down
Couple notes on blueing. I tried Brownells Oxpho-Blue, and then later Birchwood Casey Brass Black. Both produce a layer of black oxide on the brass. There are a couple of problems, though.
First of, the etched surface is not perfect - and those imperfections are not really hidden by oxidizing, obviously. Second, and bigger, problem, is that that oxide is powdery, and can be rubbed off easily with even a paper towel, given enough elbow grease. I was afraid I'd have adhesion problems with the top coat (I was gonna coat the whole thing in clear to prevent tarnishing of letters), so I decided against it.
The other side I decided to put just your basic schedule of Rustoleum - primer, and flat black.
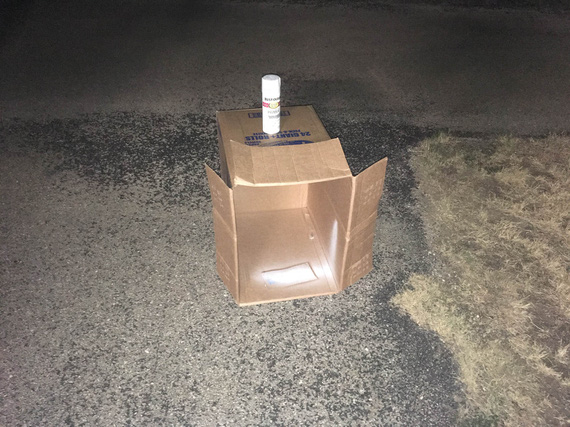
My kick-ass paint booth
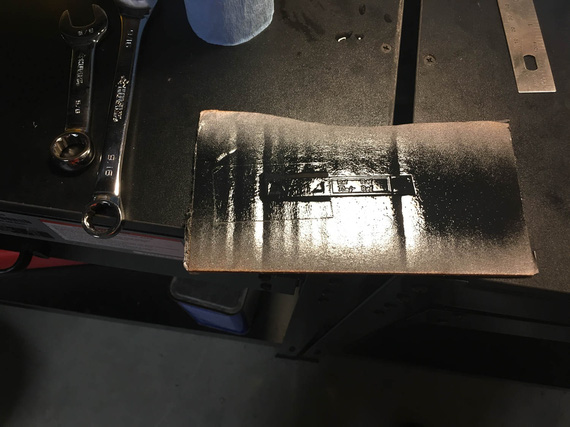
All done.
I waited for about a week with the Rustoleum side, and then sanded it down.
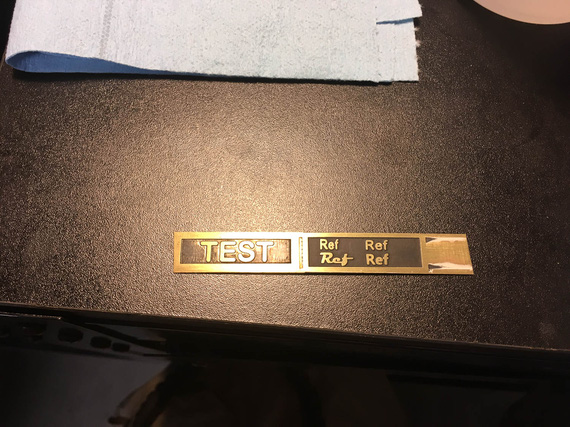
Rustoleum sanded down
I liked that side much better. However, the primer, being white, would show in between the paint and the letters, being noticeable. I decided to find some black primer - and meanwhile, coated the whole thing in lacquer, which I decided to use as a top coat.
Mistake! A few weeks later, lacquer started flaking off. Yeah, I learned the "no lacquer on top of enamel" rule. But it was flaking off on plain brass too, so.. lacquer was no way to go.
Just typing that, in hindsight, maybe there was some acid residue after blueing... but acid was dried, and I used acetone to clean up the blued side. But again, clear brass had lacquer coming off as well.
Worse part is, the enamel lifted and was coming off in pieces.
So instead, I did something that in hindsight I think was a mistake. I decided to look for a better paint solution, and very quickly arrived at epoxy, specifically, Klass Kote. It seems to be used by a lot of RC builders very successfully, I saw successful reports of brushing it, and talked to them, too. I was sold. Again, in hindsight... I think this was a mistake. But, read on. :)
The Actual Mask
To make the actual mask for the actual plates, I used my scan-and-draw-around-it Solidworks trick. I scanned the old placards, and sketched around them.
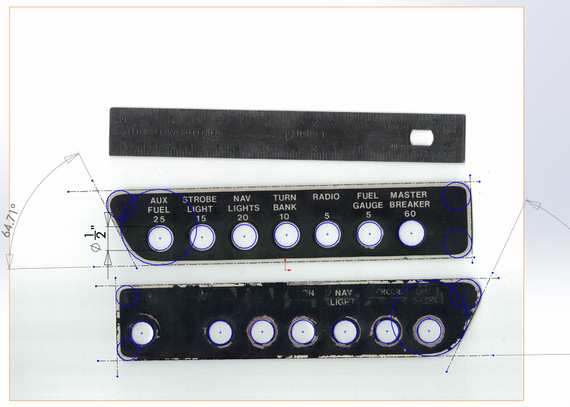
Sketch
I very quickly discovered that on one of them, the sides were not parallel; and the holes were all not on one line, and not evenly spaced! :). So, I made two versions - one all nice and even, and the other just like the old placards.
Using a bit of cardstock, I tried each of them on to make sure the holes are okay and such...
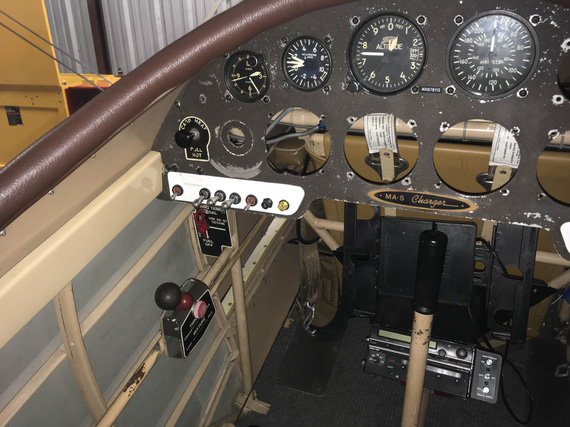
Trying on the pattern
Guess which ones fit better? Yep, the crooked ones! Straightening them out made holes not line up with holes in the panel, and one of them would interfere with some screws on the panel. Oh well.
Then, came quite some hours (that I didn't log to be honest) fiddling with the font and the layout. I decided to use "Magneto", the kick ass italic font out of the four I tried on my test etch.
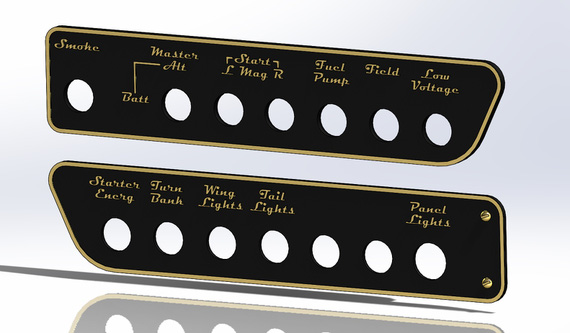
Plates with the cool font
But, the same gentleman who made me undertake this endeavor, argued that while these would look grand on a Cadillac, they have no place in an airplane. "Use standardized fonts!" he said. He did have a point. If it was not me in the back hole, and it was an emergency, readability, not style, is a prime factor. So, I had to remake them.

Plate with the boring font
Before actually committing to etching them, I wanted to do the final size and looks check with actual metal. So, I printed the things on regular paper, spray glued that paper to some scrap aluminum, cut them out, and drilled the holes.
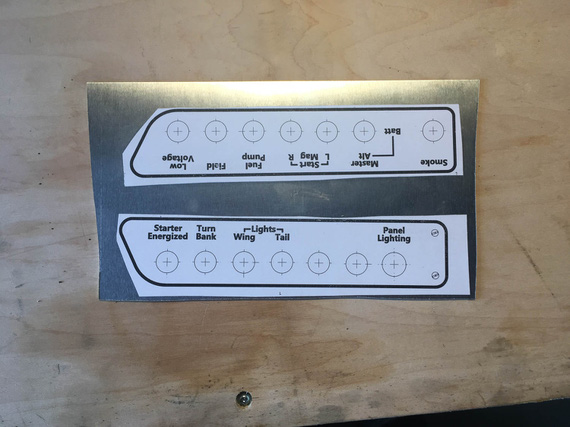
Test pieces
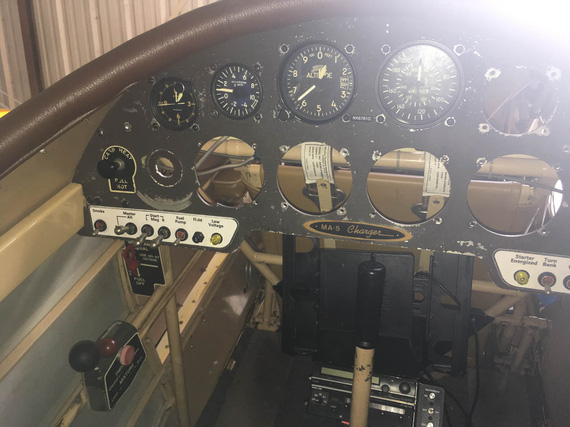
Left side
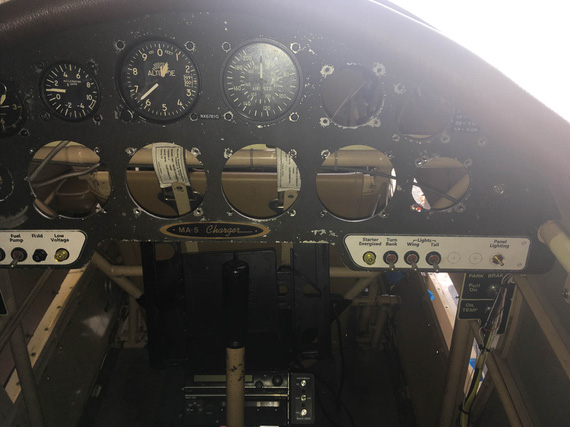
Right side
One thing became readily apparent - the lettering was too high up and rows were too close. Well, that was an easy fix on the model, I just moved the bottom row a bit down.
The hour X was quick approaching. I now had the twice tested model that fits, and all the kinks were worked out.
Applying the Final Mask
For material, I picked up a sheet of brushed "Marine-Grade" 464 .032" thick brass from McMaster (remember this, "brushed" - one side is brushed, the other is not).
On the final drawing for the mask, I replaced hole outlines with little "donuts" - thinking that those will make nice initial "center punch" marks for the holes.
When printing it, the toner flaked off the transfer paper immediately. "Bad sheet of paper", I thought. I also found the "Improve Toner Adhesion" setting, and enabled it. That made a nice print-out.
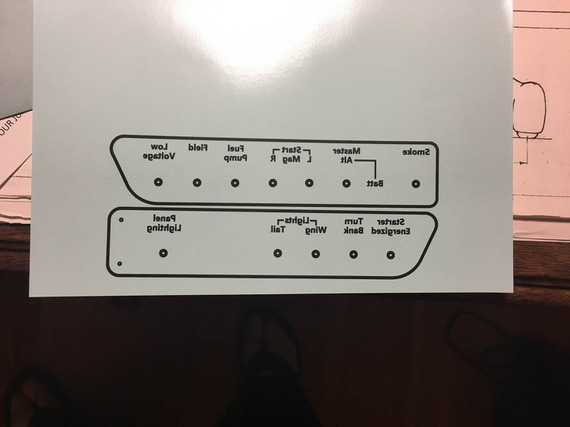
The final mask
Prepped my brass with good clean and acetone wash...
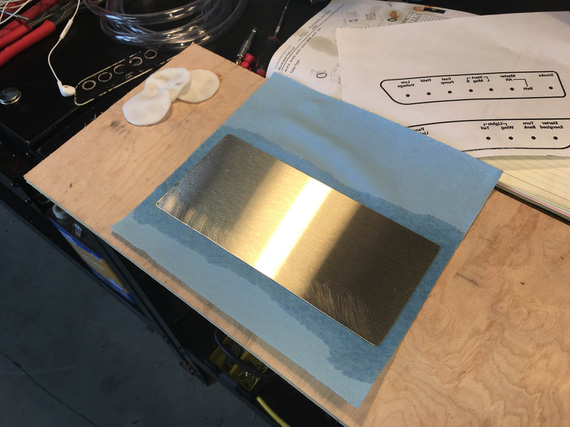
Prepping the brass
..made a nice pouch for feeding it thru the laminator..
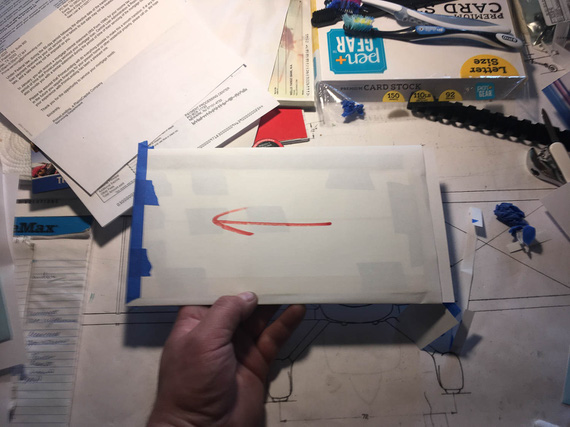
Pouch
..drove to the office, and started feeding the laminator with it.
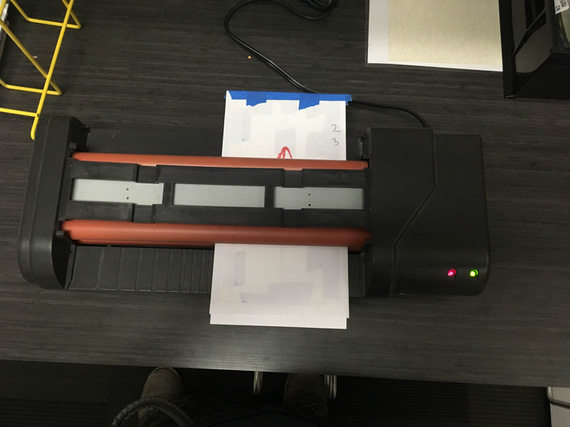
Food for the laminator
On my test piece, I did 10 passes, so I did the same here. Pulled off the pouch, and...
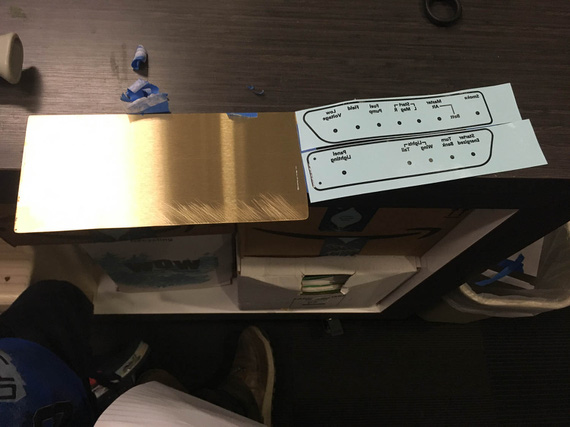
!??!??!?!?
What?! It worked before! A bunch of thoughts went rushing thru my head - more metal? Not getting it hot enough (but it was hot!)? Bad toner? Wait! YES! This time I used a completely new toner cartridge and new drum unit - to make sure my pattern has as little of those pinholes as possible (remember, I ordered a new drum and toner after my initial test etch?)
I went home, and compared the serial numbers on the toner I had success with with the new toner. The first few letters were different, as well as the few digits in the tail, which made me think it was a different brew of toner, and toner problem. So, I printed the mask again with the toner that worked before.
I also started thinking that the "Improve Toner Adhesion" setting I used might've caused mayhem. I also read a bit about that setting, and it seems that Brother recommended using it if the toner flakes off and if setting the paper type properly (ie, "plain", "card-stock", "thick", etc) does not help. So to prevent flaking off, I set the paper thickness to "thick", removed the "Improve Toner Adhesion" setting, printed it again using the toner cartridge that worked before, and went back to the office...
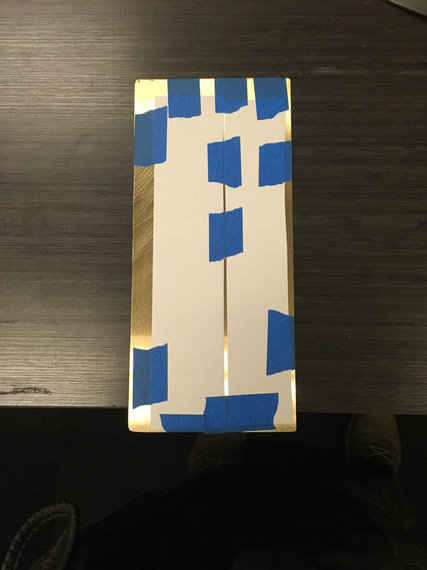
Second attempt
This time I didn't use the "pouch" of paper I typically wrapped around to protect the brass and help the laminator pull it thru (the laminator I was using had a problem with feeding first 2-3 inches of brass - it wouldn't pick it up - so I used paper as the "carrier", which alleviated the problem). I thought that maybe paper was preventing some heat from being transferred well, and got rid of it this time.
Same problem!
What the hell?
I took the laminator home, determined to run a bunch of tests (it was Sunday ;) ).
I had a couple of old masks left (I printed double the amount then, in case first try didn't work - so that would cover the toner/drum combo that I know have worked). I printed a couple of new ones - new drum/old toner, and new drum/new toner.
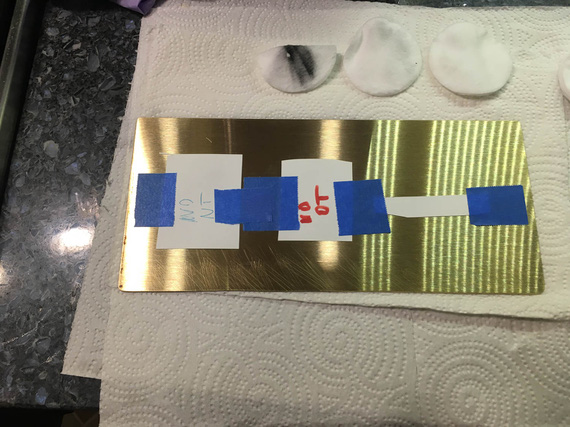
Test pieces
I also changed the settings again, for the two new prints I made.
As I mentioned before, when first printing the final mask (the one that didn't transfer), I had it's toner literally flake off the paper in some spots. "Hmm, I thought", and re-printed it, using the "Improve Toner Adhesion" setting enabled. That made the paper go thru the printer much slower, it came out much hotter than usual, and the toner adhered well.
On the second try (the one that didn't transfer either), I read a bit about the "Improve Toner Adhesion" setting, and decided to instead try to change the paper type to a more appropriate one - so blaming whatever "Improve Toner Adhesion" did for not transferring of toner, and blaming "thick" not being set on the first try causing toner to flake off, I set "thick" for paper type - which, again, caused the same effect - slow feed, hot paper, good adhesion.
And then, when finally doing a systematic attempt to figure out what's wrong, I remembered that on the very first test masks (the ones on the test piece of brass buss bar stock), I didn't tweak any paper settings at all.
"Slow Feed", "Hot", vs "Fast Feed", "Colder". This time, I started guessing that maybe, higher temp did something to the toner that would then prevent it from being re-melted when fed thru the laminator. I decided to try my luck with "plain" paper type (fast, cold feed), and count on my luck in the toner adhesion department.
I lucked out - test pieces came out fine, and, with three test masks, thru the laminator we went again.. And again... 10 times total, as before.
This time, things definitely changed! First of, all three transferred equally, but they transferred equally... crappy.
So, we knew that we were onto something with the feed/temp settings of the printer affected by the "Improve Toner Adhesion" and paper thickness settings.
But, transfer was still crap.
And then, I realized one more thing.
I was transferring to the "brushed" (remember, I had a "brushed" brass sheet?) side of brass? Those "brush marks" are noticeably deep when you drag your fingernail across them. I suspected that, effectively, whichever pieces of the mask were above the marks, wouldn't touch any of the metal, and therefore won't stick.
OKay, but I can use the other side! It was cruddy, but a bit of the deburring wheel...
Wait. Go to the airport to polish the other side? Ugh.
Found a piece of steel wool we use to scrub dishes. Phew. That, under water, made the other side of brass nice and clean on short order.
OK, the moment of truth. Printed the pattern again, using the new toner/drum, now, when we know that toner/drum aren't causing my transfer problems, but rather, the temp and the feed rate of the printer are.
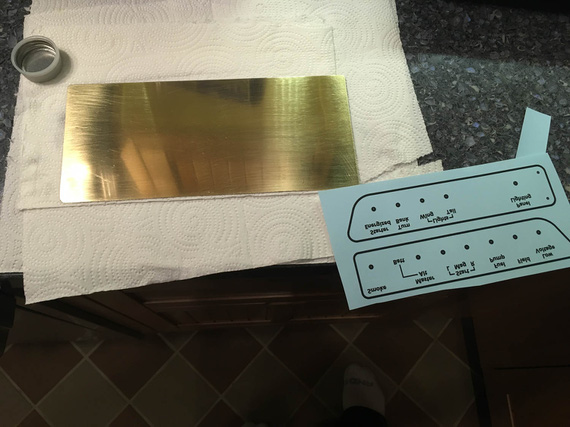
Will this be final?
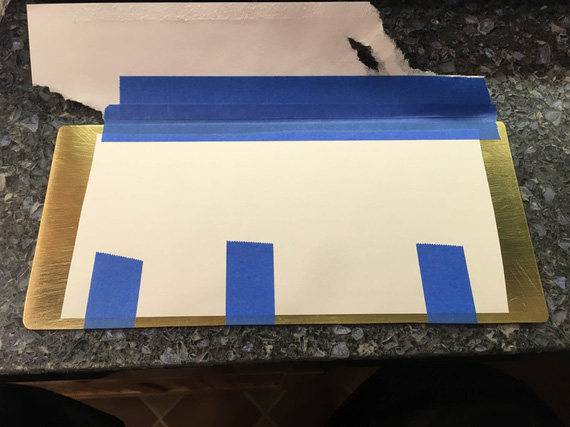
Attached to brass
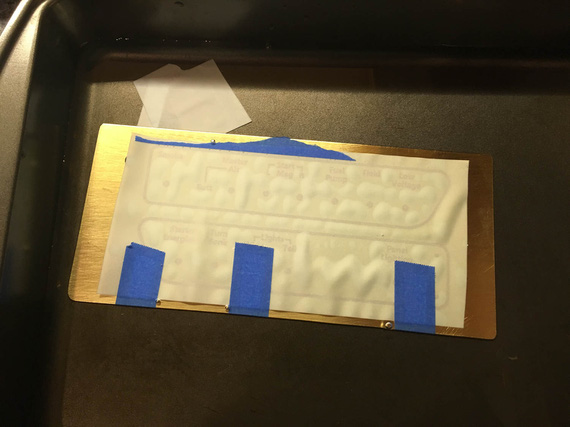
Soak after the laminator to remove the transfer paper
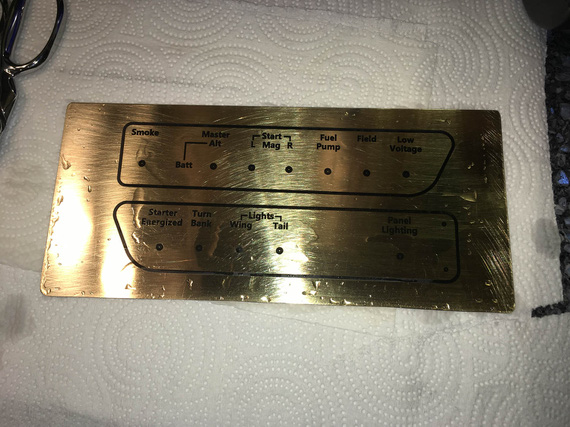
Transferred!
Phew. Okay. So, I guess, after all, Brother toner is finicky, just like the Fab-in-a-Box guys tell you, and mine is not special. I don't know why fast feed / low temp would even keep it transferable.. but... Well, the lesson I take from this is that I will be carefully considering the toner type when buying a new printer, when that time comes.
And then, the foil. I'll admit, I did a couple attempts with the foil. Yeah, and when I didn't like what happened on the first attempt, I had to re-do the mask (toner transfer, that is) yet again!
My laminator has serious feed issues. The foil is very finicky, and keeping it straight requires laminator to feed nice, smooth, even, and straight. My laminator needs to be "helped" sometimes with pressure pushing the plate "in".
Oh, well. After the second attempt, I realized that I probably won't achieve ideal results on such a big piece, and instead, used Sharpie to fix as much holes in the foil as I could find.
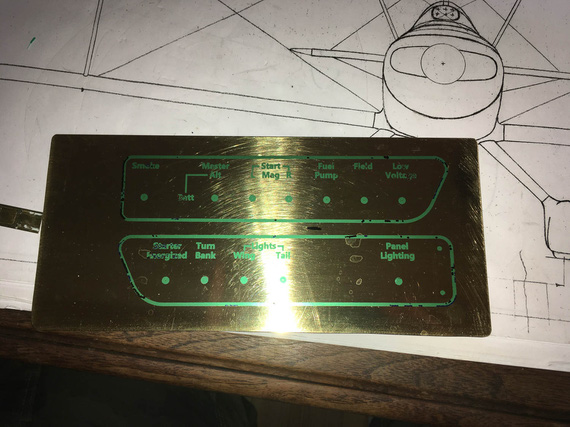
Final mask, and lots of Sharpie.
So, bottom line. If I want to make perfect, non-porous etches, I need to get me a good printer that will do what I need, and a good laminator that actually feeds things nicely. Later, later :).
I was planning to etch the following morning.
The Etch
The weather was great, and I relocated to the airport, setting up my "camping setup" outside the hangar...
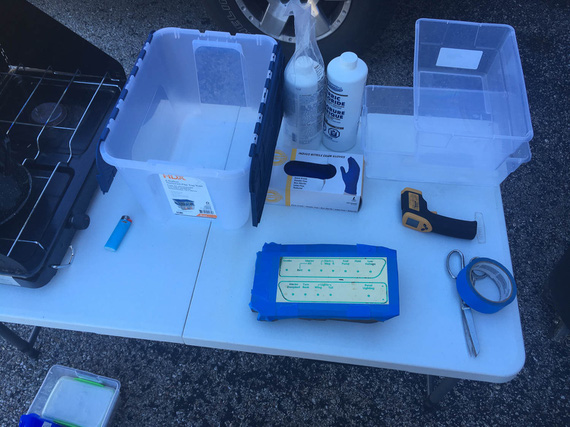
The setup
..put the plate attached to the foam into the tub, and went counting my 10 minute chunks..
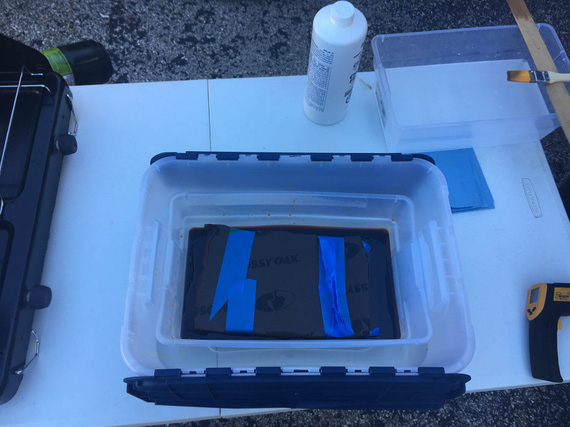
Plate in the tub of etchant
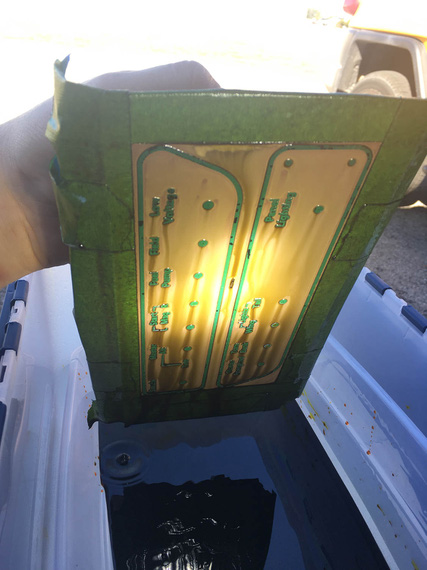
Etching is visible here
..it took about 90 minutes at 100F etchant temp to get about .010 depth.
To neutralize, this time I used soda with water, to make it get into all nooks and crannies better.
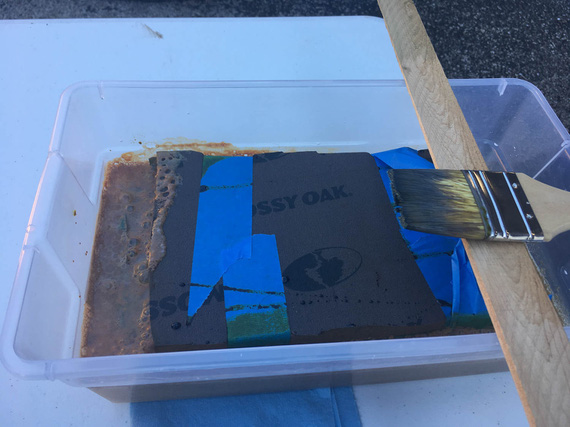
Neutralizing
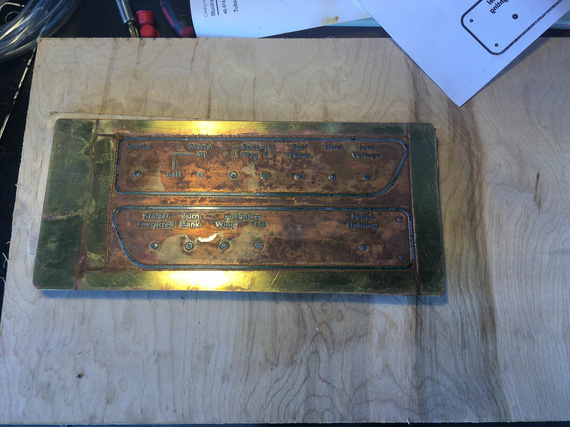
Pulled out
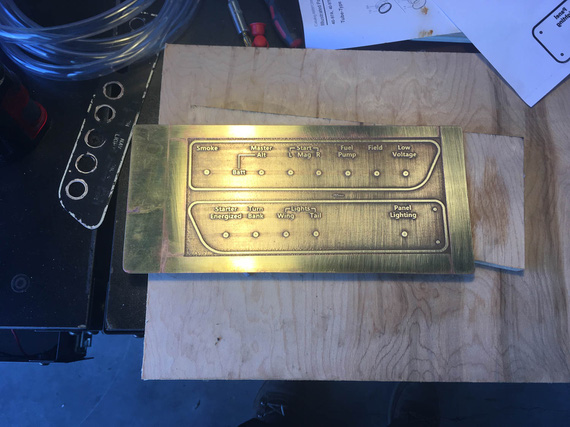
And cleaned up!
Nice! I liked it! The etched sections ended up a bit too thin, but workable still. I cleaned them up with maroon scotch brite by hand this time.
Next day, I cut them out, drilled the holes, and tried them on.
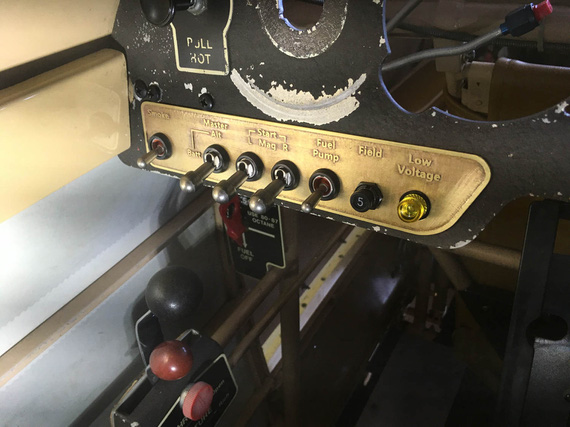
Left
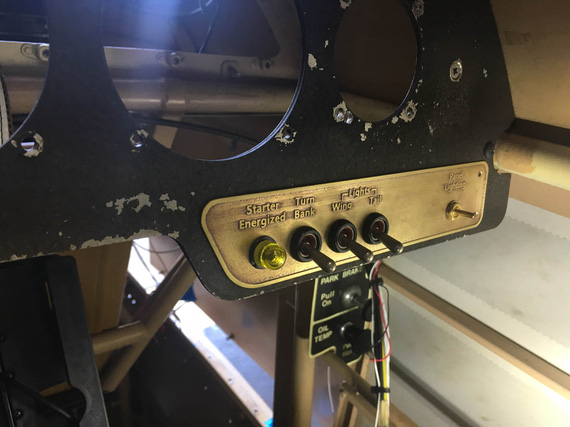
Right
I liked them! The only step left was the paint. But first,
Paint
I touched on the subject a bit already.
I was afraid of Rustoleum now, even learning that I messed it up myself with lacquer - it peeling off the base in sheets didn't give me confidence. Rustoleum has clear enamel; but my reasoning was that if it peeled off with primer, clear enamel without primer on relatively sharp edges of lettering will just come off almost immediately, given that my hands will always be around the switches when operating them.
I settled on epoxy. It made sense. Klass Kote had good reviews from RC guys, and folks reported it brushable.
I completely stripped my old sample with brass wire brush and acetone. Wire brush cleaned it out nicely and smoothed some roughness still left, so I wire brushed the new plates too. It helped, and seemingly worked better than the maroon pad! Noted.
And then, I set up in the kitchen.
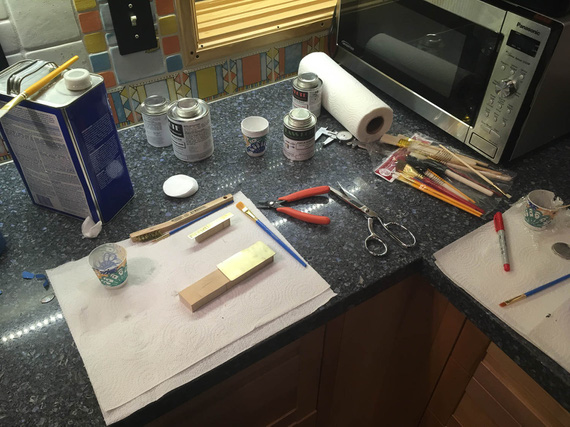
Set up for painting.
Klass Kote needs to be mixed, and reacted for at least 30 minutes prior to application. My plan (approved by Klass Kote) was to do base in black, then bake it after initial flash off for 30 minutes at about 100 degrees Celsius. That will cure it enough to make it sandable, after which I'd sand down the letters, and clear coat it. I won't need to bake the clear, 'cause I'm then done for the night, and it can take it's sweet time curing.
Klass Kote is really thick when mixed!
Trying it straight on my test coupons left horrible brush marks.
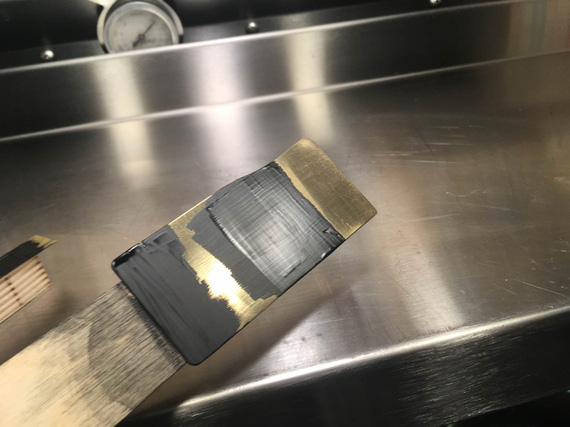
Straight Klass Kote black
I tried it on my test plate as well - just to play with the baking process.
Meanwhile, mixed up a new batch and wanted to try it reduced with a lot of reducer to see if that would make it flow better.
Nope. That left the same brush marks, but just watered down, if you will. Multiple coats just made it uglier.
Hmm... Meanwhile, I had a batch of clear mixed too, and tried to see how the clear would look over my test plate that was now baked and ready to be sanded down. Maybe, the brush marks would get better / a bit more hidden with extra brush marks of clear?
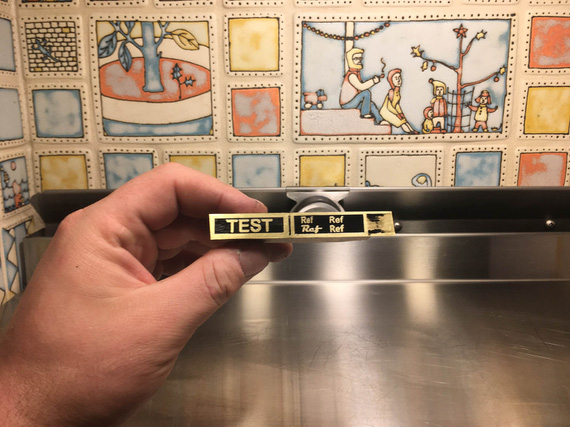
Test plate
Not bad, right? Well, you're not looking at it right.
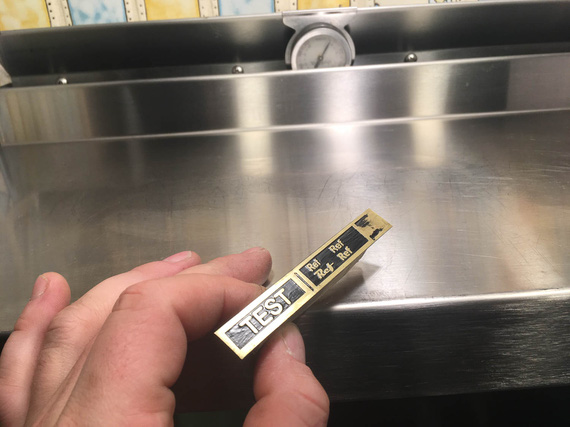
With light
See?
That's horrible.
Frustrated, I dumped my thinned batch of black into the tray I was using for garbage, and sat down thinking. My eye fell on a foam brush I had in the set of brushes I bought. I mindlessly picked it up, and started smudging the dumped paint around the tray.
It flowed! Very nicely!
I then remembered how much I hate brushes in general. I was never able to get anything remotely approaching good with brushes. When I built my kitchen cabs, I used cotton pads over foam brushes and achieved very smooth, mark-less results.
I think, this random act might've just worked!
I cleaned up my other, flat, coupon (the one that wasn't baked, so the epoxy would still come off with some wiping with the reducer).
I was now planning to mix the final batch of black I'd reduce. I'd try it on the coupon first, and then, if I liked the results, on the actual pieces...
...it went on smooth, but fish-eyed a bit. I thought that that was due to some crud on the coupon (I wasn't cleaning the coupon too good).
So, I put it on the actual plates.
It fisheyed! A lot of eyes flowed together, but some big ones stayed. I quickly dabbed them out with the corner of the brush with some paint on it - too late, damn it! It didn't flow out. The whole thing was also rough-ish... thinned paint was flowing around imperfections of the etched surface, as well as my dabs were messing with it, probably. There were also areas that had visible marks of me lifting the brush.
At this point, I should've stopped, dunked it into the reducer, washed the whole thing off, and called it a nite.
But, I was too focused on getting there.
I thought, I might be able to get a uniform "rough" look.
Solvent was flashing off, and paint was getting thicker.
More paint, but this time gently, not to rub old paint off. Then, dab-dabbidy-dab the foam in and out.
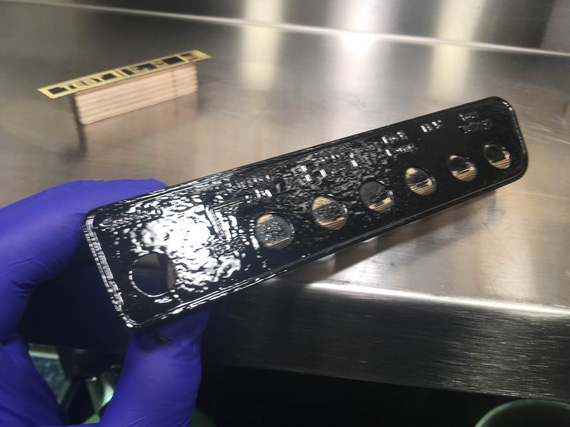
Rough look
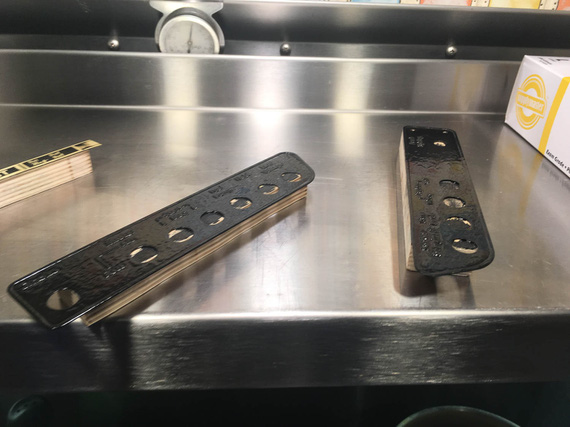
..on both
That looked acceptable, and I decided to let it flash off the solvent. Meanwhile, went to Walmart for more foam brushes (I only had two in the set).
Got back, mixed a batch of clear and left it off to react. It was looking good, with "rough look", and I was thinking I might just be able to pull it off.
After the paint stopped being tacky, put the whole thing into my oven.
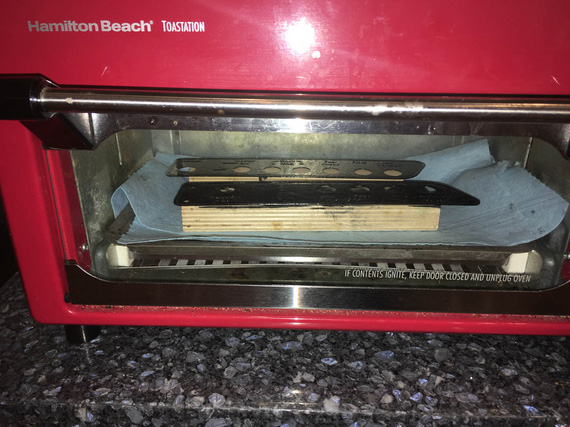
What's for lunch, ma?
Yep, that's my toaster, repurposed as epoxy bake oven, and calibrated at 100 degrees Celsius :).
I forgot about solvent pop.
See, when you have too thick a layer of paint (which I did, when doing my "rough look" pass), and the top of it skins off, some solvent might get trapped under it. What happens then is the trapped solvent tries to evaporate, and can't: pressure builds, and it "pops" the paint, making a tiny little pinhole.
So after 30 minutes, I pulled the plates out of the oven. Yep, I got the pop a-plenty. Some areas of paint that were especially thick got a ton of them.
I decided to stop then. Screw it. Rustoleum it is, as much as I hate the idea. This epoxy stuff is great (no, really, it is); but I need to spray it. So, I took a rag, wetted it with the solvent, and tried to rub the paint off.
Nope! It cured enough to no longer rub off with the reducer! Crap. Now, the only way to get it off is with Methylene Chloride stripper... :(
Oh well. What's the best second option for a frustrated guy who failed at a paintjob at around 2 in the morning? Stop? Go to bed? Strip and start anew?
Nope! I thought, "well, I had a batch of clear right here. I can see if I can rub out the worst uglies with something, and try to clear it to see if it'll hide the rest".
Admittedly, it did hide pretty neat.
I rubbed out the worst popped parts with maroon scotch brite, and sanded down the lettering.
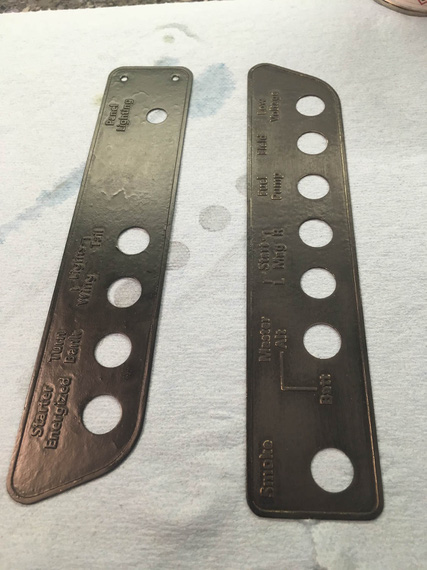
Left's not rubbed, right's rubbed
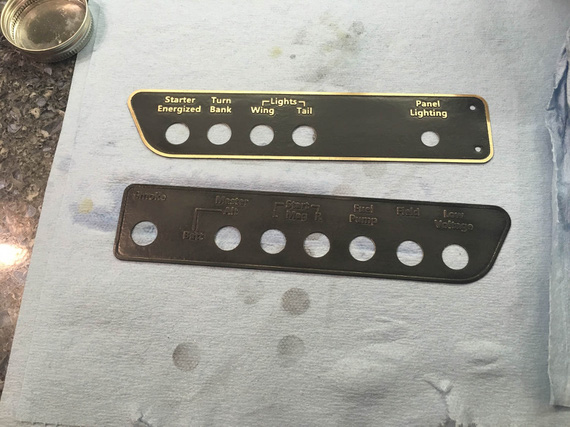
Bottom's rubbed, top's rubbed and sanded
And then, I clear coated them with two coats, cleaned up, and went to bed.
So, did they come out okay?
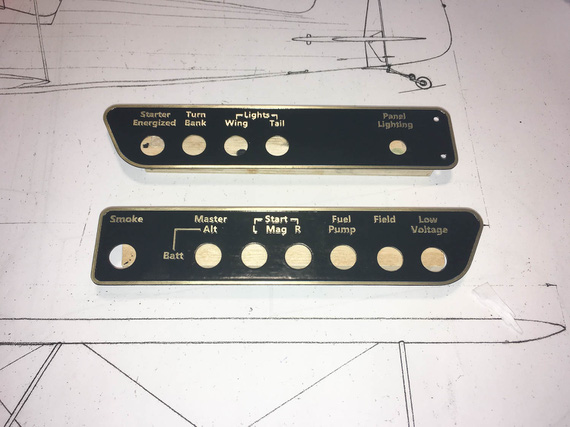
Finished
They look okay if looked at like that. I don't know. They're ugly, if looked at in the right light.
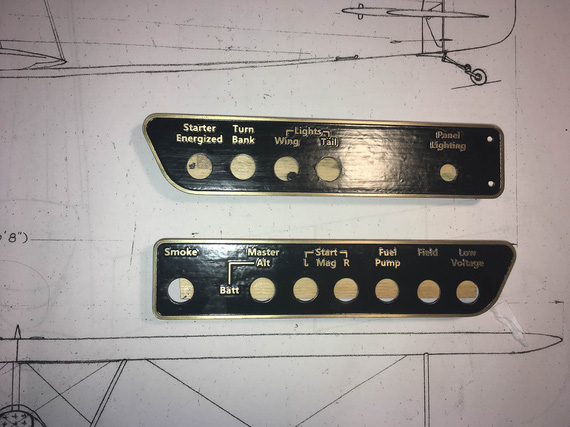
With the right light
On the other hand, it matches the "rough style" of the old school plates. I really don't know.
What I should've done from the get go is either used Rustoleum, or got myself an airbrush. With an airbrush, it would've worked much nicer.
Maybe, I will strip them and re-do the paint. Maybe not - that kind of light is unusual in a cockpit. Maybe I will file this under the "don't be an idiot / don't rush a paintjob / use the right tools" section, and keep them as a reminder - until I have to make another set.
I don't know. We'll see.
Meanwhile, the Chairman says, "Come Fly With Me!"
Good judgment comes from experience and experience comes from bad judgment.
© Copyright "79FT". All rights reserved. Feel free to cite, but link back to the pages cited.
This website only shows how I did things in my various projects. These pages are for information and personal entertainment only and not to be construed as the only way, or even the perceived correct way of doing things. You are responsible for your own safety and techniques.
