[79FT]: Building Things |
 |
Good Bye, Cheetah!
...live long, and prosper!
| On: | Nov 21, 2018 |
| In: | [Misc] Cheetah |
| Tags: | 9891U, flying |
Great weather today. A bit cold, but sunny, calm, and overall very promising.
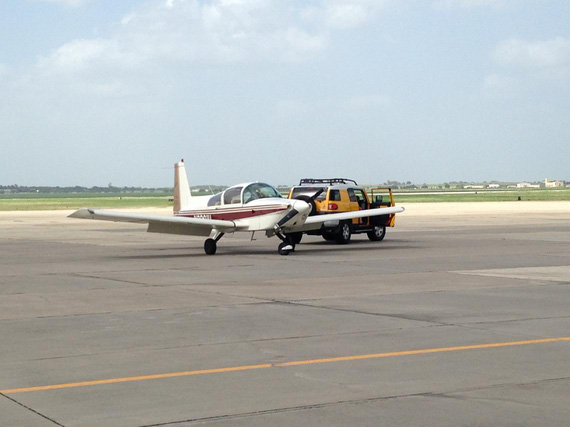
I rolled out the Cheetah out of her hangar for the last time.
This was a weird feeling.
When you have an airplane sitting in the hangar 20 minutes away from your house, you tend to sometimes put flying off.
It typically goes along these lines.
Hey, it's Saturday coming up. I gotta go bounce around! check the weather Hmm...looks a bit iffy. Maybe I should do this-other-thing-around-the-house-shop-or-whatever-I-hadn't-gotten-around-to. Maybe, I'll go flying after that...
Evening rolls in, you're tired and not up for flying anymore.. Meanwhile, weather was perfect the whole day!
"Next week", you think. And you go out next week, but this time it's something else that pops up and you have to get to it later in the day, and instead of spending half a day bouncing around, you buzz around the pattern for half an hour and go back to your daily messes and stuff to do around the house.
Not every Saturday was like that since I got back to having time to do plane stuff... but often, it did.
But this time, today. It was weird. The knowing that I am flying her for the last time, that I am listening to GTU ATIS on her radios for the last time, the last VOR to be tuned in, last turn direct to the destination, last approach guy handing you over to your destination's Tower...
"Field in sight"...
On a day like today...
Sunny, silky smooth, a touch of clouds, with all the gauges' needles frozen in place...
You remember all the good times you had together, and think... I'll miss you, Cheetah!
I guess, in the Spirit of Thanksgiving..?
Thank you for all the wingovers, low passes over lakes, and river runs.
Thank you for all the kids we've flown as Young Eagles.
Thank you for getting my ass out of that fog along the coast of Madagorda Island (that one was the "bag of luck" to "bag of experience" type thing for sure!)
Thank you for all the fun I had messing with you.
Thank you for that unique kind of smell that your inside smelled with (and my tiger LeRoy who lived in the plane still smells like you!)
Thank you for being a good plane and not giving me any trouble.
I hope I'll see you again sometime! And maybe then, we'll go bounce around together again. Just like the good old times.
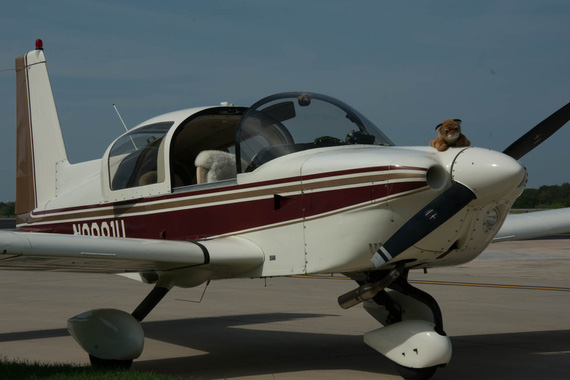
The Cheetah
No one has ever collided with the sky.
Up ↑
Cleaning up Light Coves on Wingtips for Cheetah
... I hate sanding!
| On: | Jul 03, 2015 |
| In: | [Misc] Cheetah |
| Tags: | 9891U, mechanicing, fiberglass |
In the past 7 months I have been busy building... the crib for the baby. Almost non stop evenings, 4-6 hours a day: the result is good, but this is a "Skybolt Story", not a "Bed Story": so no, I won't post all my projects here :).
Also, it seems like next 2-3 years will be mostly furniture building for this guy.. Oh well.
Meanwhile, I was able to put in a few hours into fixing up the coves in my wingtips where all the lights are.
If you recall, I have made strobe shields quite a while back, but I haven't fixed up the coves. I was waiting for the shields to be painted.
Well, they were during the cgr-30 install, and then I was working on the crib.. So finally, the time has come.
Look at what I had to start with.
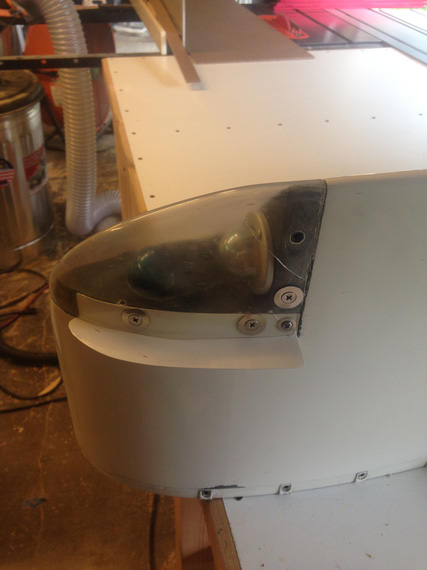
Sad sad wingtip
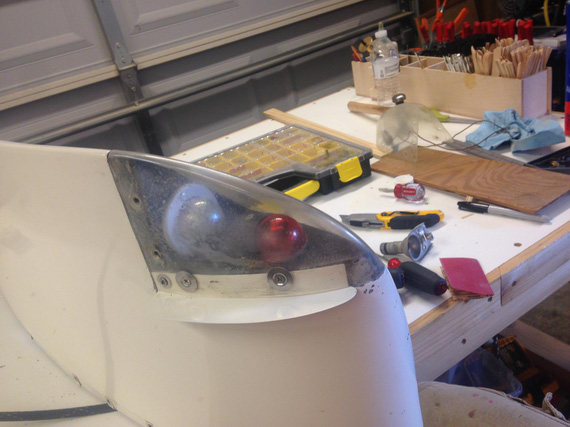
Another sad wingtip
First, all the lights came out. The old plastic lenses went straight into the trash bin. Then, came off the foam padding that goes in between the lens and the wingtip.
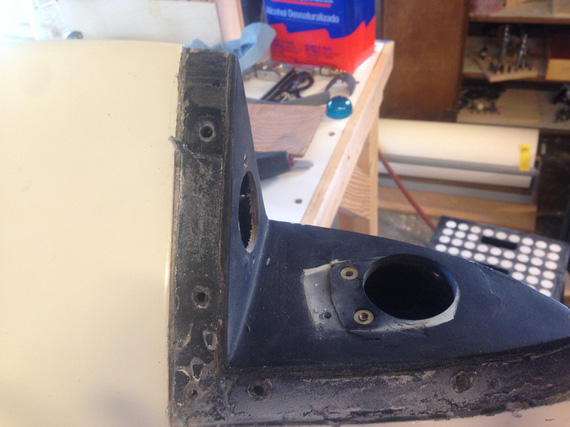
All opened up
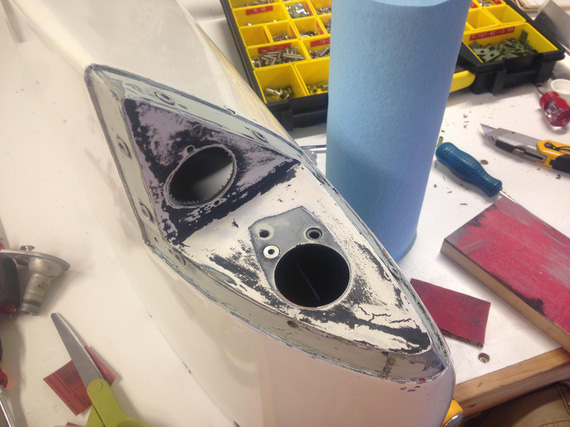
Cleaned and sanded
I think the above was about an hour of sanding. All old paint came off. Also, the broken rivnut went out (did you notice it? That extra hole was what someone has drilled and used a sheet metal screw to "fix" it instead of drilling out the broken rivnut).
Finally, masked with the first set of masking tape. I was set to repaint the coves.
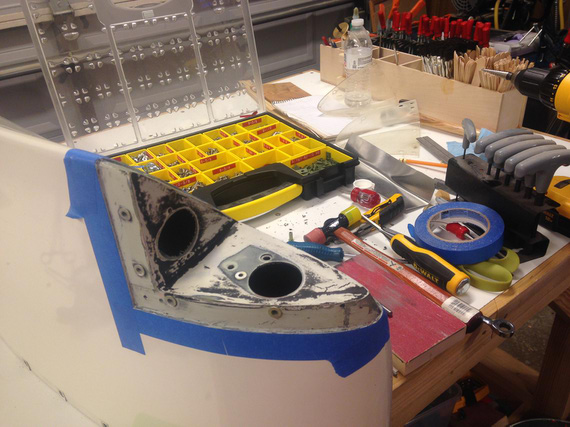
Masking the edges
The other wingtip was even worse. The cove itself had a huge "dip" in it. Also, some "genius" decided to screw #10 screws straight into the fiberglass... Some threads were all torn up, and I decided to install rivnuts all around to make sure the tips match.
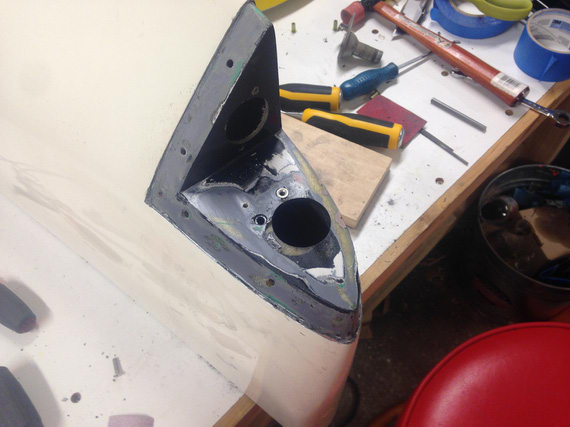
Just disassembled, note the large dip in the nav light area
In with Bondo! Lots of sanding! Oh man, I hate sanding...
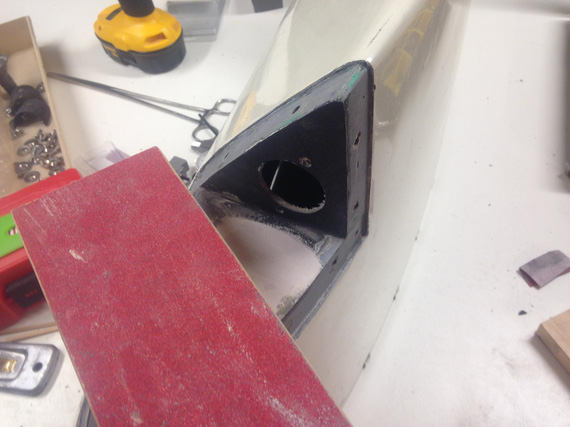
Bondo, and sanding...
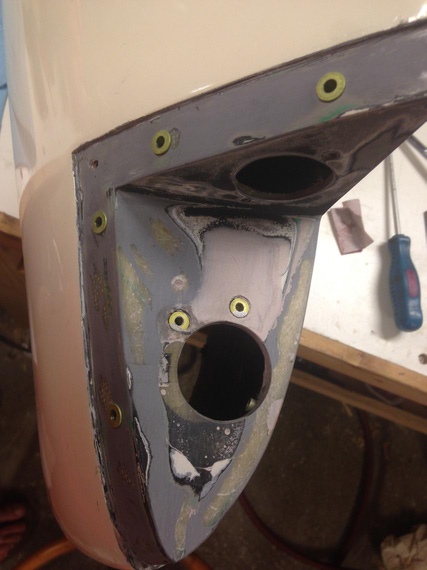
Done sanding
Phew. Quick fit of the strobe shields over the rivnuts, needed to enlarge the holes...
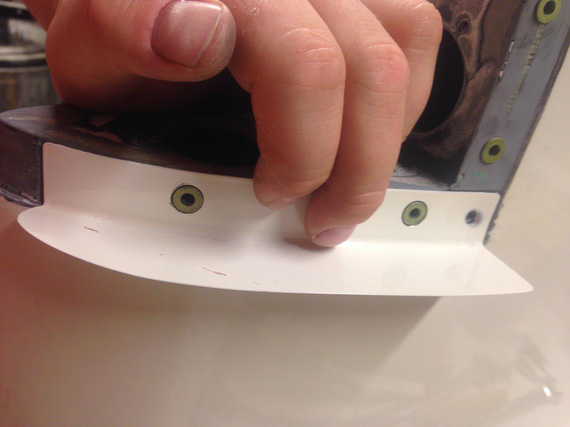
Fitting holes in the strobe shield
And we're ready with the second one.
Now, I wanted to clean up the nav lights housing as well. Originally I wanted to paint both cover and base, but once I cleaned up the base, I decided to leave it as is: apparently, it was nice and shiny after all that 40 year old corrosion cleaned off of it!
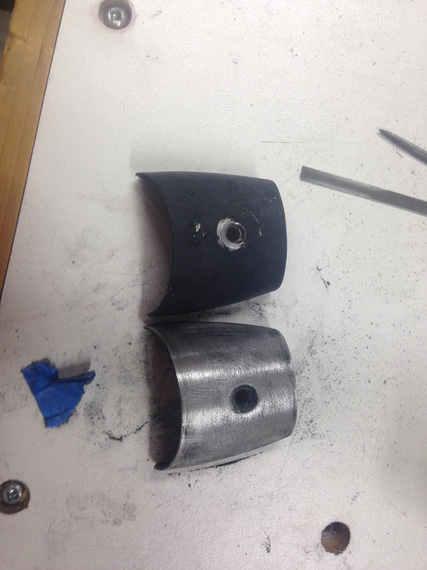
Nav lights covers. Second one was cleaned up as well
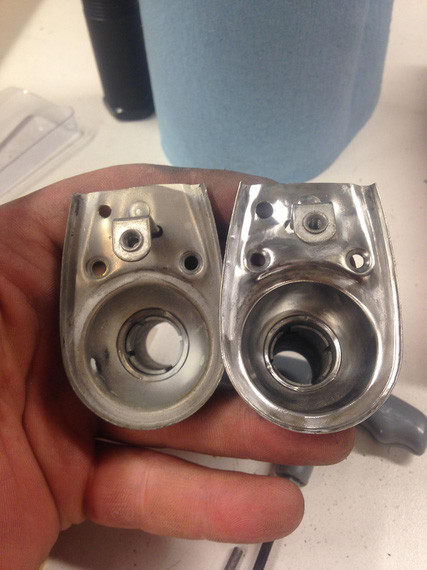
Cleaning nav lights bases. Shiny!
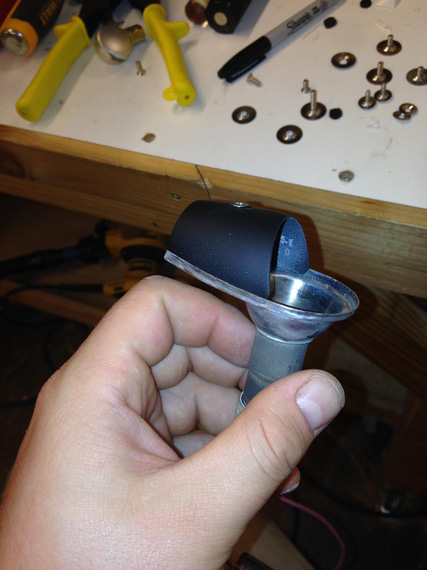
Came out nice after painting!
Then, final masking, and painting. Damn! That didn't go so well. I didn't notice a fairly small dip in the other tip's cove, and the Bondo'd one got some pinholes. Time was running very short so I ended up leaving that as is.
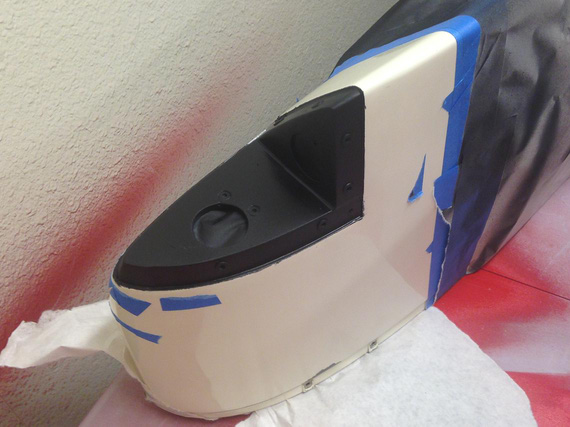
Right wingtip cove, painted. See the dip now?
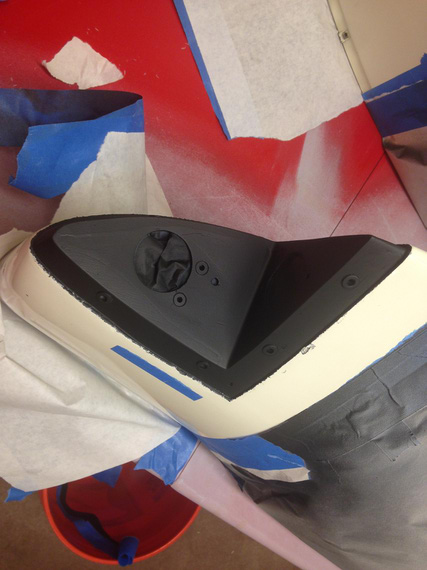
Left tip. That one with pinholes :(
Once the paint was all dry came the time for fitting the foam padding and lenses. And here, I made a fatal mistake: I have installed the padding first. That makes fitting of the lens virtually impossible (at least, for me).
That had produced an unsightly gap of about 1/8 inches. Oh god! I had no spare lenses, and I had to put the plane back together not to screw my partner who needed the plane soon. Very soon.
... I ended up screwing him anyway 'cause somewhere in the middle of me fitting that first lens Max was born and I was knocked out for 5 days ...
... just in case you're wondering: 7lbs 11oz, 20 inches, June 25, 2015, 10:35 am ...
... I still haven't had any chance to get another lens, so I decided to put it back together as is as a memory of me being stupid. Maybe I'll buy another set from Ken in another year or two; and also fix all the dips and pinholes ...
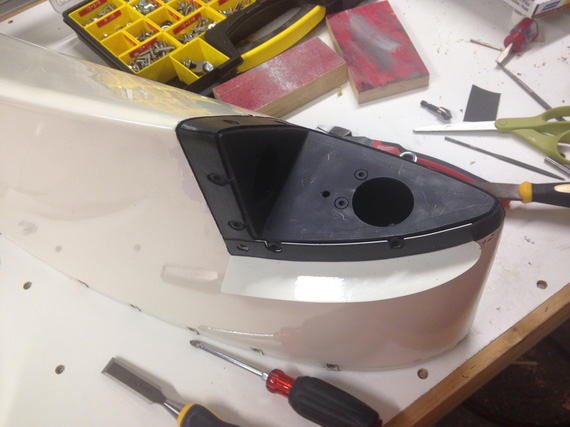
Fitting the foam padding
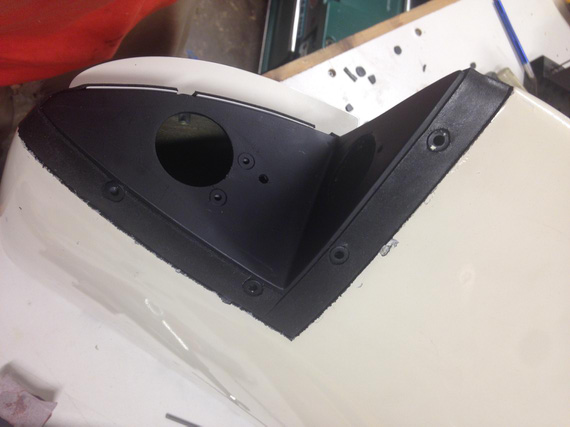
Fitting the foam padding (back side)
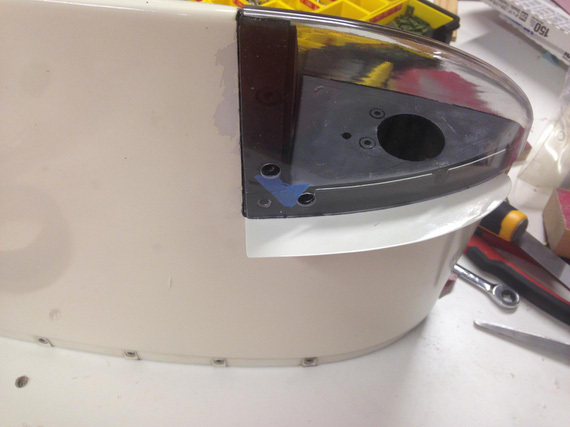
Top/front lens fitting
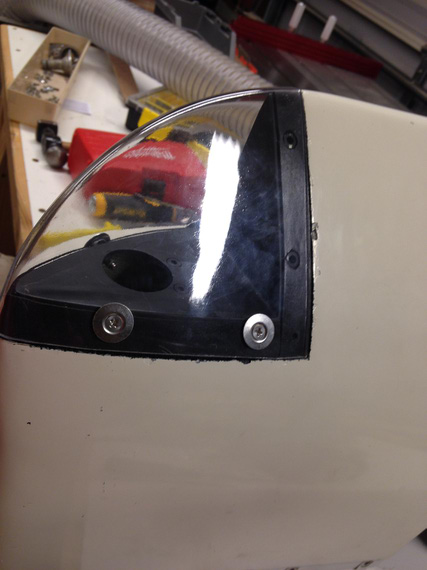
Bottom seams: see the unsightly gap?
I was much smarter with the other lens, and made sure to fit it before I put on the foam padding, and it came out perfect.
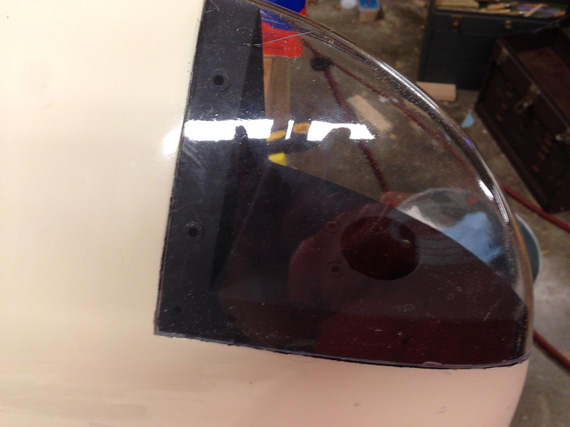
Fitting other lens. See no padding?
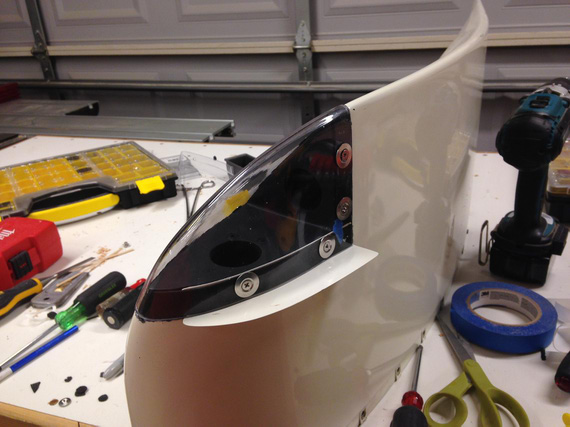
Padding on: and some holes in, too
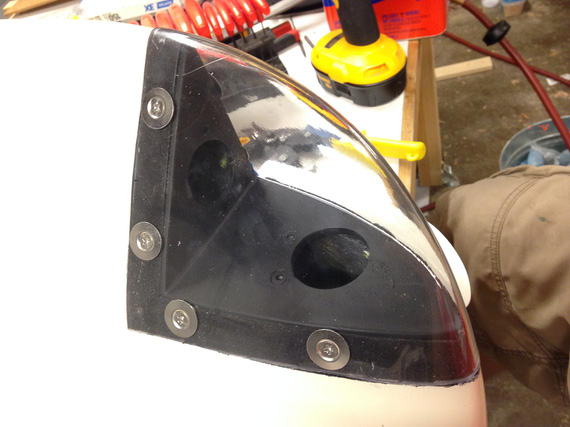
The other side
Then, I've put the lights back in, permanently screwed on the lenses, and I was done!
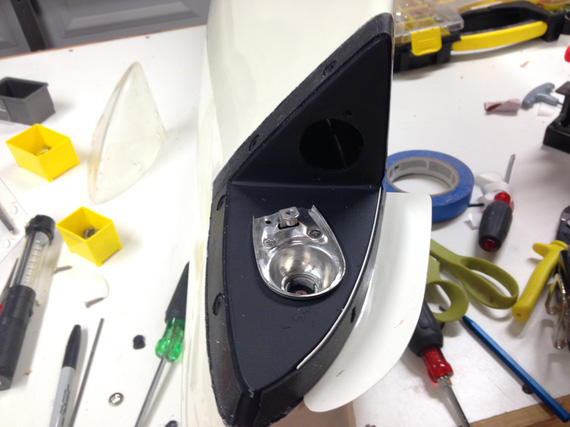
Installing the nav light base
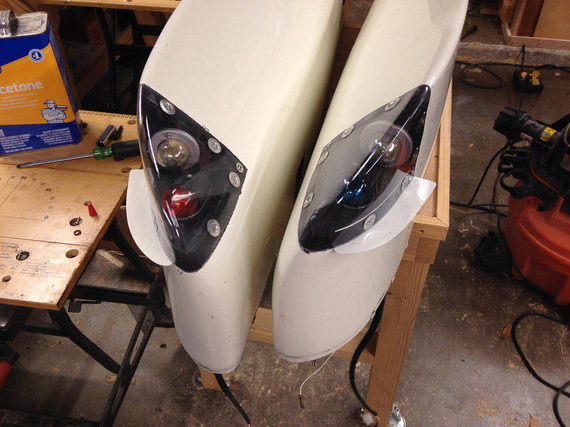
All done!
Much nicer than before, but with some problems. Still, much nicer than before.
Till next time (which-I-dont-know-when-will-come)!
"Approach UAL525 what's this aircraft doing at my altitude?"
"UAL525, what makes you think it's YOUR altitude, Captain?"
-ORD ATC
Up ↑
CGR30 and the Wheelpants
lots of upgrades
| On: | Dec 10, 2014 |
| In: | [Misc] Cheetah |
| Tags: | 9891U, cgr30 |
I'm done with my longest airplane project so far! No, it's not for the Skybolt, it's for my Cheetah. But it's an important one and was a great fun to tackle.
So, without further adieu...
The Cheetah never had an engine analyzer -- and I elected to get one, full blown, replacing all the standard engine gauges. I ended up picking the EI's CGR-30P because of it's roundness, compactness, and me generally liking EI a lot.
So, late August, it was Christmas. I got the box, that had a lot of boxes, with boxes, and boxes inside -- lots of stuff. Probes, aggregator box, wires...
First thing I did was put everything together on my dining table, just to make sure I understand the wire-up and that it works. I have even blown into the fuel transducer and was satisfied seeing it registering some "flow".
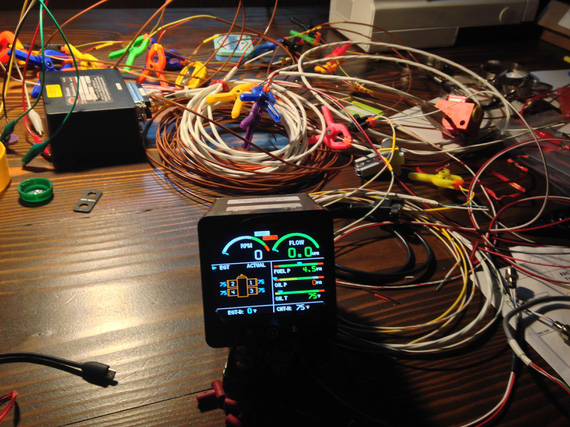
On the bench
And then, the install. The problem was, I also wanted to fly in between, so I had to plan the install in stages and make sure the airplane's flyable in between.
Session 1
First thing was running two out of three wire harnesses thru the firewall (all temp probes, and all pressure and flow transducers). I found a spot on the inside of the firewall for the box, and made sure I had enough length to run to the "aggregator" box.
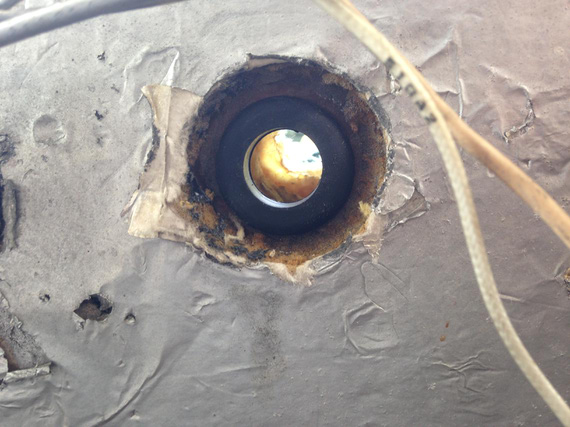
Reused existing hole, new grommet
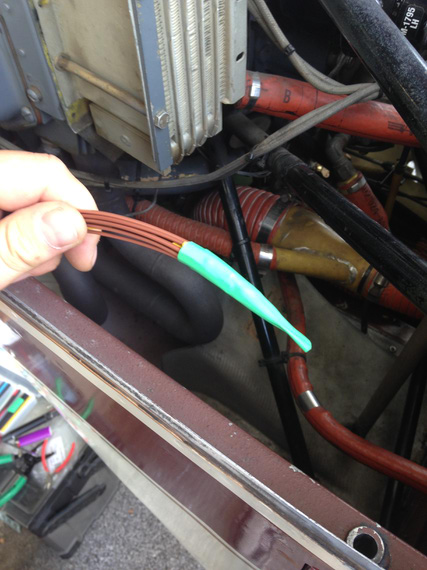
Wires bundled neatly for running thru
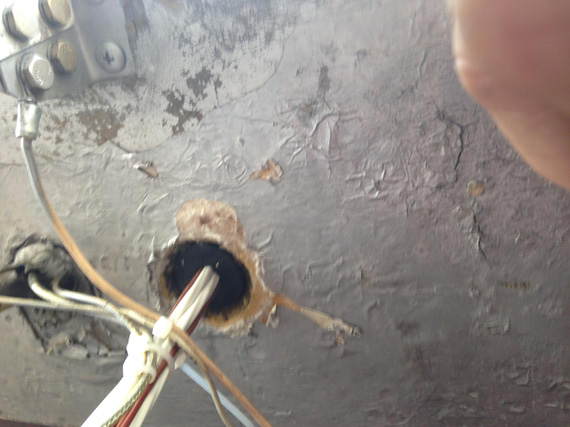
All wires are thru
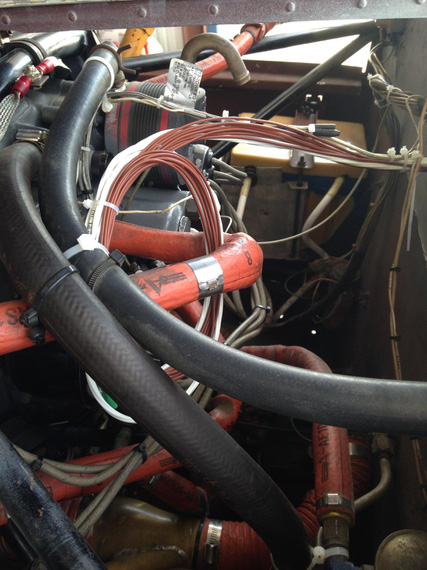
.. and neatly tucked away
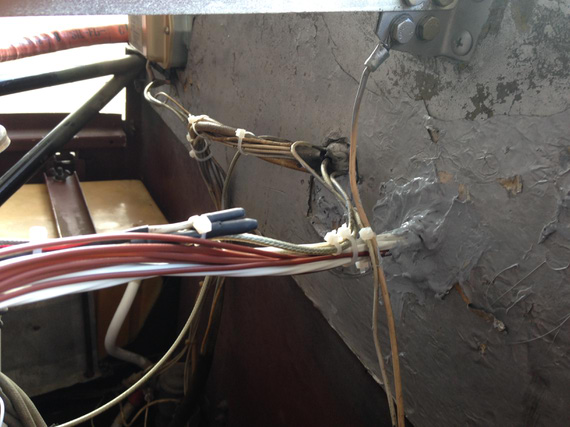
The hole with the wire harness sealed
Session 2
I was planning to fly out to friend's hangar and work on the probes install there. The luck did not cooperate -- very sluggish pull-thru on the engine start and heavy discharge right after on the ammeter hinted at the alternator failure.
Sure enough, it was. I ended up unbuttoning the cowl at the FBO I was hangaring at.
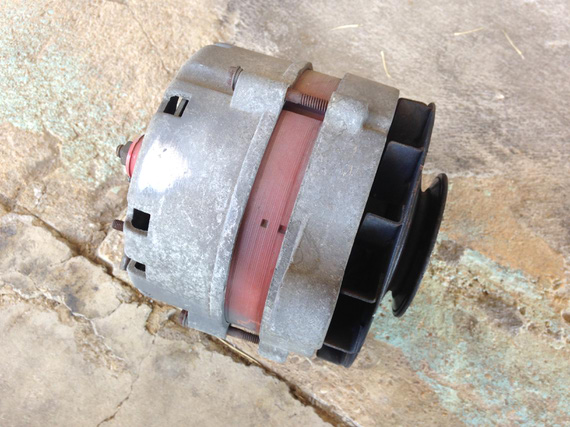
The perpetrator
That day, since the cowl was off and out of the way, I decided to continue and wire up as many probes as I could.
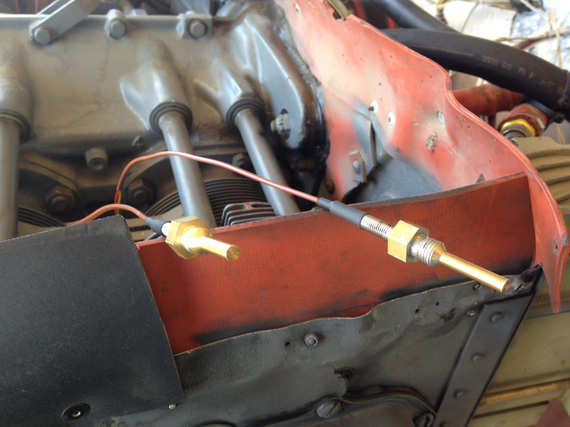
The CHT probes, lubed with anti-seize
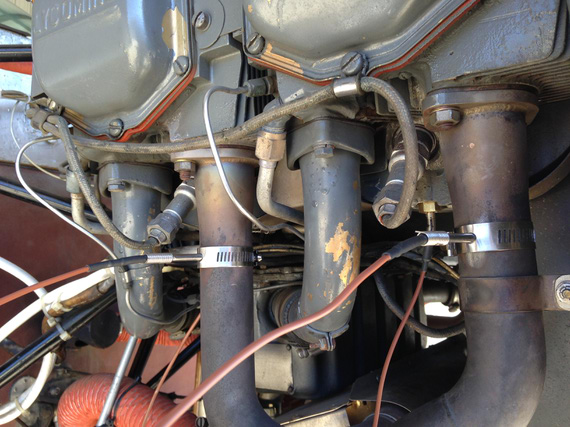
The EGT and CHT probes on one side
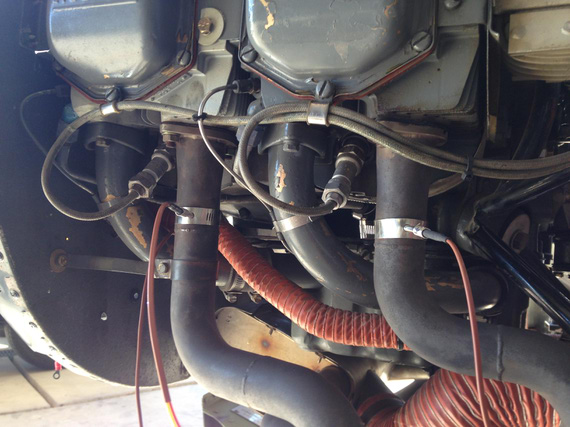
Probes on the other side
Then, came the time of connecting the probes to harnesses. As you saw on the pictures, probes have dinky little wires that aren't protected in any way. I asked EI if I should special-treat them in any way and they said no, but I still decided to get some fiberglass firesleeving from Grainger, and tucked them neatly away. Liked this much better!
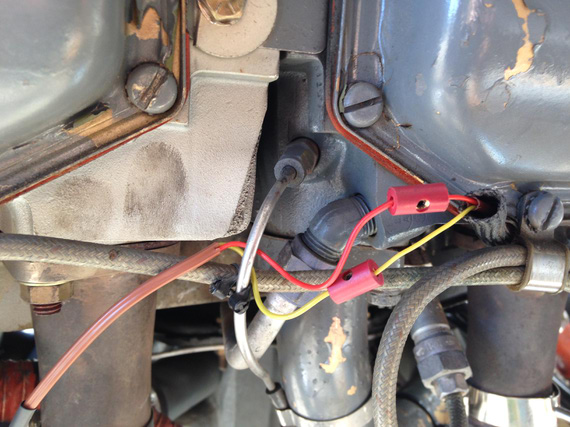
Connecting the probes. Notice the barrel connectors staggered, and fire sleeve
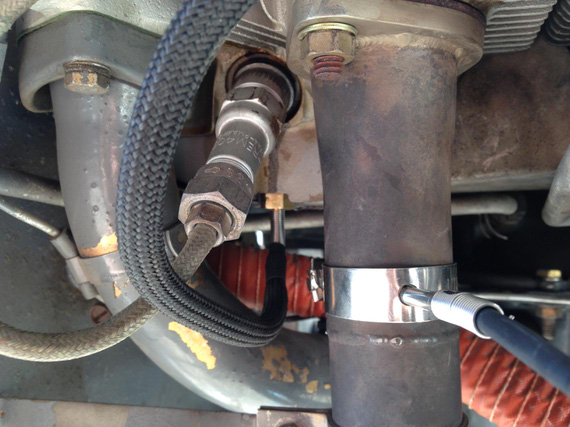
All sleeved
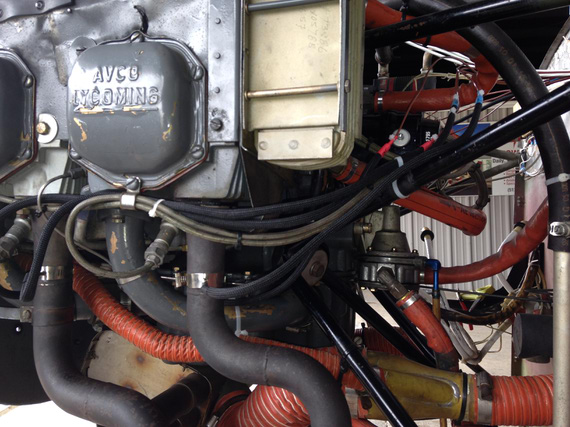
Sleeved and tucked away.
Sun was setting down at that time, and I called it a day.
Session 3
We replaced the alternator in the field, but I kept the cowl open to wire up the rest of the probes.
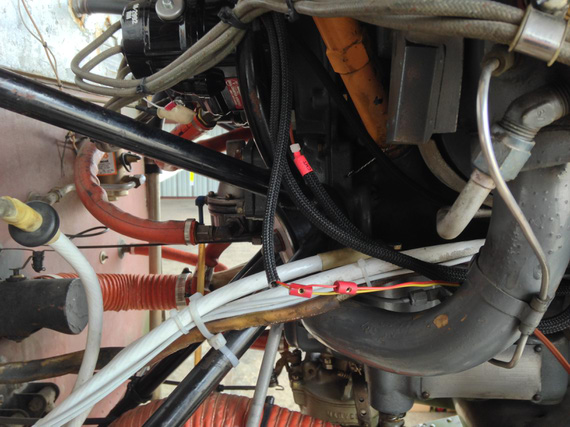
Installing and wiring more probes
I decided to install pressure transducers on the engine mount tubes using clamps, to keep them close to the engine outlets and hose lengths to the minimum. Consulted with EI again, and they said that's an okay idea.
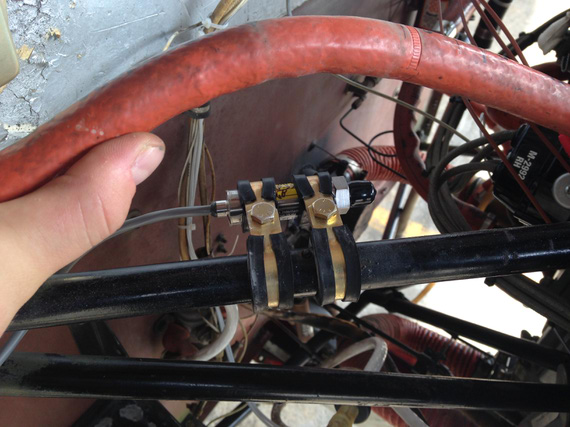
Oil pressure transducer
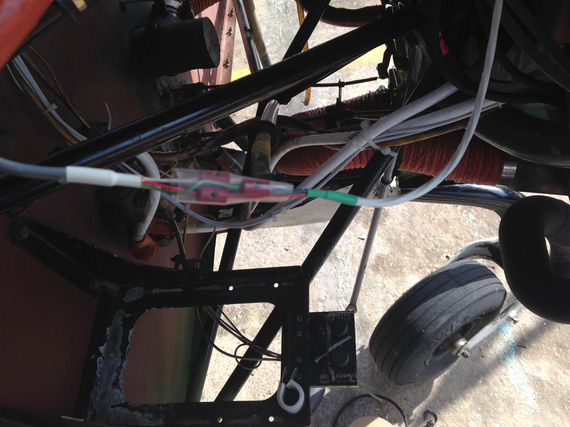
Oil pressure transducer wire-up
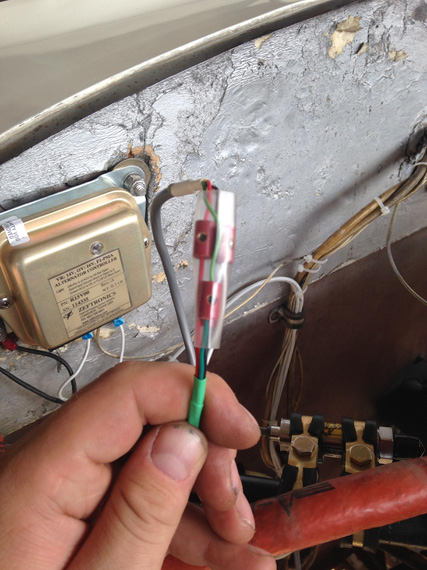
More wire-up
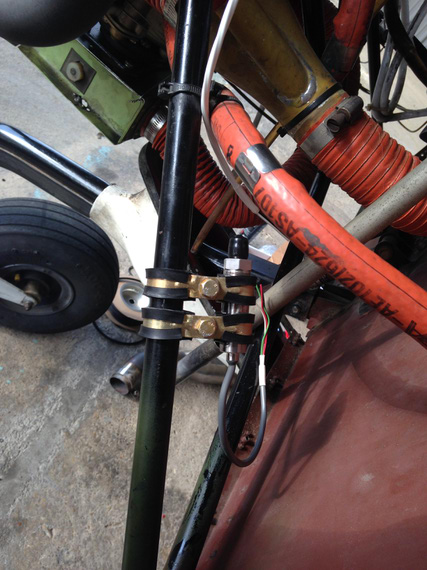
Fuel pressure transducer
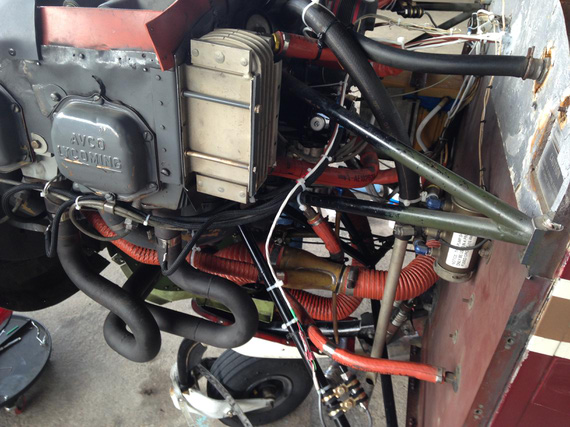
Fuel pressure transducer wire-up
That was it. I didn't install the fuel flow transducer yet.
Next, came closing that cowling, and a big break due to weather, travel, and life....
Session 4
This time it was a day to install the "aggregator box". All the probes feed into it, and there's a single wire that connects the box to the display of the engine monitor.
I didn't know what the exact length of the screws to mount it would be, so I decided to buy a bunch of different ones. Didn't have any way to measure the firewall thickness.
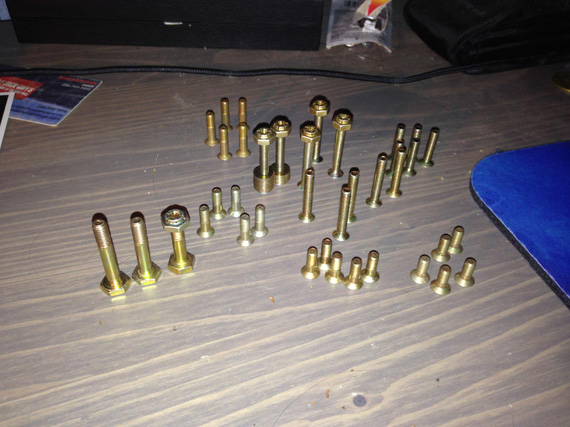
All that hardware
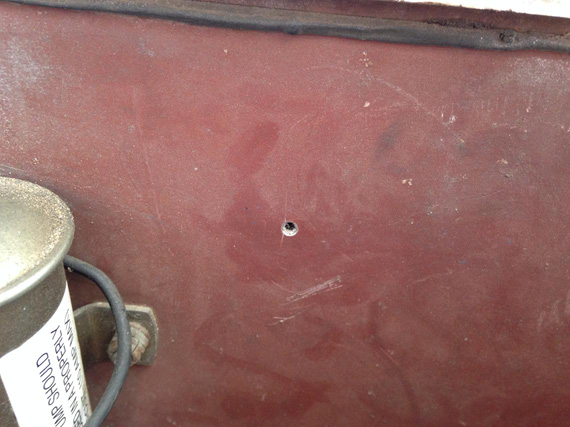
First hole in the firewall
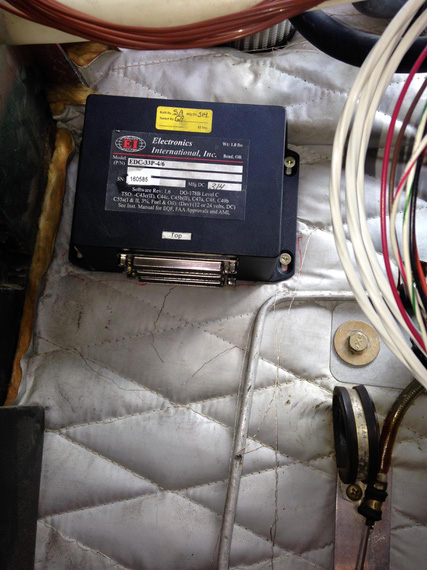
The "aggregator box" installed
That was a short day 'cause I had some things to take care of in the evening.
Session 5
So finally, it was time for a bunch of work behind the panel. Before then though, I decided to make a little panel insert that will hold the annunciator LEDs, the USB port, and the display dimmer.
As usual, played with the layout in Solid Works before I liked it. Decided on a 2 inch hole and fiddled with locations until I was happy. And then, used the final drawing as a template!
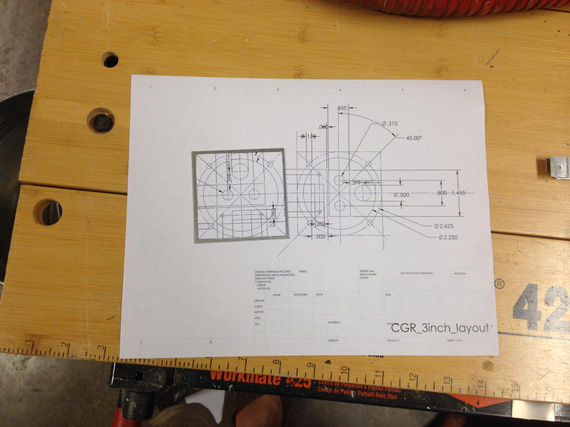
The layout
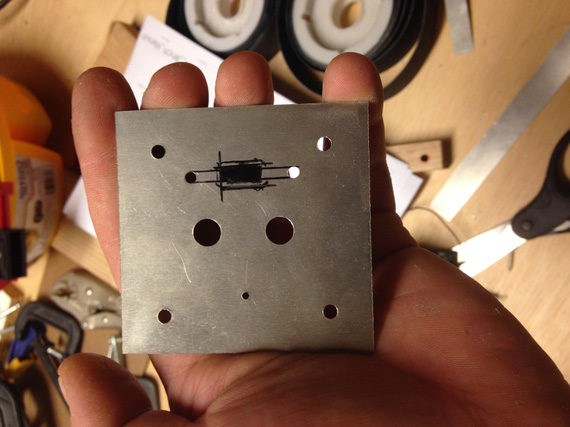
Cutting holes
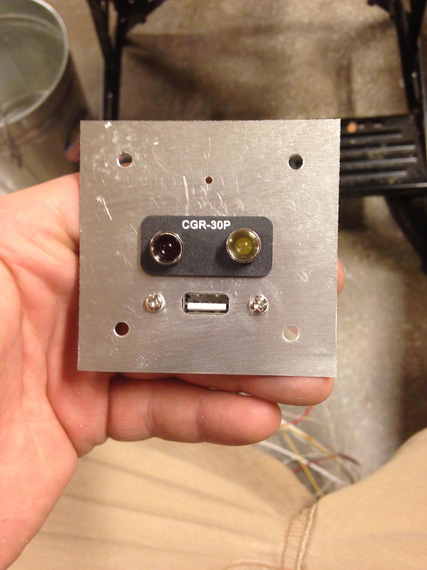
Test fit
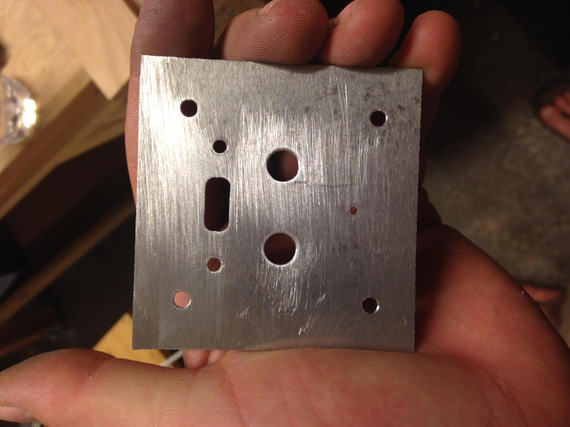
Cleaned up
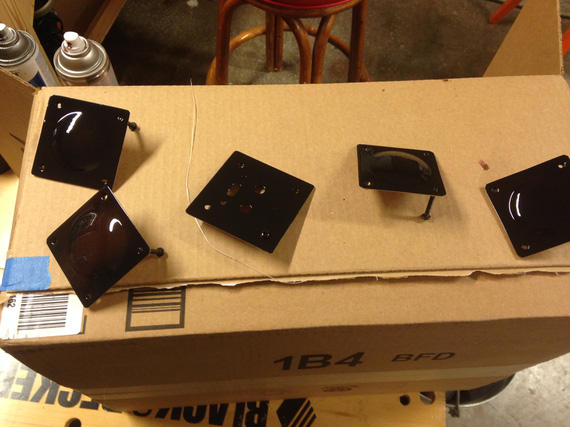
Painted. Also painted the panel covers
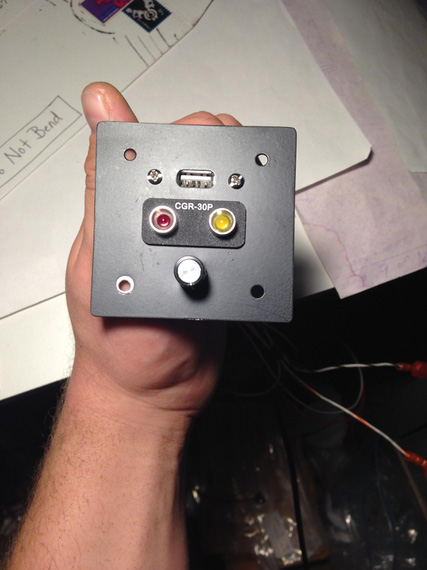
Done!
I also painted the panel covers that I took so long to figure out how to make.
Session 6
Finally, back to the hangar! This session took 2 days actually :). It was the time to install, wire up, re-position all the gauges on the panel, and such.
The old CHT, EGT and hobbs were to go. Clock was to be relocated to the position it's visible at (it was right under the panel eyebrow before). Davtron OAT/PALT/DALT/Volts gauge was to be relocated to another spot in the panel to free up space for CGR-30 auxiliary panel I made in the previous session. And, most of wireup had to be done. Harnesses connected to the box, ran to the display, and power.
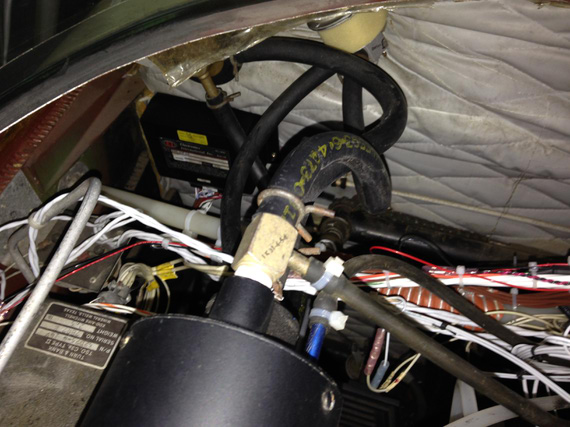
Box installed on the firewall, with harnesses coming in
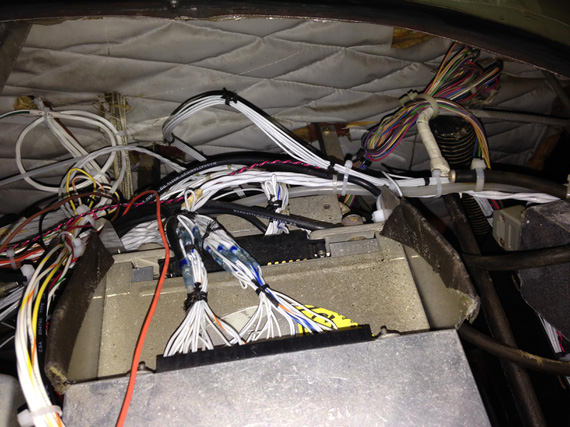
Behind the panel, sometime in the middle
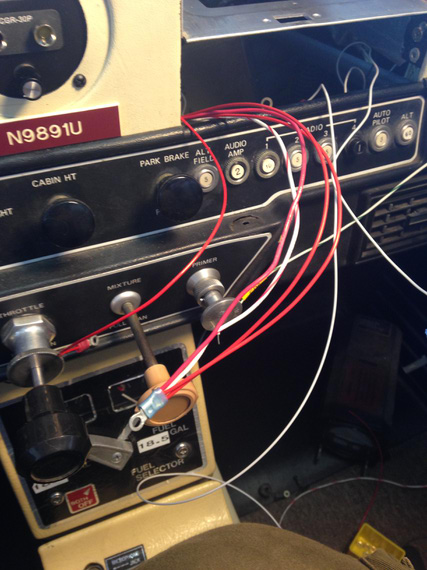
Ring terminals for power
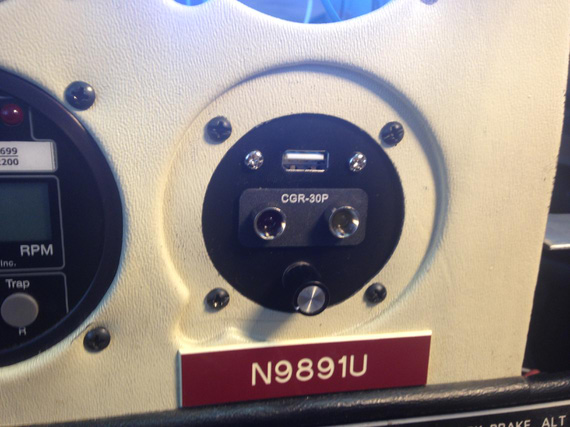
Auxiliary panel installed
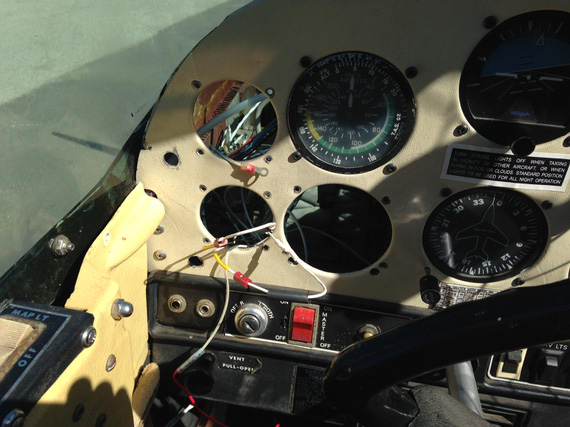
P-leads connected to mag inputs
And then, it was time for the first checkout.
I pull the plane out of the hangar, and hook the rest of things up with test leads.
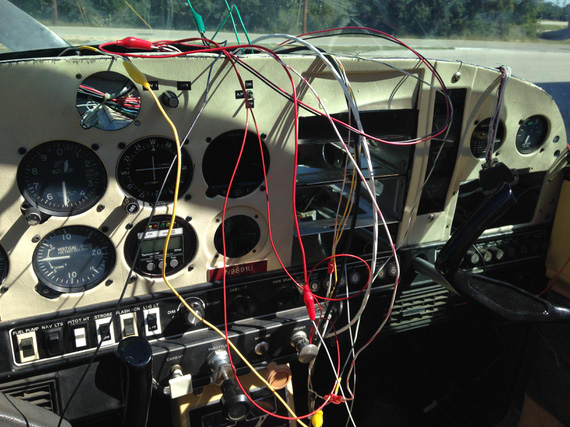
Test leads
Turn the enigne on, and observe!
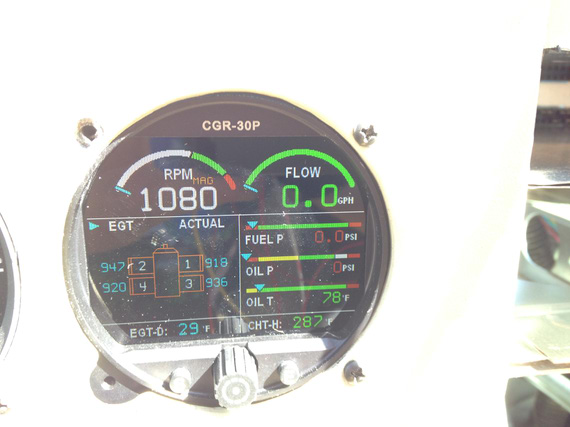
We're on! Oh, wait...
You see the problem? Yes, right mag is dead! Oh, and the old tach (I had one of those fancy Horizon P1000's that tells you if a mag is dead) is showing everything's okay. And, the engine starts doing this rattle sound, and quits. WTF?!
Thoughts about grounding something I shouldn't have grounded (ie, a plead) cross my mind. Then, thoughts about a loose screw somewhere next to the ignition switch crosses my mind.
I re-try. Same thing. Engine starts, runs a few seconds, and dies off. WHAAA??!
... I decide to go take a bathroom break. On the way back, another thought crosses my mind.... I get back, practically running, get into the plane - and sure enough! Fuel selector is "off". I switched it off the day before, before getting behind the panel. Just in case :) Phew.
The "right mag" problem doesn't go away though. I start diagnosing -- touching input wires to different pegs on the ignition key -- no matter which mag it is, "left" is okay and "right" is dead. Uneasy thoughts about a dead wire in the harness and having to undo the whole thing start crowding me... But, I decide to dig a bit deeper. Success!
Can you spot the problem?
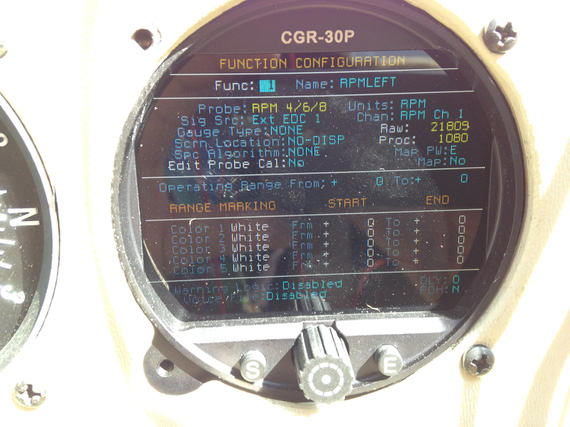
Left mag RPM raw signal value
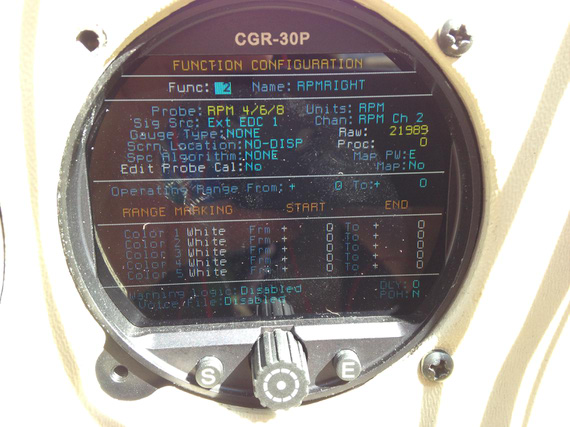
Right mag RPM raw signal value
Bingo! A call to EI, and a quick configuration update fixed that one.
Session 7
It was that time to go to Fletcher's and continue working on it there. Plus, my new wheelpants were ready!
Before I went though, I had to make one last missing bit. A bracket for the ammeter shunt. Did that at the home shop; and did it in a couple different widths to see which one fits better. That bracket was supposed to plug the hole left after old engine gauges removal, and hold the shunt.
By the way, I decided to wire the shunt into the battery leads. First of all, that's how Grummans are wired by default; and second, it actually shows you the actual discharge when you're on battery -- a good thing! It doesn't show the true load when charging the battery though -- just the charge current. That's okay though, as long as charge current remains positive I know my alt is okay.
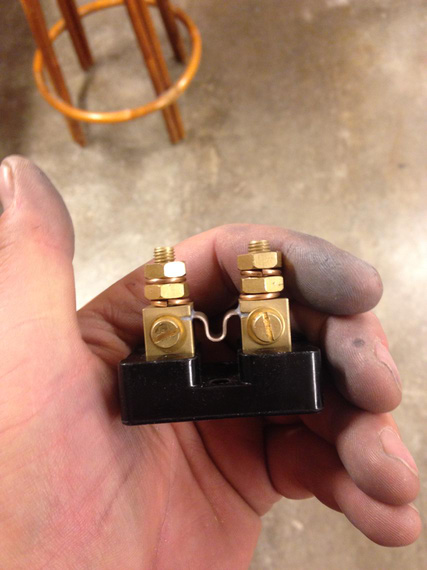
The shunt
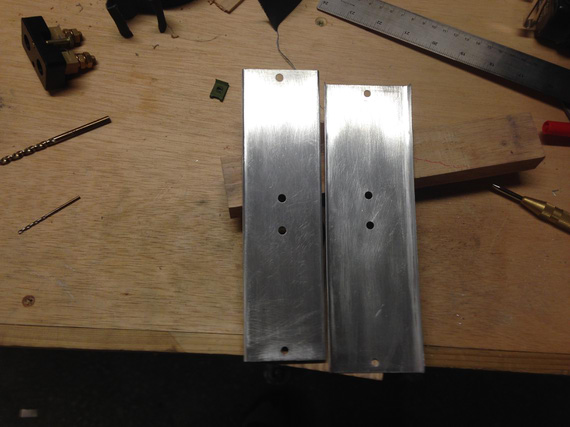
Two shunt plates
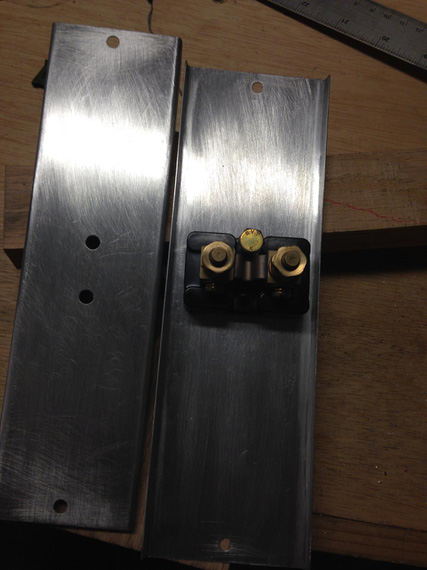
With the shunt
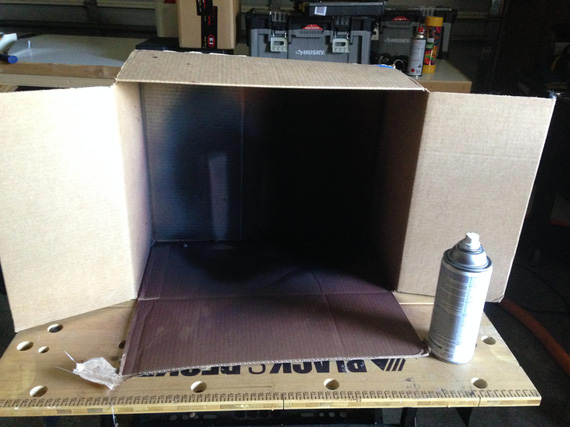
My makeshift paintbooth for painting these little boys
All that bending, sanding, filing, and drilling took about a couple hours in the shop.
Session 8
Onward - to Fletcher's!
We've measured lengths for all the new hoses; and decided to change all of them -- mine were manufactured 15 years ago. Also, found a small oil cooler leak, and decided to replace that bad boy. Oh, and I was finishing up behind the panel while David's guys were working on fitting and trimming my wheelpants.
I took out all the gauges, unwired everything that was to be removed, and installed the shunt... Then, it was time to call that a day since Clayton was supposed to fly me back, and I didn't want to make him go back after dark.
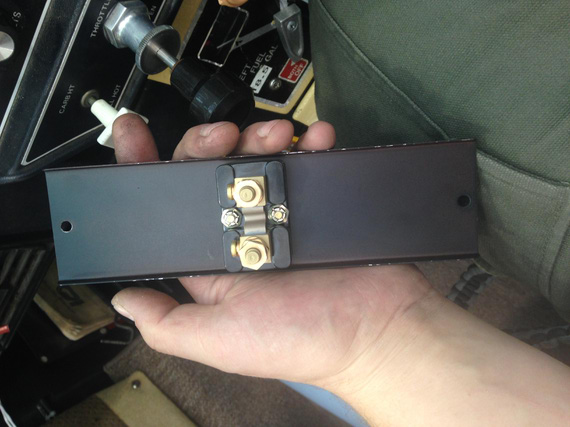
Shunt attached to the bracket
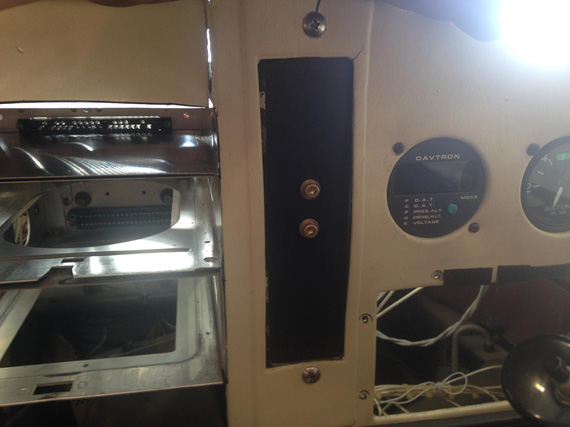
Installed. The bracket replaced old engine gauges.
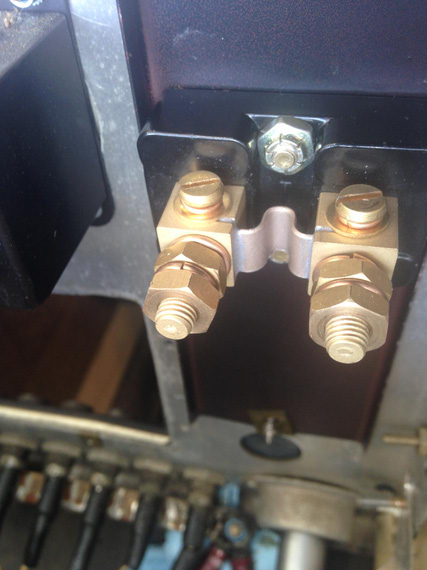
Shot from behind the panel
Session 9
I drove up to Fletcher's to finish up some more work behind the panel.
Another day
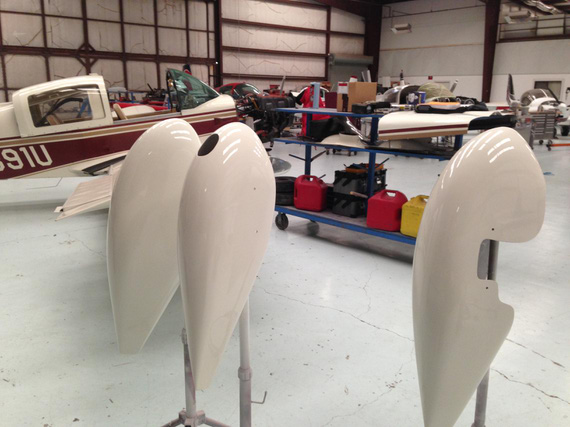
My new wheelpants, all painted!
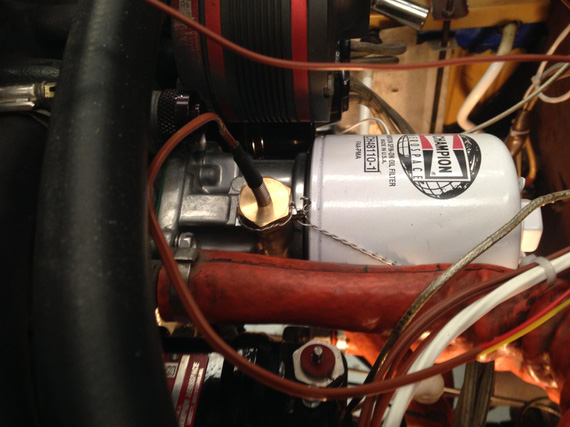
Oil temp probe installed and safetied
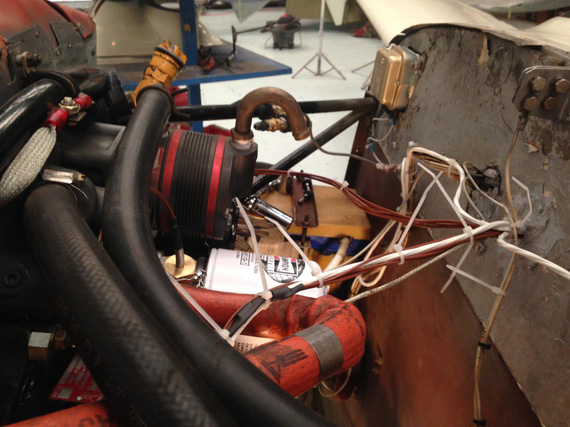
Final wireup
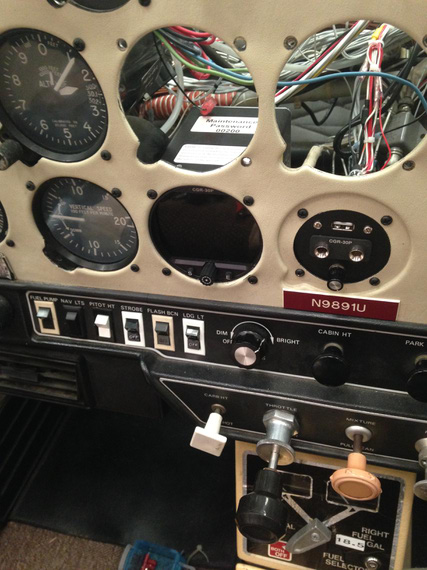
Display installed on it's final place
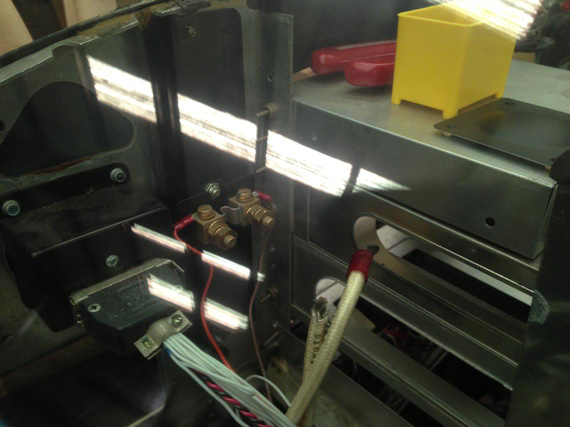
Starting to wire up the shunt
When trying to do the shunt, I realized that I didn't have the right size terminals, and the big enough crimper... Oh well, left that over to another day
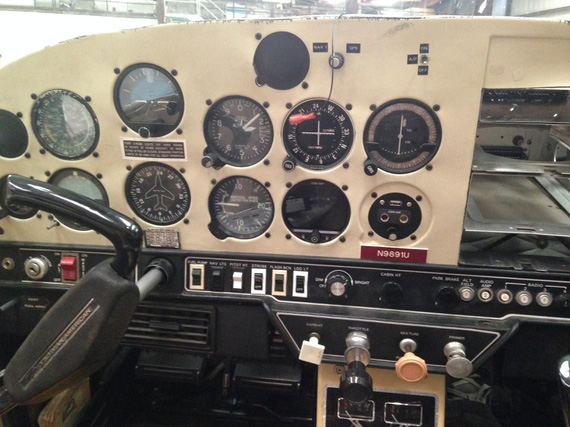
Final panel, with CGR and all the holes plugged
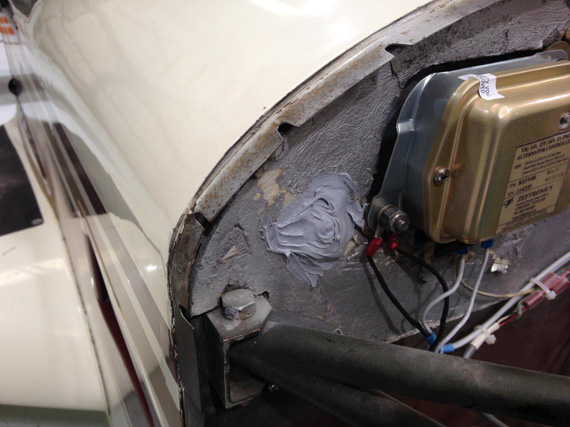
All holes left after oil and fuel lines removal patched
Also that day, I felt a blast and wanted to do more -- so decided to do the last finishing touch and clean up the oxidation off of my mixture knob. Acetone, baby!
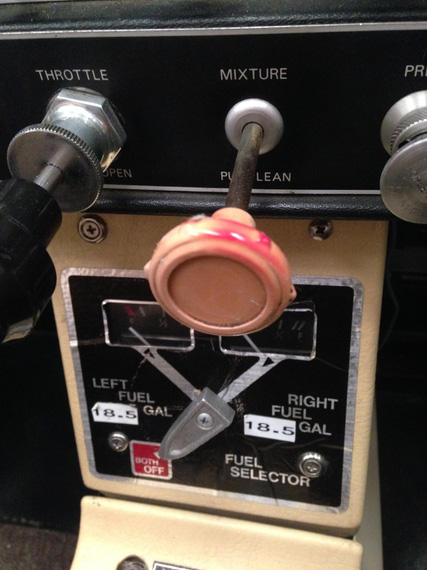
Before
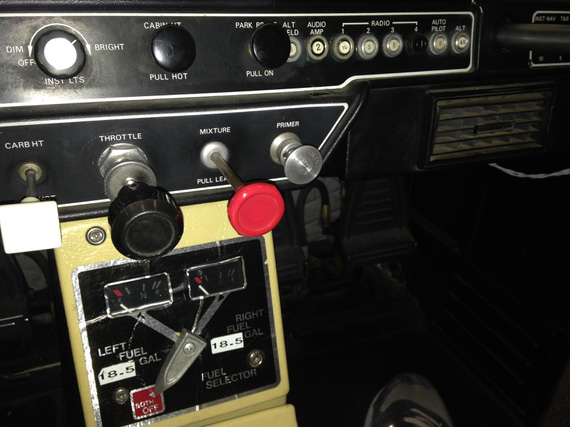
After
Good day!
Session 10
Last one! I arrived about a week later, to find the pants installed, oil cooler installed, and all hoses hooked up. John also hooked up the fuel flow transducer. And I made sure to have that crimper and right size ring terminals.
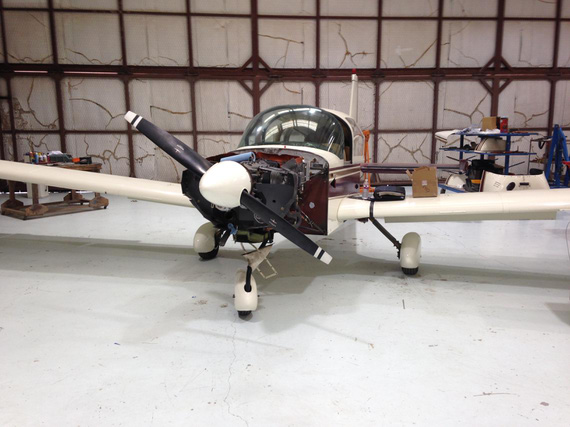
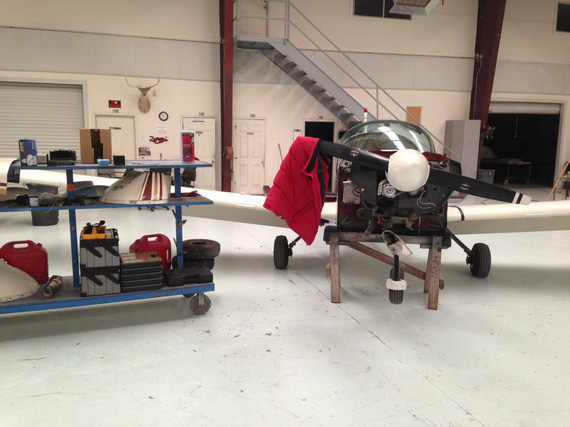
Wheelpants!!!
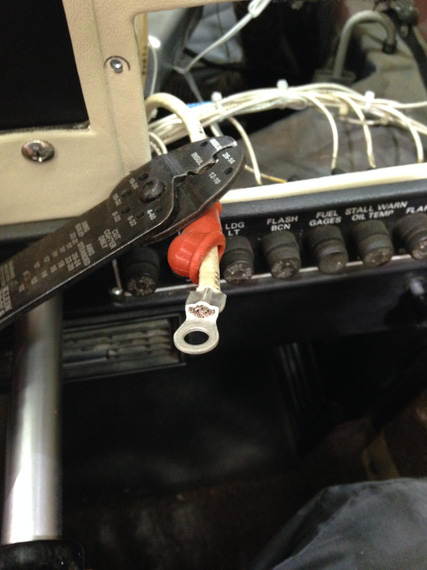
Battery wire ring terminal crimp
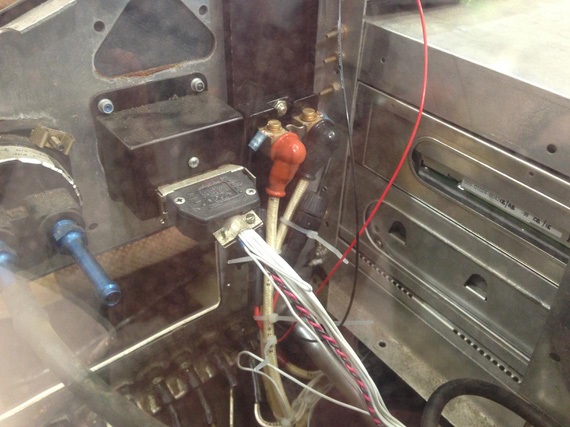
Shunt wired up
After that, we decided to temporarily hook up the cowling, and do the weight and balance, the right way. Too many changes. New oil cooler, new wheelpants, new gauge.. Plus, I know this particular airplane was never weighted at the factory, so why not.
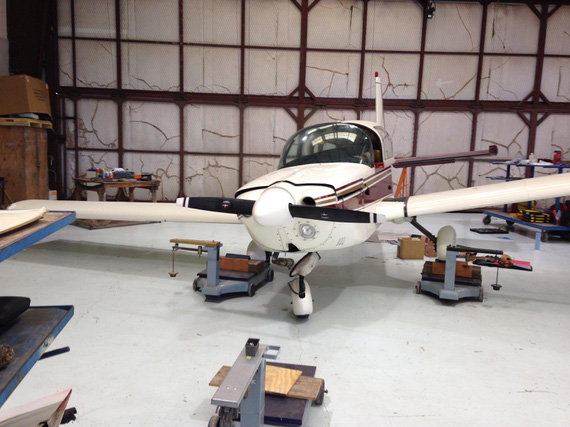
Speak of unusual attitudes! One wheel on the scales.
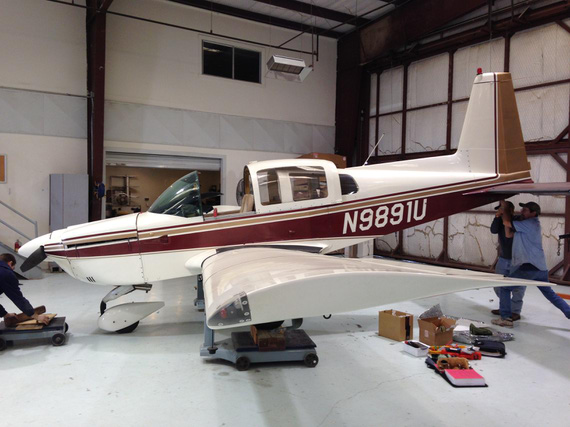
And another. "Pull up, Jimmy!"
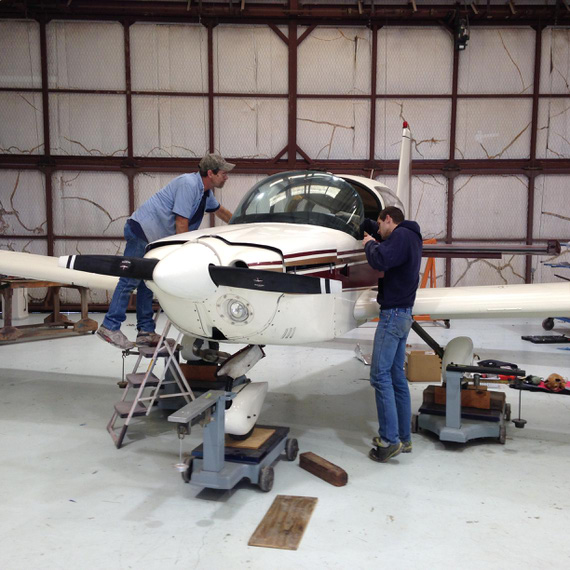
On scales. Leveling.
... and then, it was the moment of truth, sort of. Final checkup. Rolled her out of the shop, fired up, and...
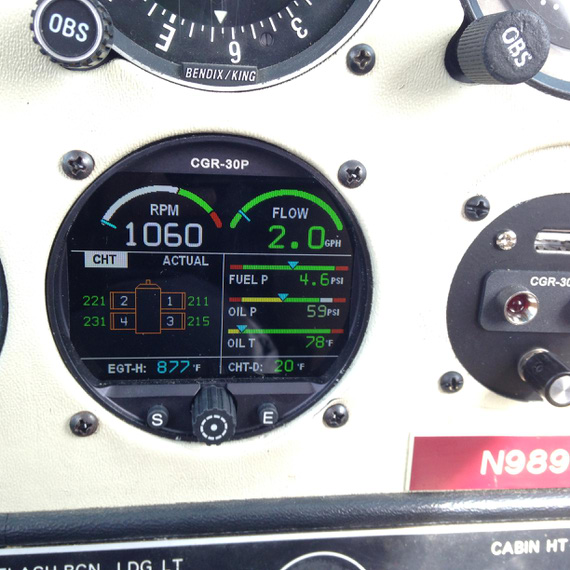
All green!
Shutdown.. checked all hoses -- a little drop of the oil on the oil cooler inlet. John said there was some oil in the hose, to wipe out, and try again.
Did just that. Fired up, and.. fuel pressure shows 0. "Oh shit!"... You guessed, right? Fuel switched off, again! Damn, that thing actually works!
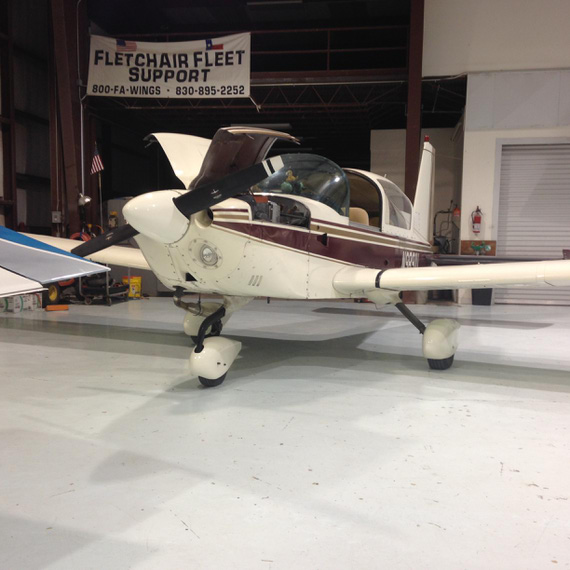
All done.
And so
I suppose I have to give some final thoughts.
Here's what I like about the gauge:
- Compact, takes only one hole.
- Not square! I hate square display engine analyzers. Don't fit right into the steam panels.
- Good documentation. Sometimes missing details like torques, but otherwise good.
- Great packaging and wiring harness pre-setup! Each wire came with a little sleeve identifying it. Didn't ever need to look at the harnesses diagram for wire-up.
- Great software and setup.
- Great support.
Here's what I didn't like:
- Single-stranded, unprotected wires for the probes
- The fact that I had to run the harness into the box, and then connect the box to the display. In my case, it made the wires longer, since they had to run from the in-hole in the middle of the firewall to the side where the box was mounted. Would've been easier to go straight to the display. I discussed this with EI actually; and they said that that was a long debated issue -- and they opted for the box, since that setup helps guys that have their engines far from panels (twins for example). I understand this rationale.
- #8 mounting holes on the "aggregator box" with countersunk screws. Would've been much easier if they had a #10 holes for AN3 bolts.
- Quality of OLP-1 barrel connectors. Very sharp plastic edges. I wasn't comfortable tying them to the wires just like that and had to hand-deburr all of them.
Overall, I love it. Great gauge, and I will be putting that on the Skybolt! :)
If it doesn't work, rename it. If that doesn't help, the new name isn't long enough.
Up ↑
Strobe Shields for Cheetah
... fun with stretcher
| On: | Oct 24, 2014 |
| In: | [Misc] Cheetah |
| Tags: | 9891U, mechanicing, sheet metal |
No Skybolt news, you say?
Well, with dead alternator, tons of work, and unfinished install of a gauge that is supposed to keep you informed about your engine, not much time for the Bolt.
Oh well.
I love to fly at night. It's just something out of a different world, something... else.
There are a few things that are extremely important at night. Most importantly, the old "See and be seen" rule.
To be seen, you need blinking lights on your airplane, nav lights, ideally a landing light, and such.
To see, you need to retain your night vision. That means, no bright white or any color light besides something like red or blue. Otherwise, your eyes readjust for "daylight", and you are at good odds of not seeing other blinking lights... like the ones on an airplane you might fly into!
You see, I don't have strobe shields on my plane. Take a look at the picture below, and imagine you sitting in the cabin.
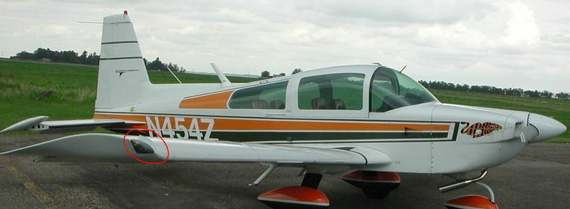
Strobe Shields on a Grumman
You see that vertical little metal "fin" I circled? That's what blocks you from seeing the strobe - a bright flashing white light. If that metal fin is not there, you basically get blinded every second or so.
It's so bad I ended up flying with strobes turned off a couple times I was up after dark. I figured, just one beacon on the tail and no strobes is better than a blind pilot.
And especially now, when the weather in Texas is so nice and night flying is just calling and calling and calling, that became a priority project.
So, on to it!
Those shields go under the wing tip light cluster lens, and the spot they're supposed to go into is curved. Shields themselves are nothing but a curved L - angle out of aluminum.
So, I needed a stretcher.
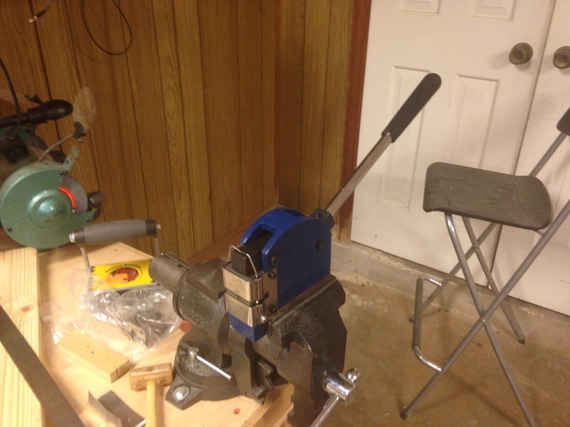
The Stretcher
Prepared one of the wingtips:
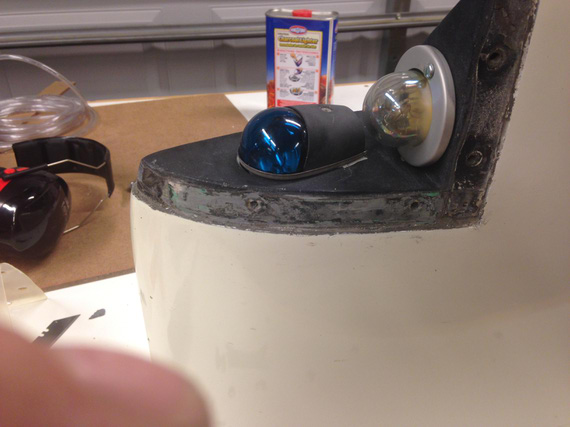
Wingtip light cluster with the spot where the shield goes cleaned up.
First, I decided to make a test piece to get some practice. Never used a stretcher before.
We start with a simple L-angle. I used 6061-T4, 0.025 thick.
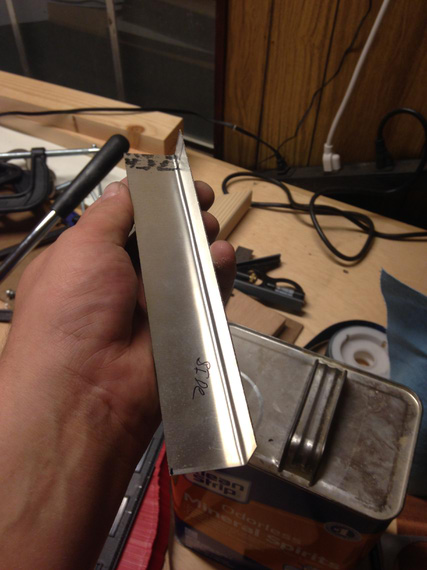
Simple angle
And then, stretch-check-stretch-check... Not bad at all. Just takes time.
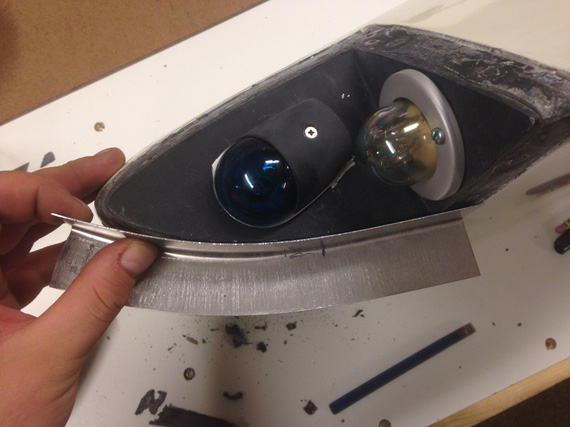
Stretching
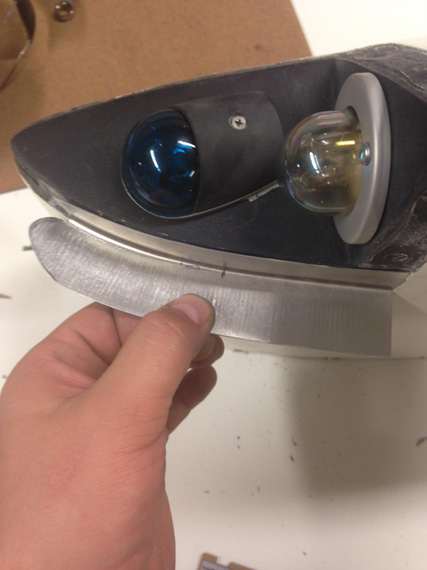
Close enough for a prototype.
You can see on the pictures that the stretcher leaves pretty deep "scratches". On the prototype, I tried sanding them out -- only to get my metal turn paper thin.
On the real one, I decided to fill them up with Bondo.
So, bought some, and made myself a pattern too -- which I printed full size.
To do that, asked Adam, the guy who bought my 28797's share (thanks again, man!) to take some pictures of strobe shield on his Tiger.
And then, just drew around it in Solid Works. Turned out nice.
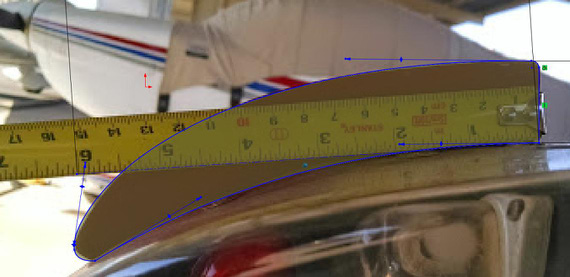
Sketching around the photo in SWX.
Note the tape measure above -- I first drew a line 6 inches long and scaled the photo until that line matched 6 inches on the tape measure. This way I ensured proper scale.
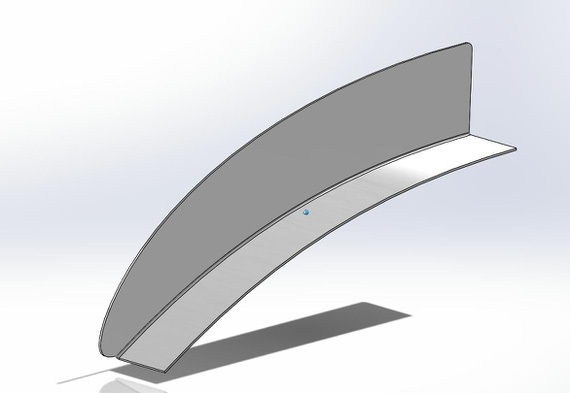
SolidWorks part for the Strobe Shield
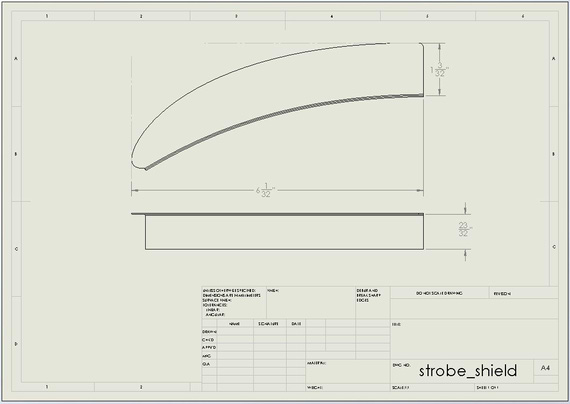
Drawing of the part for the patterns.
So with those patterns printed out, I went to town.
First thing I noticed is that curvature on the wingtip I was working on doesn't match the pattern :). Of course. They're all different (and by the way, on the other wingtip it matched perfectly. Go figure.). I wanted the pattern to primarily get the general shape right.
So, here I am stretching my L shaped angle, and... SNAP!
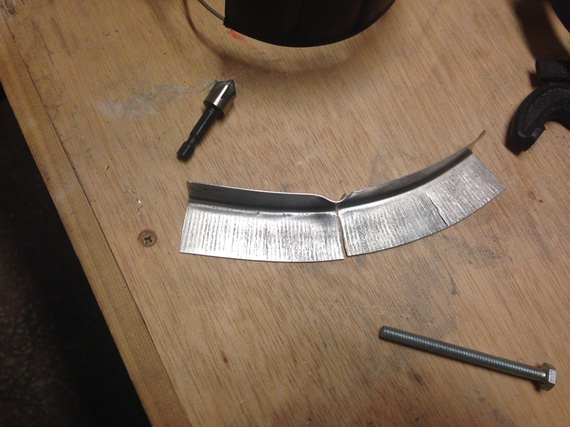
:(
So now, bend another L angle, deburr, clean up, size... sigh.. I went much much slower...
I think, getting it perfect took around 3 hours of careful work. That curve gets aggressive towards the end. And, when I was almost done.. snap! I tore it up again, this time the very tip.
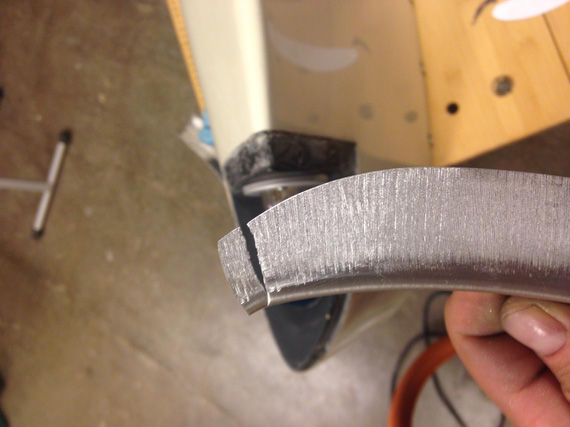
Damn!
Luckily, it actually still was long enough (I started with a piece longer than necessary), so I was able to get away with this tear. Phew.
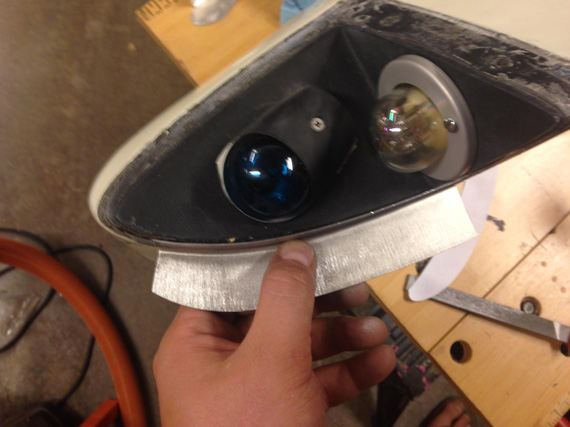
Perfect fit!
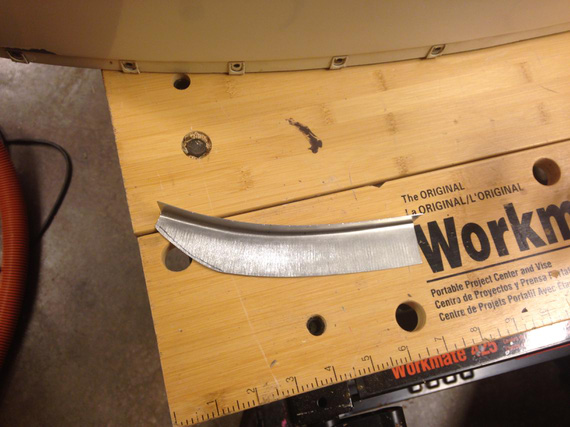
Cut to about the right size
Next, came a lot of sanding, filing, and emery-clothing to get it to the right shape. And then, the holes.
Those had to be duplicated and match up with the existing holes in the wingtip, so I made a simple hole duplicator. No, I'm not paying 10 bucks for that thing!
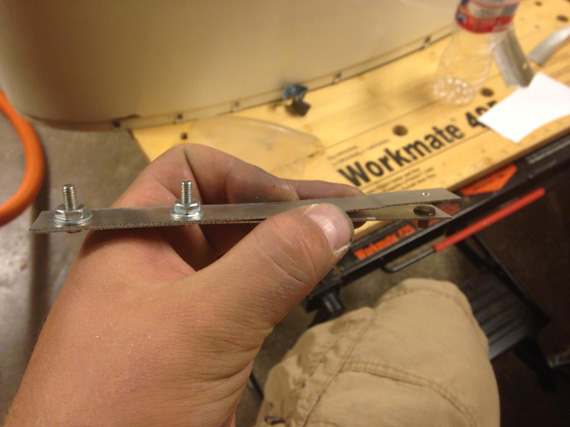
Homemade Hole Duplicator
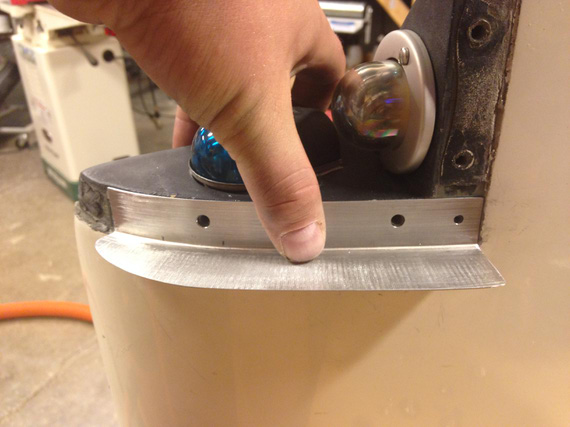
And, we have the holes.
Finally, I filled all the scratch marks with Bondo, sanded it down, and called it a nite. I think it was around 3 am then :).
Next day, the other wingtip.
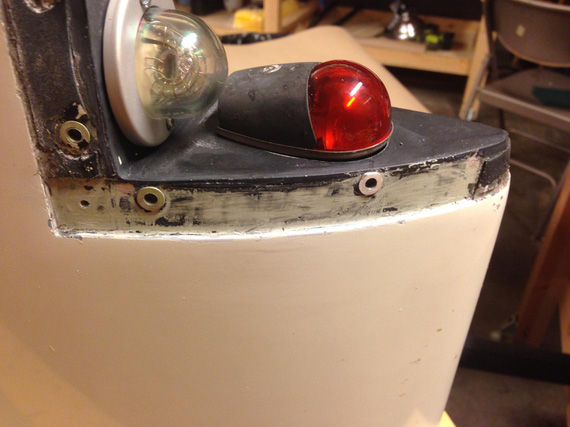
Prep
Notice that this one has rivnuts and not just holes. I now have a theory why this plane is missing strobe shields.
I think the guy who tore all the threads in the fiberglass wingtip and installed those rivnuts (remember, the other one doesn't have them?), was too lazy and didn't want to tweak the holes in the strobe shields to match with the rivnuts. That's my guess.
Initially, I thought about making oversized holes in the shield, but that would put one of them too close to the edge. Then, I tried filing the rivnut down a bit, but decided that I'm not gaining much there, and that notching the strobe shield base would be best. That's what I ended up doing.
I made just the first notch, and to stretching it was!
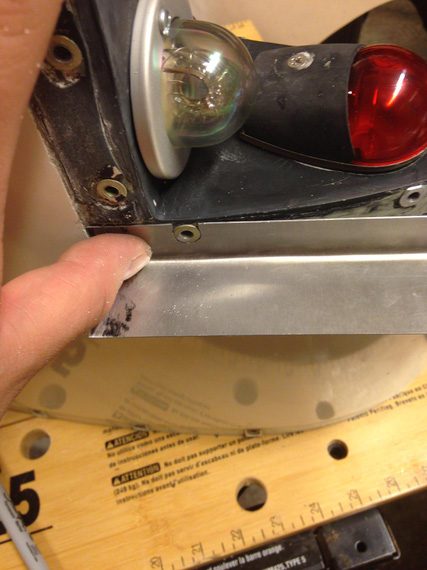
First Notch
When it was close to the other rivnut, I notched area around it.
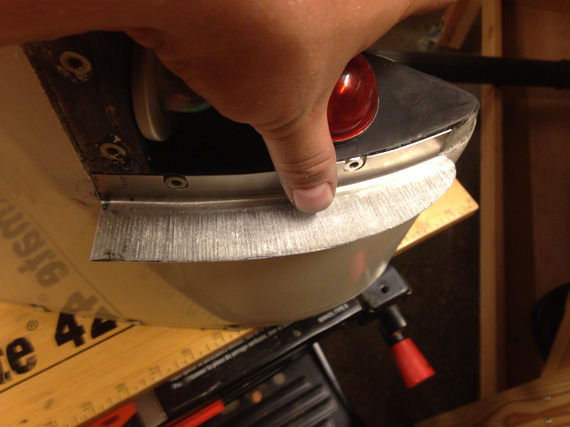
Secont Notch - close!
They came out perfect.
And then, tons of filing, shaping, sanding, Bondoing, sanding, washing, and...
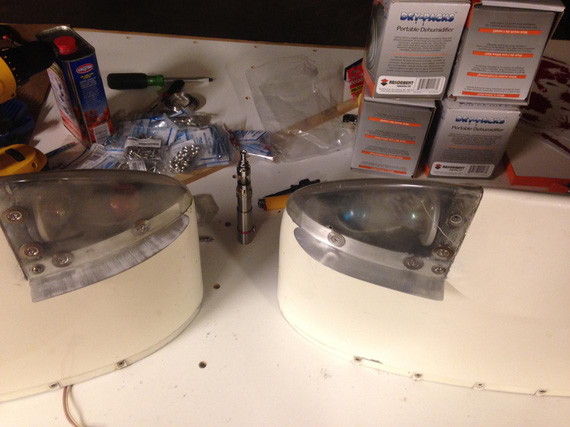
All done!
They're not quite complete yet. I'll have to clean up the rest of black tape from under the wingtip lenses and replace them with new ones, but that'll come after painting the shields. I'll ask Dave Fletcher to paint them into the same Imron he's gonna use for the (now soon to come) wheelpants.
And you know what.. that was fun!
If God had intended man to fly he would have given him enough money for a Bonanza.
Up ↑
Banging Sheet Metal
making bulges
| On: | Sep 03, 2014 |
| In: | [Misc] Cheetah |
| Tags: | sheet metal, cgr30, mechanicing, 9891U |
So on the Cheetah side, I am slowly ramping up for replacing all the engine gauges that I currently have on the panel with the CGR-30. I got it at Oshkosh, and finally, the box arrived a couple weeks ago.
Ain't she a beauty? Assembled on the bench for testing and familiarizing myself with it :)
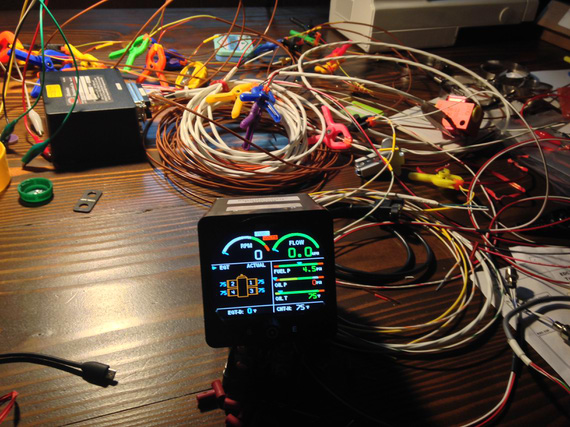
Ain't she a beauty?
Because of it, I will lose a few 2 1/4 inch round gauges, and I decided to make some covers for the panel, not to have unsightly holes in it.
Of course I could've bought them from Spruce or whatever, 5 bucks a pop, but if you know me, I would rather spend hours making something I can make. Besides, this is a nice first sheet metal exercise :). And, I wanted a nice domed bulge on each one of them. Just Flat wasn't enough.
So, I got to it.
First iteration was making a jig that would sandwich the sheet between two boards, with holes over and under the metal. Then, I would press a "piston" thru the holes using my vice as a press. Pictures are better than a thousand words.
Three piece jig + soon-to-be-'piston'. Oak boards sandwich the sheet between them. Ply plate has the "piston" and is used as a backing plate for it.
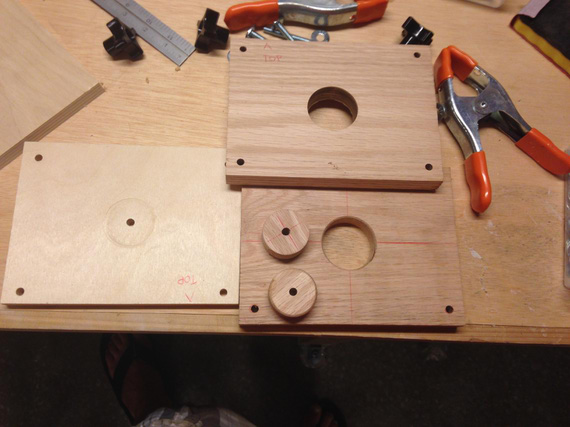
Jig pieces
That didn't work out. Vice jaws are not perfectly parallel, and the "piston" is not exactly the same diameter as the holes -- so it gets misaligned, even though there are four guiding bolts in the corners... Here's the jig assembled, and one of the first tries.
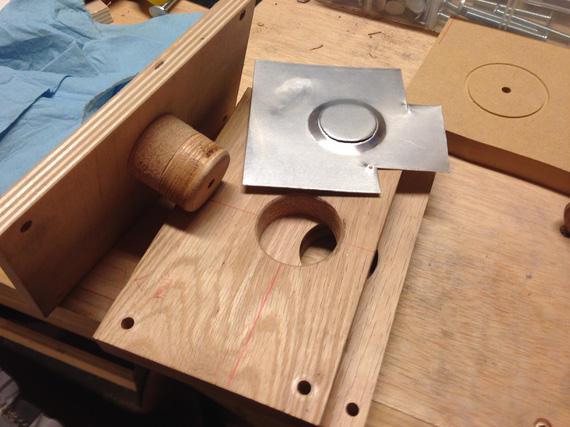
First try...
I think I tried it two or three times, with the same result.. no matter how much I tried to align the "piston", it would make a bit more pressure on one side of the jig than on the other, either resulting in a tear, or in an uneven "bulge".
Out of desperation, I took a piece of metal, laid it over one of the holes in the oak jig board, and started banging away - and was surprised! I was getting almost what I wanted, just not clean enough.
I tried sandwiching the metal between two plates and banging via the top hole - and made a fairly nice bulge! The edges weren't very clean, but I reasoned that if I opened the top hole up a bit more, that would give me access to the edge, and I will be able to bang on the edge a bit more, defining it better.
Ha! No. Same stuff.. I was able to make a fairly nice bulge, but the edge will be all "torn" and ugly.
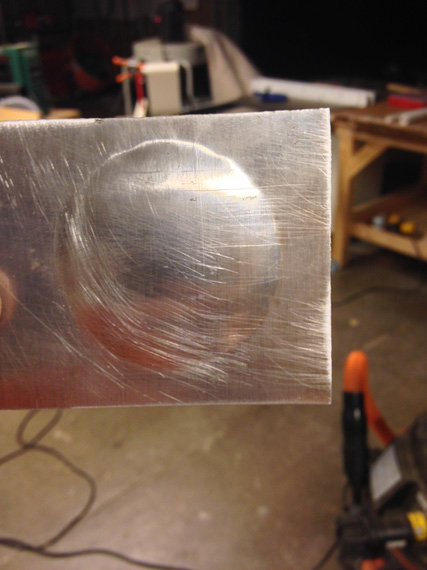
Bulge is there, but the edge is god awful
I also tried putting a profile on the bottom, "die" plate of the jig, with a very sharp edge and curvature under it.
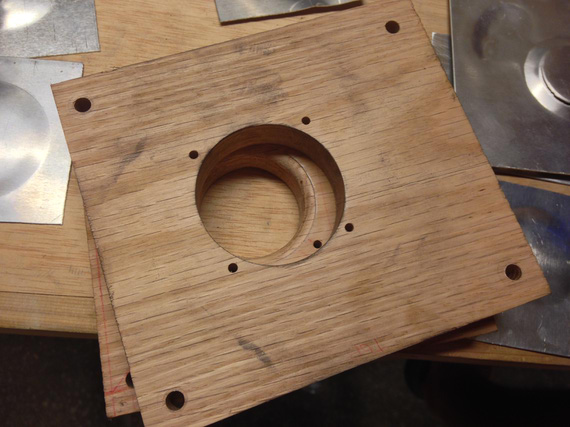
Second jig
No luck. I think I spent a couple hours, making over ten "bulges" and trying different hammering techniques...
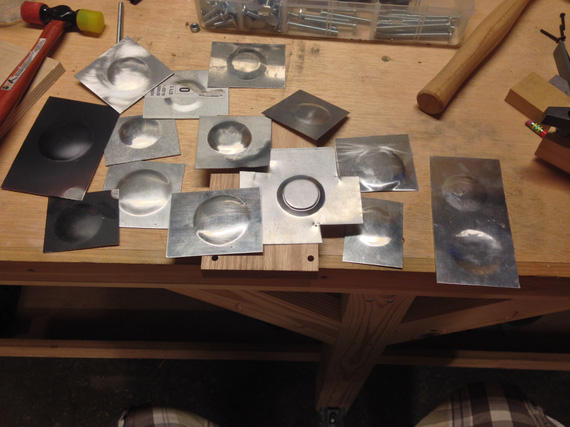
All those tries.
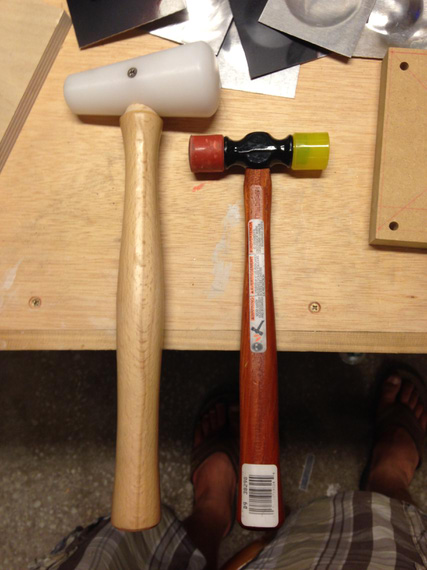
The Two Hammers
So I gave up, and emailed Bill Rose, the gentleman who gave me all the SolidWorks parts for standard HW, and, in general, helps me a bunch with my silly SWX and other questions, for advice.
Bill suggested using MDF for the jig instead of oak. Apparently, irregularities in wood grain would make it hard to define the edges uniformely. He also suggested using corking tools akin a big "chisel" on the edges to better define them.
..and.. it worked!
The third jig is ugly, but it works. Upper hole is enlarged just to get access to the edges (I didn't bother making the top hole concentric with the bottom or even round; there was no need).
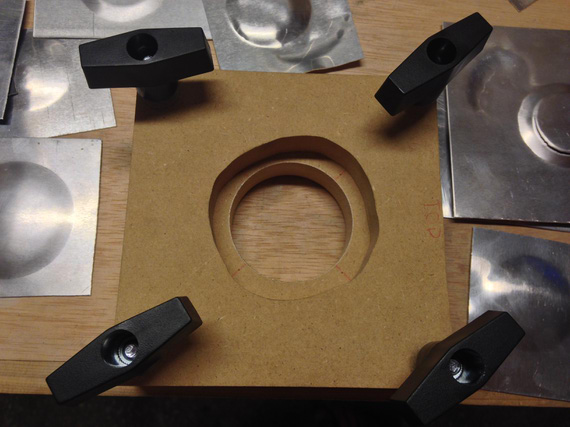
The third jig
I used the two-headed plastic/rubber hammer's rubber head as a corking tool, lightly hitting it with the plastic mallet, and having it slide from the edge into the center of the bulge.
This bulge still has some "orange peel" on it and needs to be smoothed out, but the edges are very well defined!
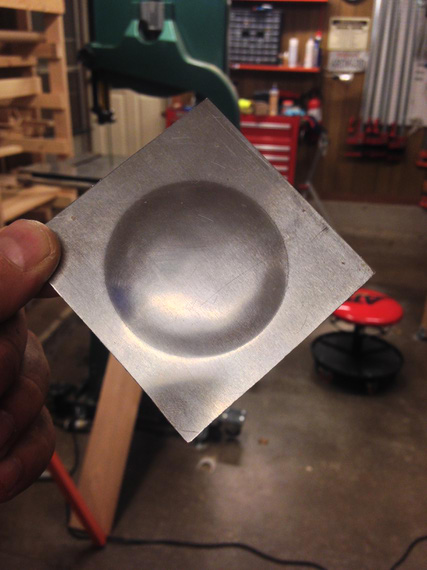
Check out those edges!
But of course, I screwed up again - the hole in the bottom, "die" plate of the jig, is of a wrong diameter (I used the wrong holesaw). But hey, at least I think I figured that technique out!
Good evening in the shop tonight :).
Why did God invent women when airplanes were so much fun?
Up ↑
Ken Blackman's Story
... on landing
| On: | Aug 18, 2014 |
| In: | [Misc] Cheetah |
| Tags: | 9891U, flying, stories |
After I posted my story on removing the footstep to Grumman Gang mailing list, Ken Blackman of AirMods NW fame wrote me an email.. He recognized the plane, and apparently he flew it back in the 70s and had a great story to share... Here it is, below.
Ken Blackman's Story
...we were so desperate for airplanes we were picking up "drop-outs" from other dealers canceling orders when they came available and this plane was one (sans the little tanks) we bought while at the 1977 Dealer Convention. We has also agreed to purchase a '75 Traveler "Repo" from Grumman Credit that a dealer had faulted on. It was in Oklahoma City. Maynard took airlines to OKC to get the Traveler and I was going to fly the Cheetah to San Jose, drop it there, and fly the AA-5 on up to our facility at Everett, WA for needed mechanical work and sale prep. (We had a much better maintenance facility at my end of the operation) I was within a half hour of leaving when the delivery center paged me to the phone. It was Maynard and he was asking me to come to OKC and pick him up at the Traveler was a total piece of crap.
I flew there and we stayed overnight to get a got early take-off the next day. This was in January and there had just been a minor snow fall all through our intended route through Albuquerque and on west to California. The weather was clear the next day and winds were forecast to be light & variable. There was a big high pressure coming into the NM area so we figured we would make ABQ the first leg, refuel, and on to Prescott. The 37 gal. usable put us on a thin edge for the first leg but we figured we had close to VFR reserves. Tracking the VORs, measuring the distances and doing the math I was maintaining a steady 145 to 147 MPH and flying at the higher altitudes we were getting real good economy. From Tucumcari to the next VORTAC I calculated 146 MPH and the previous leg was 147. Marking the time from that one to the next one would require a certain number of minutes enroute so we continued along in smooth air. Maynard was sound asleep in the right seat. When the stopwatch showed we should be arriving at the next fix the "TO/FROM" didn't flip. I waited another couple of minutes, then started looking at my chart and the ground for references. (Lots of luck over the desert.) I woke Maynard up wrestling the chart and he asked what was going on. I explained we should have been at the check point 10 minutes ago but weren't. We both started looking for ground references and finally found two roads that intersected along our route line and identified we were still a good 25 miles from the VOR.
I called Flight Service and was connected to a briefer in ABQ. I explained our situation and he said there as a weather phenomenon occurring called a "Venturi Effect" I had never heard of. The high pressure area coming into the ABQ area was causing wind to flow into the lower pressure area we were in and, coming through the Sandia Gap east of ABQ, set up a headwind that dissipated just east of our position. We had a head wind of nearly 50 MPH! This definitely put Albuquerque out of range but retreating to Tucumcari would not work because we would lose the wind very soon and not have the push needed to get there. Santa Fe was possible as we would be flying about 80 degrees to the wind direction and it would dissipate before we were half way there but it was a stretch and they were having snow pellets and possible freezing rain in the forecast. Looking at the chart I found a dirt strip at Kline's Corners right along a freeway and cross road intersection. It was within our range so we headed for it. Arriving at the intersection and identifying it we could only find a ragged old windsock on top of a collapsing building in the middle of a lot of snow. "NFY"
We flew low over the cross road but there were power and phone lines that would prevent landing on it. There was the freeway and an underpass where that cross road went over it. There was a Chevron gas station there with the on-ramp to the interstate and traffic was light. We made a low pass to check for obstacles and it was good for about a half mile past the on-ramp. We made a left hand downwind and tried to set up a landing but there were a couple of cars we were concerned about followed by a couple more that we didn't trust to not panic and run into us if we landed in front of them. We went around again and had a similar problem plus two cars were coming down the on-ramp. We were flying on the tank that read the most fuel and, about the time we turned downwind, the engine quit! Switched tanks and decided we were committed this time. There was a Semi just going under the overpass and another one a mile or so behind it. Trusting that the driver of the 2nd one would not run is over, we settled down to land about where the on ramp joined the freeway.
We taxied off the main lanes to the shoulder and turned 45 degrees to the left and shut down. The Trucker pulled his rig up to block anyone from hitting our plane and got out his flairs. "What'd ya do, run out of gas?" he asked. "Nope, but close. If you think you are going to run dry, for God's sake, land before you do!" I replied. About that time a state trooper came flying off the opposite set of freeway lanes, bounding across the dirt, snow covered median and blocked the right lane of the highway. He had picked up the CB call from the trucker. After explain our situation to him he asked if he should call a tow truck... "NO!!!" I asked if he could just block traffic back of the in-ramp and we would taxi it up to the gas station. He did and we did. (I had to zig-zag through the edge of road snow markers but made it fine.)
This was before EAA was working with MO-GAS and we didn't know how it would react to it. We decided to use the higher octane unleaded so stuffed a hose in each tank and filled it up. The cop blocked off the freeway again and one of the guys from the station drove his pickup to park under the power lines and turned on his flashers. We taxied back to the underpass to give us a little more runway I did a run-up only to have the engine run very rough. We thought the car gas might be causing this then realized we were about 7,000 ft, MSL, and full rich was not the correct procedure. Leaned it out half way and run-up was fine. Take off was long but we were well above the power lines and on our way to ABQ. The damned thing ran better, and burned a little less per hour with the car gas. We decided to park it in ABQ and get a good dinner and night's sleep before flying on the next day to San Jose.
We decided to leave the plane at RHV and I flew a used trade in 2 place on home. The owners of Bede Micro (Keith Henshaw and Rod (his partner)) were close friends of Maynard and had become so with me. They developed the Honda Turbo conversion for the BD-5 and stretched the fuselage. They had a facility to help people build their BD-5 kits with their tooling and fixtures and assistance. They were talking about getting a Grumman for their running around and bought '91U soon after it arrived.
There was a good article about Keith in Sport Aviation, I think the January or Feb. issue this year, about his achievements in supporting the BD aircraft and development of the Honda powered version. (He passed away last winter in his late '80s.)
Well, now you know the bit of history of your airplane that is not in the log books.
Ken
There are some flight instructors where the student is important, and there are some instructors where the instructor is important. Pick carefully.
Up ↑
Messing with Cheetah, Footstep and Friends
... all in TX summer
| On: | Aug 18, 2014 |
| In: | [Misc] Cheetah |
| Tags: | 9891U, flying, mechanicing |
Weekends are plane days now. I fly to my friend's hangar and mess with 91U, the Cheetah (I still need a name for her :) ).
This past few weeks Ive been doing little stuff here and there...
Cleaned up the nav lights lenses.
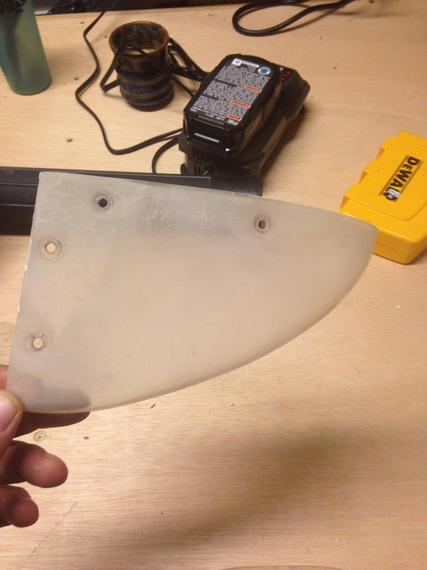
Before
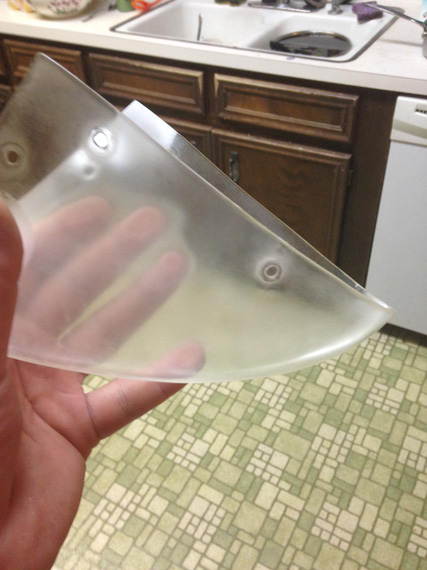
After
... they still look like crap, so I'll probably bite the bullet and buy a set of new ones.
Oh, and I need to make those vertical "shields" that cover the strobes away from the pilot's view.. Ill probably get the new lenses after I make those shields.
Started getting under the panel and cleaning things up, preparing for the CGR-30 Engine Monitor installation (I got one for a really good price at Oshkosh).
Taking the glareshield off, found this:
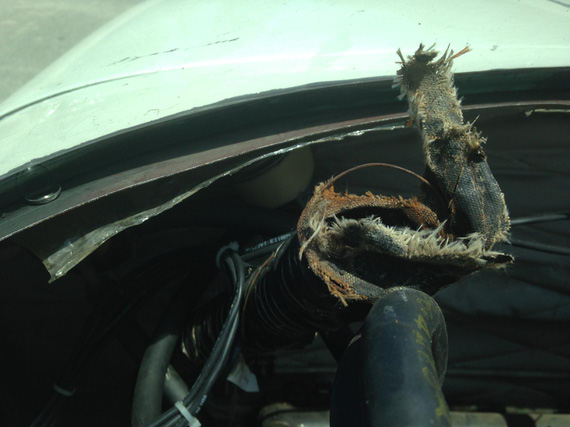
All dead defroster SCAT tubing
I'll need to replace all that...
Started taking the old gages off and thinking about where Im gonna put what.
I'll need to make some plugs for the holes emptied.
Right now, I have analog and half-broken EGT (the selector switch is dead), analog CHT that's not hooked up to anything (wires are butted, and there are no probes installed). Those are going away. HOBBS is also going away. This is all being replaced with CGR-30, so I get a few empty holes and options to move gauges around. I'll probably move the clock and the vac suction gauge so that they're better visible.
Pictures will come later when the work is actually done :)
This last weekend started quite jolly with me putting in the engine grounding straps (didn't have them when I bought the plane).
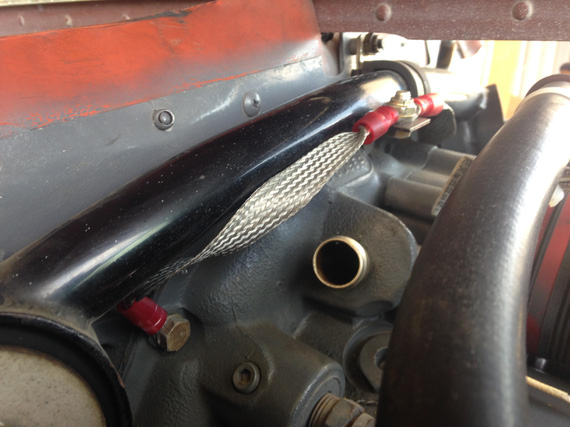
Grounding Strap 1
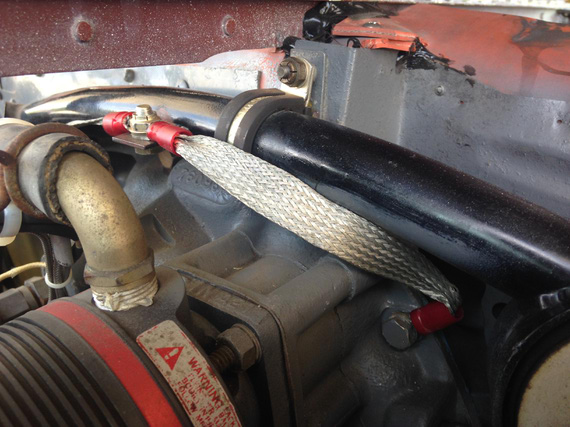
Grounding Strap 2
And then, I decided to deal with something special; the Foot Step. You see, I don't like them. I think they're ugly. So, I decided to remove them, and make a couple of fairings to cover the holes up and to replace the original plastic fairings.
Beej helped me (that means, "did it himself" rather ;) ) whip out the first test fairing.
And then, we needed to take off the steps.
The steps are bolted thru the fuse honeycomb with a couple of backing plates. There are two bolts, top is aluminum one (the thought is that it will shear before the bottom one and therefore prevent leverage and damage to sensitive fuse sidewall honeycomb). I believe AG-5s (later Grummans) replaced them with steel bolts; and people had some serious honeycomb crushing issues because of that.
Aaanyway. The bolts come from the inboard side, thru the streamlined tubing of the footstep and a couple bushings, and fasten themselves to the nutplates riveted to the other side of the footstep. Here's the schematic from the Parts Manual.
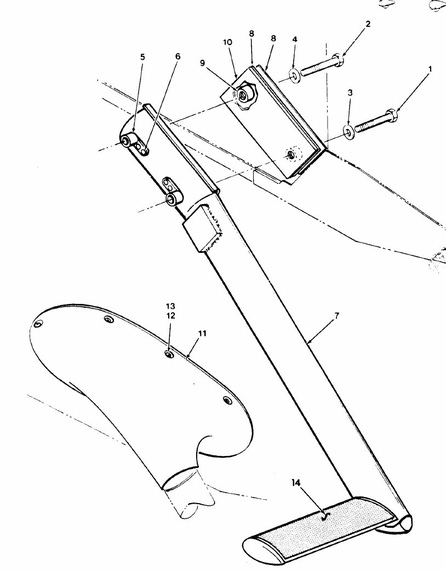
Footstep Schematic
There are a couple more bushings inside the streamlined tubing that aren't shown...
Also, the footstep sits in the wing root. You can kinda get access to the bottom nutplate if you take the fairing off. The top is right in the center of the wing root. And wing roots on Grummans are not fairings. I don't know how to remove one without pulling the whole wing (and Im not quite ready to do that yet...).
So anyway, happy me, I undo the rear seats and the cover that covers all the business under them, take the wrench, "assume the position" and start undoing the bolts. The first thing that happens is the rivets holding nutplates snap off.
So now, I am having Beej, not a small guy at all, under the plane on a creeper, holding the nutplates. We did the bottom one fast, the top one is a pain in the ass because it's, like I said, in the wing root. Had to take the flaps torque tube inspection plate off to get to it, and even then only could hold it with fingers.. the torque tube is getting in the way, you can't get any tools in there.
I should also mention that the bolts sit right under the back seat framing that holds the seat, and I can't even see the bolts I'm undoing without an inspection mirror. Gladly, not much there, so I've found them easily.
So, we undid the bolts.
Hehe. Now, to getting them out...
We were able to tap the bottom bolt out fairly easily. Well, it's right there under the footstep fairing, so that wasn't a problem.
The top bolt is the whole other story...
You see, the bushing inside the streamlined tube is steel. And the bolt is aluminum. The Mother Nature decided to give me a practical lesson on dissimilar metal corrosion.
So Saturday, as this was progressing and it was getting late (and time for Beej to go home), we tried pulling it, rotating it with a ratchet while pushing on the side. No joy.
Beej had to go. We had to disband.
I parked the plane in transient on Beej's field (I couldn't fly back with the footstep dangling like that on one bolt:)); and went home, determined to fix it. Had to have Dash pick me up...
Talked with Ben for over an hour.. Got a lot of good advice. "Heat it up". "Liquid Wrench". "Die Grinder".
Furnished a whole bunch of various tools. Some of them will probably scare some aircraft mechanics :)
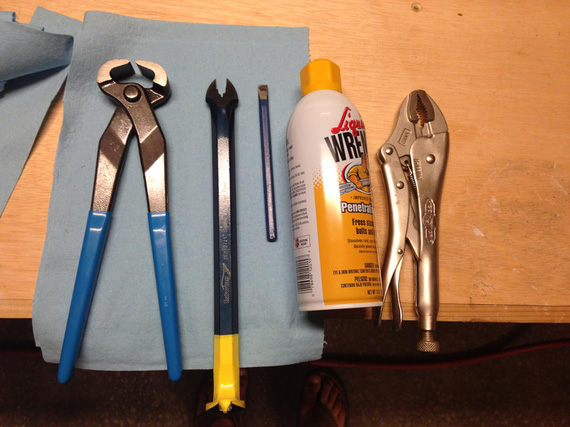
The Tools To Pull That Bolt
Note the pry-bar notch enlarged to take an AN5 bolt. I also custom-beveled the cold chisel to give it a sharper angle (hoping I'll be able to get it under the bolt head).
Sunday.
Put a bunch of Liquid Wrench on that bolt. Tried the chisel - nothing.
Did I mention that I couldn't see the bolt, only feel it? :)
Tried pulling, rotating with Vise Grips - nothing.
Soaked in more Liquid Wrench. Nothing.
Looking at it from the inspection mirror, it was clear that I could cut the head off if I could see it (I would never try that blind. Ever).
So, the mission became the "See The Bolt Head" one.
Bottom interior side panel, if came off, would reveal the bolt from the top and give me access.
Top interior side panel was blocking the bottom interior side panel.
Also, seatbelts and a little latch for the rear seat.
So, off went all of that.
Finally, I saw the sucker!
Tried pulling it out a bit more, now when I had a better access point.. no luck.
Oh well. To The Dremel!
The rest is...
History :)
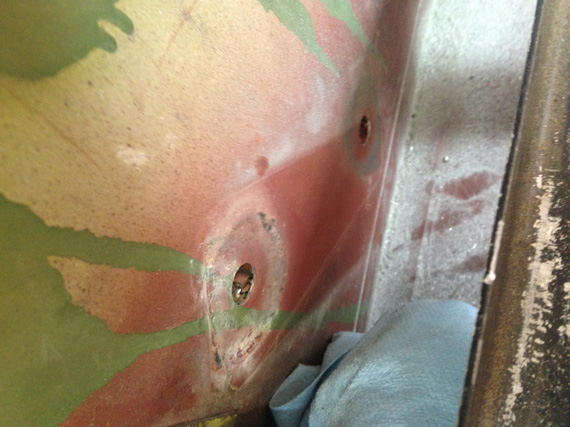
Holes after the bolts were out
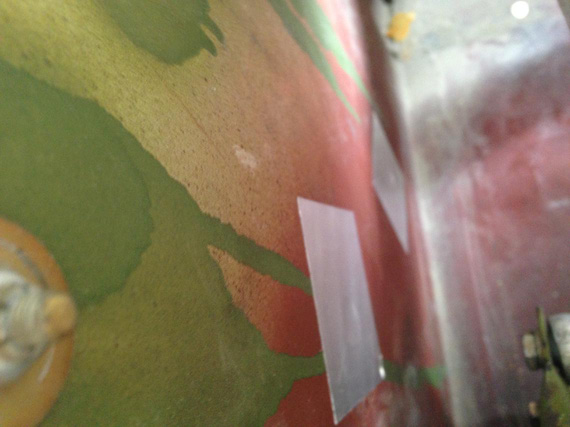
Patched with aluminum tape
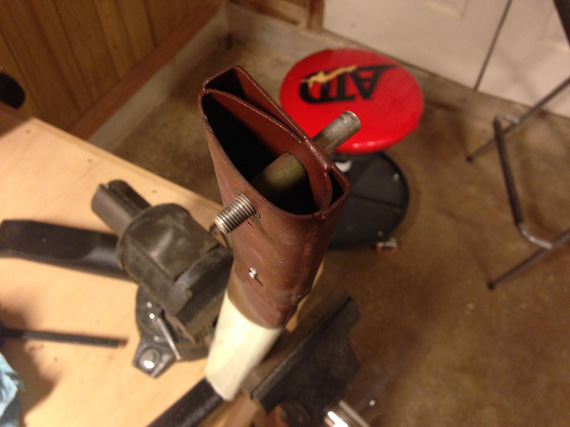
The footstand, with headless bolt shank and the bushing
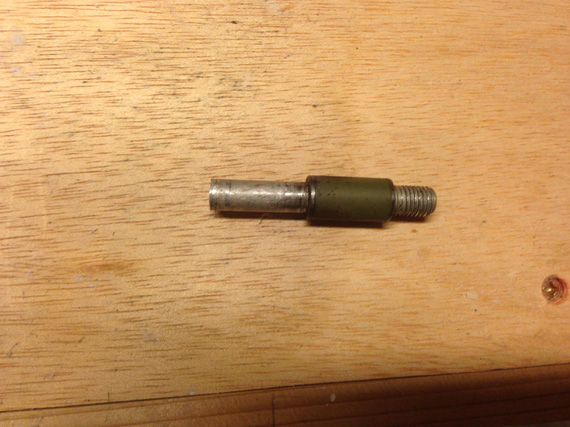
The nasty, nasty bolt shank with the bushing "welded" onto it by corrosion
But the Mother Nature wasn't done with me yet.
Buttoned the plane back up; pulled it in front of the hangar, and took Beej to lunch.
Came back.
Realized that I left the keys to my car in my wife's car parked at a terminal.
Had to walk there and back. A good mile.
Oh, did I mention the 100 degree Texas summer? :)
Coming back, needed to push the plane back. But no - the parking brake on one of the wheels was completely and utterly stuck.
My Cheetah is a 77, and uses mechanical parking brake. Ive heard before that they get stuck; but I always was able to get them unstuck by taking the brake off and tapping on the pedals with my feet.
The way they work is there is a metal plate that has a hole thru which the brake cylinder's piston's shaft goes thru. There's a chain that pulls it up, making it eccentric with the shaft, which locks the shaft in place.
Well; apparently it got a little more hot while we ate, and that plate just didn't want to go down. Tapping the pedals while putting the brakes on and off didn't do anything.
Oh, did I mention that I would have fiddle with it, get out, try to push the plane back, fail, get back in, all in a 100 degree weather? Not fun.
Finally, gave up and "assumed the position" again. That's when you dive backwards under the panel with feet hanging out of the airplane.
Wiggling it for a minute or so finally yielded a loud snap, and it was unstuck.
Phew.
Flight back home was uneventful :).
Bonus pictures:
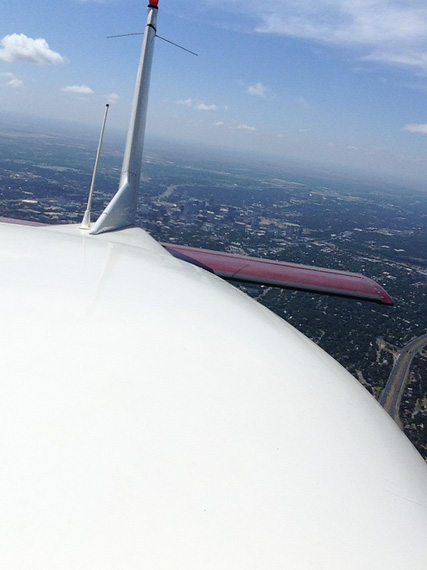
In flight, looking back over Downtown Austin (I risked my phone taking that!)
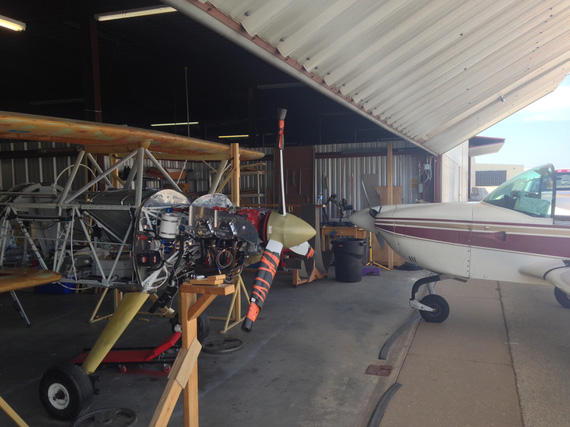
Skybolt: "Are you talking to me!?" Cheetah: "No, are you talking to me?!!!"
Lack of planning on your part does not constitute an emergency on mine.
Up ↑
An Unintended Trip
meet 9891U
| On: | Jul 07, 2014 |
| In: | [Misc] Cheetah |
| Tags: | 9891U, flying |
Heh. Multi-week moments of silence seem to start taking hold here. I haven't got much time to work on anything lately.
You see, I have finally decided that I am going to get myself something to fly while I work on the Bolt. I haven't flown for some months, and the withdrawal was settling in pretty badly.
Problem is, I moved to Texas about 8 months ago. Back where I lived before I used to own a 1/3 of a Grumman "N28797" Tiger; flying her at least once a week. I often would spend weekends bouncing between airports and hangar-flying in between hops, and took her to Oshkosh last year.
After moving, the only airplanes I was able to access were ratty Cherokees and Cessnas in a local flight school; and I could no longer go on my day-long hops just because it was too expensive. Writing $400 checks every time I went flying just... hurt, and I ended up not flying much.
So, a decision was made. I was to buy a plane.
A few strategically placed calls to my friends back in California immediately yielded a very good deal on a Grumman Cheetah (it had to be a Grumman of course) :).
Now, Cheetah is the same airframe as Tiger less 200 pounds of max gross and an O-320 instead of an O-360. Figuring that I now live on the right side of the Rockies and don't need to cross them much, my thinking is that Cheetah will actually suite my mission much better.
So, I hopped on a Winged Tubular Human Transporter, and was in CA a few hours later.
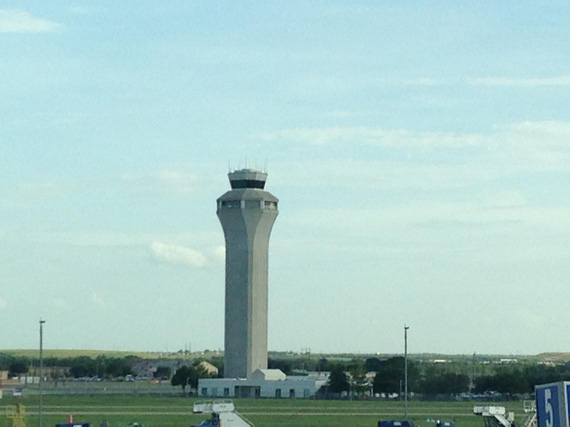
A mandatory airport shot. KAUS tower.
I was out of BFR; so we had to get that squared away first... No problem - AYA's Ben Rolfe, my good friend and Grumman mentor and fellow aficionado, told me that AYA was having a fly-in in Delano, and we went for it.
Oh man, I haven't flown a Grumman for a year! What a feeling it was to fly the airplane you truly know and love to fly, again.
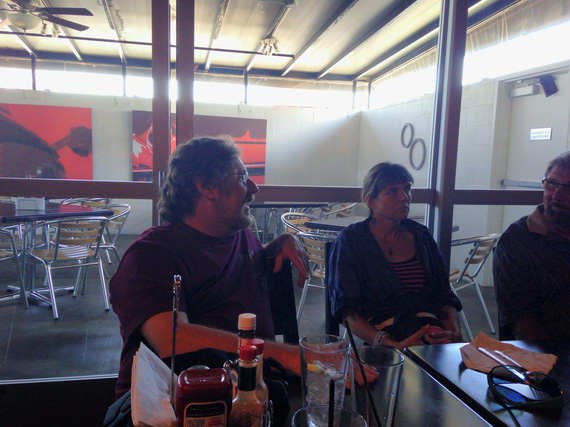
Ben sharing bits of wisdom at Delano airport's restaurant
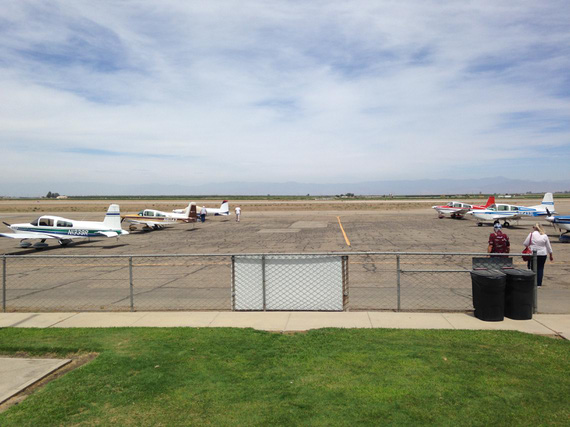
Grummans (not quite a mile of them :) )
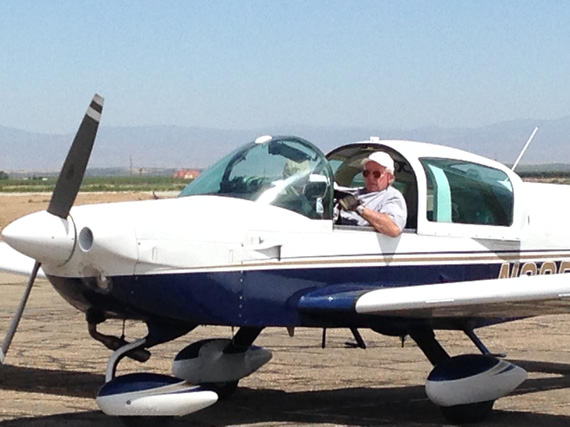
Stu's Tiger
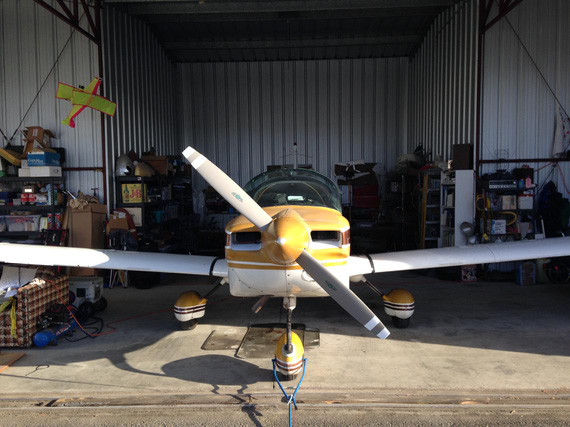
The Bird of the Day: Ben's Tiger
..and finally, I meet the seller of my future plane at Abundant Air in Palo Alto. And the plane. 9891U!
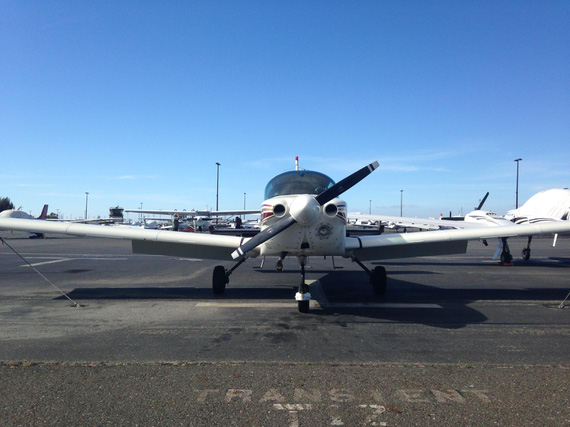
Meet the Cheetah!
LoPresti, Powerflow, and 160HP pistons STC. No wheelpants (will have to put those on, but okay for now). Basic panel. 400 hours on engine. Love it!
LeRoy loved her too. (LeRoy is my plush co-pilot. He likes Grumman Tigers the most, but liked this Cheetah a lot, especially 'cause of the colors. They got along real well!!!)
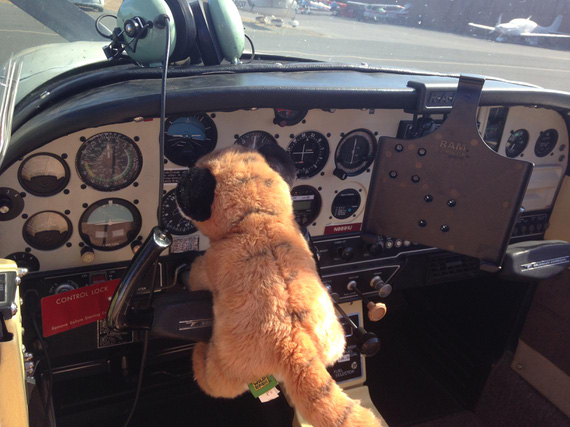
LeRoy getting acquainted
Over that week I was in CA after buying the plane, I have flew more than I have flew over 8 months in Texas.
I got checked out with Drew Kemp, my CFI and guru, gave some old friends a long-overdue ride over San Francisco, visited some more of the old friends in airports around CA, including the awesome Gary Vogt of AuCountry fame , and read lots of paperwork.
Funny thing: apparently one of the radios was stolen from this plane in 1995..
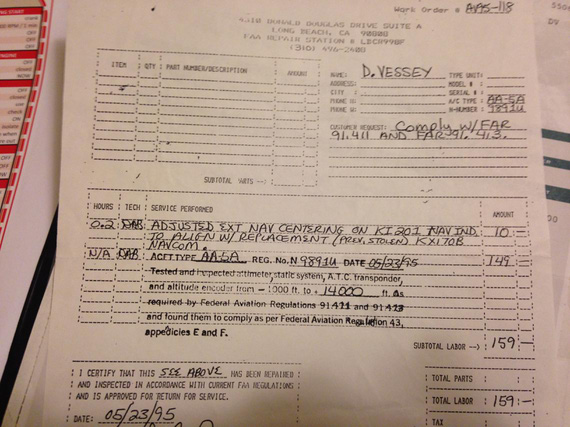
Stolen radio mentioned on this invoice
And finally, we were off to Texas!
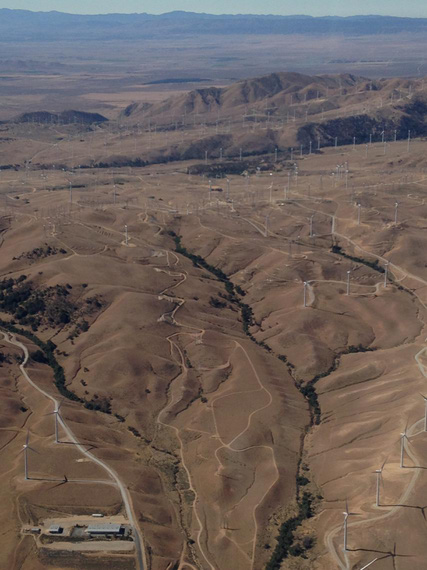
Windmills in CA
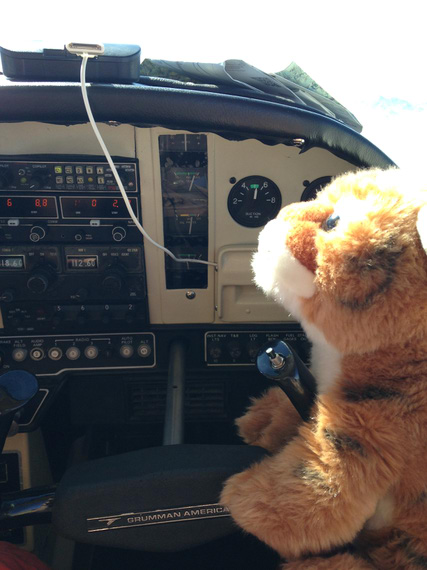
LeRoy flying
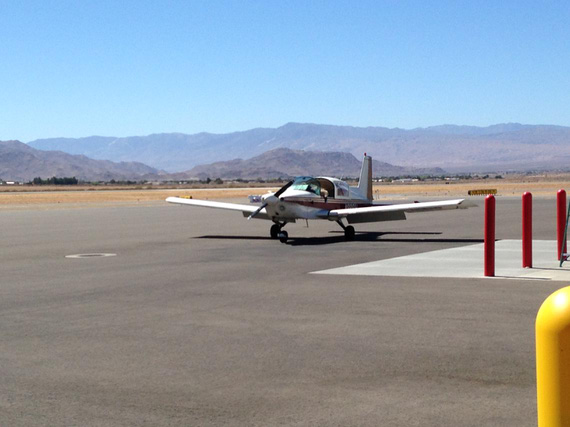
Refueling in Apple Valley
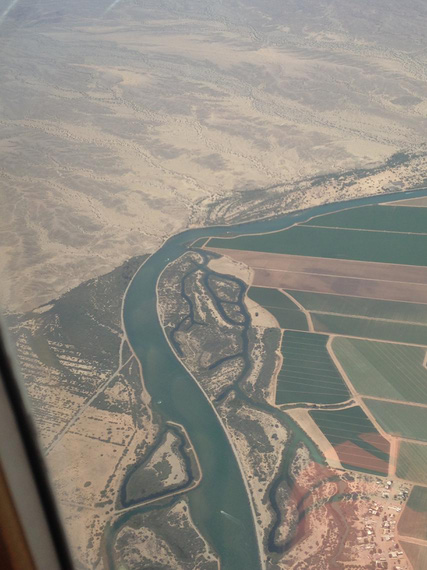
CA-AZ border, Colorado River
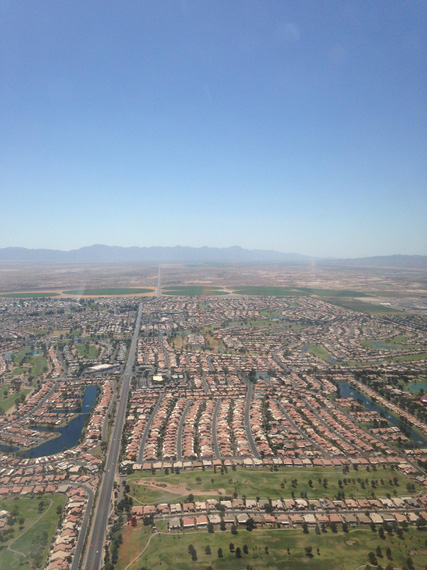
Buckeye: approaching Phoenix. Lunch time!
After lunch in Phoenix, we took off... My second in command Dash noticed high oil temps -- and I reduced the climb, leveling off finally at 5500. The oil just did not want to cool! Half way between Phoenix and Tuscon, the oil finally got a bit cooler, and I attempted climbing some more, but no joy. The moment I start climbing, the oil would hit redline. After trying that a couple times, we decided to bail in Tuscon, and spend a night there. Plan was to take off at 5:30 in the morning, and get past high terrain that starts after Tuscon early in the morning.
Cooling off in the FBO at Ryan Field near Tuscon, we started looking for options. It was Saturday, so renting a car didn't work out. I found a business card for Jeannie's Taxi in the FBO and called her up.
Jeannie's great! She came out immediately, and took us back over a great little road winding thru the Black Mountain and Old Tuscon; and agreed to pick us up at 4:30 in the morning!! We also had a great conversation pretty much about everything as we drove.
Next came Demming, New Mexico. A sad sight of an Arrow stuck on a runway at a weird angle warned that something was amiss. Luckily, Demming had two runways so I landed on another one. Noticed guys at the FBO already rolling in a golf cart to a now obviously belly-landed retractable Arrow, and decided to just wait.
The FBO guys rolled in a few minutes later. "What happened? Did he forget?" - "He forgot". Oh well. Gas-Undercarriage-Mixture-Prop...
One of the guys started fueling us. They have already lifted the Arrow, extended the landing gear, and rolled her into a spare hangar by the time we were leaving.
Fort Stockton was our last en-route stop; and three hours after that we were approaching San Marcos, my temporary home.
17 hours.
What a trip.
I am no longer planeless.
Amen.
Home
Think ahead of your airplane.
© Copyright "79FT". All rights reserved. Feel free to cite, but link back to the pages cited.
This website only shows how I did things in my various projects. These pages are for information and personal entertainment only and not to be construed as the only way, or even the perceived correct way of doing things. You are responsible for your own safety and techniques.