[79FT]: Building Things |
 |
Solder, and Good Crimps
... the answer is NOT solder?!
| On: | Oct 08, 2019 |
| In: | [Chickenhouse Charger] Electrical Rebuild |
| Time logged: | 5.5 |
| Tags: | tools, electrical, soldering |
A while back, I wrote a note on my failures at getting good crimps with the hydraulic crimper I had.
My conclusion then was, "solder".
Well, I tried :). I had to make a little bonding strap, maybe 5 inches long.
First time, I cowboyed it - just stuck the strap into the terminal, and soldered away.
In. My. Face.
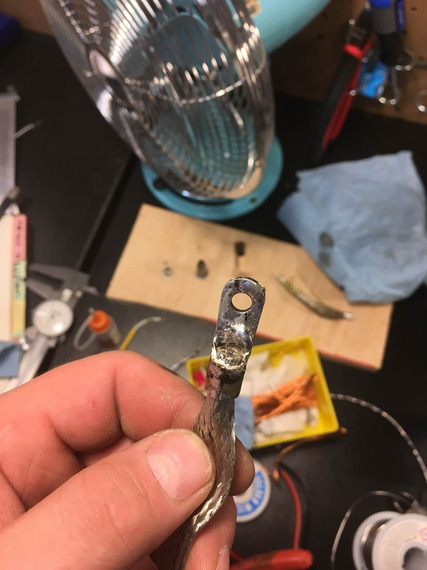
Ugly!
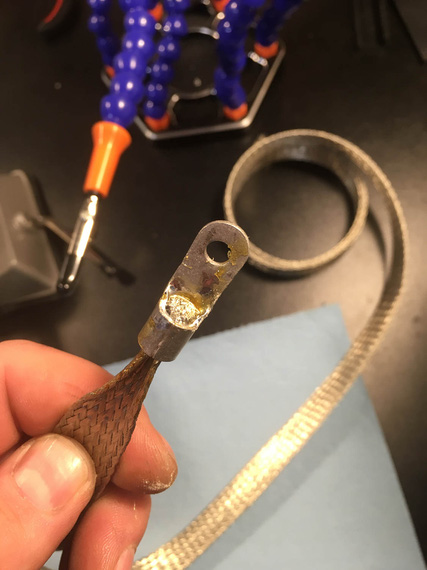
Second try.. I think
I was soldering, de-soldering, soldering again, etc. Trying different positions, and different heating methods (butane torch worked best).
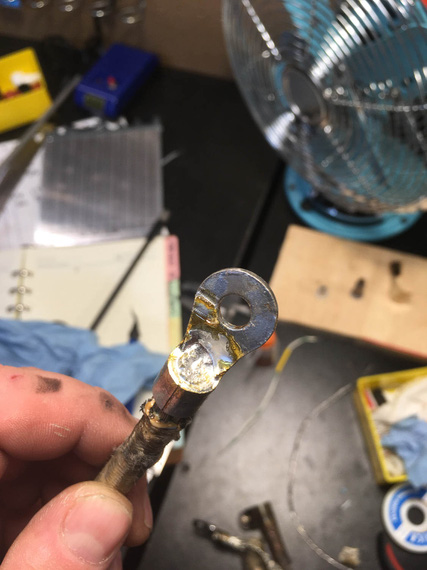
One of the better ones
I eventually started using the "wedge" trick - to wedge a piece of thick wire in between the wire strands, so that the wire gets packed into the barrel of the terminal.
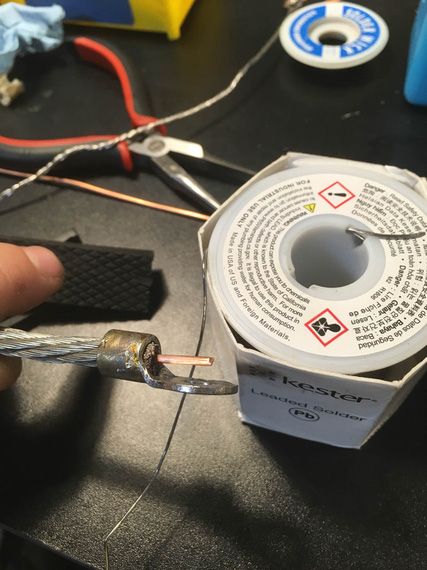
Wedge
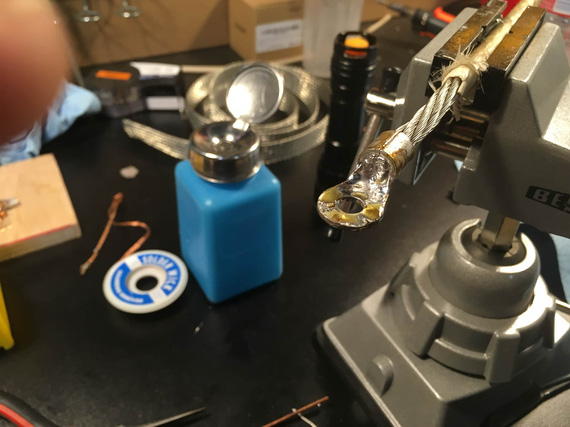
All that yellow crust is rosin flux
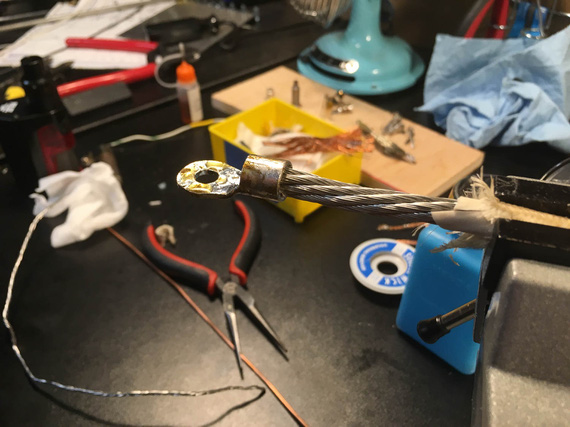
Back side
My main problem was, I was trying to prevent solder wicking as much as I could. And I couldn't. It would make 1 inch or more of the wire perceivably "crusty", and I still won't have the barrel filled in. Remember, I was trying to make a small, short grounding strap, that had to be flexible to bend almost 180 degrees. I was trying to achieve a "crimp quality" break between solid metal and strands, and could not.
When I started thinking about it like that, I realized that what I'm trying to do is likely impossible.
Solder will wick - you can control how much with technique and practice, but you can't prevent it. So my current thinking is, if you solder your large lugs, be ready to support first few inches of wire really well, so that that "crusty" portion of it doesn't move.
So, I tried to Hail Mary the crimps again. Previously, I had them just damn ugly (I linked the article above).
I got a small anvil tool (the kind you insert the barrel of the terminal and whack a pin with a hammer) from Spruce. Thought, 25 bucks was worth a try.
Those crimps were even uglier. I don't know what I expected - I guess that was an act of desperation? I didn't even take a single picture.
But then... I had a minor epiphany.
With the Harbor Freight Crimper, dies are not properly ground for wire sizes. But. But.
Just like with hammering, we can crimp progressively until we "flow" all the strands and the barrel into one solid piece!
Here's the approach (okay, this is the final procedure, first try did not include turning - but I did it (admittedly, accidentally), and liked the results a lot).
- Given wire gauge of, say, 6
- Use die 2 sizes up - so, die marked for #2 wire
- Put the wire in the terminal. Start by squeezing the terminal turned 90 degrees (so "side to side" rather then "top to bottom"). Just give it a gentle oval shape
- Now, turn it 90 degrees and squeeze until the jaws close
- At this point, you will have a somewhat undercrimped joint, as I described in my notes on the crimper; but it's shape will be a perfect hex.
- Now, go 1 size "down" (so, dies marked for #4 wire). Squeeze.
- Stop when you feel it's done shrinking.
Results?
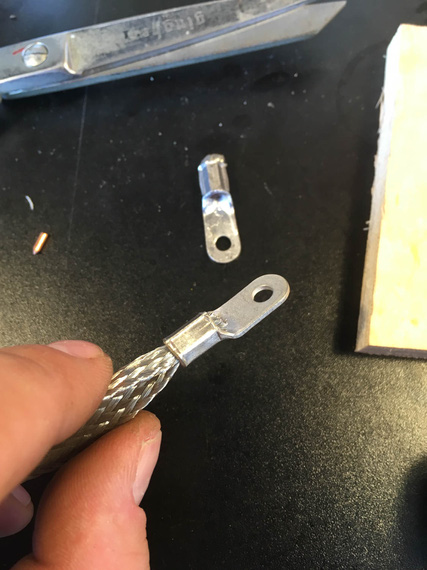
Pretty!
Pretty, ain't she? And, no "wings".
If you don't do the turning trick, it'll still be pretty; but with just a whiff of those "wings" present:
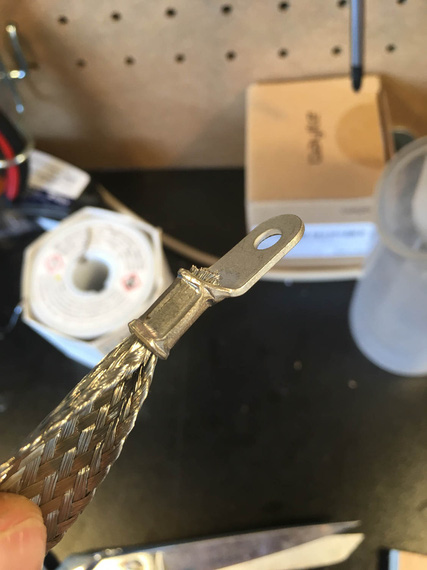
Pretty!
All all this was what... five and a half hours?
Well, I guess, that's the "education" part of the "Education and Recreation" charter of E/AB aviation ;).
Don't drop the aircraft in order to fly the microphone.
Up ↑
Harbor Freight Hydraulic Crimper
... the answer is: solder!
| On: | Sep 07, 2019 |
| In: | [Blog] |
| Tags: | tools, electrical |
Doing the electrical rebuild on the Charger, I needed to terminate quite a few of heavy wires with large lug type Amp terminal rings.
I had a Harbor Freight hydraulic crimper lying around that I got to crimp a couple wires when I was installing CRG-30P on the Cheetah, and was planning on using it; though the type of crimps produced by it kinda bugged me.
After doing a few crimps, I decided to burn a few terminals and do a proper test.
The Crimper
Normally, crimpers for large size terminals are super expensive; but Harbor Freight, as usual, sells a hydraulic crimper with large dies for just about fifty bucks.
Here it is, in it's full glory.
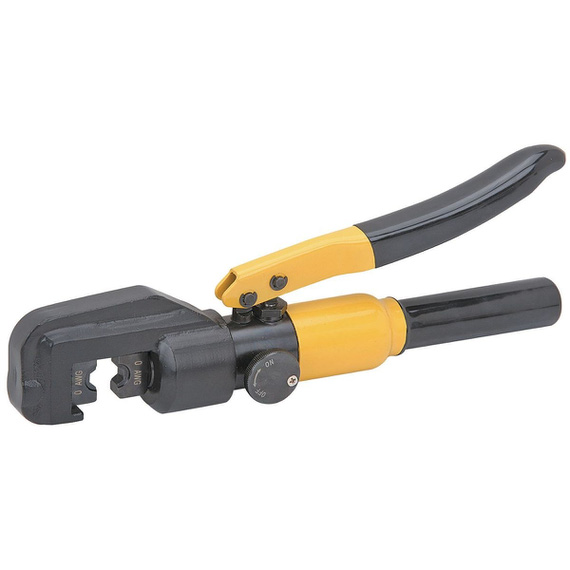
Crimper
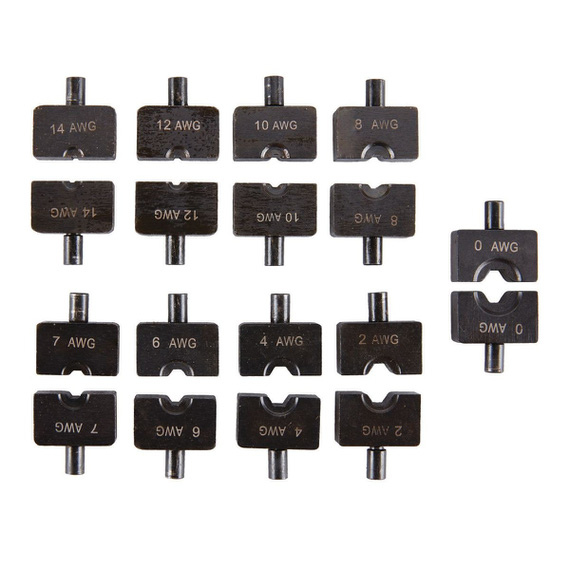
Dies
Technically, the way it's designed is it's supposed to produce these nice hexagonal crimps. Or at least, I think that's what they were trying to do.
But those familiar with crimpers know that the key is in good dies; and that's were most of the money is. Damn, "regular" stripping dies for StripMaster are what, $10; while milspec dies are what, $150? Now; of course there's diminishing returns there - in the case of StripMaster, regular dies work just fine for most applications.
Here's the problem with HF Crimper dies. The holes in them are severely undersized, which makes them produce "flat", rather than hexagonal crimps. We can't know if this is by design. What I tried to do is to research what others are doing, and to run a few "is this a good crimp" tests.
The Test Setup
I was crimping chunks of 8 AWG MIL-W-22759/16 wire into AMP Battery Terminals.
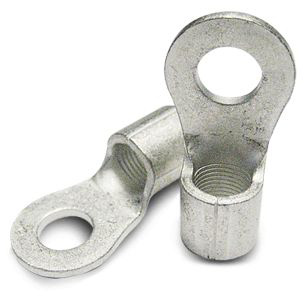
The Terminal
After crimping, the terminals were hacksawed in the middle of the crimp, and polished to see if there were any voids or visible wire strands. A good crimp must be "gas tight". In other words, all the metal has to be pushed together hard enough to become a single piece of metal for all intents and purposes.
Using 8 AWG dies
For baseline, I used the HF die marked for 8 AWG.
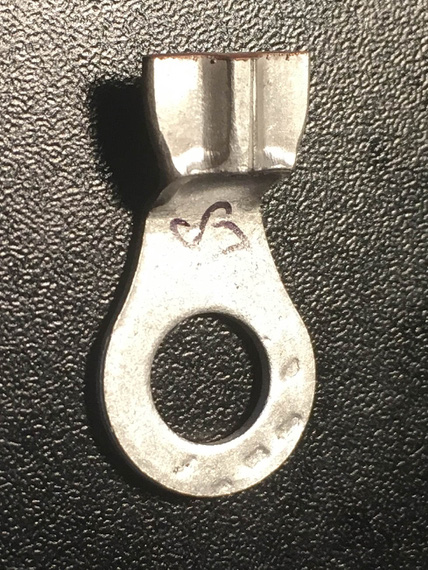
8 AWG die / crimp

8 AWG die / crimp
As you can see, using the "nominal" die produces this weird, flattish-with-a-bulge crimp. What's worse is it adds this strange "jog" to the terminal lengthwise, and scrapes the metal inward where the crimp starts. That's lots of stress risers.

8 AWG die / cutaway
The crimp quality is good though. There are a few specks of shavings I didn't clean off - those are not defects.
Using 6 AWG Dies
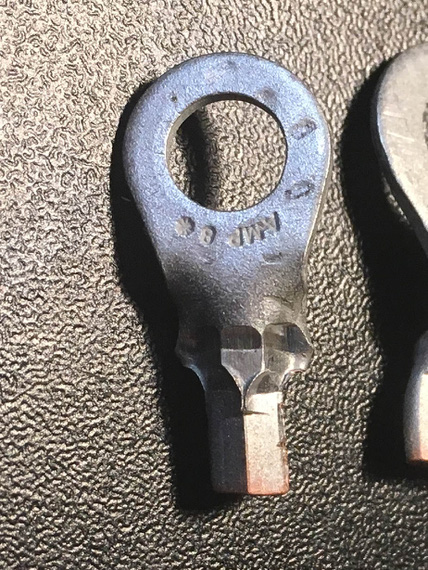
I went next size up, to dies marked for 6 AWG. That produced the same crimp as for 8 AWG, but with "wings" being thinner - almost paper-thin. I also didn't like how it mangled the terminal even more.
Somebody online mentioned that they rotated the crimp 90 degrees and did it again to "push the wings in" and I tried that.
6 AWG die / crimp

6 AWG die / crimp
I think the resulting crimp, while tight, is too rough to be acceptable. It almost feels tortured.

6 AWG die / cutaway
Inside though, it's all nice and compressed.
Using 4 AWG Dies
Finally, I tried 4 AWG dies.

4 AWG die / crimp
This crimp almost looks good. The jog is almost not there, and it has nice hexagonal shape. "Wings" are almost not present.
However, the dies closed fully and it felt to me that the metal was not compressed enough (I recall the resistance I felt in the crimper doing the previous two tests, and the resistance I felt on this one was much less).
The cutaway confirmed that.

4 AWG die / cutaway
Those imperfections on the cutaway are voids left from not enough compression force applied.
Conclusion
Well, it's a sad one really. If you want to use the HF tool, then you probably should use dies that make those "winged" style crimps (like the one produced in my first test), and suck up the jog and other imperfections.
I have posted my findings on AeroElectric list, and the conclusions seems to be supported - the dies are horrible, and to make them real good one would need to rework them significantly.
Or, alternatively, just solder them (here's a nice howto by Mr. Nuckolls) , which is what I am seriously considering.
Update - October 2019
After trying and failing the soldering approach, I have devised a technique of using this crimper to achieve good results. Musings linked in the previous sentence, and here's the jist:
- Given wire gauge of, say, 6
- Use die 2 sizes up - so, die marked for #2 wire
- Put the wire in the terminal. Start by squeezing the terminal turned 90 degrees (so "side to side" rather then "top to bottom"). Just give it a gentle oval shape
- Now, turn it 90 degrees and squeeze until the jaws close
- At this point, you will have a somewhat undercrimped joint, as I described in my notes on the crimper; but it's shape will be a perfect hex.
- Now, go 1 size "down" (so, dies marked for #4 wire). Squeeze.
- Stop when you feel it's done shrinking.

Pretty!
"Don't anybody maintain anything.
-ORD ATC
Up ↑
Hangar Redo
cleaning up!
| On: | Jun 17, 2019 |
| In: | [Dream Shop] Georgetown Annex |
| Tags: | shop, hangar, tools |
Well, since it seems now that my Hangar will become my shop for a while with me doing the electrical rebuild on the Charger, I decided to set myself up in it. I am still rebuilding the main shop at the house (reminder: need to write up a couple notes on that), so the only place I have to work on the plane is in the hangar - and frankly, I probably wouldn't have dragged the whole thing over to the house anyway just for an electrical rebuild... though it is getting hot, and being in a tin can of a hangar when it's 100 degrees outside is not.. pleasant, shall we say.
At any rate, the Hangar is now to be officially known as The Dream Shop, Georgetown Annex!
Not much to tell - but much to show here.
Easy Route
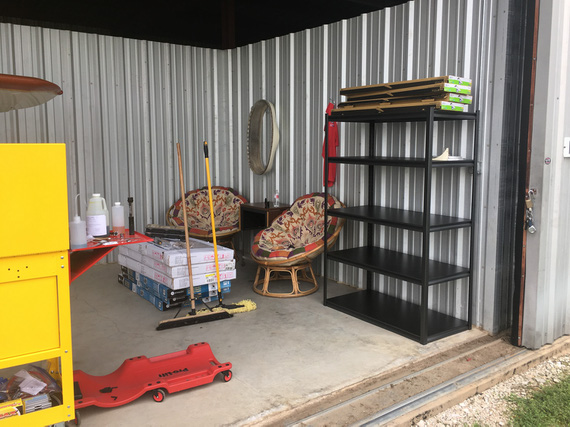
I didn't have anything in the hangar besides a couple of old bookshelves, a couple of small tables, a few filing cabinets I have inherited from my good friend Pete, and a cart. Not very nicely set up for working on airplanes, and everything was overflowing with parts, tools, and hardware even after just a bit of disassembly I have done for the annual.
I needed a lot of shelf space, and a lot of bench space.
I decided to take an easy route this time, and instead of building everything, just bought a bunch of shelves at Costco, and benches and a tool cart at ... Harbor Freight. Yep, I know. Throw a rotten egg in my face next time you see me.
The First Shelf
The Light
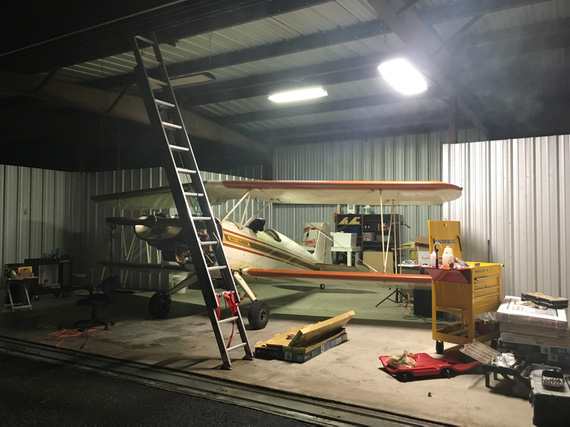
I work evenings a lot, and the only light source there was there was a four T8 tube fixture in the back of the hangar. But the most interesting stuff is on the front of it (engine, yep :) ). So I added some lights around the front.
Lights
The Benches
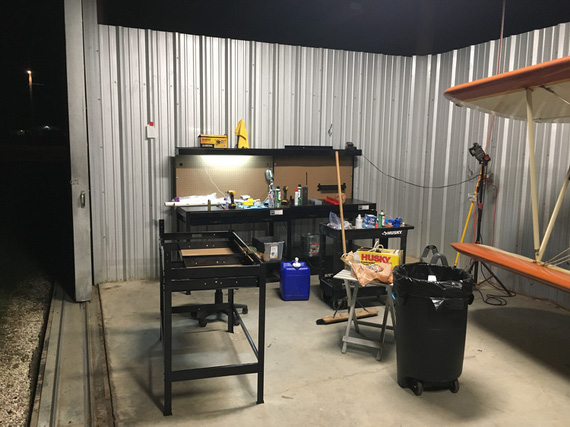
Next, came the benches from Harbor Freight. Don't buy them. They're built like crap, and, frankly, I think I could've built better ones out of 2x4s in about the same amount of time it took me to put these together... But hey, I already bought them, and disassembling the first one (I got three total) rather than putting the other two together... I didn't want to...
Benches
You might notice the pegboard at the back "wall" of those benches. Well, they attach it every about 12 inches around the perimeter with machine screws and nuts. Guess what happened to the first pegboard after a humidity cycled high, and then low? Yep; it all warped!
Ended up resorting to straightening it out with shelves that acted as "stiffeners", and putting the warped pegboard bench as far away from the "main" bench as possible).
On the other two I actually made the pegboard "floating" - re-drilled the mounting holes to be large, and used large washers and just enough small washers underneath to MacGyver me a "bushing". That worked, and the other two benches' pegboard is straight after quite a few large humidity changes now.
And then, the sink.
The Sink
I long had a large 7 gallon jug with a tap. When I was doing a lot of work, I'd drag it out of the hangar, put it on a small folding table, and use it to wash my hands. Very nice to be able to do that when your hands are covered in oil and crud, and you need to climb into the airplane or grab something generally clean. I also like clean hands when doing detail work like soldering, painting, etc.
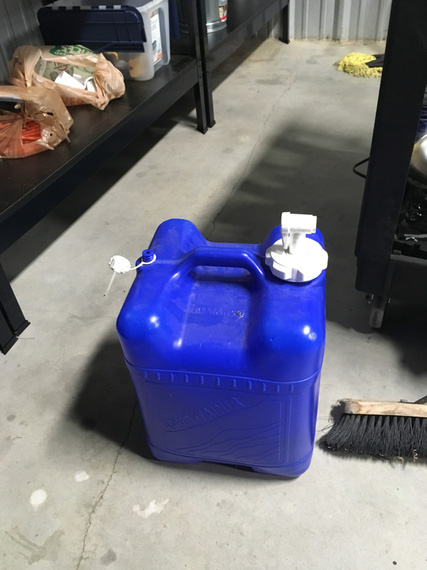
The Jug
But dragging out a 7 gallon jug every time I got into the hangar got very old very fast, and I ended up typically resorting to rags and not so clean hands, or "washing" them with mineral spirits... ugh.
But hey, we're cleaning up! So I decided to put in...
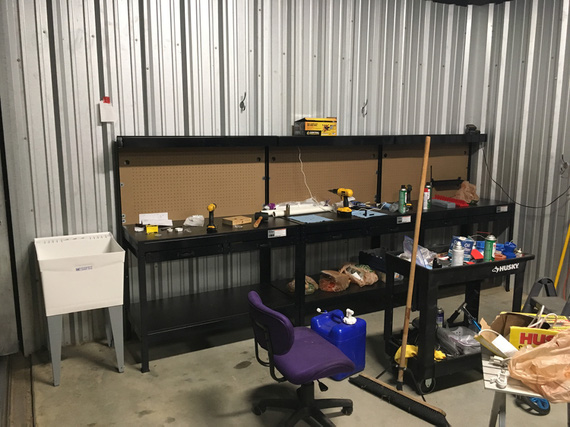
The Sink!
But a sink needs a drain!
No problem.
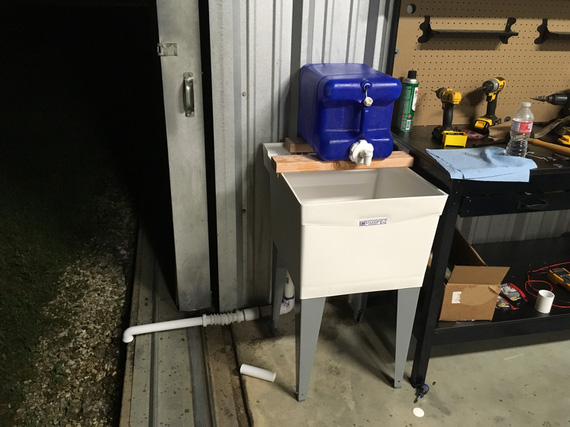
The Drain.
This came out very nice, and I love that I can now just wash my hands whenever, no jug dragging required.
The best part? The hangar door slides, so I can have it closed and then slide it a bit past it's "closed" position, so that there's a gap between the hangar divider wall and the outside for the drain to be put out.
But how do I close the door?
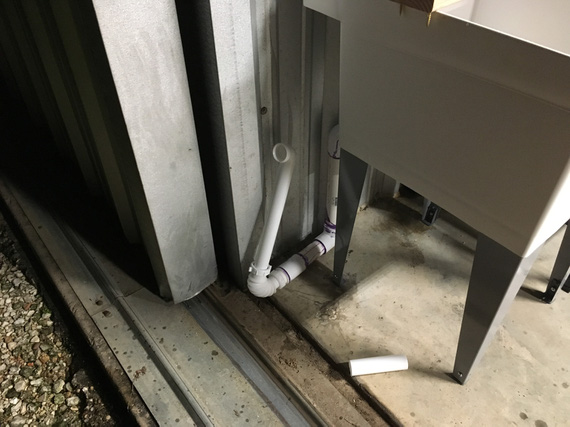
Retractable!
Do I need a Complex endorsement to operate in my hangar now? ;)
The Wiring
Before you wire your plane, wire your hangar, says a proverb. Or something like that.
Well, my hangar floods. And it's not my hangar, so I can't quite make holes in the walls and run wiring and conduit. And I only have one outlet. Yep.
So it was all to be a bunch of extension cords, making sure that all connections are suspended a few inches above the floor, hooked to something (previous tenant of my hangar had some holes in the walls drilled, so I reused his, or hooked them up to legs of whatever was there, etc).
I ended up making a bunch of splices on extension cords. Hey, I love soldering!
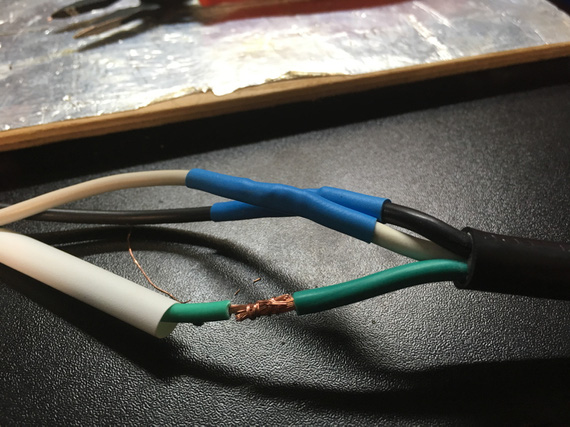
Almost a splice
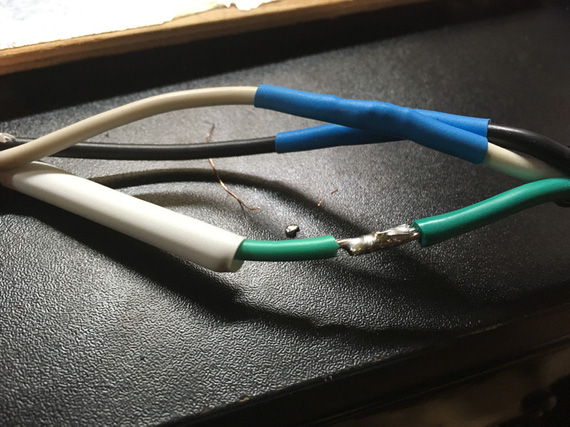
And now, with liquid metal!
Air and Shelves
I had a compressor. I moved it to the back corner of the hanger, and hooked up a reel in the front, so that I can have my hoses neat... Not much more.
The back wall of the hangar got lined with the big shelves, too... Mostly, to stack the parts I take off the plane and need to keep off.
The first one up is there on the right, near the yellow barrel.
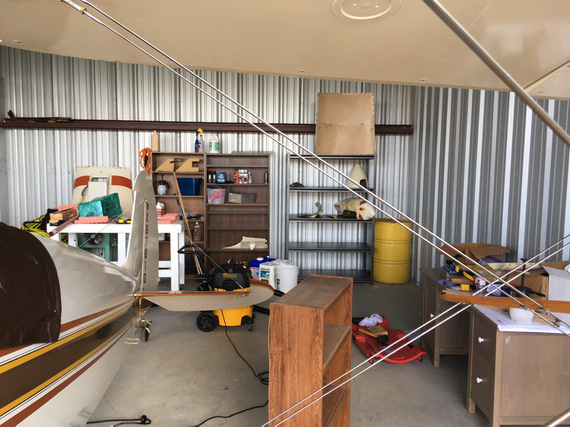
The First Shelf
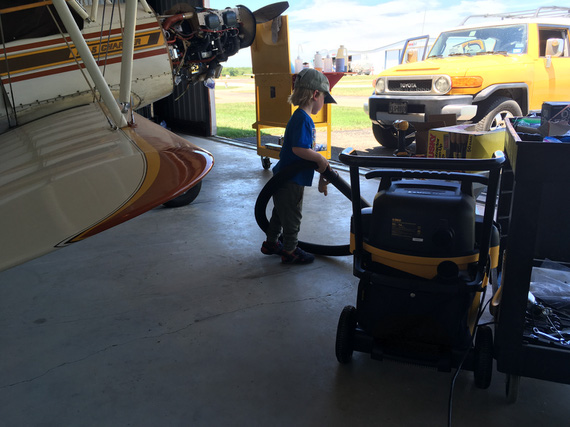
Some child labor might have been involved in cleaning this hangar
The Shrine
... and since the Charger is a Grand Champion, I needed a shrine in the "mancave corner" of the hangar. Every hangar must have a corner with a couch, a fridge and what-not, to relax and ponder and procrastinate. And that's where all the artifacts need to go.
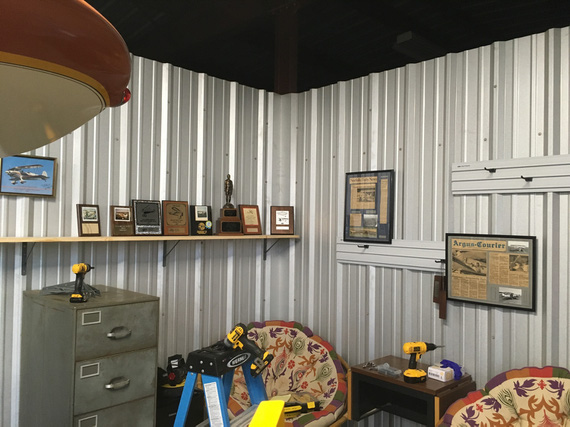
The Shrine
And I didn't drill a single hole! All those rails and shelf are re-using the screws that are holding the hangar walls together :).
The Bench
I needed at least one good bench for grinders, bandsaw, and aluminum work; and there was a perfect spot for it. Didn't have my wood tools though, so had to use 2x4s straight out of the store... Normally, I mill them down :).
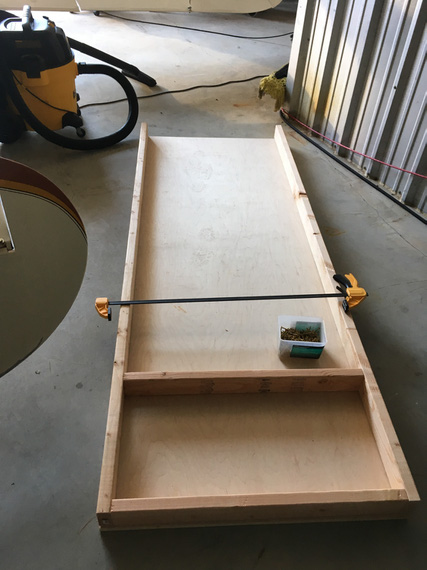
The top and the frame to be
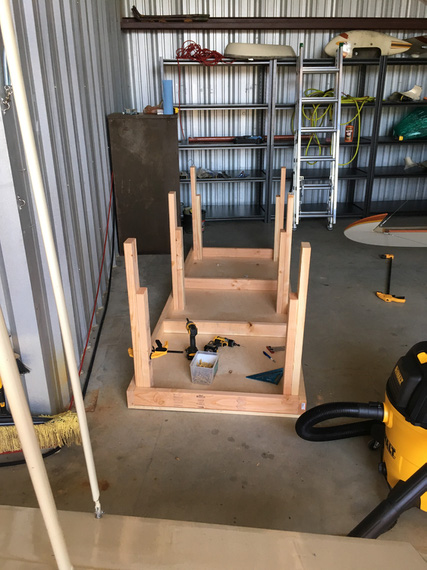
Legs
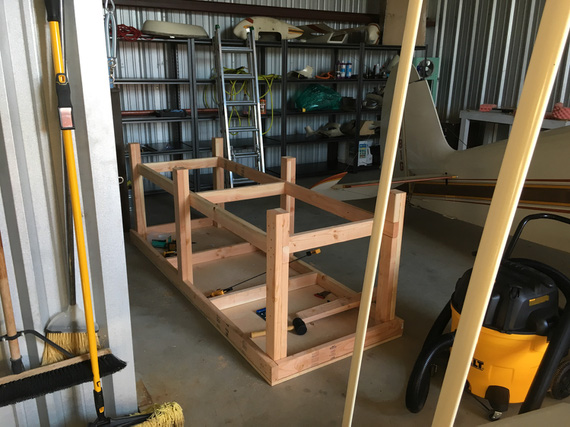
All together...
... and then, you flip it, add the bottom shelf, attach the leg stands, and voila:
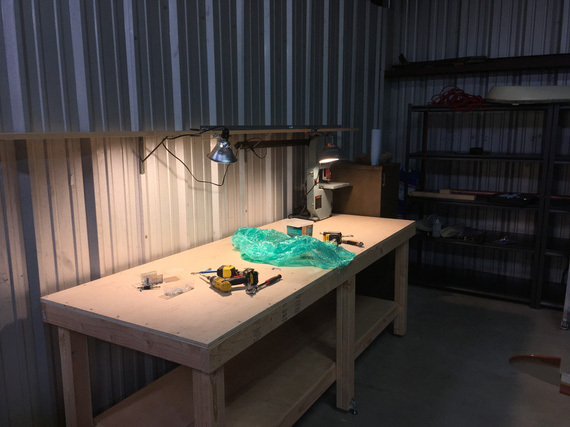
The bench
Even though it's not very flat, it's perfectly fine for anything but being a reference flat surface for assemblies...
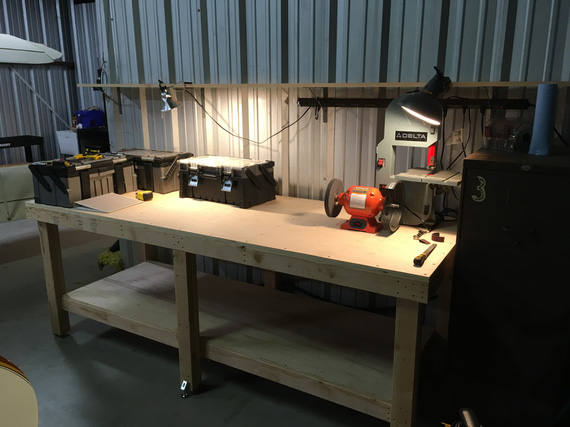
Set up
The End
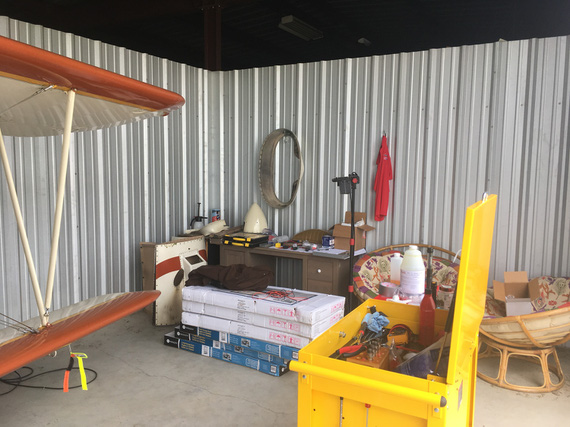
Well, and I guess, that was it. I spent a few more days and evenings cleaning up, and putting everything in place. And I guess, we're due for some "before" and "after" pics :).
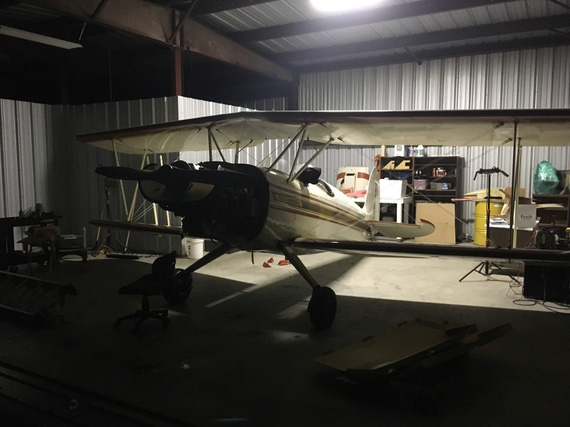
Lighting: before
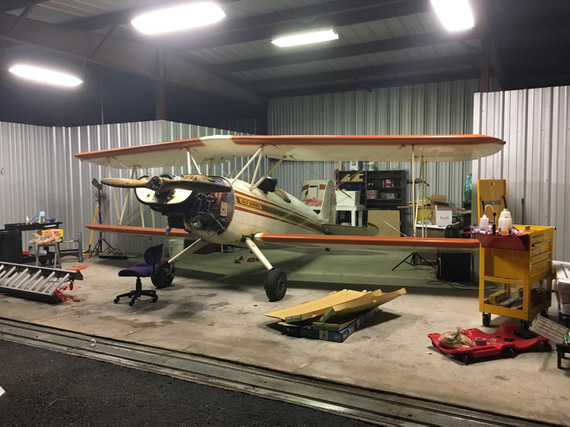
Lighting: after
The mancave: before
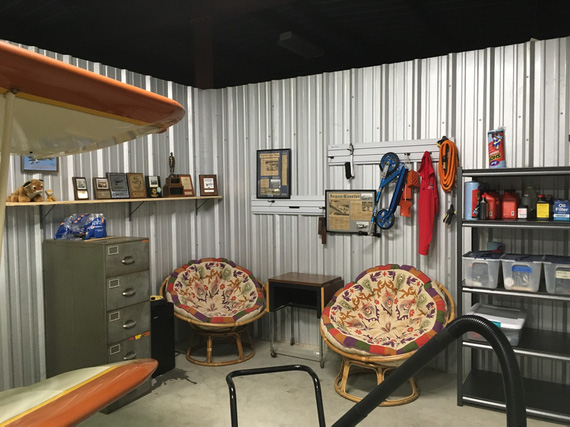
The mancave: after
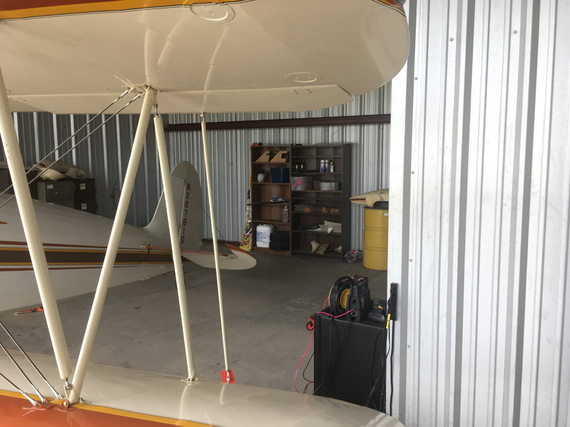
The back: before
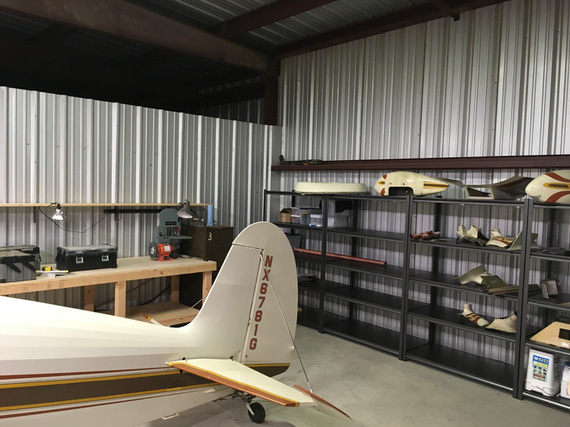
The back: after
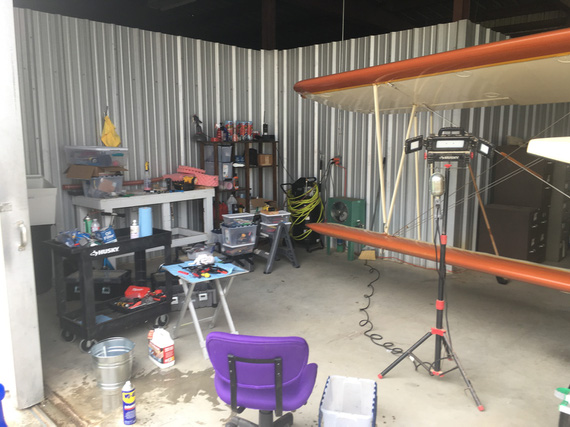
The main work area: before
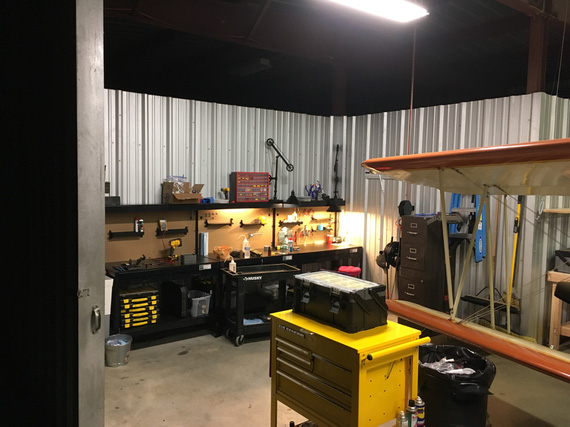
The main work area: after
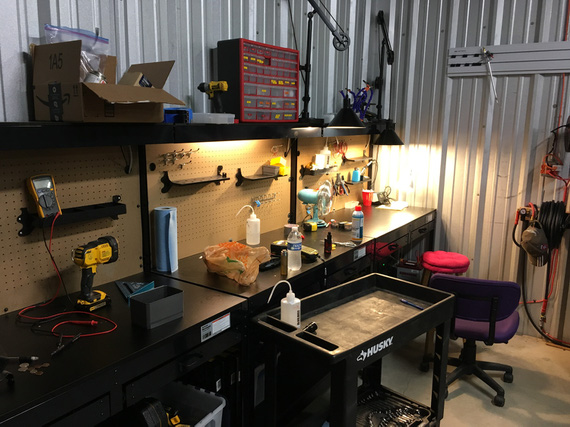
Benches' closeup
So, there. Took me a month with the breaks for fixing HVAC wiring on a Subaru (funny how that happened in anticipation for rewiring the plane, eh? and I really started to dig Molex connectors doing the fix - but we'll talk about Molex when the time comes), and a bunch of other stuff.
But hey, I can work on things comfortably now. And, wash my hands whenever I want!
Learn from the mistakes of others. You won't live long enough to make all of them yourself.
Up ↑
Fall Round of Pickles
... out of heavy machinery
| On: | Oct 12, 2018 |
| In: | [Dream Shop] Tooling |
| Tags: | shop, tools |
As we have established before, Fall for Russians is all about pickling things.
Last time it was an O-360. This time, it's tools for the new shop.
My current shop is all packed up and in storage, waiting for the actual shop to be built. Well, actually for the building to be gutted.
When I have built the new house, I have kept the old house. That's what's about to become my Dream Shop. Meanwhile, all my tools are nicely set up in my storage shed, waiting for their time.
I have sold most of my Chinese Grizzly crap I bought before knowing any better, and was hunting good, old, American-made machines for a while.
Okay, I settled for a Chinese-made Powermatic drill press, arguing with myself that it was in mint shape, dialed in with no obvious runout / shake, and would be my wood-only press anyway.
But two most important things wood-wise I still didn't have: a jointer and a table saw. Few had come up on Craigslist, and I would go over to check them out with all my dial gauges and a U-Haul trailer in tow.
I would spend close to an hour with each one of them, measuring all sorts of convoluted alignments and run-outs, only to find something very basic wrong with them.
One of these was a newer (mustard, but still American-made) PM60 jointer. It checked out reasonably well; until I asked the guy if I could adjust his fence square (I wanted to check it's warp by measuring squareness to tables along it's length).
"Sure Thing!" - he said, walked to a corner of his shop, picked up a hammer, and ... WHACK! - ... ... yeah. Call me a WHACK-o, but that is not how you adjust squareness... Not in my book. I felt for the poor machine.
I left, of course.
Another time I spent just south of 40 minutes with a PM66 table saw, only to check it's flatness dead last. Of course, it was so horribly bowed out of shape, I had to leave. And that was a 3 hour drive. Each way, mind you!
At any rate, yet another PM60 jointer popped up on Craigslist, and I grabbed a trailer in preparation of going to San Antonio the next day. That's where the jointer was.
Now, there was a rolling joke with one of the guys from the office - that he absolutely HAS to convince yet another guy from our office, his buddy, to sell me his PM66 saw - or, Russian Mafia will get him! Them both, in fact!
I kept it up for over a year; and I am not sure if that joke had made any contribution to this... but, he called me and said, "Roger is selling his Powermatic! Grab it, QUICK!". Same day as the jointer popped up.
Hah. So tomorrow I am about to go possibly pick up a jointer. Did I just land me a saw too?
I went to Roger's to dial the saw.
Arbor was shot, but trunnions were in great shape, and arbor for PM-66 is not a problem (someone still literally makes them and sells them on EBay). The tables were flat aside from a very tiny dip, a bit dirty at that, but alright.
I decided to pick it up.
So I did land me a saw and a possible jointer!!!
Next day (Friday), I rush to San Antonio to look at the jointer.
It was a green, older one, and it checked out good, except one minor mis-alignment of infeed and outfeed tables. I was trying to tighten them up a touch with gib set screws, and... I broke one of them.
The tables were flat, the motor was good, and the price was reasonable though, so I decided to buy it from the guy - especially after I broke it :).
Didn't take any pictures of jointer in transit... damn.
So, Friday night Im back, barely manage to roll the jointer off the trailer and into the garage, and Saturday I pack my wrenches and such to go break down the saw at Roger's.
See, it was set up with a large side table, router plate insert, and outfeeds - no way I would've been able to load all that; and besides, I don't need any of that aside from core saw. I already have all my router stuff from my previous shop (Incra no less).
It's raining. Damn.
I get to his place - he's gone for the weekend, his wife lets me in and leaves me alone with the saw and my tools.
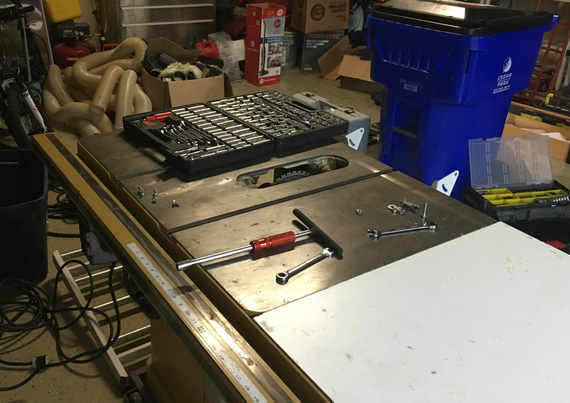
About to begin.
Saw comes apart quite nicely.
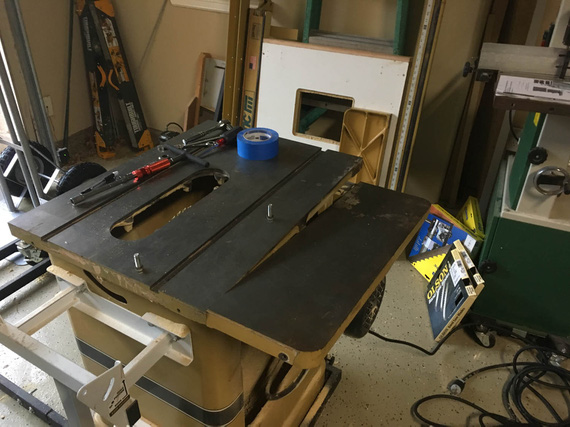
Most of exterior stuff off, table's coming off next
I took off the fence, the side table, and the outfeed rollers. Side table goes into trash. Outfeeds and the fence I will sell (in fact, as of right now I sold the fence already - had three guys call me in the same day!). Yeah, I don't care for it. Incra's TS-LS any day over any other fence (and I have one :) ).
It was obvious no one has cleaned it inside. Likely, ever. Oh, well...
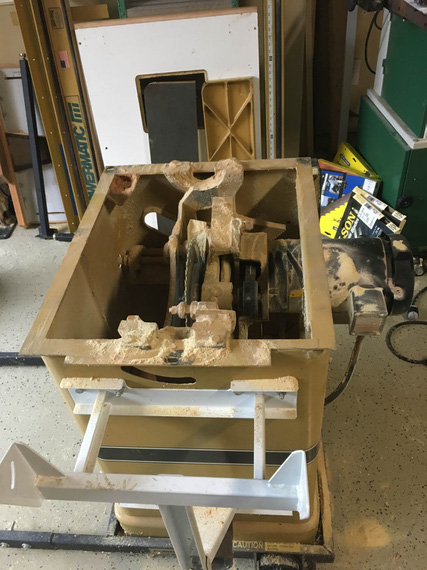
Dust
Remember, I said it was raining? I got a bunch of wrap, and plastic to cover the guts - I wouldn't drive under rain, but even the splash-back concerned me...
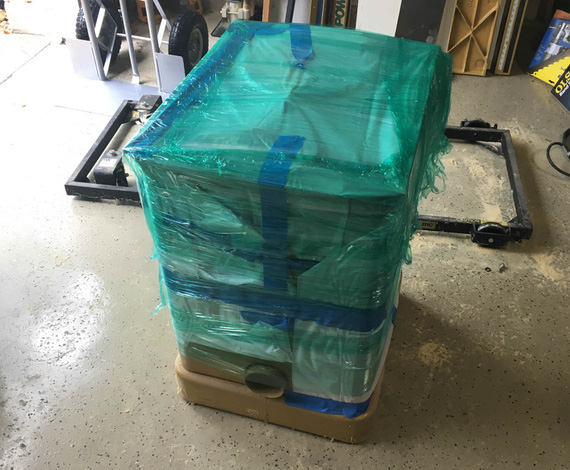
High-Tech Rain Proofing
Funny thing - when I was almost done, we got a nice break in the rain... So, I was able to load the saw up, and got it home without further adventures.
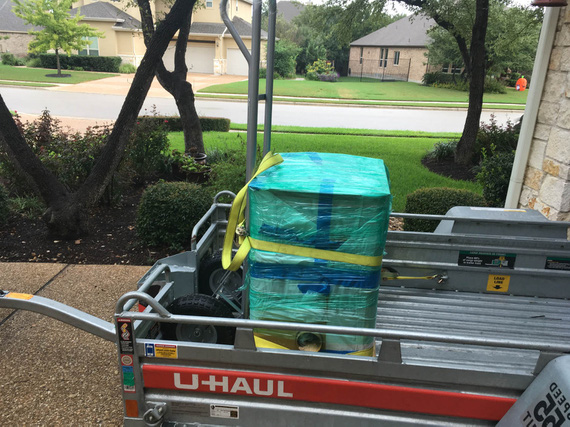
On the trailer
Later, in the next few days, I scraped together a vac and a compressor (remember, all my tools are packed away!), and cleaned it out. All important and not so important unpainted surfaces got a coat of either T9 or Corrosion-X, and she got wrapped back into plastic... The Saw, I will see you in a year or so...
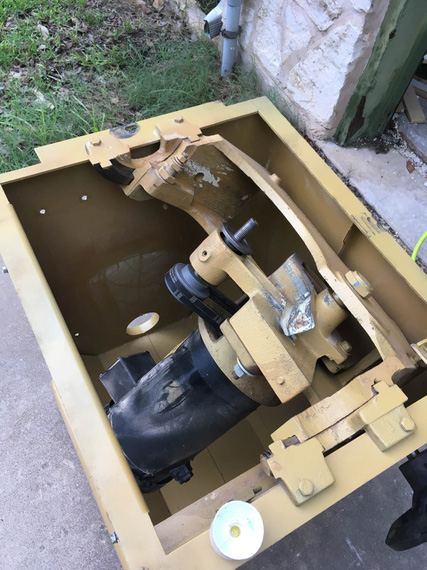
Clean
And the jointer? Well, the jointer was clean already. So it just got wrapped too...
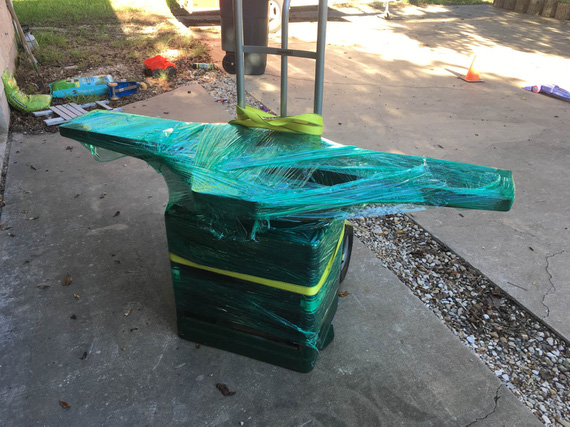
The only pic of the jointer I got
They're sitting nicely in the storage shed now, making acquaintance with my other toys.
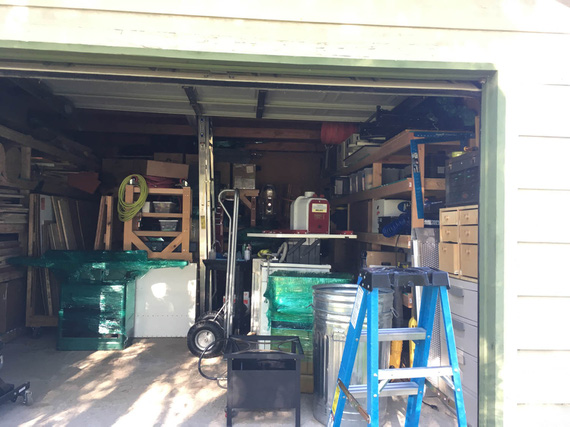
The Shed
And, there. Two most important tools? Done. Pickles out of metal done? Done. What's left?
A mandatory airplane pic, of course! Ken Wittekiend's PA-12 on floats on Lake Buchanan, first time ever I flew a seaplane! That was nice!

The Seaplane
"MidEx 726, sorry about that, Center thought you were a Midway arrival. Just sit back, relax and pass out some more cookies ... we'll get you to Milwaukee."
-ORD ATC
Up ↑
B-Log v2
...the long-needed updates
| On: | Sep 25, 2018 |
| In: | [Misc] B Log |
| Tags: | tools, software, website |
After using the setup I did for myself in 2014 for a while, I decided it was time to change things around a bit.
Segway
... so yeah. I needed to add a static page, and I had a bunch of ideas about extra stuff I wanted to do for a while. But mostly, I just needed to add a damn static page, and thinking about coercing the existing setup into doing that with all the pictures I needed there was not making me happy...
... it was also about time I set this thing up so that I could actually log more projects than just a single airplane. Hey, I bet we all know - websites of this kind are mostly created to be later enjoyed by their authors in periods of 'I ain't got nothing better to do than review my old notes' mood ...
Multiple Projects
First of all, I wanted to be able to log multiple projects. The way the old setup was done was it had basically one project, under the section called "Build", and then this dangling catch-all "blog" thing for everything else.
But as you can see, most of articles here actually are NOT about the airplane I was working on at the time - the Skybolt - but rather, other little things here and there.
First thing I did, is I changed the way the files are laid out, and added semantics converting source content's directory structure to "Project / Section" semantics.
Each project now has it's own "sub-log" (that's what time logged is tracked based on). There is still a catch-all "blog" section, and a "default" project that can be configured if one so desires.
Logging
One more thing I realised is that the original version would only allow to log time if it was associated with an article-type entry... Flooding the Internet with tens of pages of "built three more ribs tonight" type stuff just to log time seemed kinda silly, so I added support for plain text log entries.
Articles still can track time; but you can also now have a separate text file with just "Date", "Summary", and "Time Logged" entries - one per line.
When creating the "log" page for a project, entries, being both from articles and from logfiles, are sorted by date, and then ones with articles associated with them will pick their summaries up from articles. Entries coming from text files will be displayed with summaries from log files.
Major Code Cleanup
All this time tracking functionality, structuring articles into projects, and such, were becoming an entity of its own large enough for me to justify clumping it all into a single Pelican's plugin, now called "b_log". I also added a bunch of config options to set up it's behavior.
No Google Analytics
Yeah. I killed it. This site Does Not Track You now. Because there's too much of this crap online.
Fixes, Fixes, Fixes
Too many to count...
- Fixed how logos and icons behave
- Fixed templates in numerous places
- Fixed bugs in image processing and copying
- Images in pages now handled properly - they just weren't. At all
- Decimals in logged times would sometimes show up to 10 digits past the decimal point
- ...
Silliness
And finally, some silliness! I wrote another plugin that adds a "quote of the day" at the end of each article, randomly :) Enjoy; and I hope they will encourage you to read more articles (or at least, scroll thru them to get to the bits of wisdom).
And So, (v2)
I got happier now.
I have changed the B-Log notes to match the new setup, just so that there's one place I can send people to in case they are interested in my setup.
And I'm very close to posting that damn page, but...
...of course, I am restructuring the old content and modifying old pages instead to match what I got now, and writing stupid notes on what I did to the thing. Because, as we all know, making yourself a tool is as, if not more, pleasant, as using it...
To go up, pull the stick back. To go down, pull the stick back harder.
Up ↑
SolidWorks Models
commonly used items
| On: | Aug 28, 2014 |
| In: | [Blog] |
| Tags: | tools, software, website, SWX |
Thanks to Bill Rose of the Biplane Forum fame, I have a lot of SolidWorks models of various hardware and other common airplane things.
I just recently have set up a page where you can grab all of them. Models are hosted on GitHub, so you will always get the most recent version.
The page is going to be linked in the Resources menu on the left. Click here to go straight to it.
Enjoy!
It is said that two wrongs do not make a right, but two Wrights do make an aeroplane.
Up ↑
The Shop Day
... and how it turns into two weeks
| On: | Jun 07, 2014 |
| In: | [Blog] |
| Tags: | tools, shop |
So, originally it was supposed to be the shop day. I was gonna clean and put together the compressor I picked up off a gentleman on Craigslist, and set up the air hoses, filters and such - and then, back to CAD. And then..
See, I was looking for a bandsaw. I wasn't in a rush, so I was gonna pick up a good used one; so I was watching Craigslist and such, waiting and waiting. After doing that for about 6 months and after I got tired of not having one; I finally said "screw it" and bid on one on Ebay.
I won it on Friday around 4pm; paid, and went home. Well; there, in my Gmail's Inbox, was a notification from CraigWatcher saying that yet another bandsaw ad was posted... I opened it up; and couldn't believe my eyes.
Someone was selling.. an 18 inch Grizzly saw for 250 bucks! I couldn't pass on it; and next morning was driving back with a 300 pound beast in the back of my car....
... and then, spent a week and a half cleaning it up. I polished the rust out of the table; changed some bearings, re-cut threads on the blade tensioning rod, added a 4 inch dust port (for whatever weird reason, Grizzly decided not to put a dust port on this particular model).
It also ran on the 220, so I had to add a 220 outlet to the shop... Decided to go all out; and added a 6 gauge run with 50 amp breaker, so that I can run a TIG welder off of it when I get one.
So now; I own two bandsaws :).
Here's the perpetrator:
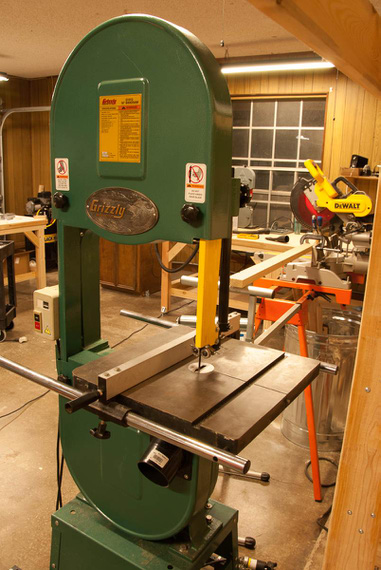
The Bandsaw
Since we're talking shop....
Right now Im set up in the garage of the old house we bought about half a year ago. Dash (my beautiful wife) is working on designing a new house we're gonna build; and that one is going to have a good sized shop. We will build that house first and then demo the old house; so I could start setting up earlier than I thought I would be able to; which is certainly nice.
But; Im dealing with 40 year old electrical; and other fun stuff..
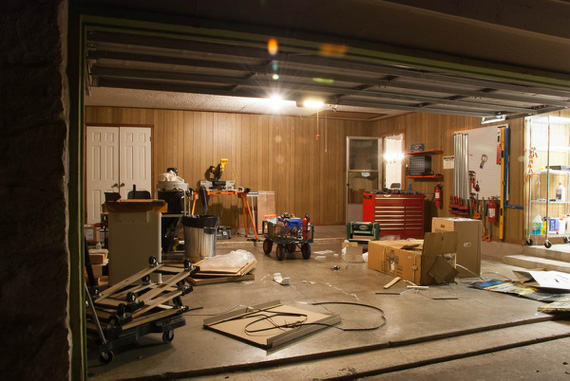
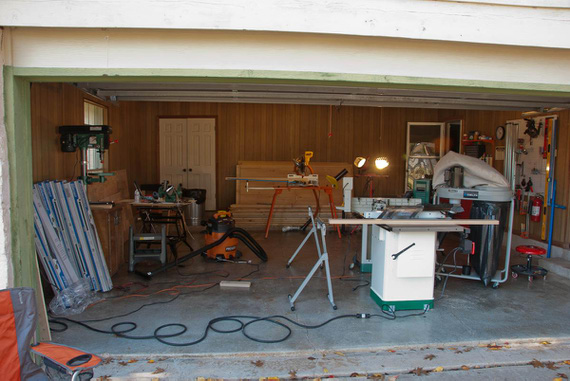
Here are some pictures of that garage, ordered historically, as I was setting up.
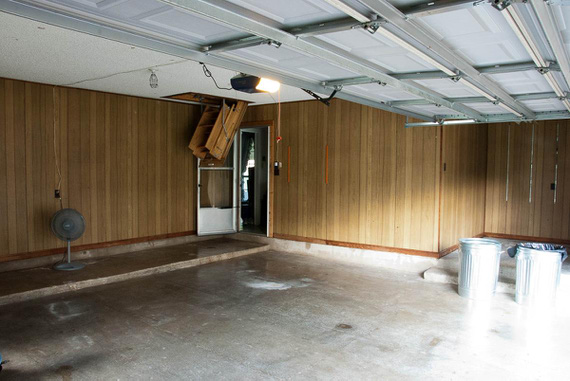
Just after washing everything with a pressure washer...
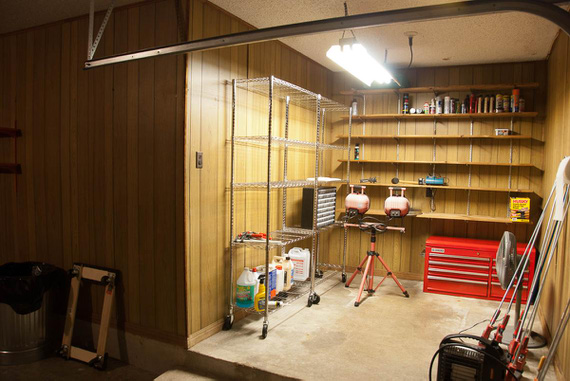
The beginnings of the storage spot
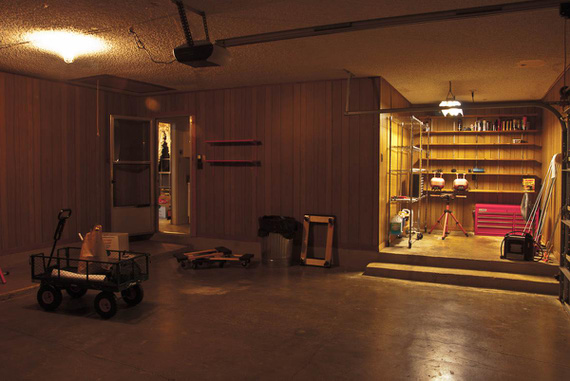
.. all that empty space :)
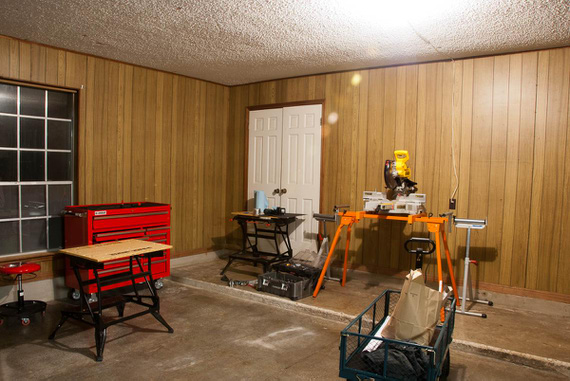
That's pretty much all my tools before I moved (the big red chest is new)
First batch of stuff - table saw, jointer, planer, drill press. Excited!
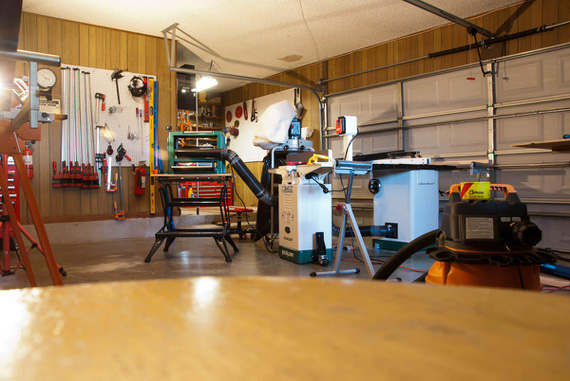
.. and set up!
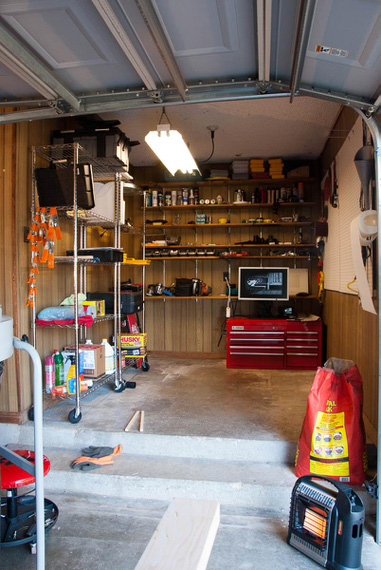
Storage's getting a bit more crowded
Setting up lighting. All that wood is for the benches.
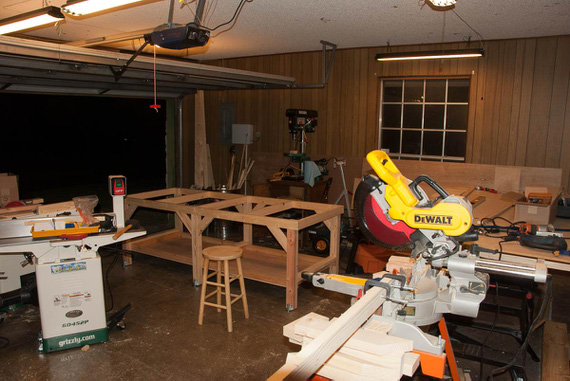
First bench - the frame is ready.
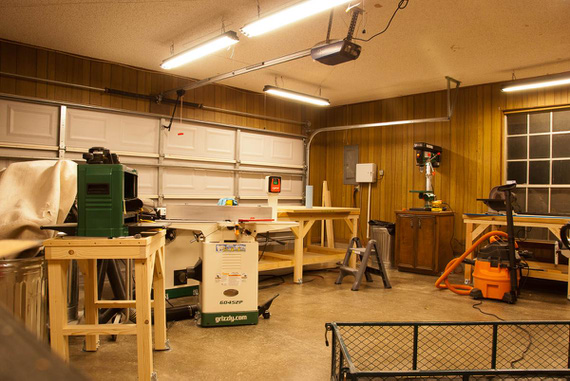
The benches are up - and this place is starting to look like a shop!
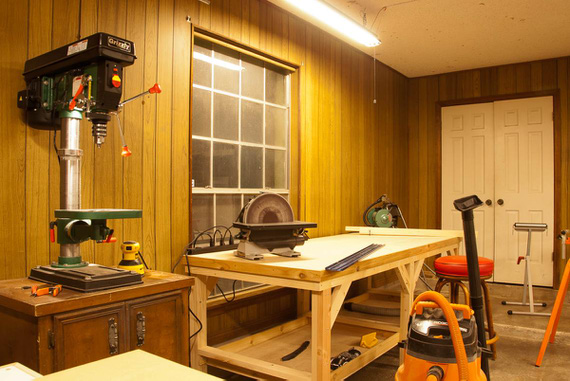
.. yep
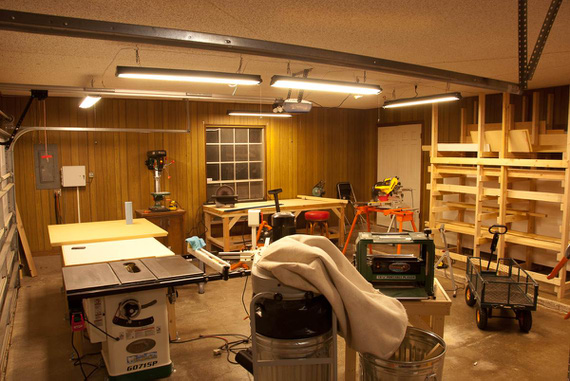
Next, some 2x4s put together into a material rack. Cleared a lot of space!
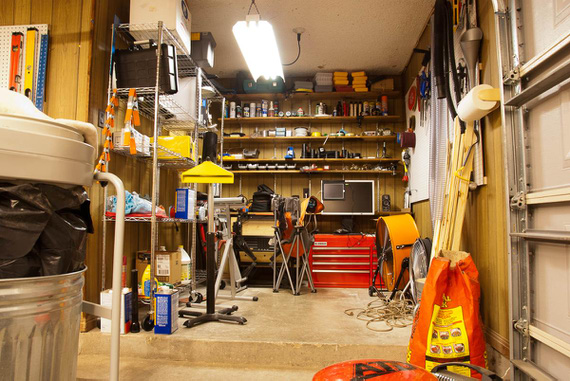
Storage again
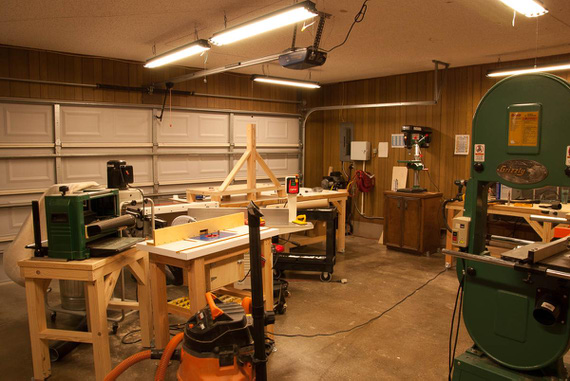
Air setup, router table, and The Bandsaw
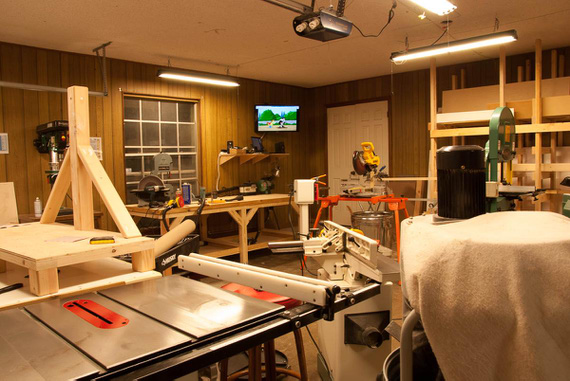
Added some entertainment :) Also, the little Delta bandsaw on the bench
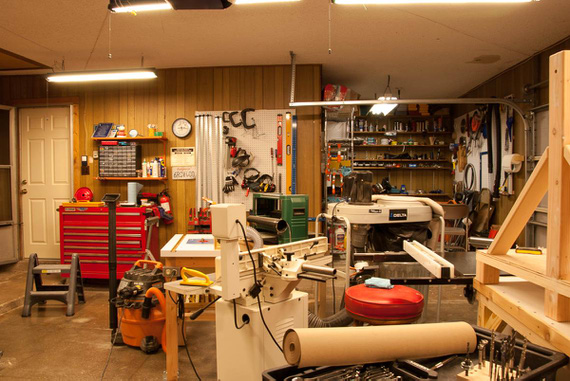
I like how this looks!
And here are a couple pictures of the tools...
Air setup is very simple, a compressor with a shutoff directly into an air filter, regulator, and 25 feet of hose on a reel. That reaches pretty much everywhere.
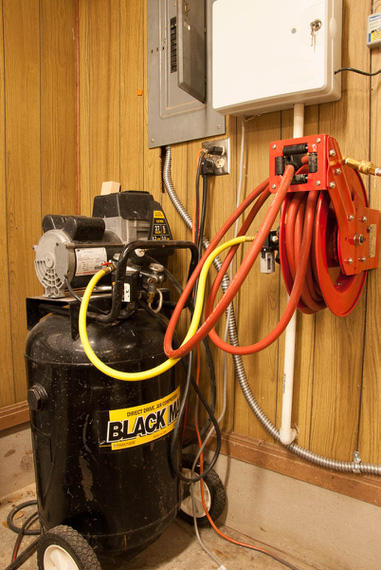
The Air Setup (very simple for now)
At some point; I measured the runout on the drill press -- got around 10 thousandths - no wonder why it was all vibrating when drilling deep holes!
Grizzly includes very cheap chucks and arbors with their presses... Gladly, the bearings have no play though. I ended up picking up a used Jacobs chuck on Ebay, and boy, what a world of difference! Used a SouthBend arbor picked up on Amazon.
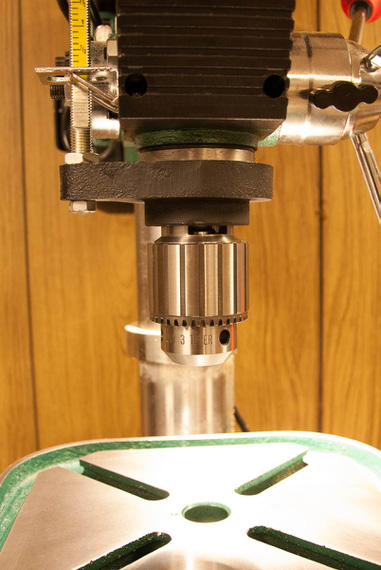
The Jacobs Chuck
I wanted a router table; but didn't want to pay around a grand for the one I like (and cheap ones are just.. crap, honestly); so I built one.
Top is two sheets of 3/4 MDF, laminated together. White Formica is laminated on top, bottom, and sides. All done with DAP Weldwood contact cement.
I bought the insert plate (though in hindsight, I should've just bought a hunk of aluminum and made it myself).
It still ended up being a bit out-of-flat, so I built a leveling system into the base (two bolts on each side are pulling the top "down", screwing into holes in the top with threaded inserts; and there are two screws pushing up on the top in the center of each long frame side. All that allows me to work out any non-flatness out of the top.
Fence is 3/4 ply; and the router sits in the box under the table. The box has 4 inch dust fitting epoxied on it on the other side (and the fence dust collector feeds into that fitting too).
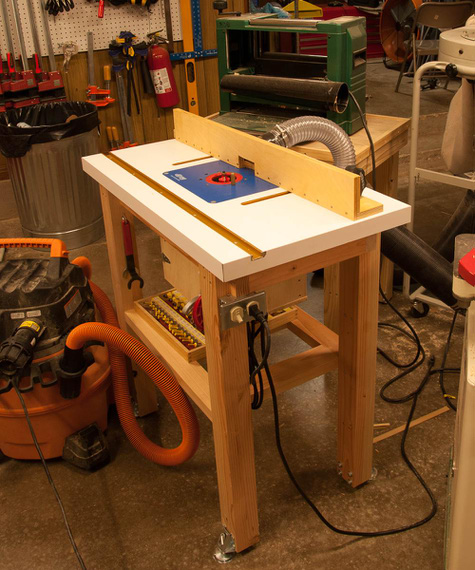
The Homebuilt Router Table.
"Sure you can have eight miles behind the heavy...there'll be a United tri-jet between you and him."
-ORD ATC
Up ↑
B-Log, The Nerd's Builder's Log
How I went about b-logging
| On: | May 20, 2014 |
| In: | [Misc] B Log |
| Tags: | tools, software, website |
Note: this article was updated in 2018 to reflect changes I did in version 2 of B-Log. I want to have a single article to link to in case people are interested...
Notes on the update are here.
The Problem
... was that I needed something to organize my builder's log. Being a software engineer by trade, I didn't want to go old school with paper logs and pictures, and whatever-random-collection-of-stuff-on-a-computer I could do. I wanted something that's easy to add entries to, calculates everything automatically, and allows me to publish it on the Web. Plus, I find it pleasant to view HTML as opposed to .doc, .pdf, or whatever.
Being a nerd, I just had to make it as nice for myself as I could...
The KitLog Pro
Many-a-builder is using this apparently successful piece of work. Apparently, as of writing this, they have over 1100 logs published on their mykitlog.com.
I have played around with it quite a bit. The program is trivially simple; but I can't stand the way it's architected.
- Windows only
- Uses Access database for storage (sic!!)
- Only three pictures per entry (really???)
Oh, the Access databases. Basically, what this means to me as a user is if it ever .. erm.. decides to stop working, I will loose all my data. "Revert to a backup", you say.. Yes, but if the problem is that I can't add my N+1st record because the DB just corrupted itself, no backup will help -- I'm stuck.
On top of that if, god forbid, KitLog ever goes out of business, I am stuck with the data that I can't export w/o some serious reverse engineering.
No thank you. :)
The Early Attempts
So, I was toying around with other stuff.
BlogSpot
Really cool (probably, second best to WordPress) blogging platform. Plus, links very nicely with Picasa, making image inserts a breeze.
The problem? How do I track time spent?
Also, the "going-out-of-business" problem was still there...
Moving on...
A CMS (Drupal or Joomla or whatever) + custom plugins
Now, that was better. Those are open source, good content entry and organization tools, and I can export it all out of a MySQL DB should I need to.
But, they require a server (which means either I'm running a server, or require hosting). And frankly, I believed that there must be a better way...
Sphinx
Close, but no cigar. Sphinx is the documentation framework used by Python and many others (including the company I work for).
It takes a bunch of ReST files as input (more on that later), and runs them through a converter, producing whatever you want (there are writers for html, txt, doc, pdf, and so on). The parser and converter is called docutils.
The problem with Sphinx is that it's geared towards writing documentation, and frankly, felt a bit too heavy to me for writing a builder's log.
While googling about yet-another-thingie-I-wanted-to-figure-out-about-Sphinx, I stumbled upon an article that talked about static site generators. There lied the Holy Grail....
Mutilation of the Pelican
The Pelican. I fell in love with this thing almost immediately. Here's what it does:
- Takes a directory with a bunch of ReST, Markdown, or ASCIIDOC
- Parses all those files into internal state, obtaining metadata from both files and paths (ie, if you organize your files in category/<date>/name way, you can tell it to properly parse that path and populate the metadata)
- Uses Jinja templates for generating a bunch of HTML output
- Allows plugins and custom templates
- Is all Python!
I did the initial version in 2014 (the date of this article). Then, I've spent about a week tearing it to pieces and figuring out how it works, and adding a few plugins to add things that I needed for the B-Log that it didn't have. I added time tracking, changed layout, got a Bootstrap-based template and modified it, etc.
In 2018, I fixed some suff and added a few more things.
You be the judge of results :).
Here's what I've done, in the end:
- I'm writing text in ReST, so I've added the custom directive to it allowing for 'figures'. Problem is, ReST image directive produces HTML that wasn't much useful to present images the way I wanted them. Instead of modifying core Pelican code, I elected to add a custom 'Figure' directive. This is done as a Pelican plugin. This plugin also automatically adds thumbnails for images. This is the figure_process plugin. It also requires the image_copy plugin.
- Another plugin I've written is image_copy. It enables sane handling of images placed next to the entries (pages and articles). Back when I started in 2014, Pelican wanted you to separate images and text (and it's internal mechanism of not separating them was broken back then). Pelican guys might've fixed this in the last 3 years, but hey, my setup worked for me - and I kept it.
- And most importantly, the plugin that allows the bulk of functionality - the
b_log plugin. It does a lot of stuff:
- Generates the project structure ("Project / Section" concept with multiple projects)
- Enables a special metadata tag to track time in an article
- Loads and parses logfiles that don't have articles associated with entries
- Calculates totals
- Creates internal data structures for theme templates to use
- Renders log pages
- Then came theming. Pelican is geared towards bloggers, so I had to tweak a lot of things to be better suited for B-Logging (build logging, remember? :) ). In the process, I've switched to Bootstrap, since it makes it very easy to organize content on a webpage. I added theme templates to produce the build logs with totals, etc, etc. Also integrated FancyBox - a really cool JavaScript image overlay.
- I added a couple of extras for myself - like silly QuOTD messages at the bottom of each entry - but that's not strictly related to B-Logging...
I like the end-result. I enjoyed hacking at it, and this was the first time I touched Python (so had to learn that on the way). Pretty neat (though I still prefer Perl (now, why do you need lists and tuples and sets again? :) ).
The only drawback is that it's regenerating everything every time. You can easily see how that might become a problem when you get a lot of entries, but I'm feeling like I'm ways away. 30 pages take about a second. I think I will need a lot of records before this becomes a problem; and at that point I will rewrite the whole damn thing to cache stuff.. probably :)
The code is here. The repo includes my theme, plugins, some tools, and sample content. It requires Python (I used 3.6 and did not test anything else), Pelican (which is checked into the repo in pelican/, along with it's dependencies), and Pillow (pip install pillow). Oh yeah, and pelicanconf.py's PATH_METADATA will likely require tweaking of slashes on Windows.
Read the config file (pelicanconf.py); and read thru Pelican docs to get the idea. sample-content/ contains my sample generated content that I was testing with. content-gen/ contains the simple Perl script that generates as much sample content as you want.
How it Works
To me as an end-user, it looks like this.
My source files are organized in directories like so:
/project-one/section-one/

        2001-01-01-entry-one/
                    entry-one.rst
                    picture.jpg

        section-one-log.log

/project-one/section-two/

        2001-01-02-entry-two/
                    entry-two.rst
                    picture.jpg

        section-two-log.log

/project-two/section-one/

        2002-01-01-entry-one/
                    entry-one.rst
                    picture.jpg

/project-two/section-two/

        2002-01-02-entry-two/
                    entry-two.rst
                    picture.jpg
and so on. Note the text *.log files - those are just log entries without the articles. They are optional, as you can see in Project Two.
Text log files look like this:
2011-01-01 | Some Summary Here       | 1.02
2011-01-02 | Some Other Summary Here | 2.02
Note the separator - that's configurable :).
There can be as many log files in a "Project/Section" as one wishes, they will all be parsed, and all entries will be properly sorted by date.
There can be entire sections without articles - but a project must have at least one article to be properly displayed. Yeah, you got to at least declare your intentions :).
This directory structure will get parsed into two Projects (Project One and Project Two) with their separate logs. Each project will get it's own menu on the left. To display the menus, B_LOG_PROJECTS_MENU config var should list them.
If there was any time logged in a project (either in article entries, log files, or both), that project's menu will get an extra "Log" entry, which will neatly display all log entries, and some totals.
There are a few special directories I use, pages (configurable in PAGE_PATHS) for static pages (ie, About section of this site is a static page), and blog, for blog entries (they don't show up under any projects).
If I want a new article-type entry, I just add a directory in the project/section path, and start writing the article in my favorite text editor (VIM!!). If I decide to log time, I just use my special logged metadata entry at the top of the article. I drop images into article's directory, and use my figure ReST directive to reference them.
If I just need to log some time without polluting the Internet too much with useless text, I add it to an appropriate .log file, or create a new one.
If I don't want to log time, I don't have to - I can just post an entry into the project w/o time logged.
After I'm done, I run Pelican, which generates the full website (html, images, everything!) into an output directory. Voila! I can stop right there, and I will have a fully working local version of my log, since it's all static HTML, but we want this online, don't we? So, the only thing left is...
Hosting
This was another revelation. Apparently, GitHub hosts static pages! 'Uploading a site' is a git push, and it transfers only deltas, so no fiddling with FTP, rsync, or whatever! They allow custom domain names instead of username.github.io, all you need is to set your A records in your DNS to point to their servers. It's awesome!
And So,
I am very happy with this so far. I have all my logs in practically plain text format, parser for which is open source and available. I have it nicely organized, and I can back it up as I please (to GitHub, anyone? :) ). I can re-write the programs that parse and produce final .html. I can extend the generator and change the theme to produce a printable version of the log, styled for paper rather than web. The list goes on!
A grease-job landing is 50 percent luck; two in a row are entirely luck; three in a row and someone's lying.
© Copyright "79FT". All rights reserved. Feel free to cite, but link back to the pages cited.
This website only shows how I did things in my various projects. These pages are for information and personal entertainment only and not to be construed as the only way, or even the perceived correct way of doing things. You are responsible for your own safety and techniques.