[79FT]: Building Things |
 |
Wings and Control System
done..! Well, almost
| On: | Aug 12, 2014 |
| In: | [Skybolt] Wings |
| Tags: | CAD, lower wings, ailerons, control system, fittings, fuselage |
Ahh.. Finally. One week for a business trip, nothing done. One week and three days for Oshkosh. Nothing done (or rather, other stuff done :) ). And many more hours of fighting Solid Works; I finally have something to log! :)
Incidence and Fittings: Finishing Up
First, the incidence. Last time, I was trying to figure out how to deal with vertical fittings having to align with spars angled at 1.5 degrees up (incidence). A good discussion on the Forum ensued, and I figured (aside from me having to buy a +/- .0001 Precision Axe), to drill the hole at 1.5 degree angle in the front fitting, and forget about the little gap that shows up there, and weld the rear fitting in place. So something like this (you're looking at the fitting pair from the side, the CL is the hole centerline).
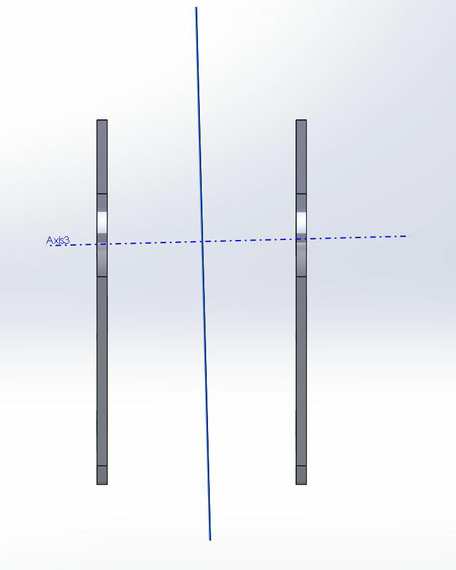
A pair of fittings, with the hole drilled at an angle
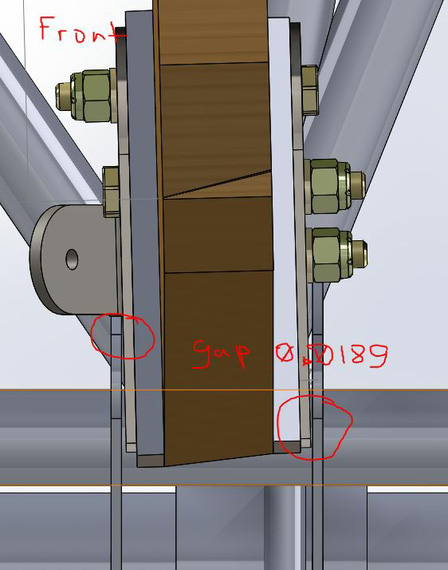
Gap that shows up when fittings are vertical, and hole is at an angle.
Note to self: When building / finish welding, I might reconsider and bend the tops of that fitting 1.5 degrees back to make everything flush. I probably will.
Back to the Control System
Next item on the list was bellcrank-to-aileron pushrod, which is tricky. See, if it's straight, it doesn't clear all the hardware.
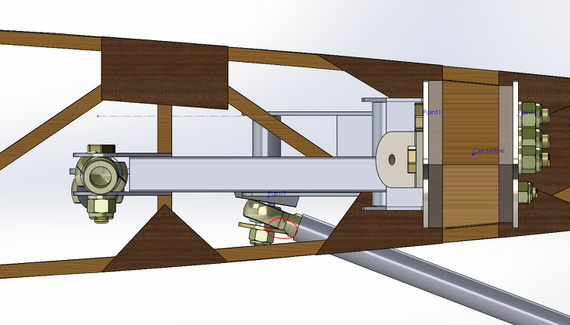
Pushrod is not clearing hardware if straight
So it had to be slightly bent to make the bellcrank side rod-end a bit more "horizontal", if you will, while not "horizontal" enough to hit the spar above.
This sounds easy; and probably is -- but tweaking splines, checking, re-checking and tweaking again while checking for full range of aileron's motion took up most of the time here.. I think I spent a good 10 hours or so just tweaking that one pushrod... And finally, here it is -- notice a slight bend in it. Just a touch less bend and it hits the washer under the bellcrank side rod end, just a touch more, and it gets dangerously close to the spar.
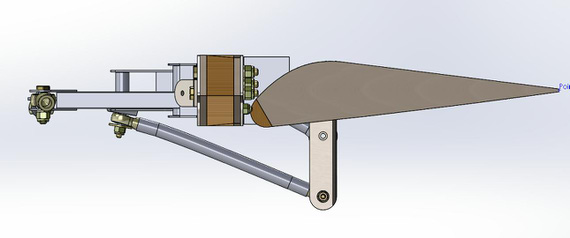
Aileron pushrod, tweaked to fit
Finally, I was able to move the aileron linkage on the wing model and check the idler - bellcrank pushrod for ribs' verticals clearance. It clears! There's another clearance issue though - by the looks of it, it won't clear the compression struts (3/4 x 3/4 inch struts go in the middle of the ribs, forming wing bays along with drag/anti-drag wires) by the looks of it. So struts and wires it is, next, amongst other things..

Control system looking from the wing butt: won't clear the compression struts
Fitting Wings To the Fuse
For some reason, Solid Works gods decided to start hating me here. Remember the note about angled hole in the front wing fittings pair? Assuming that pair is mated to the fuse (lower longeron); front spar butt hole (ha.. ha ha.. haha..) mated to that angled hole in the fittings' pair should produce correct incidence; and dihedral can be set with wing spar centerline mated to, say, one of the fuselage's crossmember's centerlines, at required 1 degree angle? Ha! Yes; that worked -- but for some reason, would cause all kinds of shenanigans the moment I would make the SWX assembly flexible (== allowing me to move control surfaces of the wing sub-assembly as a part of the overall assembly).
Yeah-right. -3 hours of my life until I gave up.
Instead, I made a virtual "jig" -- another sub-assembly containing planes at correct dihedral and incidence angles. Wing's "Top" plane would mate to the "wing" plane of the "jig"; latter ("wing" plane) would be at 1.5 degree incidence / 1 degree dihedral. That worked.
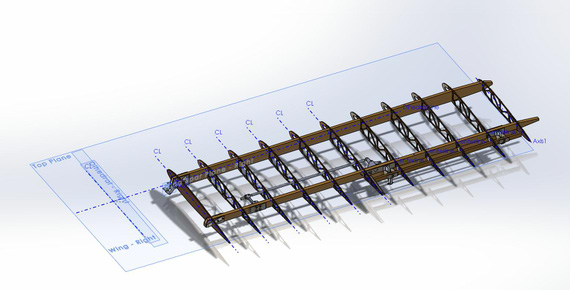
The virtual "jig" made of planes.

Dihedral of the lower right wing
That same "jig" assembly contains fittings mated to the wing spar -- and then, that "jig" subassembly is mated to the fuse via fittings - to - longerons mates.
That, for whatever reason, worked. After that, 10 more minutes of making one final pushrod connecting idler to Actuator Arm on the Torque Tube, and..
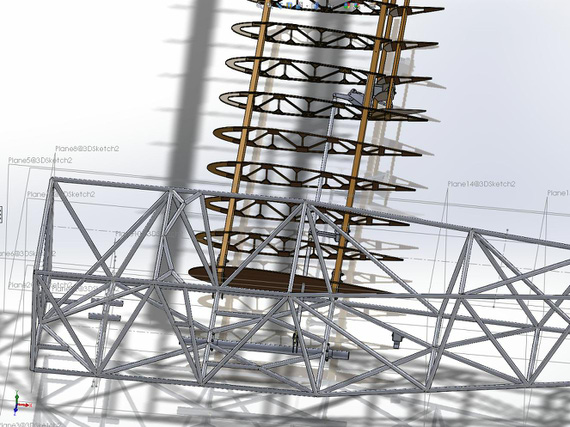
Control system all hooked up and working!
Happy me, making virtual airplane noises moving virtual torque tube moving virtual control system actuating virtual ailerons... Who says CAD isn't fun? :)
Now, back to those compression struts, only to find out that the pushrod does NOT clear... Le sigh.
"Air Force Four-Five, it appears your engine has...oh, disregard...I see you've already ejected."
-ORD ATC
Up ↑
© Copyright "79FT". All rights reserved. Feel free to cite, but link back to the pages cited.
This website only shows how I did things in my various projects. These pages are for information and personal entertainment only and not to be construed as the only way, or even the perceived correct way of doing things. You are responsible for your own safety and techniques.