[79FT]: Building Things |
 |
Wire Markings, Fuselinks, Load Measurements, and Turn-and-Slip
tested fuselinks, measured loads, removed and diagnosed turn-and-slip indicator
| On: | Jun 18, 2019 |
| In: | [Chickenhouse Charger] Electrical Rebuild |
| Time logged: | 6.5 |
| Tags: | 6781G, MA5 Charger, electrical, experiments, research, instruments, soldering |
Finally, doing some actual work on the airplane, and having fun! And I decided to start logging time.. because, why not!
Wire Marking
I like marked wires. I used to be a networking guy, and I was very meticulous about marking every single wire in my cabinets, so that I knew exactly what was plugged in where.
It took a bit of upfront time, but saved a bunch of it later on.
So naturally, I was planning to do the same on the Charger, and, more importantly, make it look professional.
Thanks to living in this day and age, that is simple. No, I'm not gonna pay someone to laser etch my wires - that's a cop out :). It's like paying someone to paint your plane.
Instead, I have researched and found a perfect label maker - Brady BMP21 (not including a link here because it will probably go dead after some time... just search for it). This thing has 3:1 heatshrink tube cartridges.
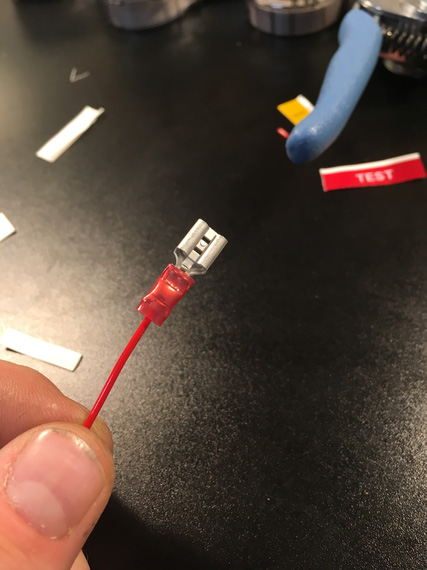
The proverbial coupon
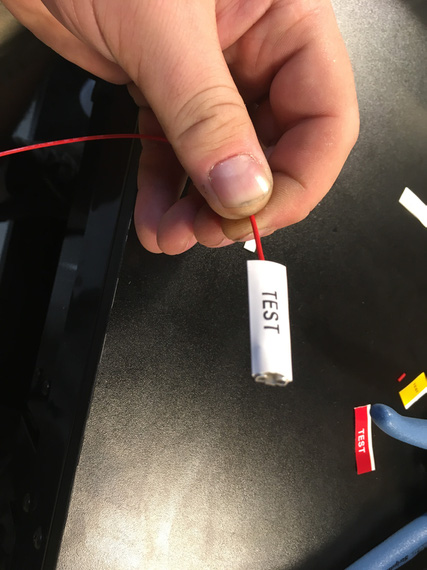
Prior to shrinking
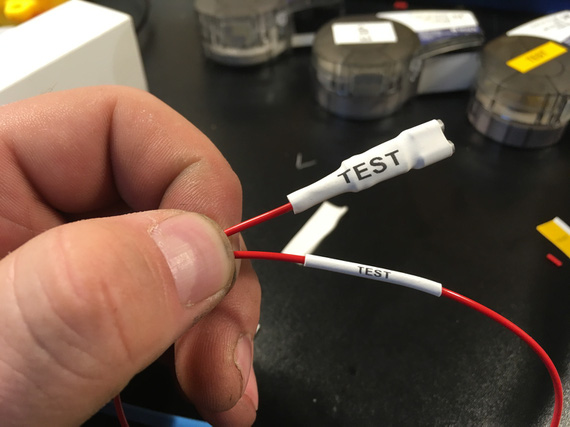
Shrunk!
Fusible Links
Every wire must be fused at the source. Well, almost every :). We don't fuse a couple wires like battery - master contactor: but this is an exception rather than the rule.
Most wires are fused on the fuse block at the main buss. But some wires are impractical or impossible to have hooked up to that. Think ammeter shunt wires as a classic example.
For those, most people use bulky, ugly, and generally eww-y inline fuses. But there's a better option! Enter fusible links.
The idea is simple: use a short length of wire 4 gauges smaller the wire to be fused. So if your wire to be fused is 20AWG, you would do:
Source -> 24AWG -> 20AWG where the 24AWG segment acts as a fuse. The idea is, in case of a short, that piece will burn first.
So, I wanted to convince myself that that will work fine for me.
Initially, me and my ham neighbor tried to use his ~30 amp power supply to do it. No joy. The best we could do is 22 amps, and (imagine that!) 24 gauge we were trying to burn held up to the abuse with no sweat at all! I could even hold it in my fingers. Yay, milspec wire!
So I decided to go rough. I do have a discarded old battery, after all. It was time to burn some wires with it.
Here, the red wire is 20AWG, and the black wire is 24AWG. Using crimps for quick setup.
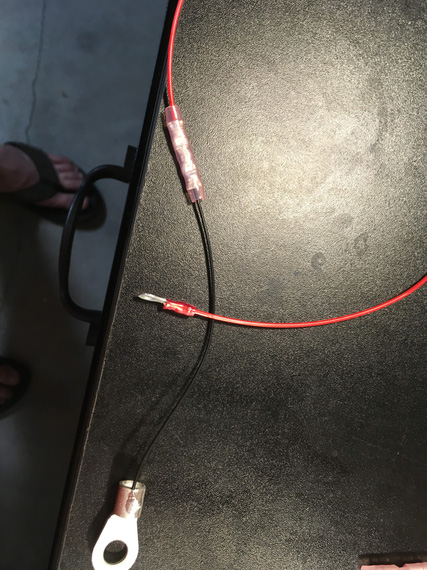
The link
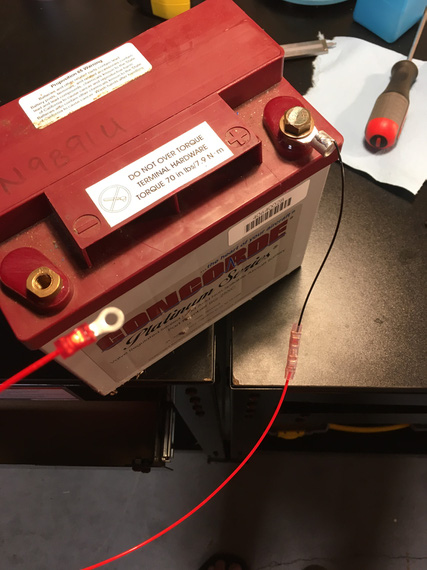
The hookup
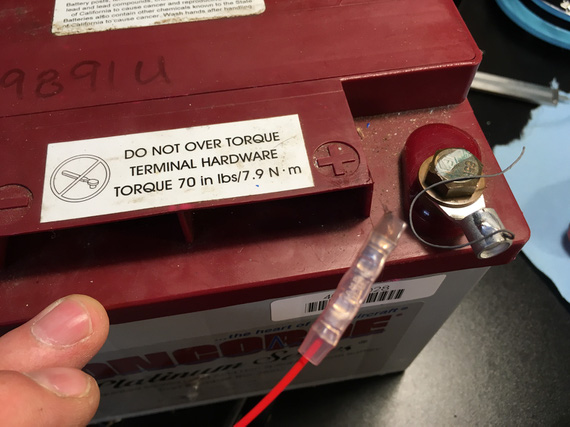
Boom!
It burnt real quick, in less than a second, and the protected (red) wire barely got hot (I was holding it - that was a part of the test). Yes, say that I am unscientific all you want - milspec wire holds up to 150C, and I can't hold up to 150C. The 20GA wire got barely warm - which means it won't cause any problems in a bundle.
It worked!
Now, it was time to set up a real one - to make sure that when the "fuse" wire burns, it doesn't damage anything.
B&C sells very nice fiberglass tubing covered in silicone for exactly this purpose.
I also soldered the fuselink in this time - I wanted to see how well will the solder splices hold to the temps.
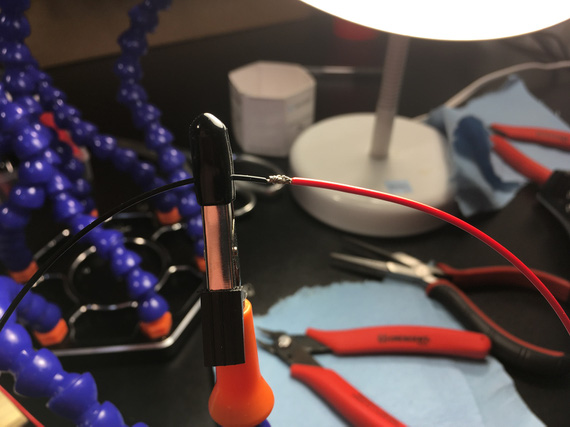
Soon to be splice
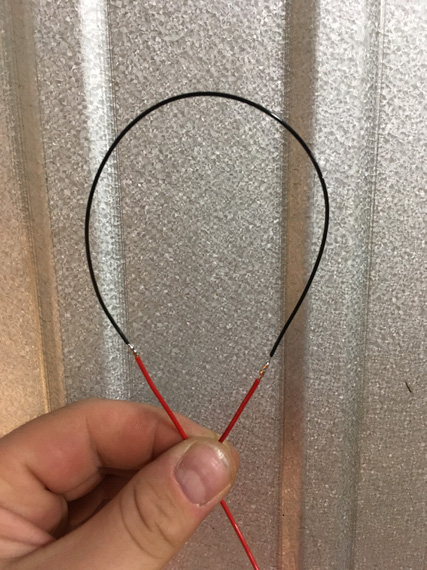
24AWG spliced into 20AWG
Note here: I know that in reality, the thin 24AWG wire will be the first in chain; here I'm just splicing it in the middle of 20AWG segment so that I can cover both ends. In "production" fuse links, the "source" end will be a ring terminal, and the fiberglass sleeve will go over it.
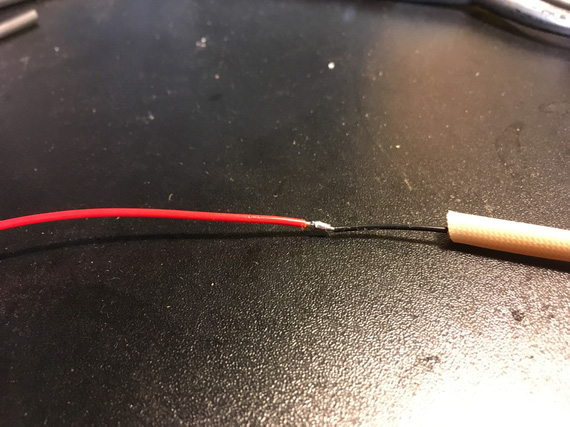
Sleeve on
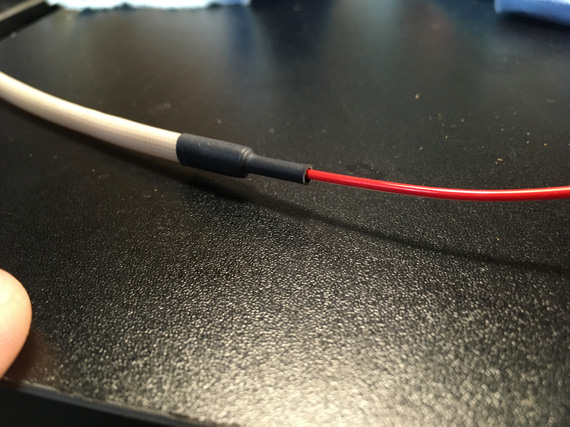
With heatshrink
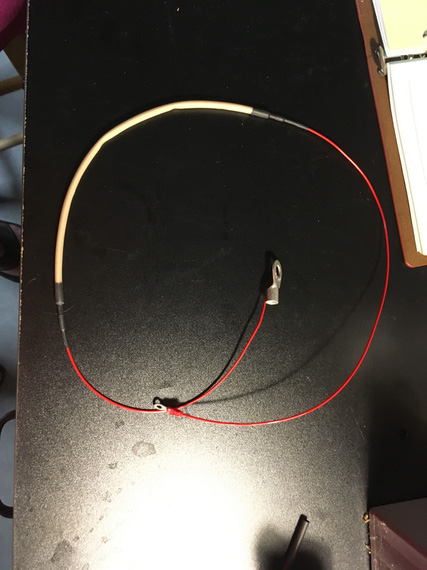
Ready to go!
Boom! Or not? I thought it didn't work, frankly. I didn't hear anything. I didn't smell anything. I actually took my multimeter to make sure the continuity wasn't there - it wasn't!!! Wow. The fiberglass sleeve contained the micro-explosion really well.
I took it off to inspect.
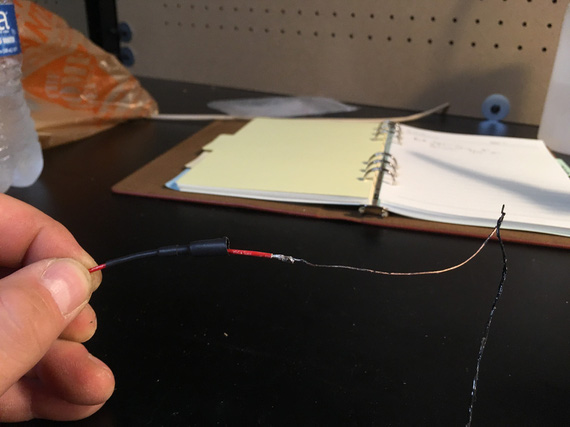
All burnt up wire
The fiberglass sleeve showed no signs of damage.
Great success!
I will need to play with different sizes of heatshrink and probably will use the glue lined strain relief kind just to support everything well, but hey - this worked very well indeed!
Load Measurements
Prior to ripping the old wiring out, I wanted to take some real life load measurements with various things turned on, so that I don't get any nasty surprises.
But this plane has no ammeter... damn. I searched around, and found this little doodad:

Hall Effect ammeter
Very nice. It basically measures current on the wire passing thru this big white ring using Hall effect. Very cool! No need to splice into the battery leads and install a temp shunt.
So, I rigged it up and took some numbers.
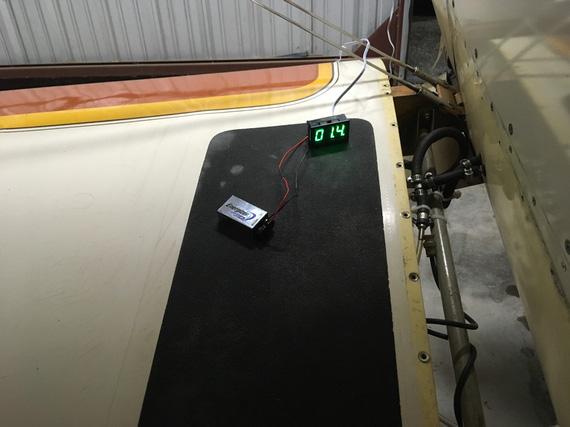
Rigged up
- Master On: 1.5 amps
- Includes: Master Solenoid, and a couple of gauges
- Fuel Pump: 0.2 amps
- "Radios" switch (turns on engine monitor, and power to radios: turning backlighting on them): 0.8 amps
- I-Com Radio, Transmit: 2.6 amps
- Intercom: 0.1 amps
- Transponder: 1.1 amps
- Smoke Oil pump: 2.2 - 2.6 amps (high on startup)
So couple interesting things here. I think the x-der number is too low, but it wasn't being interrogated, and I can't make it be interrogated without flying the plane or using a transponder tester which I don't have. Also, Master On is too high seemingly... Will need to double check later and isolate things (master solenoid, hobbs, voltmeter, voltage regulator, fuel gauge) if I care enough - I don't think I do. Also, fuel pump is too low seemingly. Need to double-check the spec.
And then, I could not turn on the Turn-Slip Indicator...
Turn-Slip Indicator
Sad, sad indicator... see, it's long. And it's wire connector is sticking out. And it's right behind the front seat's headrest, and there's just not enough room for it, and the connector.
So whomever put it in... did this:
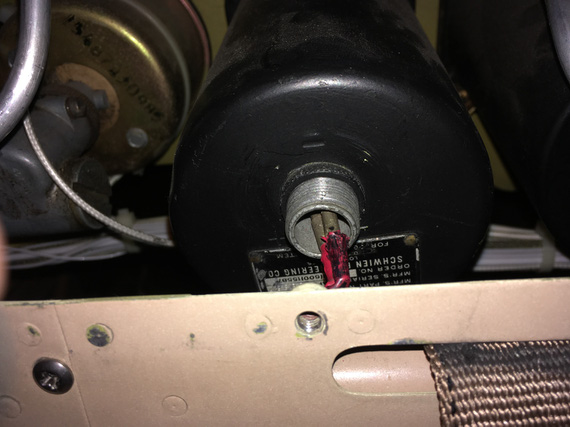
Sad, sad wiring
It's hard to see; but basically, those wires are bent "down" at a very sharp 90 degrees angle. Notice how he just used pins without the actual connector. The distance between them is tiny! I am surprised they haven't shorted over all these years. I really am.
Initially, I thought the gauge didn't turn on because that wiring was all bust up, so to test it, I decided to pull it out.
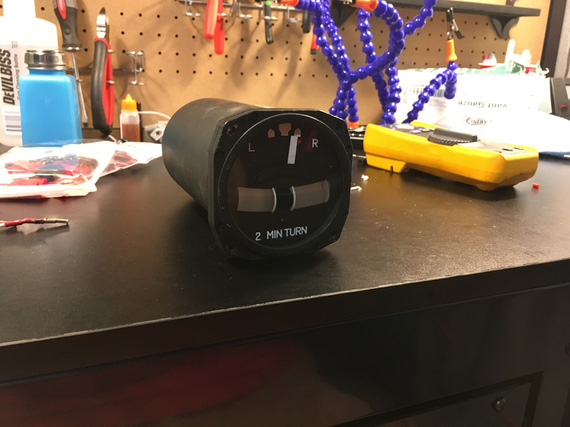
On the bench
I cut off the wires with those pins on them to hook it up to my testing battery... hmm.. but I needed some leads! Well, I was gonna make a bunch of various test leads - so this is as good a time as any! Man, I love soldering...
I long decided to make a bunch of leads with "passthru" banana plugs on one end, and something (a crocodile clamp, a battery clamp, a ring terminal) on the other. This way, I could mix and match, and plug them into my multimeter; daisy chain, and have multiples depending on what and how I needed to hook up. I had all the bits (clamps, crocodiles, banana plugs), and even got a roll of very nice super flexible silicone coated probe wire.
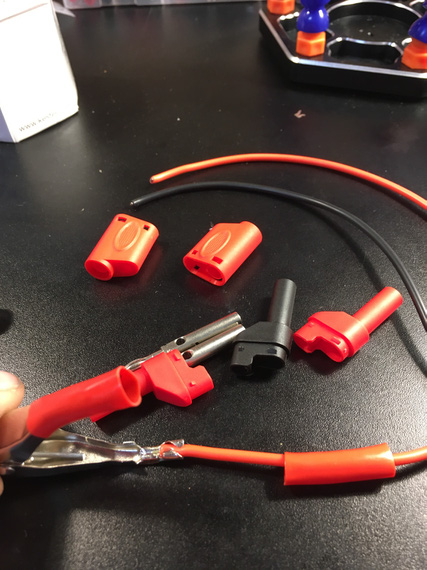
Components, and the battery clamp crimped on
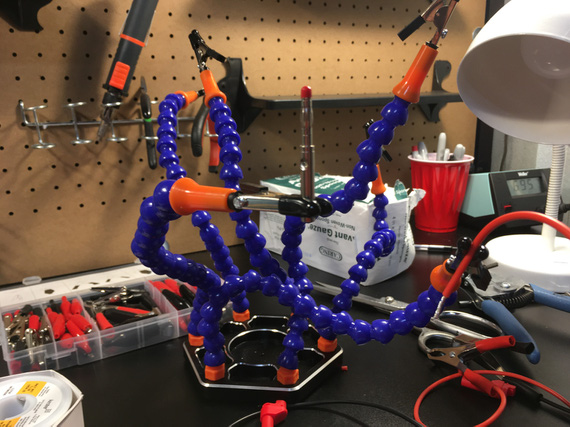
Release the Soldering Kraken!
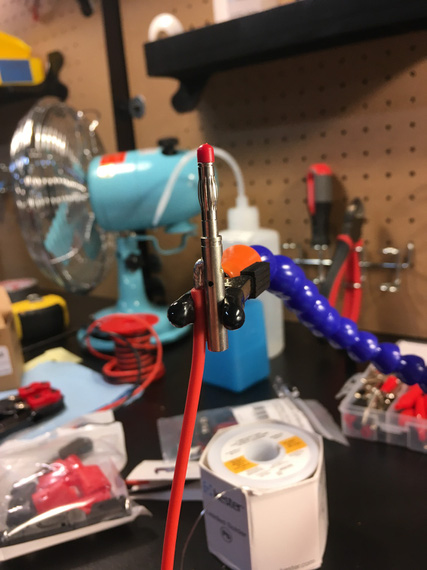
The banana plug pin
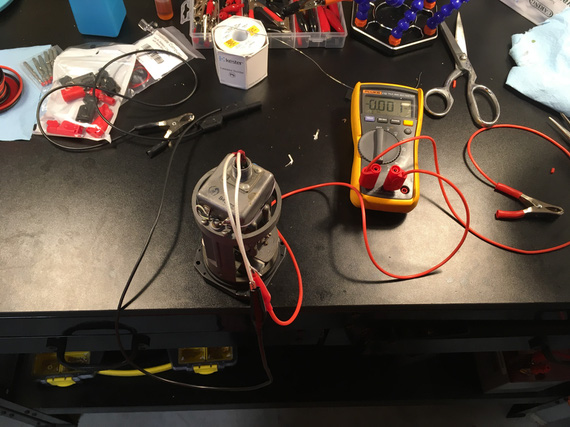
All hooked up
The gyro in the gauge didn't start. Damn.
But I had resistance between + and -. And I had voltage! Hmmm..
Second time I hooked it up, I saw a bit of a spark when I put the positive clamp to the battery, and heard something.
I spun the gyro with my finger.... it spun up!
Well, well. So that gyro "froze" in a bit... Yep, it was hard to turn over with a finger - no doubt a small motor in there had a hard time!
I probably "cleared it up" a bit when turning it over with my fingers - but that won't last long... damn.
Are we looking at the overhaul for this thing too now? Sigh.... Maybe I can find parts to do that myself, but not so sure about that.... It's not common for owners to overhaul their instruments - they're precision clockwork, after all...
Oh well.
And I will have to figure out how to solve that wiring problem with no space to hook up the right type connector. I am thinking along the lines of maybe routing a wire from inside of the gauge down thru a hole I'd drill, a grommet it it, and covering the whole business with with some sealant or something, so that the dust doesn't get in. we'll see. Need to ponder this a bit more.
Young man, was that a landing or were we shot down?
Up ↑
Race for the Engine
...or was it pickles?
| On: | May 17, 2019 |
| In: | [Chickenhouse Charger] 2019 Annual |
| Tags: | 6781G, MA5 Charger, Annual, engine, Rotec TBI, prop |
So after having discovered the electrical mess, I realized that she's gonna be sitting for a while.
Which meant...
Pickle time! Damn, this pickling thing is becoming a thing, excuse my tautologies...
I had to put her together enough to be able to run the engine to circulate and warm up pickling oil.
And she was apart. With intakes off, TBI almost off, no oil, and such.
Fuel / Intakes
So first, it was to be intakes.
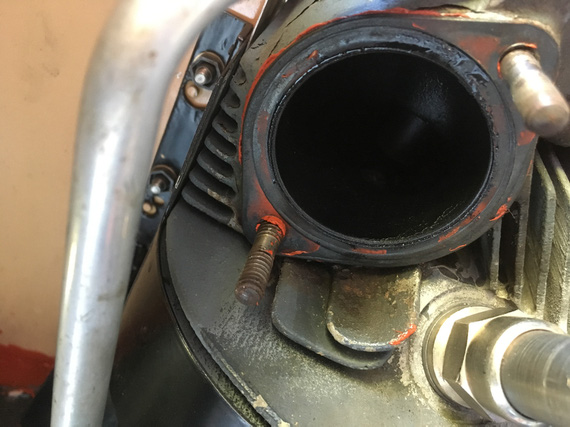
RTV where there should be none
Somebody put RTV to "seal" the intake gasket. Oh well.
Did you know that those 1 1/2 inch rubber hoses that go on intake tubes are much easier with very thin coat of oil?
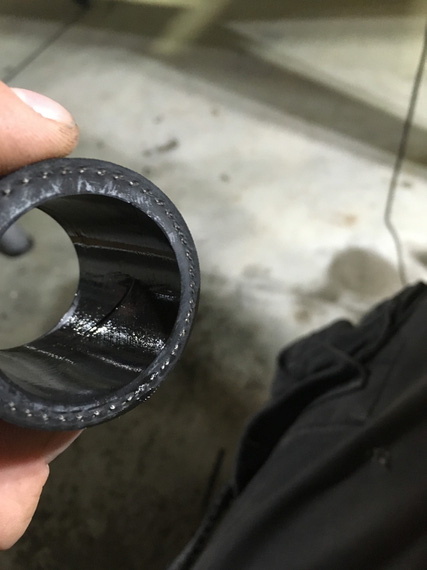
Oiling the hoses
And then, it was the TBI.
Recall that when I was putting her apart, I found pipe dope on the TBI inlet port?
Let me explain.
Fuel goes into gascolator. Then it branches: one branch goes to the engine driven pump, the other goes to the electric pump. Then, they go to the regulator on the TBI. Then, a couple of 90 degree fittings feed it into the TBI's inlet port, which has the "last chance" screen in it.
That's the port here, right above the airflow straightener:
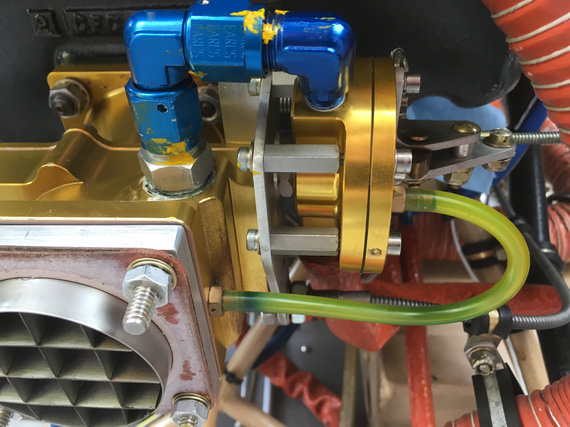
TBI from the down low
See that white gunk? That's Teflon dope. "Aircraft grade"; whatever.
Here's the problem.
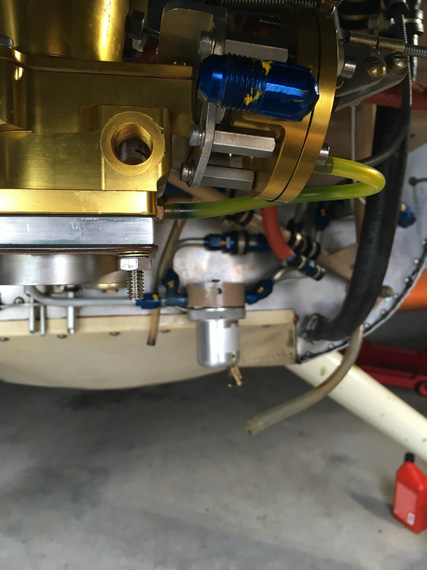
TBI inlet hole
Fuel has to go there, into that inlet hole. That's what the screen fitting screws into. Right past that, inside the TBI itself, there's a turn, another turn, and a spray bar that sprays gas into the intake, injection-style, thru a tube with a bunch of tiny holes. That's why there are screens in the fuel system: to prevent gunk from clogging up those tiny holes.
So now, what happens when you take a male fitting out of a female threaded hole, and the fitting was doped? Some of that stuff ends up on the female portion. Next time the fitting is put in, dope remnants will be pushed in past the engaged threads, and possibly clog up the works.
Not. Good. At. All.
That's why there is the copper crush gasket behind that screen fitting - to seal it to the TBI body w/o requiring anything extra. You can kinda see that gasket all smudged around with that dope on the first picture.
So I had to deal with it.. Clean it out somehow.
It was crumbly, but sticky enough to not want to come out.
I tried every solvent on hand. Nope.
I tried carefully scraping it out with a dental probe. Yeah, kinda worked, but I wasn't satisfied.
I tried every solvent in my buddy Dick's hangar. Nope.
In desperation, I drove to the local Home.. strike that, Aerospace, Depot, thinking about picking up every kind of solvent they had and I didn't.
And then, I remembered this:
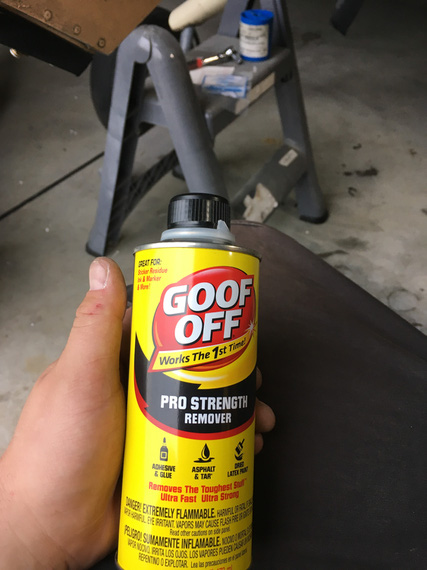
Goof-OFF!
I don't know what kind of concoction that is; but it worked! The hole was clean. Next time was a couple days after, and when I got back to the hangar, I discovered that it has turned into a lake :(
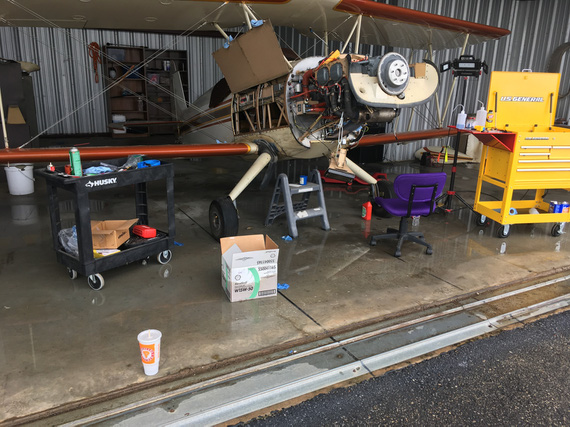
Lake in my hangar
Grading's all screwed up around our hangars, and when we get lots and lots of rain, they flood. Not too much though, luckily. This was the second time in the past few weeks - first time, I had my tools scattered around the floor. This time, I was smarter...
Anyway, back to the TBI. The rest of it went together quite nicely. I discovered that there was TorqueSeal put on the idle mixture screw.
Why? No idea. That screw is spring loaded. Should stay put.
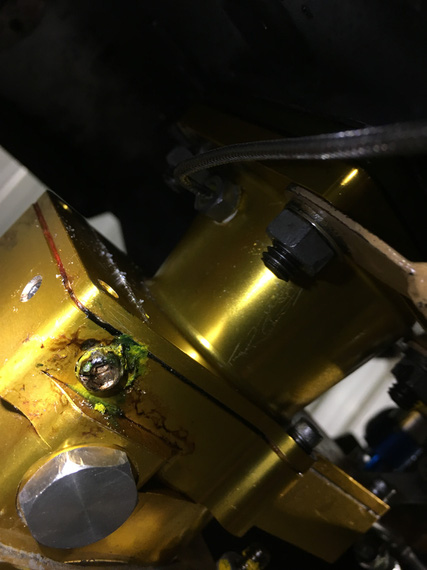
Torque Seal where there should be none
I wanted to flush the lines and then the TBI to make absolutely sure none of that dope went it. The best way to do that would be with the electrical pump; but I'm a one man show.... and the switch for it is 5 feet away from the firewall.
So, I had to rig me up a little doodad.
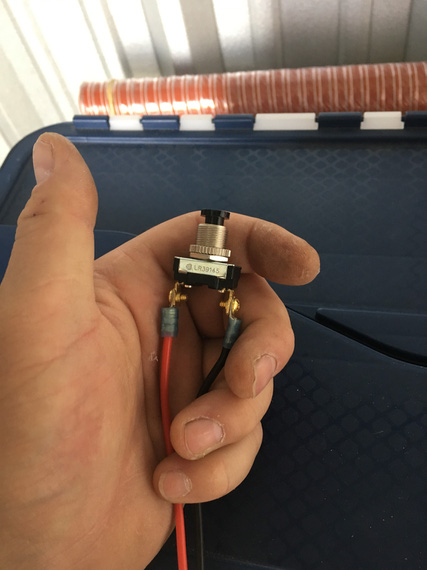
The simple click switch
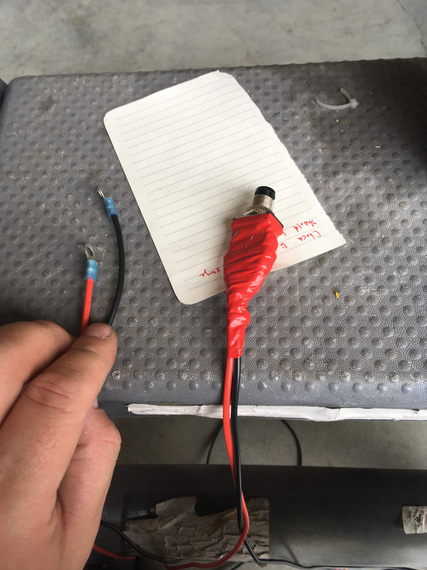
.. with ring terminals
The ring terminals were hooked up to the Master Solenoid in such a way that when the button was clicked on, the Solenoid would close.
The pump was turned on.
This way, I could click my button, Master Solenoid would close, and the pump would start running. Neat-o! I'll need it later, too.
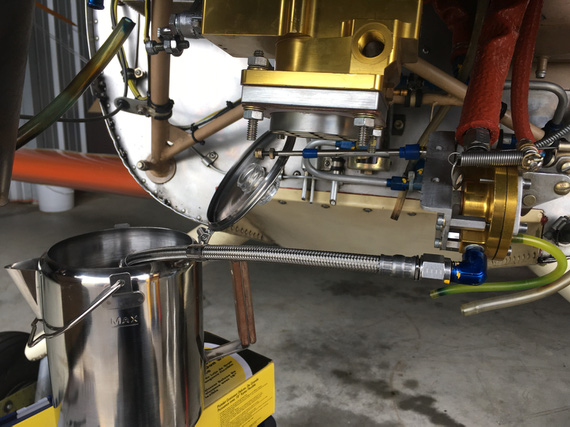
Flushing - braided hose provides nice bond to the airframe
The Pickling
I borescoped the engine (looked alright - I'll post a report about this later, maybe...); and it was time to fill'er up with oil.
Pickling oil was mixed up next, and into the engine it went.
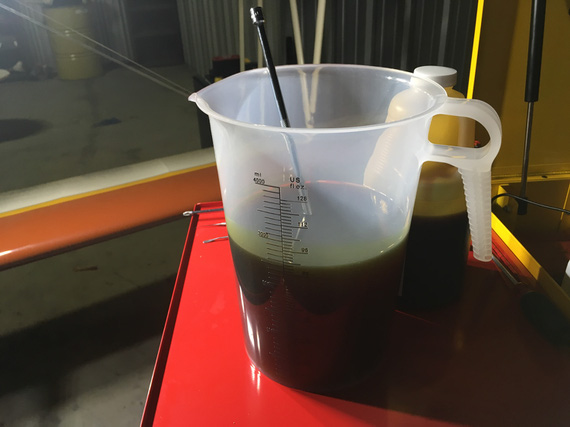
A pitcher of pickling oil
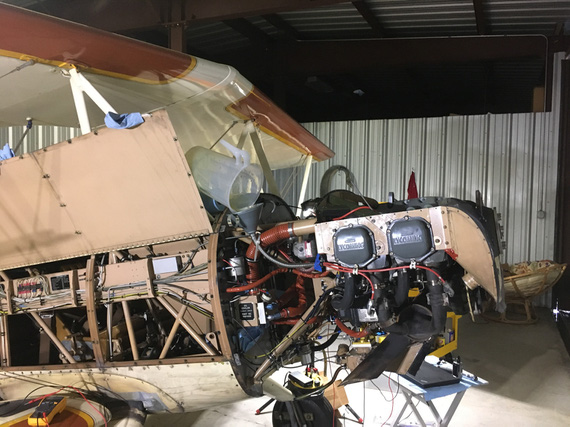
A recipe for a mess...
After filling the sump up, it was time to check for oil pressure. Lycoming tells you in SB1241C to pre-oil your engine by cranking with the starter in 10-30 second bursts until oil pressure comes up to 20 PSI.
Well, oil pressure gauge on the Charger is finicky, so I wanted it to at least move.
Oh wait. She has an ignition/start switch. No way I can use that to crank and not have a hot mag w/o messing with P-Leads.
Crap.
Also, I might want to crank from around the firewall (the prop was still off).
But I had my pushbutton doodad!
So I rigged it up to the starter solenoid this time.
Of course I misunderstood the way the starter solenoid was wired.
It had two terminals.
I thought one of them was ground; with the wire going to the firewall. The other then was supposed to be positive.
That didn't work.
I measured it - between those terminals - nothing. "Dead starter solenoid", I though. Crap! It was 8pm. Auto parts stores were closing soon.
I rushed to a nearby O'Reilly. Picked up a starter solenoid. Went back.
Measured it too. NOTHING? How come? Something was amiss.
Only then I started suspecting that something was off. That other terminal on the original starter solenoid I was hooking my positive wire to was all corroded and looked like it never had a nut.
OH! The way it's supposed to be wired is that positive goes to the same terminal where that wire I thought to have been ground was. It wasn't a ground wire - it was a diode. And the ground was off of the case of the solenoid.
Okay.
So, we're cranking now.
30 seconds. No pressure. 30 more. No pressure. Crap!
I unhooked the oil pressure sending hose (the one that hooks up to the line that goes to the gauge).
Crank. No oil. A couple bubbles is all I got.
CRAP!
The oil pump de-primed itself?
Kinda makes sense I guess? The plane was sitting for way too long :(
So, I took off the oil cooler return line. Dumped another quart of oil in there.
I had this hose fitting that goes on top of an oil bottle that was very neatly set up to mate with the engine oil hose's flare: so I could squeeze the bottle and push the oil in.
After the whole quart, I re-hooked the line back onto the oil cooler, and tried again.
Success! Now, I saw oil coming out of the oil pressure sending hose.
Hooked it up to the gauge line, and saw the gauge move, finally. Good.
Damn, with all that cranking I ran out my old battery I had put in there.
Now, have to flip the battery (to put in the good one - the flying one - I always use my old battery from the Cheetah when I mess with electrical, not to abuse the actual "production" battery).
Now, the top spark plugs go back in, the ignition wires get hooked up.
Prop time!
Bolt one - start it in. Bolt two. Bolt three.
Bolt 4. Doesn't go in? Not even a chance? What the hell?
I pulled the prop back off and laid it down. Put the front crush plate on top (that one positions the bolts).
No matter what I did, there'd be at least 3 out of 6 bolts that won't go in. This time, it was a few dry days, and I guess the prop moved enough to have the "top" and "bottom" holes (if looking at the prop horizontally) move closer together. It was off by almost a 1/16th.
So here I was. With an engine that was cranked for a total of a few minutes, and probably had scraped a lot of oil off of cam lobes and lifters.
With a prop.
I couldn't put on.
Which I needed.
To fire the damn thing up.
It was late. I tidied up, and went home.
The Prop
I wrote a note to Frank Johnson who made the prop that same night, and called him the next day.
He wasn't surprised. "Redrill" is a simple fix.
But I was a bit apprehensive, and this was a nice excuse to meet him. He's 2 hours away from me. We agreed to meet in a few days, at the first time he was available.
So, the engine with oil scraped off the lobes had to sit for another couple days.
Nothing I could do in that short a time...
Interlude
The weekend hit us; and it is a weekend in May, in Texas. Which means...
MUDBUGS!
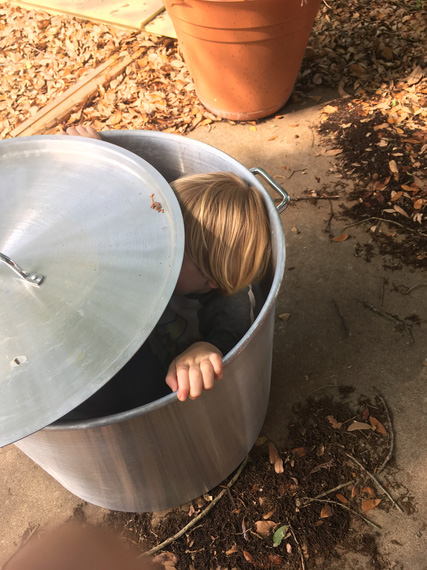
The annual fit inspection
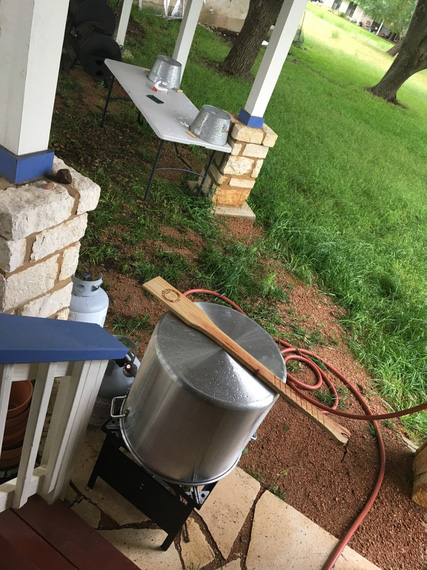
The setup

The fixings

Prep

Aliens!

The Boil
The Finale
Into the trailer the prop went, and to Frank's we drove.
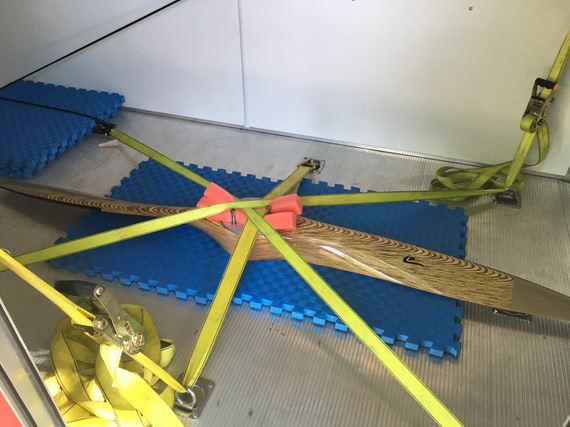
All tucked in
Of course, it took us 15 minutes out of 3 hours I spent there to fix it. The rest of it? Well, what can two guys who're crazy about airplanes do at one of those guys' shop and hangar? Hmm... What could we do? :)
The weather was swell, and I was in a good mood - and airport was on the way back from Frank's.
So, I went straight to the airport.
The prop went on beautifully.
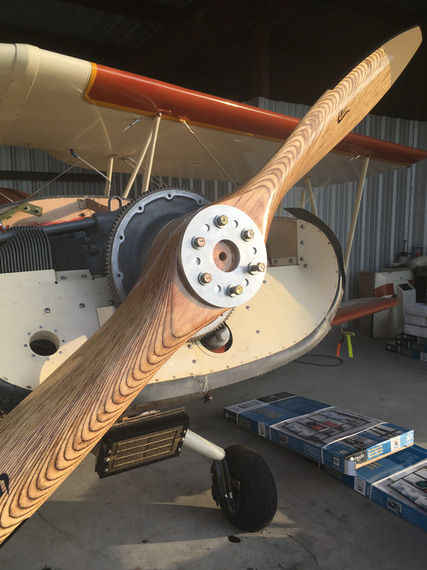
Finally, on
It was nice, sitting in a running, shivering airplane, to watch the sunset. If you looked up, it almost felt like flying. With the buzz, the shake, the smell and the noise.
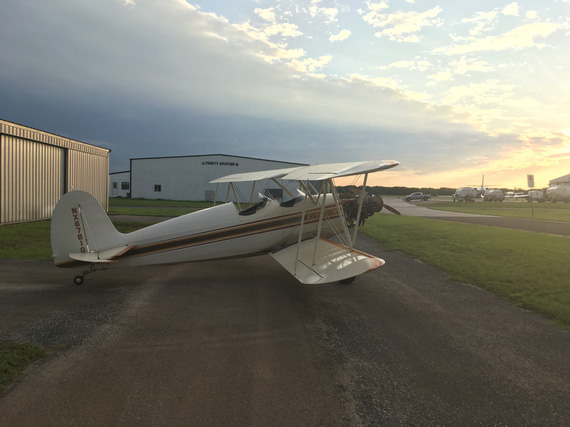
The Sunset
A couple days later, I went back to the hangar, sprayed the engine top and replaced spark plugs with desiccant.
Now, I can focus on the electrical mess...
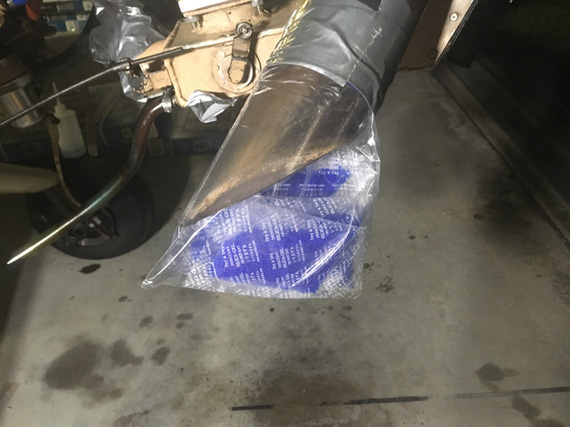
The Muffler plug
You can always depend on twin engine aircraft. When the first engine quits the second will surely fly you to the scene of an accident.
Up ↑
The Flying Fire Hazard
...sparks galore!
| On: | May 16, 2019 |
| In: | [Chickenhouse Charger] Electrical Rebuild |
| Tags: | 6781G, MA5 Charger, Annual, electrical |
This thing nagged me for a while. The Charger did not have the Field breaker. For that matter, it didn't have the Alternator master breaker, either.
It had this weird "main buss" breaker for 60 amps, but that didn't look like the Alternator breaker to me.
So in between dealing with other things after having decided to put her thru Annual in 2019 a bit early, I was running around with my multimeter, tracing wires.
Initially, I quickly discovered that some lines were definitely not fused; like Battery -> Main Buss line, and thought I'd put inline fuses into them, and be done.
She has an old charging system; a mechanical switching voltage regulator, and a Delco Remy alternator seemingly from a tractor:
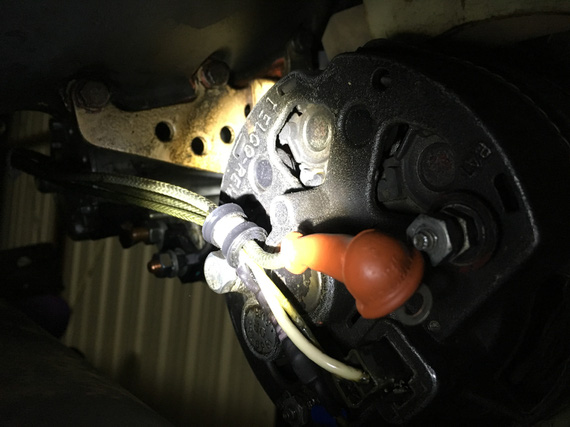
The old Delco-Remy
Voltage regulator didn't make sense. It had 4 wires (should be 2: supply and field output, or 3: supply, sense, and field output).
Alternator didn't make sense. Instead of 1 wire for Field input, it had two wires.
Additionally, Battery Contactor didn't make sense. One terminal had a wire going to it. The other was grounded....
Interlude
Battery Contactor is an interesting point here. Normally, one terminal is connected to the "always hot" side of it (basically, directly to the battery) and the other goes to the Master Switch. Master Switch turns the Battery Contactor on by grounding that wire, providing the negative side to the circuit. It's a safety thing. If that wire breaks, it'll either turn the electrical off (open circuit), or it will keep it turned on (short to ground). That's it.
But, one of the terminals on the Battery Contactor was grounded... that means, that the other terminal (the wire coming from the Master Switch) must provide positive side??? Huh? But where does it get it's power from?
Tracing
So to tracing we went. I spend maybe 10 hours trying to find diagrams and understand that alternator and voltage regulator hookups.
And me tracing it spelled my doom.
The Diagram
Now, I didn't trace the rest of it. Just the main distribution system. That was enough.
Shall we?
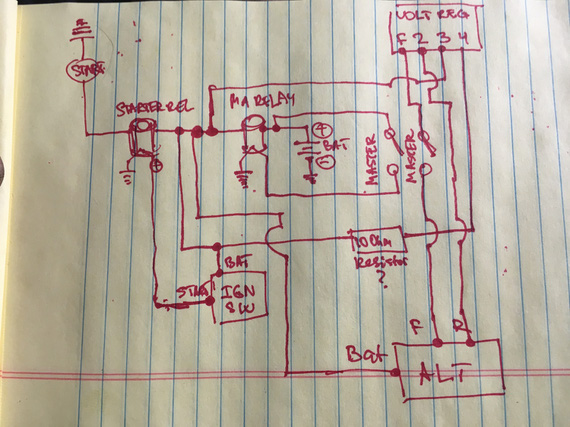
The current main power system of the Charger
Yep, the diagram is missing the main power buss. It's dangling off of the same spot where everything else that's interesting is - the Battery Contactor (marked MA RELAY) <-> Starter Contactor (marked STARTER REL) link.
So let's see what we have here.
- Lots of unfused wires. Do you see a single fuse here? Nope. That's because there aren't any. All the fuses are further downstream, off of the main buss.
- Voltage Regulator has this extra wire running to / from cockpit that isn't really necessary and could've been kept on the hot side of the firewall (terminal 4 wire)
- Alternator field broken at output (F->ALT) rather than at input (battery -> terminal 3)
- And the best part? Always hot wire that you can't turn off between the battery and the Master Switch to turn the Master Solenoid on.
That last bit bugged me. I couldn't find the damn thing. Even before actually tracing it, I knew that if the Master Solenoid is switched on the "hot" side, it needs to get the power from somewhere, and that only could be battery. But I didn't see any wires on the always hot side of the Master Solenoid. Only when I traced it, I actually traced the physical wire to where it goes, and then found it. It was so tucked behind the battery -> Master Solenoid wire that it was invisible:
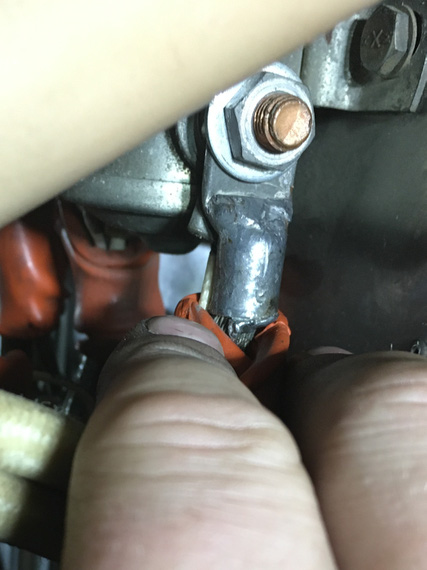
This little !@#!S@#....
Oh; and by the way, the Master Switch is the only switch that's soldered in, and w/o any good insulation around the terminals, and over-stripped wires. So that's just waiting to short, and the magic smoke that'll be let out behind the panel when that shorts can't be stopped (always hot wire, remember?)
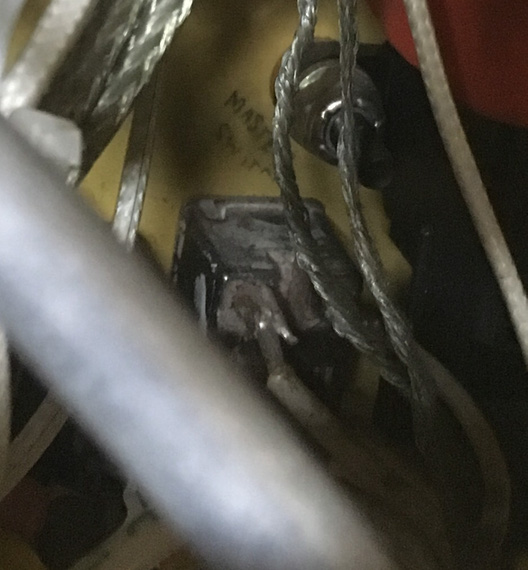
Master Switch
The Wires
So I kinda went backwards here; but I thought it'd be easier to see the diagram first.
Let's see.
Most of connections are made on this very nicely marked terminal block:
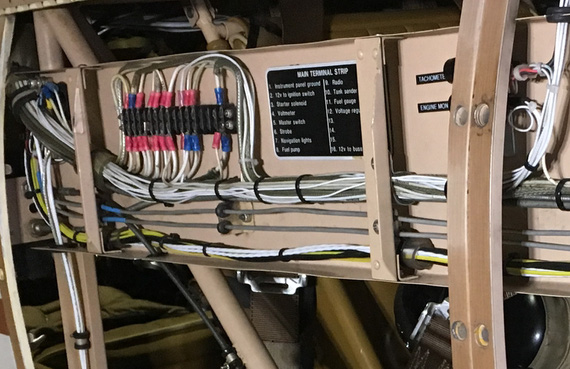
The terminal block
All the switched power comes out there, and every wire is marked. This actually helped a lot in tracing. This block is on the side of the plane, right next to the front hole's backrest.
You know what threw me off the most with that damned always hot wire (I ended up tracing it physically)? It's how it's hooked up.
Yep, it is hooked up to that terminal block. To the terminal... that is marked.. (drumroll).... "Master Switch".
Wait.. this actually makes sense... But where's the "return" from the switch?
Ah! It's the wire that's marked.... drumroll... "Fuel Gauge"!
So really, let's look at what's going on, shall we? Zoom in the image below, it's annotated.
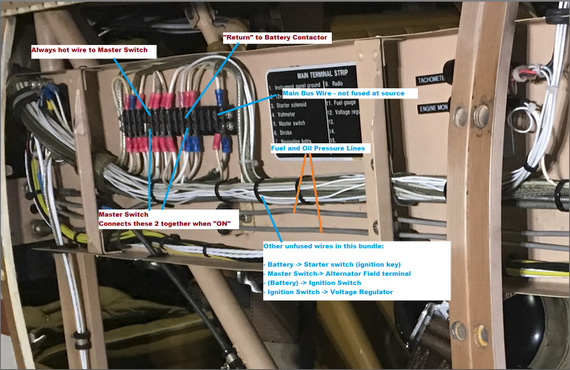
Untangled
So let's see. We've got this bundle of wires, a lot of which are not fused, and one of which is always hot.
The Main Buss wire is the thickest one (10 gauge maybe?) that's not fused between this buss bar and the source (engine compartment).
Oh, did I mention that this buss bar is on the side of the plane near the rear instrument panel (so that 10 gauge run, and the rest of the harness between firewall and the panel is about 30 inches long)?
What else do we see there? Oh! The two little 1/16inch thick aluminum lines carrying.. fuel pressure (and oil pressure).
Shall I say more?
Shall I say that there's a fuel tank in between the front hole (passenger) and the firewall?
That the wires run along between firewall and rear cockpit along that fuel pressure line (to fuel pressure gauge)?
That if one shorts to this very nearby fuel pressure line, it'll burn a hole straight thru it, and then ignite the gas that'll start coming out?
Yep.
Can I fix all of that?
Sure. But rewiring will be much much easier, because I have to touch pretty much everything. Re-running half of individual wires in a bundle is much harder than re-running them all.
So, I made a decision to rewire the plane... Sigh. Looks like I won't be flying for a looooong time.
Oh, and tell you what. Tracing wires on a biplane is dangerous. I ended up twisting my knee and pulling a muscle while trying to get behind the panel so badly that I couldn't walk (or sit) for 2.5 days :(.
Navy carrier pilots regards Air Force pilots:
“Flare to land, squat to pee.”
Up ↑
Annual 2019: The Cowling Conundrum
...Comanche, no Comanche?
| On: | May 15, 2019 |
| In: | [Chickenhouse Charger] 2019 Annual |
| Tags: | 6781G, MA5 Charger, Annual, baffles |
Baffle seals on this plane are original reinforced neoprene rubber, and they were in pretty beat up shape. There is a lot of gaps, they sag in places, making the seal really not that good.
So one of the things I decided to do is to redo them.
Pardon the cruddy pictures; but those ones are the only ones I have :(
The Nosebowl
One of the things I noticed immediately is that baffle seals were turned the wrong way in the nosebowl area; where the front "air ramp" joins the bottom of the nosebowl.
Here's the nosebowl and the front ramp:
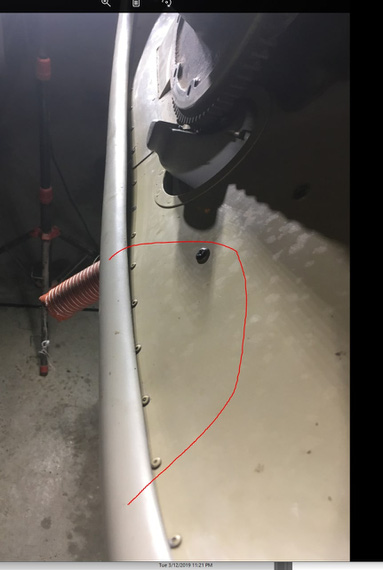
Front ramp
Notice the circled area? Here it is, from the back:
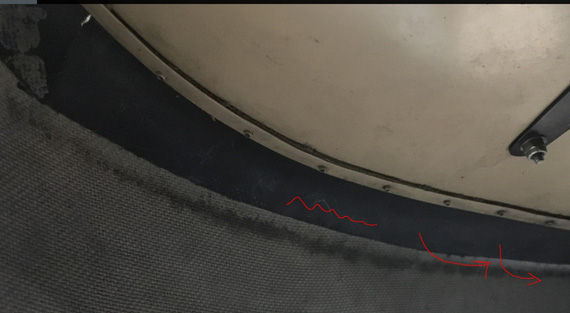
The behinds
That marked rubber seal is in the circled area. Notice it's turned the wrong way; "into" the cowling, rather than away from it? Ram air hitting that front "ramp" will "bend it in", and leak into the underside of the engine compartment - precisely where it's not supposed to go.
Naive me thought that it was just wrongly installed - the rubber needed to have been folded up and out, "into" the lip of the nosebowl.
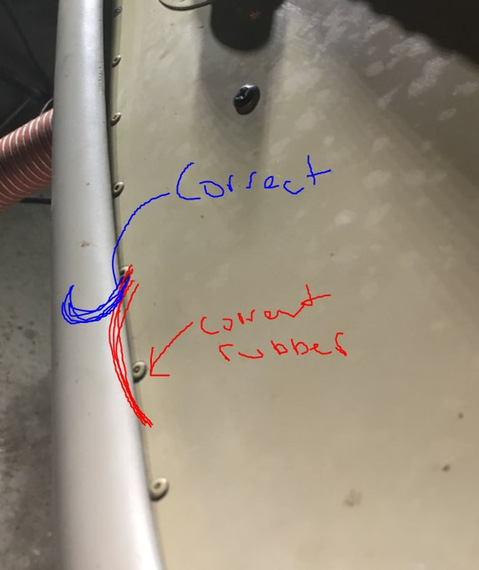
Correct and current seal orientation
Ha! Well, Remo (the guy who built the Charger) thought different.
There's just not enough room there. Everything is super tight. The seal just won't go there and stay there. There's just no room.
Look at the above two pictures - inside and outside - again. You'll understand why. Use pop rivet line as your reference.
Here's where the problem gets worse. Ramp is really thin - so with just a mild pressure, I can make that gap between the ramp and the bowl 1/4 - 3/8 inches. Guess what happens when ram air hits it... :)
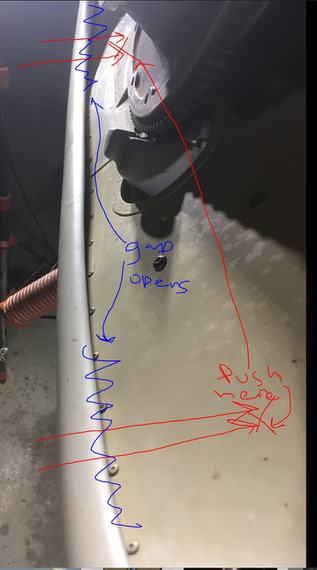
What ram air does...
Okay, so then I went digging.
I thought this was a standard bowl. I was right!
It's an old Comanche single style bowl (I think).
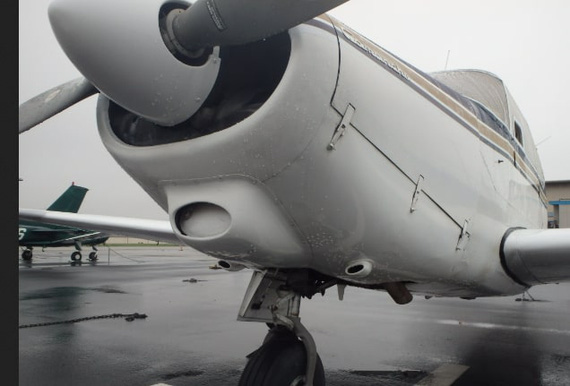
Comanche nose
Looks similar? I researched further.
Here's a guy making replacement ramps for Comanches, with some good pictures.
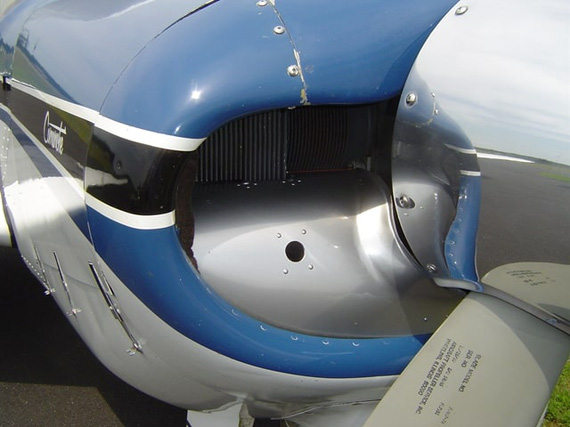
Front ramp on a Comanche
Okay; see the difference? Comanche ramps are curved the other way.
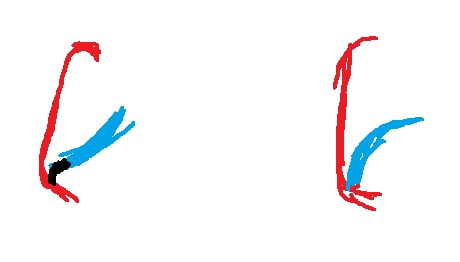
Changer vs. the Comanche
This is cross section. Mine's on the left, Comanche's on the right. Red is nosebowl; blue is this ramp, and black is my baffle seal.
Mine is "concave". Comanche is "convex". So if I got my thinking right, this makes the Comanche version more rigid facing the wind.
Drawing from the Comanche's parts' manual confirms this proper curve.
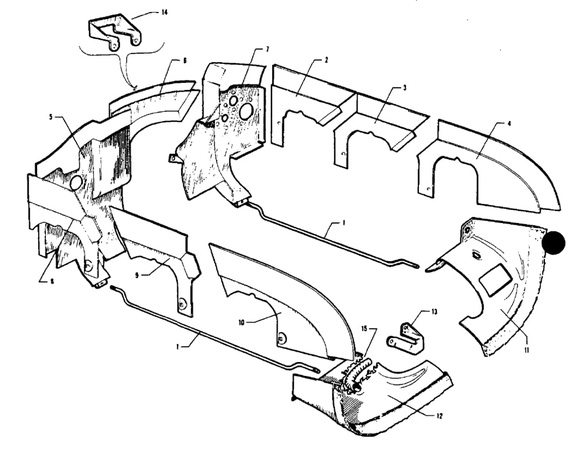
Comanche parts manual on baffles
The parts I'm talking about are numbers 11 and 12, bottom right corner.
But how the heck do they seal them? Notice that the material on the drawing above seemingly has some "dots" on it (as opposed to the rubber material on the side baffles).
Well, back to our "remade Comanche front baffles" guy.
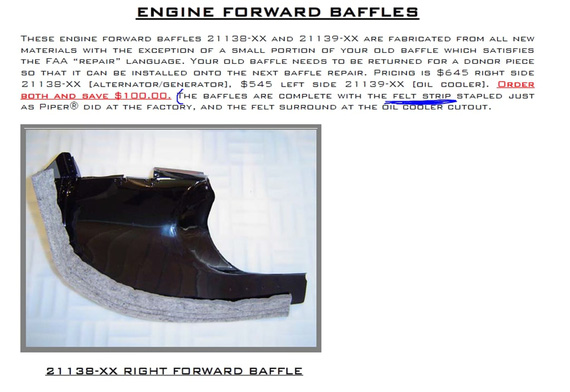
Forward baffles from Comanche Gear guy
Felt strip!
Well, I guess that makes sense. Felt wrapped around the front ramp.
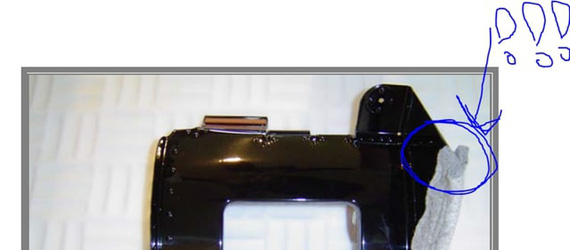
Felt strip
Felt is thick and, contacting the nosebowl, I guess, will create a good enough seal if the ramp is rigid enough. I am guessing that Comanche's ramps are way more rigid than mine due to that opposed curve.
So where are we at with all this?
Remo probably built this noseramp himself. It looks very custom. It's too thin and doesn't have rigidity - ram air will flex bend it "into" the cowling. It's not sealed properly practically along all of that bottom edge between the bowl and the ramp.
The only hope for it is that it's aerodynamic-ish and looks like a "dozer blade" - curved up. Maybe the nosebowl lip deflects the air enough for it not to go under too much:
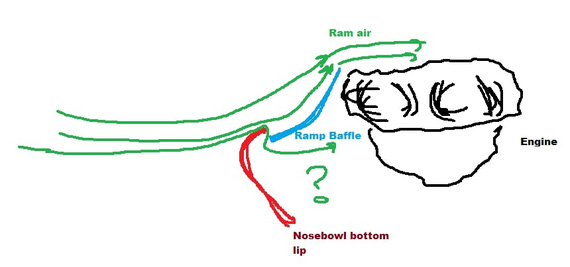
Airflow diagram
Can I replace the current rubber seal with felt?
Maybe. The front of the engine moves. The ramp's aluminum is very light - I am afraid that if I were to add any reasonable quantity of felt to it to hold the seal tight it will warp the aluminum via relative motion of that ramp (hooked up to the engine) rubbing on the bottom of the nosebowl. Or worse yet, make a hole in the bowl.
Can I replace the ramp? Well, everything's possible; but that's a massive undertaking. That ramp / nose baffle, Comanche-style, has that compound curve, and I don't have time or skill to do it fast. 2 months? Maybe, if I get lucky. BTW this is probably why Remo did it this way - because his is just an aluminum sheet, wrapped around the front of the engine, "neck cone" style, and cut to fit.
So, what do I do?
After discussing this at length with my good friend Ben, we settled on testing this out first to see how bad the air flow going "under" will be. I can mark the bottom of the nosebowl with some tinted oil, and go fly. Oil streaks will tell me if the air is flowing under a lot, or not so much.
I'll also replace all the other baffle seals, which will improve cooling. There's a lot of gaps to RTV, too.
I don't want to replace the bottom nosebowl ones, because actually there the rigidity of old neoprene rubber seals should help...
The three best things in life are a good landing, a good orgasm, and a good shit. A night carrier landing is one of the few opportunities to experience all three at the same time.
Up ↑
Annual 2019: The Rest of April
...and 1/2 of May
| On: | May 14, 2019 |
| In: | [Chickenhouse Charger] 2019 Annual |
| Tags: | 6781G, MA5 Charger, Annual, Rotec TBI, baffles, prop, fabric |
Well, as usual, I got too focused on the plane and the mess I got myself into; and didn't log things as they went...
I will split the notes in multiple posts; by theme / subject. Just general notes here.
Annual, Continued
We got together with John, my IA, and continued working on the plane early April.
We pulled the prop, so that I will have access to baffles (I wanted to redo them).
John re-riveted the air takeoff flange back to the front ramp.
Meanwhile, I started disassembling the fuel system to get to the screens, including the oil sump screen, and clean them.
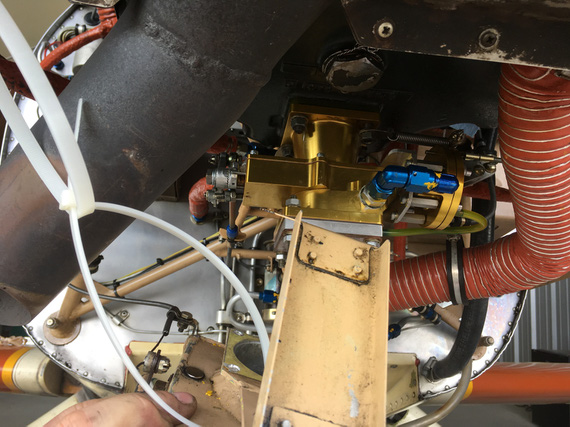
Airbox off
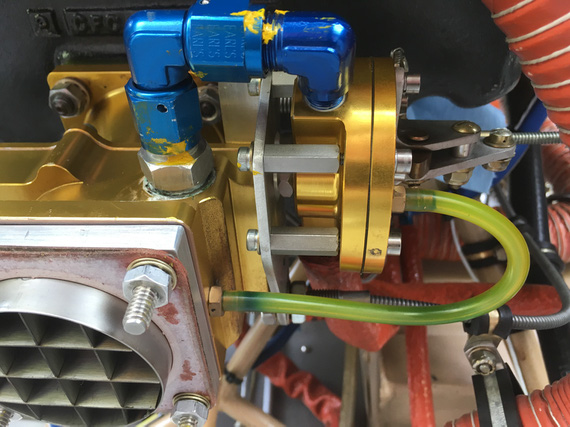
TBI intake airflow straightener
Okay, stop right there. See that fuel inlet, right above the air intake? See the little smudge of dope around the inlet fitting? Yep. Teflon dope. Rotec explicitly tells you not to put ANYTHING on there - there's a copper crush gasket behind that fitting.
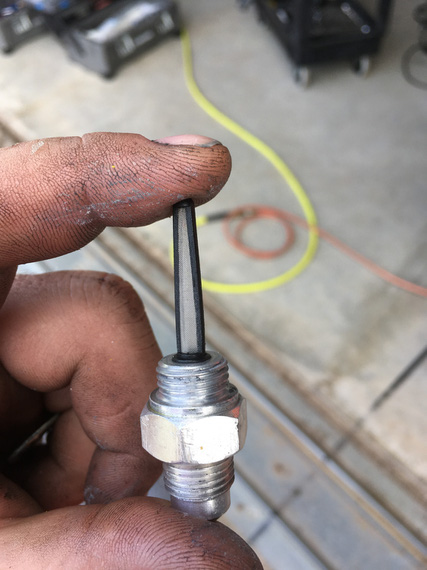
TBI screen
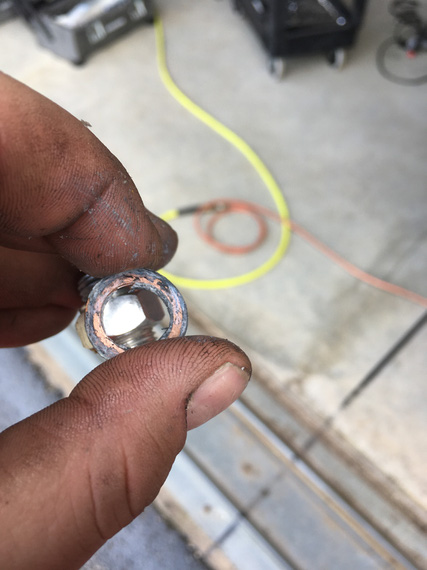
TBI crush gasket
See all that dope above? Okay, that thread on the TBI is a female thread. Dope will be all in it, and guess what will happen when I screw the fitting back in? Yep. It'll go into the TBI fuel galleys. Right to where that spray bar is with tiny little holes in it. Not Good (c).
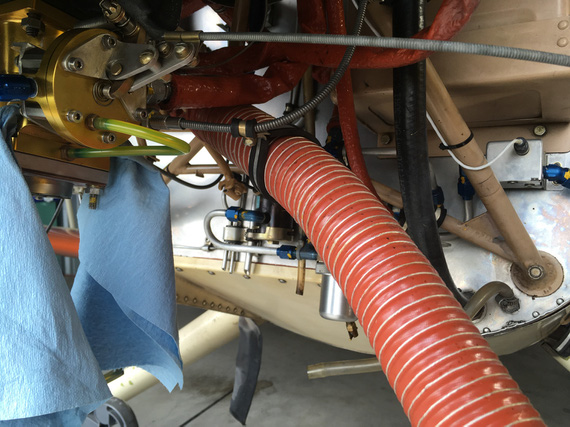
TBI holes plugged
Intakes
I noticed evidence of possible intake leaks, so without "burping" the engine, decided to pull the intakes and replace the gaskets. This is my karma. I did that on the Cheetah just a year ago, and scraping remnants of one of those gaskets and re-chasing the threads took me about 10 hours; maybe more.
Also: interesting note: she has intake tube clamps on studs and not bolts like every other Lycoming I've seen. Old, narrow-deck cylinders :).
Prop
When we pulled it, bolts were in the thru holes on the wooden prop really tight.
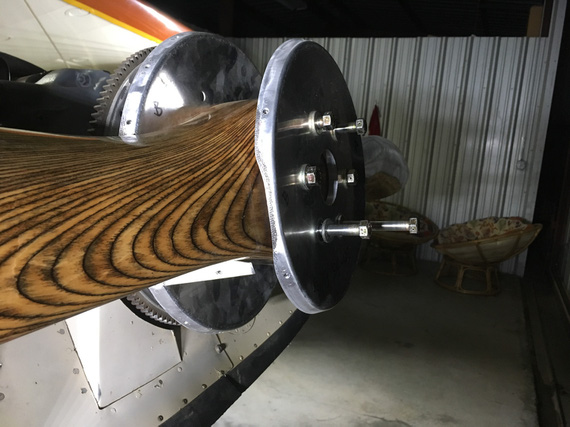
Pulling the prop
She has the prop made by Frank Johnson of Performance Propellers fame, and after contacting him, he just suggested to re-drill the holes and re-coat them inside with something.
Well, I got me a 29/64 (1/64 oversize) reamer, and went to town.
But first, I needed a rack.
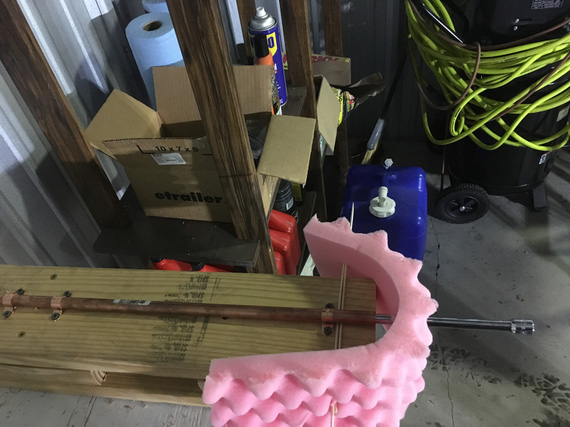
My prop rack
Built with a 1/2" pipe, some foam, pipe brackets, screws, 2x6s screwed to the table, and my 3/8" drive extension rod. You get the idea :). Redneck engineering galore.
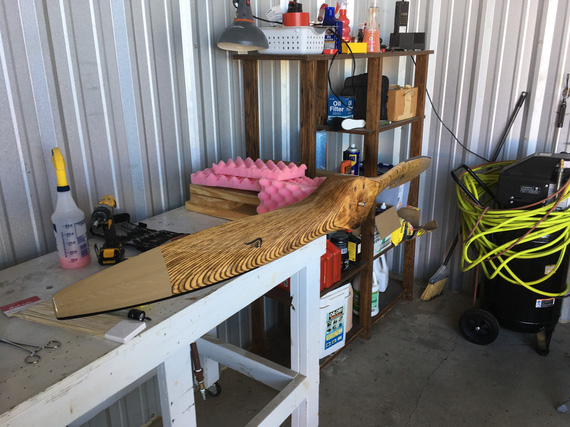
Prop on the rack
This whole thing was happening over a few days by the way; and when I finally got my reamer and had time to deal with it, the holes.. extended. Wood moves!
Hey, we had much rain then, and prop "swelled" a bit methinks.
But I still decided to fill the holes as much as I could.
Even got me some nice scales for mixing System Three ClearCoat.
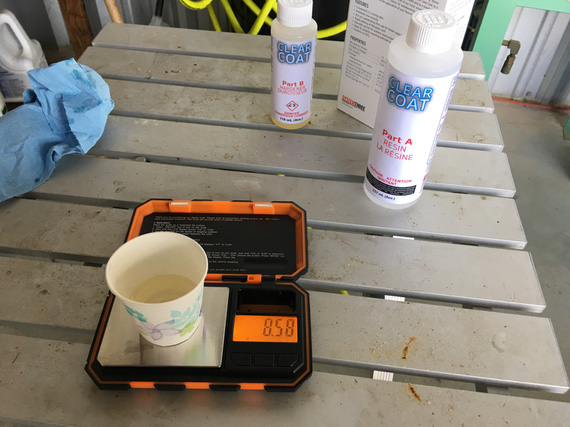
Mixing
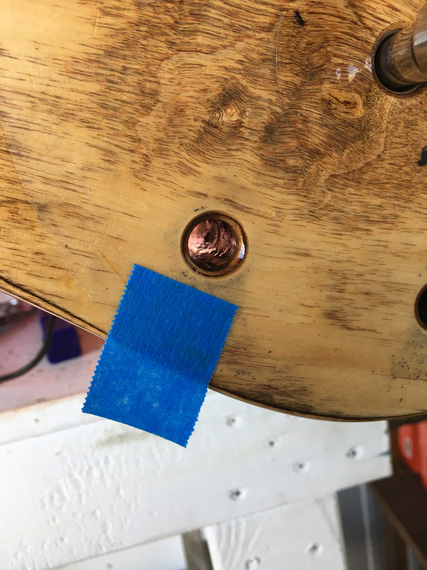
A filled hole
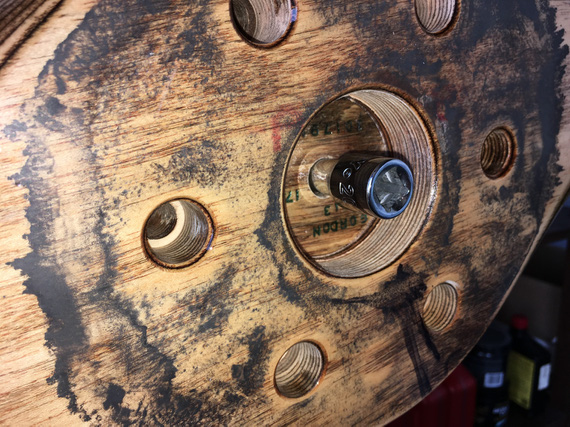
Backside
Fabric
Fabric on this plane is old. Flyable from what I am being told by experts, but old. Cracking, peeling paint.
Original logs say that she was covered in Polyfiber. But the current finish looks more like Imron and the company - "flexible" automotive poly. It's cracking and peeling around areas of high wear (prop wash, etc).
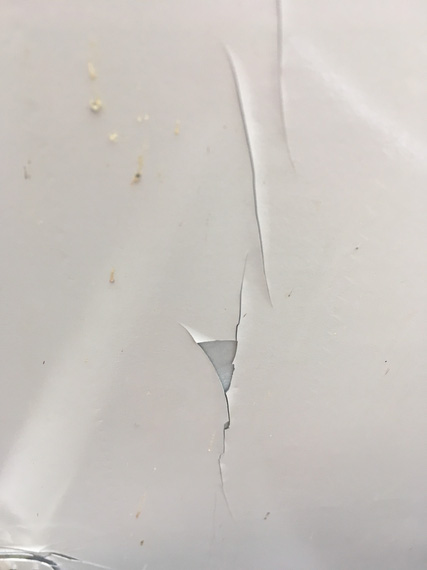
Sad fabric
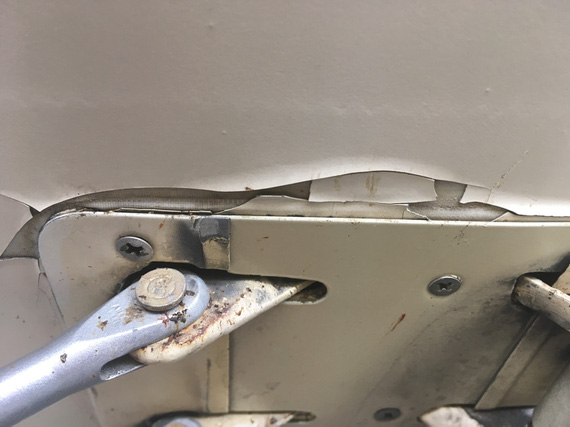
Sad, sad fabric
John (my IA) wanted to take a Maule fabric tester to it; but I didn't want holes in my wings.
I discussed this with a few guys that worked with fabric their whole lives, and we came to a consensus that for now this is fine. Will just fill with silver, and keep on flying. Incidentally, that's what Glenn has been doing, too.
Full Stop
I worked on baffles a bit, but then, everything went downhill. We'll talk about baffles in the next post. And the downhill part, afterwards :).
"Expect lower at the end of this transmission."
-ORD ATC
Up ↑
Annual 2019: April 6
...wing root fairings
| On: | Apr 06, 2019 |
| In: | [Chickenhouse Charger] 2019 Annual |
| Tags: | 6781G, MA5 Charger, Annual |
Only had a few hours today, so decided to concentrate on taking off the wing root fairings. As I mentioned before, the "back-side accessible" screws were set up to have nuts on them rather than nutplates. Well, I don't know about that accessibility....
It ended up being 3 hours for ~30 screws.
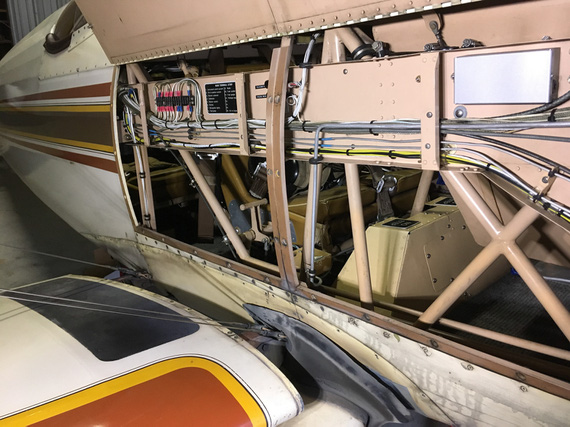
Root fairing off
Most of them on the back side of the wing require you reaching with a wrench thru the rear cockpit, and my arm is just barely long enough to do that successfully. Since nuts are nyloc, no way I can hold them with my fingers - they need a socket.
Some of those nuts are in a U-type channel over which the fabric is glued, and some of the holes are off-center: making it impossible to put a socket over them.
I could've ground a socket down; but I don't have a grinder - so especially one of the nuts took a while to get off. And oh, you have to do all that without dropping the nut and the washer onto the floor (and having them go into the tail). So the process looked like this:
- Get your hand in, try to put the socket over the nut.
- While holding the ratchet, try to put the screwdriver into the screw w/o missing it and poking a hole in the fabric.
- Undo the screw, almost.
- Remove the socket, take a strong magnet.
- Finish undoing the screw, hoping that the magnet will catch the washer and the nut.
Having magnetic sockets helped. They weren't deep enough to grab most of the fully tightened nuts because screws protruded from them. I used them as magnets sometimes, and sometimes used my magnetic "fishing for lost hardware" probe.
Now I'm writing this, I realized what I should've been doing is using a long extension and a 90 degree adapter on my socket. Damn! But this still doesn't solve the problem with some of the nuts that were hidden almost behind things that were in the way (ie, a trim control wheel's attachment structure that's welded into the fuselage).
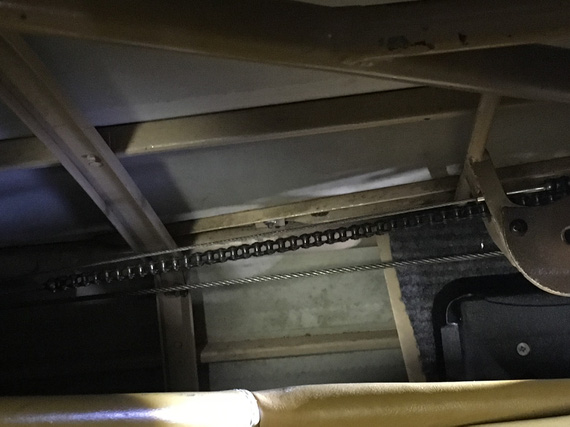
One of those pesky nuts
I'm considering replacing those nuts with Tinnerman-type and screws with sheet metal screws thru Tinnermans. I'd put some anti-chafe tape inside the U-channel, and then Tinnermans on top of it. Since Tinnermans are long, when undoing (or tightening) the screw, they will turn and touch the side of the U-channel, which will act as a wrench.
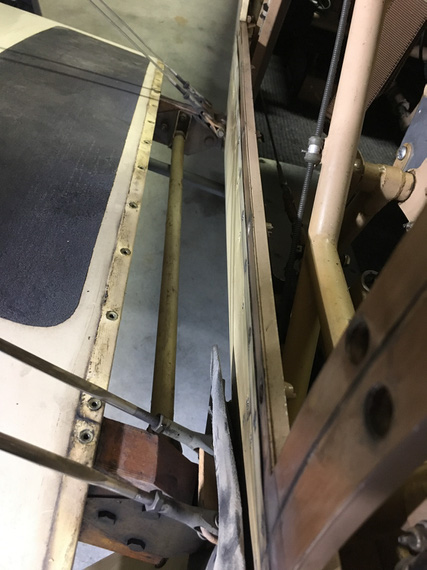
Wing attachment - right side
And that's literally all I got done today. Just took those damn screws out.
The similarity between air traffic controllers and pilots?
If a pilot screws up, the pilot dies.
If ATC screws up, the pilot dies.
Up ↑
Annual 2019: March 30
... getting familiar
| On: | Mar 30, 2019 |
| In: | [Chickenhouse Charger] 2019 Annual |
| Tags: | 6781G, MA5 Charger, Annual |
Decision
After getting the Charger, I have decided to fix a few basics.
- Clean plugs
- Change oil
- Give her a good look over
Getting a bit ahead of myself, a series of coincidences (airport closed, baffles' condition, intake leak, and others) made me decide to go thru the annu... sorry, Condition inspection (damn, will have to get used to new nomenclature :) ).
Notes
Cowling came off.
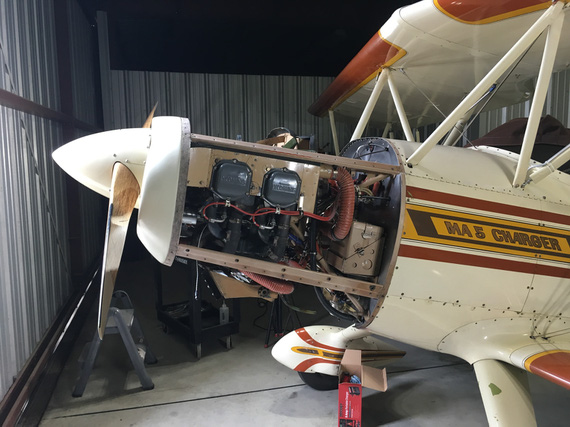
Cowling off
Discovered a few booboos:
- Cracked cowl inlet ramp: need to stop drill.
- Baffle seal behind the inlet ramp is turned the wrong way (Glenn was complaining about high temps - one of the reasons, hmm?).
- Top baffle seals are too hard and sag in few spots.
- One of the air take-offs off the ramp has almost un-riveted itself.
Since I will need some helps with skills and tools with riveting, and we'll need to pull the prop to change (and turn the right way) the seals, decided that I will put her thru annual.
Studying the systems (I was mainly concentrated on fuel and other al lines and hoses to see where things go), discovered a few things, too
- She has the Rotec TBI-40-MKI TBI installed, which requires a 40 mesh filter upstream of it. The only filter besides finger strainers in tanks is gascolator, which goes down to 72 micron (0.003) only. Need to get a hold of Rotec people and discuss this situation.
- The "low" end of the tank (in 3-point attitude) has a very nice drain fitting + drain cock draining behind the cowl. I am seriously considering adding a quick drain there - that is the lowest point of the tank in 3-point. My thinking is: water collected in the tank, goes to that lowest point; but there's not enough of it to go thru the take-off (which is in the middle). Then, when I raise the tail, it slushes forward, goes into the take-off, and reaches the engine right when I am just off the runway. Not Good.
- Some un-critical drain hoses are clear vinyl and hard as a rock. For now will replace them with clear polyurethane, and if that hardens, with rubber.
- TBI needs positive stops on the throttle quadrant. Need to check if they're present and adjust as necessary.
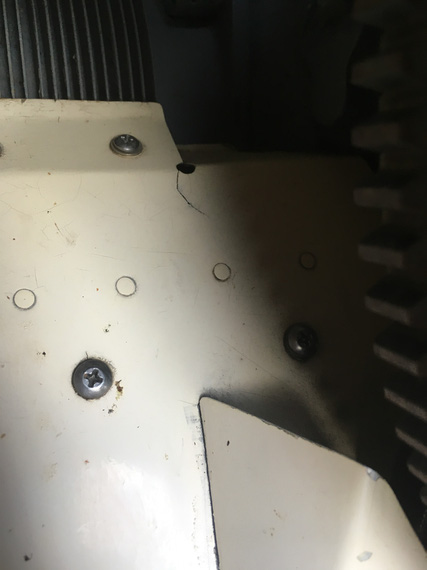
Crack in inlet ramp: stop drill
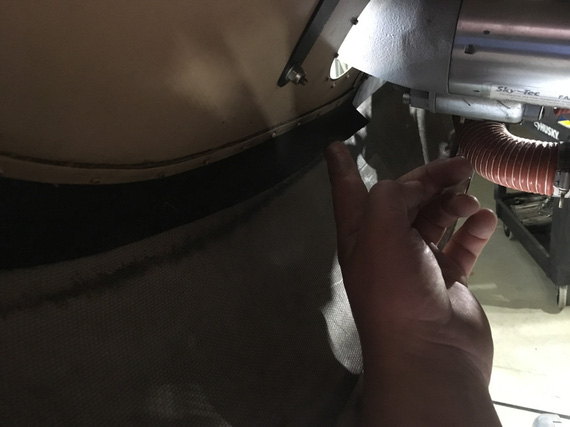
Inlet ramp baffle: turned the wrong way
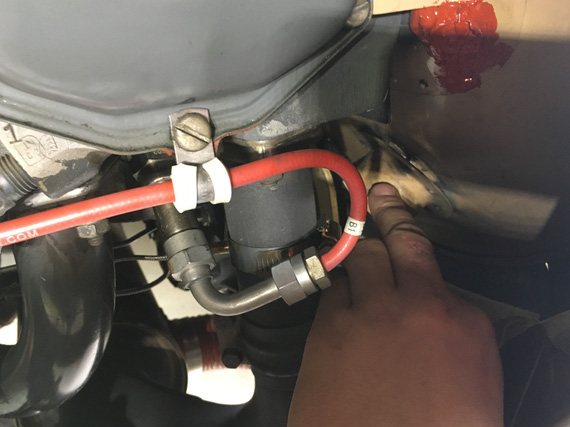
Inlet ramp's take-off flange - un-riveted itself
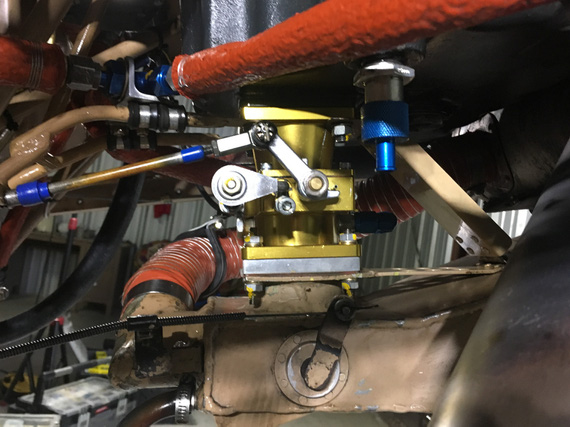
TBI
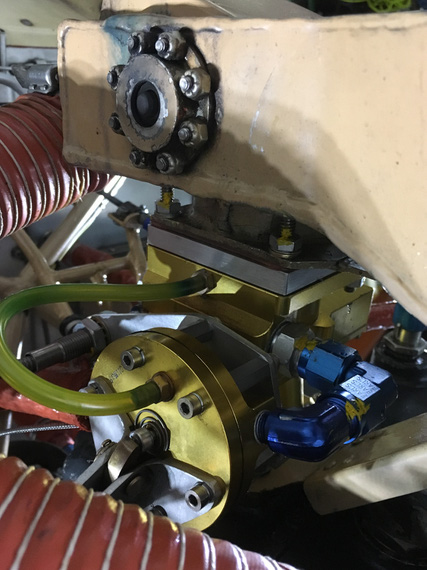
TBI - Regulator Side
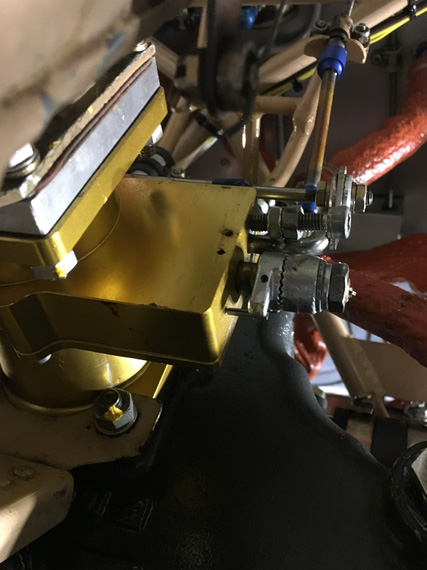
TBI - Throttle linkage
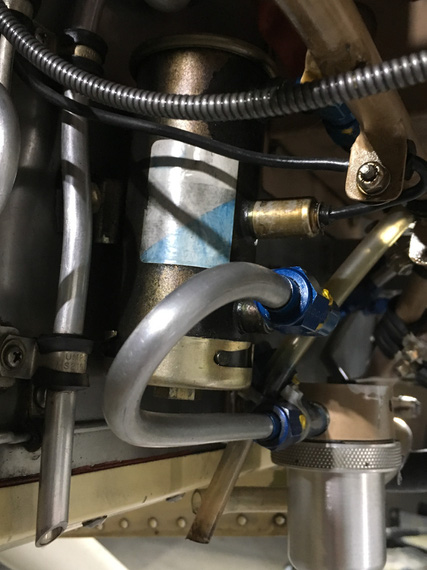
Electrical fuel pump and gascolator
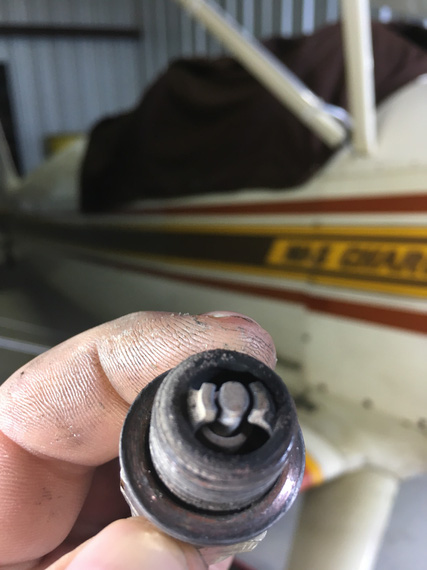
#1 bottom plug - in pretty good shape
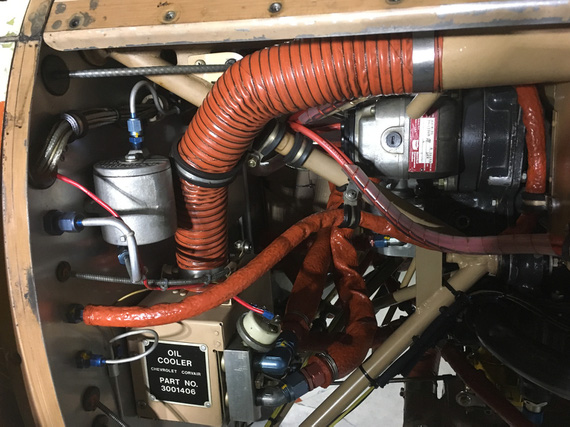
Engine compartment right side
Fairings
Spent the rest of the day taking off fairings and access panels. This is the first thing I thing could've been done better here methinks. Everywhere where it was deemed that the back side would be "accessible", Remo used #6-32 nyloc AN nuts on machine screws instead of nutplates. Well, some of those nuts are not accessible, and I gave up on quite a bit of them around the rear wing root fairings.
Need to standardize on fasteners' length so that I don't juggle 10 different screw sizes.
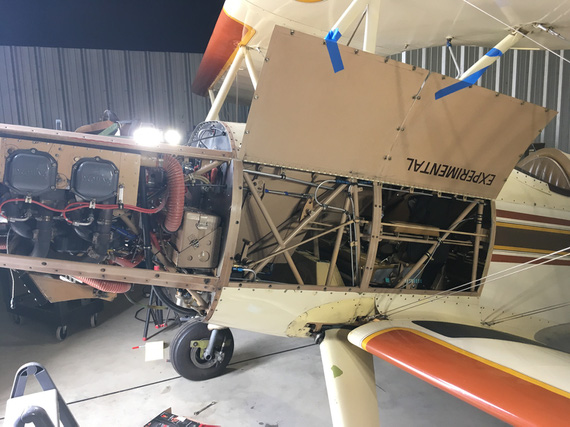
Gotta love that easy access!
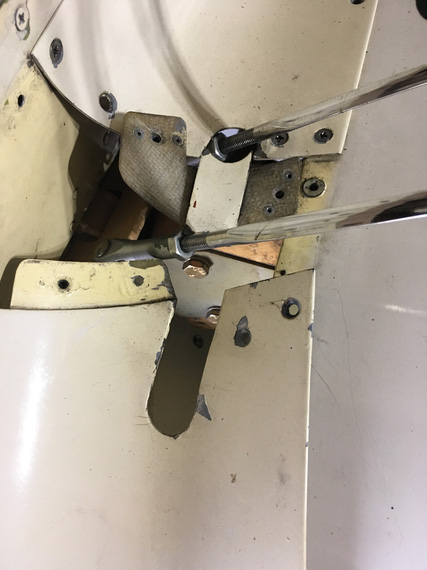
Flying wires' fairing
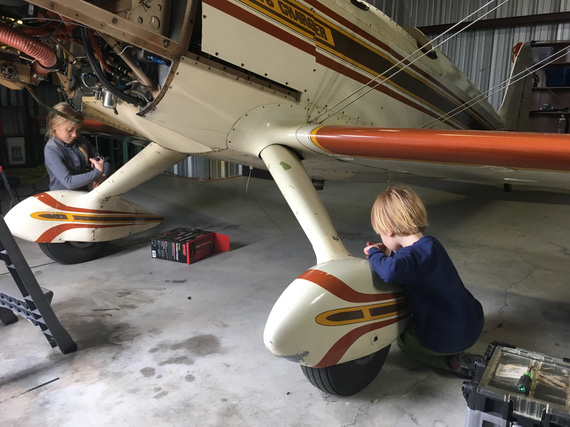
My laborers for the day working on wheelpants
Gravity, it's not just a good idea, it's the law.
Up ↑
A Long Planned Trip
... for Glenn
| On: | Mar 27, 2019 |
| In: | [Chickenhouse Charger] Blog |
| Tags: | flying, 6781G, MA5 Charger |
Fade In
I met Glenn and Judi in 2014.
This was my second Oshkosh, and the first time I noticed the Biplane Forum's Beer'O'Clock thread.
We had two "events" that year: one in the Vintage at the awesome Piper Pub (yep, the spelling is right - it was a Tri-Pacer with the baggage door that had a beer tap. The guy who owned it claimed he had an STC; but paperwork got soaked in beer and was drying somewhere). We sneaked in a large cooler of Austin sour beer then, hauling it all the way from the opposite end of Camp Scholler. I met Glenn there, and later that night washed out in his camp and was fed with a kick-ass grilled cheese sandwich, and met Judi.
The second "event" was at Glenn's airplane, parked near Homebuilder's HQ. It was a beautiful Marquart Charger, I learned then; a 1987 Golden Lindy recipient, built by Remo Galeazzi in Petaluma, CA.
That biplane was beautiful; just the right curves and not as aggressive as more modern ones like Pitts and Skybolts. It looked straight from the 1930s, with wooden prop tipping the nose. I fell in love with it.
In 2015, we've had a good crowd around the plane.
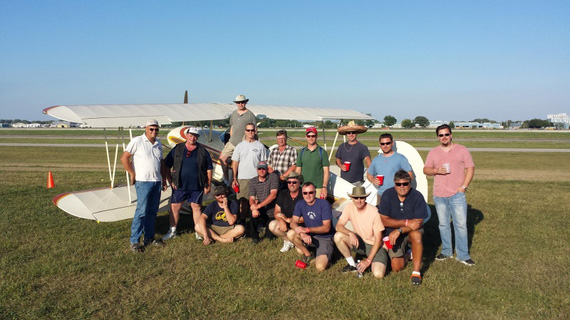
Oshkosh 2015 Biplane Forum Beer'o'Clock crowd
Glenn's Charger became a traditional spot for these beer get-togethers, and we became friends who only met at Oshkosh; but to me it felt like I knew Glenn for my whole life, and 11.5 months between AirVentures felt like hours.
In 2016, I was finally around Chicago where Glenn lived, and he took me out to his home field, Poplar Grove. Man, what an airport! Just the right kind for his plane. We spent a day there, and I think I have seen only one spam can and maybe one RV. The others were a few Cubs, a Twin Beech, a Waco, and the like. A few friends showed up, and that day I got a ride in an AcroSport bipe, and later in the evening, finally, in the Charger.
Oh man. I flew a couple sport biplanes before; and while I liked them, they were too much for this lazy guy. Just a bit too twitchy and too sensitive.
This plane? It flew just like a Grumman. Perfect control harmony. Perfect, light forces on both elevator and ailerons. It fit like a glove.
Then, that night, by the way, I started seriously reconsidering building a Skybolt (BTW, this site was started as a Builder's Log for a Skybolt). I flew one, and while I still liked the plane, I liked the Charger even more.
Especially with it's more "classic" looks (and come on, admit it, we pick biplanes for looks), and it's perfect flyability.
In 2017, we did Beer'o'Clock at my camp (I forget why.. maybe the Charger wasn't around).
And later that year, Glenn told me he's thinking about selling it. He got too much stuff on his hands, and didn't want to neglect the Grand Champion.
I thought for about a day. I loved my Cheetah, and I loved the fact that it was a "normal" airplane. I could take my 2 year old son up in it. Not in a biplane. I could take "normal" people up in a Cheetah. Not in an open cockpit biplane - at least, it's a bit more.. rough, shall we say?
But I couldn't let the plane I loved just be sold on the Barnstormers; so the next day I told Glenn I'll take care of her when the time comes. I was overwhelmed, and honored to have a chance of taking care of a piece of aviating and homebuilding history.
The Plane
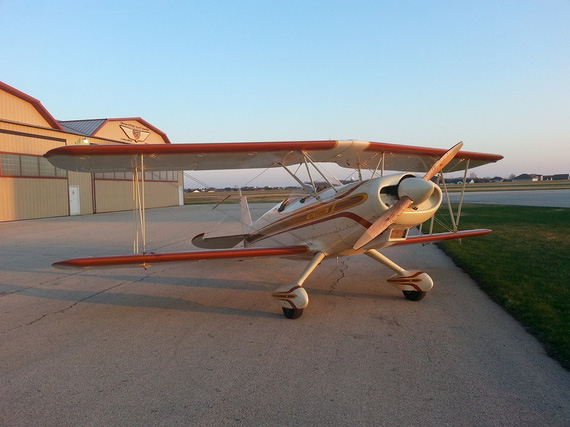
The MA5 Charger
She was built in 1982. From what I could gather, she was started in 1977. There were two guys who built two MA5 Chargers in a chickenhouse in Petaluma, CA. Glenn's plane was built by Remo Galeazzi, and won the Golden Lindy in 1987. The other Charger won too by the way, some years earlier :).
Remo wrote a really nice article for Sport Aviation about both planes.
Here's another article about the plane.
Glenn changed it a bit, adding the smoke system, changing the prop to wood, and tweaking the induction and fuel systems. But the plane stayed all original mostly - original engine, original fabric, and such.
Oh, and it's the Charger on Wikipedia :)!
Logistics
I told Glenn to give me 6 months heads up, so that I could work out the logistics.
See, I have lots of hours to be very comfy flying any common tricycle single. I didn't have enough experience to haul a taildragger bipe across the country (Glenn moved to CA by then). I would have to learn how to fly it comfortably before embarking on the trip; and figure out the logistics.
But then, things went much faster than I thought.
At Oshkosh 2018, Glenn was telling me he's about to sell the plane. I realized I didn't have time to train enough, and that it would be better to train in the Charger from the getgo. So the working plan became me renting a large-ish truck, and hauling the airplane over to Texas with wings off.
And then, Glenn offered to fly the plane over himself, as a good bye to her. I couldn't refuse.
September 2018, Glenn told me he's gonna fly the plane over soon. I put the Cheetah up for sale, and said my last goodbyes to her November 21, 2018. Then, life and weather intervened, and we couldn't set the trip up till last weekend.
'It's warming up', Glenn texted me a week and a half ago.
A week after that text, he was wheels up en route to TX, with Judi in the front hole.
The Trip
That didn't last long. An hour and change later, Glenn was stuck in Bakersfield, just at the southern tip of Central Valley, CA. All mountain passes were blocked by low ceilings...
What's funny was that I was flying.. strike that, being flown from San Jose to Los Angeles, continuing to Texas, the same day Glenn and Judi were stuck at Bakersfield. I saw the damn clouds blocking the passes. They were maybe a mile wide!!!
This delayed them by about 24 hours, but the rest of the trip was fairly smooth. They did a lot of flying after being stuck in Bakersfield for practically a whole day, and some hours the following day.
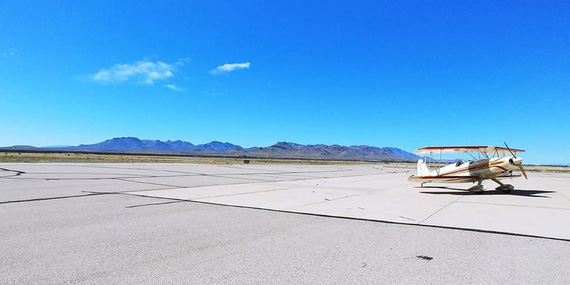
Somewhere in the desert...
Saturday, March 23, at around 10:30 AM Central, they touched down at my home field. We had very little time - their flight back home was in a few hours. Glenn walked me thru the basics. We tucked the airplane away.
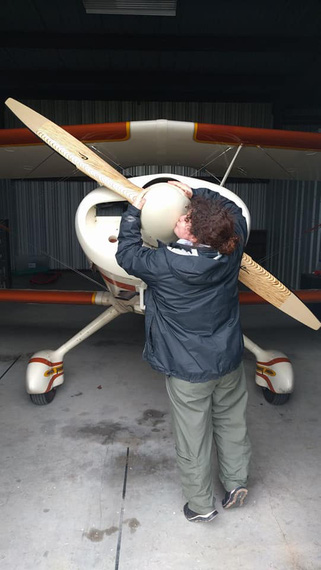
Judi saying bye
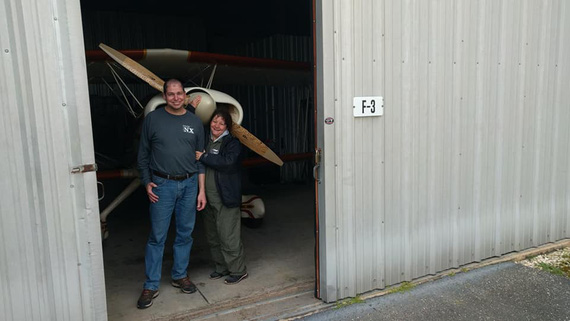
Glenn and Judi...
Quick lunch, and on the way to the airport with the big planes we went. A few hours later, late at night, Glenn and Judi were back home.
Fin
It was all so fast, I was in the state of... denial? and disbelief? I started becoming overwhelmed when I got back home in the evening on that day, and opened up the logbooks.
Remo's signatures and flight log.
Remo's letters.
Glenn's signatures and notes.
The letter from Remo to Glenn, with a bunch of pictures - just pictures of this Charger being built; mundane almost; but a part of the Champion's history.
I ended up writing this into my logbook:
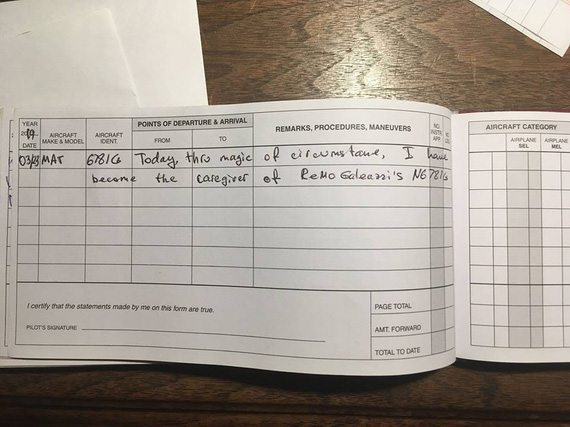
First 6781G log entry in my log book
I now am a caregiver of a piece of aviation, homebuilding, and EAA's history.
And, I am no longer planeless! She needs a bit of cleaning and a touch of TLC, and to learning how to fly her we go!
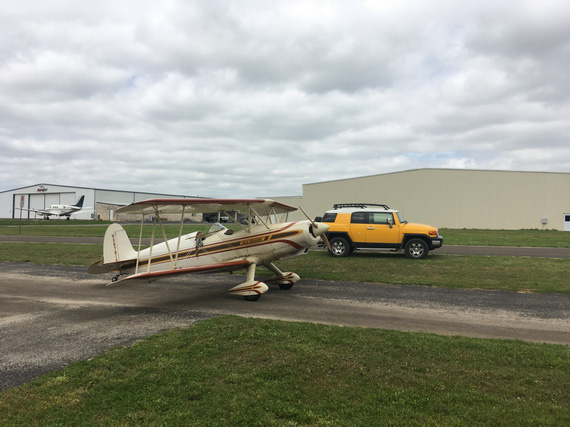
The Chickenhouse Charger!
Better to be on the ground wishing to be in the air than in the air wishing to be on the ground.
© Copyright "79FT". All rights reserved. Feel free to cite, but link back to the pages cited.
This website only shows how I did things in my various projects. These pages are for information and personal entertainment only and not to be construed as the only way, or even the perceived correct way of doing things. You are responsible for your own safety and techniques.
