[79FT]: Building Things |
 |
Carb Controls
...finished!
| On: | Feb 21, 2020 |
| In: | [Chickenhouse Charger] Electrical Rebuild |
| Time logged: | 15.95 |
| Tags: | 6781G, MA5 Charger, carb, throttle, mixture, cables, controls, engine, fwf |
Quite a while back I have measured the control cables and ordered them.
They took a long time to show up, and then I was working on this amongst other things. Just finished now :).
So, right to it, shall we?
First things first was to get thru the firewall. I had these fancy penetration trims for cables called 'CableSafe' from Spruce
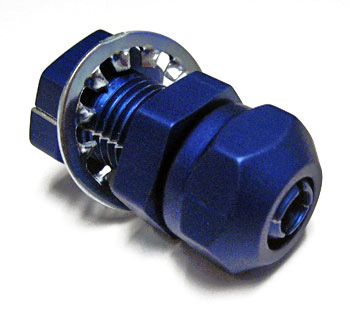
Cable Safe
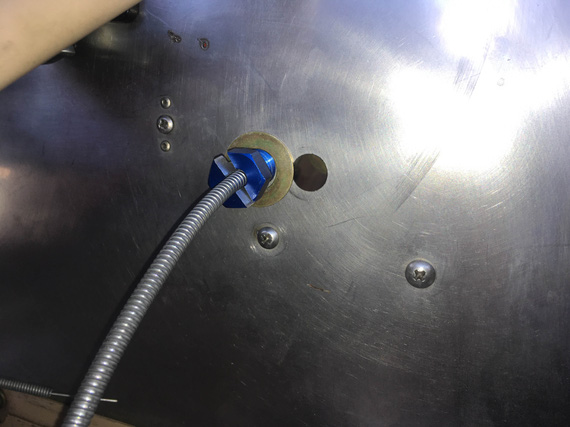
Throttle cable with it
Hmm... problem one. Washers clearly won't fit given the old holes in the firewall (Remo had grommets there, but I wanted something a bit more substantial).
No worries - we'll make me a special washer!
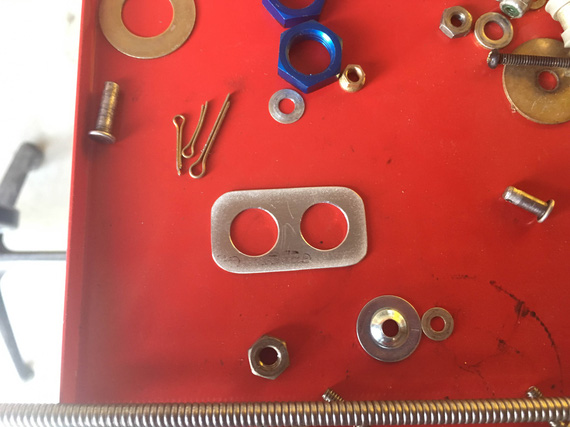
Special washer
Here's how this looks from the "airplane" side (ie, opposite the motor side of the firewall).
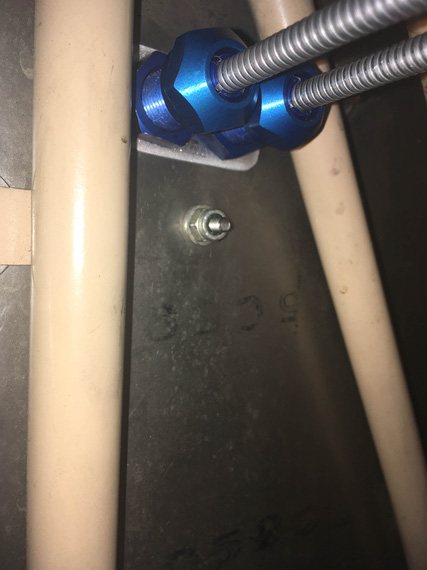
Cabin side of the firewall
And then, came fiddling. Most of it was done before ordering the cables, but I still wanted to check and re-check everything.
Hooked the clevis ends to the control cables, and the cables to the carb to verify everything.
When measuring, I figured I'd need a rod end for the mixture arm due to misalignment of the cable rod and the control arm. And the damn bushing, too - because the hole in the carb is 1/4", and the bolt is #10. I got some bushing stock from McMaster, but it was too long - had to shorten it with some creative sanding.
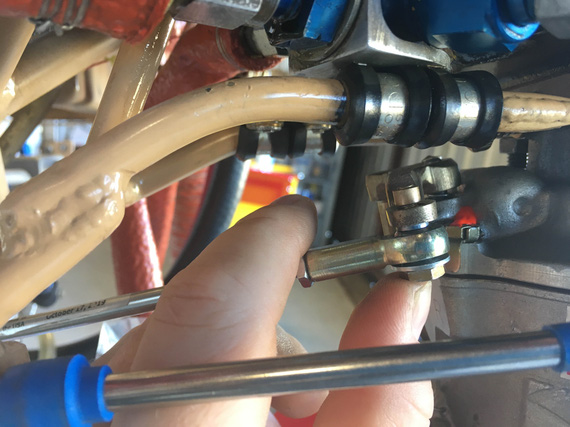
Mixture rod end hardware stack
Fun hardware stack, isn't it?
Bolt -> Large Washer -> Rod End -> Shim -> Bushing (inside control arm) -> Washer -> Shear Nut + Pin
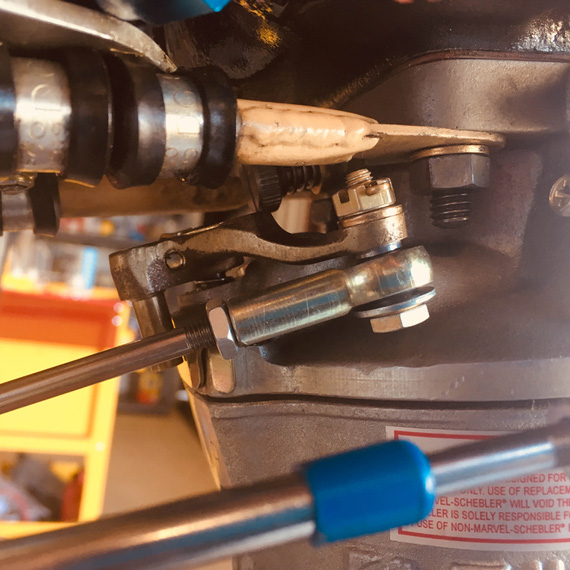
Bolted together
Throttle's clevis looks way more dull.
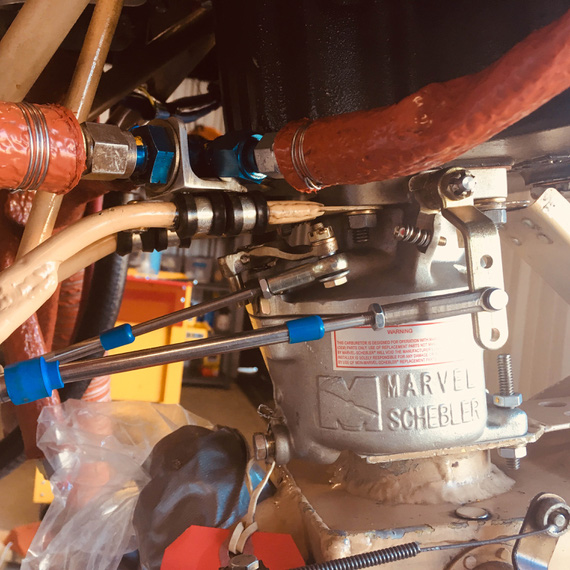
Throttle arm
Then, the airbox went on and I noticed something.
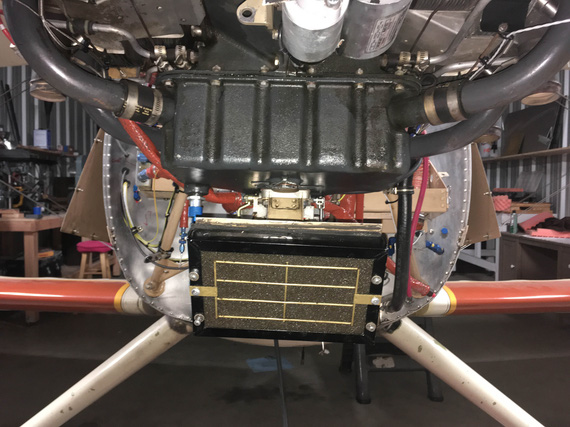
Airbox - do you see it?
See how it's tilted to the right (clockwise)?
I spent quite a bit of time there trying to figure out what's wrong. I put the cowling back on!!
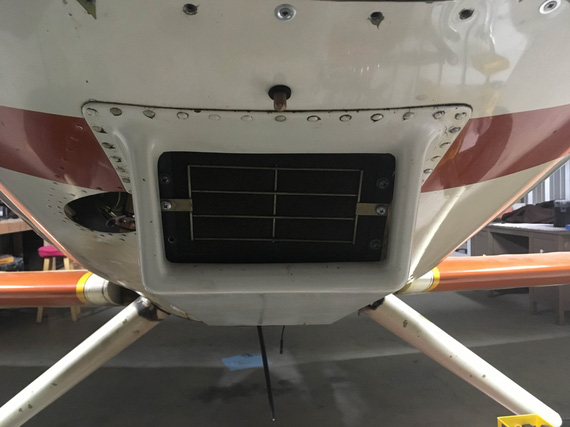
With cowling
Still crooked.
I kept thinking and thinking. It's motor -> oil sump -> carb -> airbox -> filter. That's how everything's bolted together. The first three are not "home buit", so I didn't think they were off. So it must've been the airbox and / or the filter mount.
Upon closer examination, I realized that the airbox was welded together way off, and is crooked itself. And the filter is mounted even more crooked in the same clockwise direction.
To confirm, searched all the pics I could find online of the plane prior to my having it (and disassembling the front).
It was hard to tell, but.. I think it was like this from the very beginning.
Phew.
--
Meanwhile, we had a night of a kind of weather when it rains without actually raining - you know, as if you are in a cloud with large droplets. Everything in the hangar got soaked, obviously. Including my clevis ends.
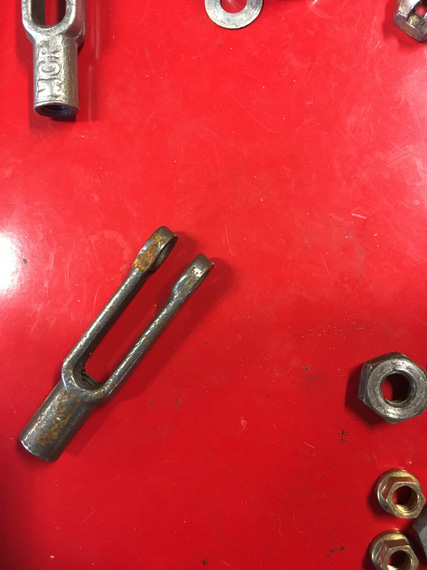
Rust on a new rod end?!
Aren't they supposed to be cad plated? Oh; and that was the first time I really noticed how cad plating sacrifices itself to prevent rust on steel - a lot of my hardware was covered in little white stains, which were cadmium having corroded and saved steel.
At any rate, I double checked the order paperwork. "Cad plated". Hmmmm. They definitely were not.
Called Spruce. She checked and doublechecked - and confirmed that indeed, their vendor stopped doing cad plated clevis forks specifically in that dimension - #10 end, #10 rod. They refunded my money, and let me keep the forks.
Called SkyGeek, asking about the clevis forks they sell. The lady goes, "yep, plated". I ask her to triple-confirm.
She takes about 10 minutes, and gets back to me - nope, not plated. She's sorry. No longer made.
John F., a local IA, confirmed. Only plain steel now, seems that cad plated forks are unobtanium. Crap! Oh well, I guess, paying attention and making sure to put oil or something similar on them from time to time is in my future.
--
Glenn had a carb temp probe in the Rotec TBI I am replacing, and I decided to try to keep it. Wire was cut way too short for how everything's on the carb (vs. the TBI), so I spent a bit of time pondering if:
- The probe was a thermistor, or a thermocouple
- If latter, could I successfully extend it
Pouring thru (mostly AeroLectric Bob Nuckoll's) notes on thermocouples, realized that some are magnetic. Let's see.. score! Magnetic indeed.
Got some multi-strand thermocouple wire of the same kind (red/yellow - I forget which metals those are :) ), and did some "back-bench" testing.
- Hook up the probe direct to the gauge
- Pour solvent onto the probe tip, watch for rate of temp change and lowest point
- Extend the wire now, do the pour again
- Subjectively decide if the indications were "roughly matching"
They seemed to have been indeed matching, so I decided to attempt to keep the probe.
But, problem. It'd interfere with the airbox'es mounting bracket (and for some reason, I didn't take a picture of that :( ).
So first, let's cut a slot that will let that bracket clear the wire.
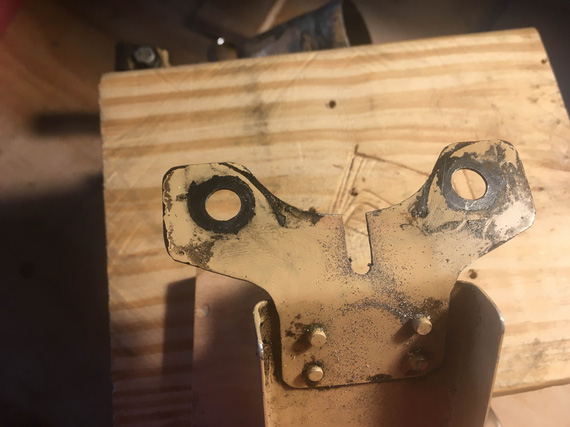
Slot
A bit of drilling, a bit of hacksawing, and a bit of filing.
Then,
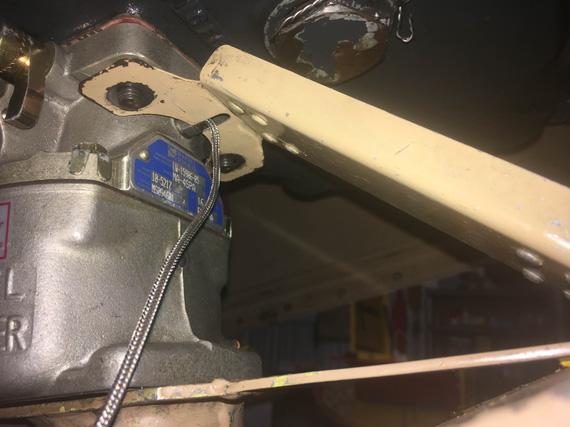
Trial fit
Nope, still not good. The carb temp probe there is the little thing that looks like a bolt with a wire sticking out of it - and it's hex was interfering a bit. But we cleared the wire now.
So, a touch more cutting was in order.
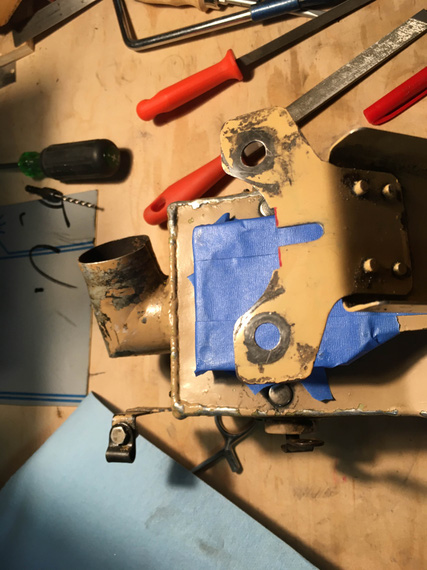
A touch more cutting
... and it fit.
---
Since I was messing with the airbox, needed to finish one last thing on it.
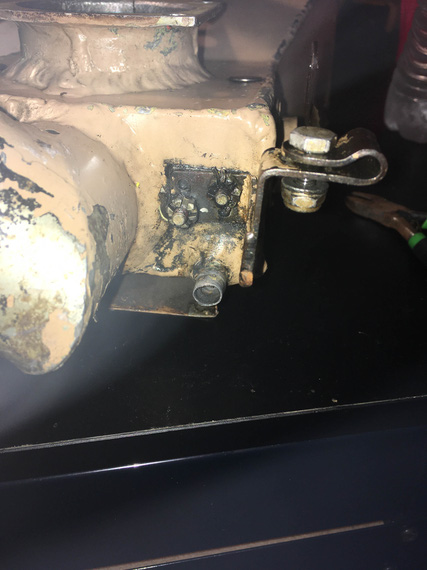
Carb heat bowden bracket
That bracket holds the carb heat bowden cable. Notice something weird? Yep, castellated shear nuts and pins. And, no, they weren't tight either, so the whole bracket business was wobbling around.
I spent quite some time pondering why would it be set up like that. Castellated, pin, not tight, wobble - all of that adds up to "he wanted that bracket to move around". It adds up really well too! The setup makes total sense if he wanted to have this arm move around - but there is absolutely no reason for it to do that! In fact, it's not good at all - steel bracket with steel bolts moving around holes drilled thru aluminum airbox - that would elongate and tear up those holes!
I decided that no. It should not move around, in fact. So,
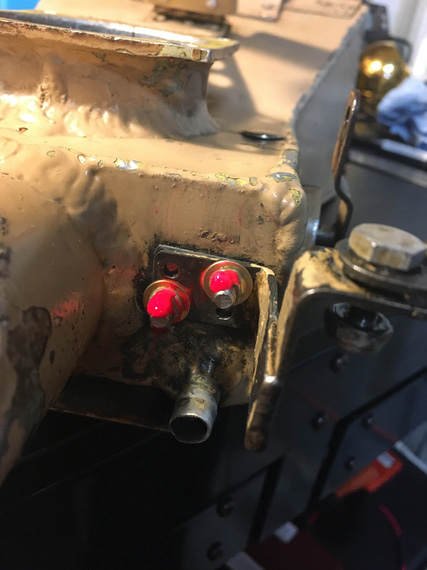
Hardware replaced
--
And then, the final hookups of everything after a long break. Routed the cables, and hooked them up with adel clamps where necessary (doing that conforms them to their final shape, which causes some changes in positions of the cable and controls and the range of motion).
Then, fine-tuned positioning of the controls, and tightened the pivot bolt on the bellcranks. Clevis pins might still need to come out - and that's why cotter pins aren't bent yet - just in case I'll need to unhook them again.
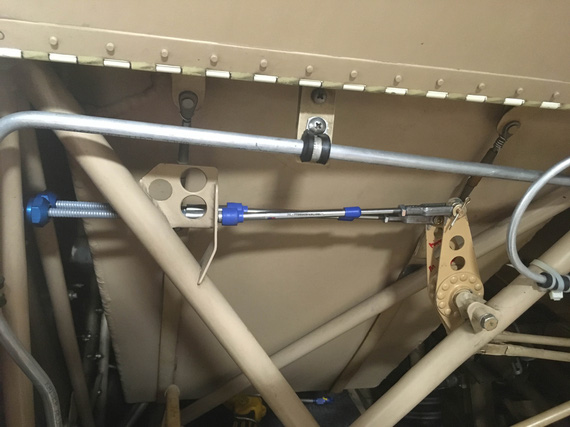
Bellcranks all done
Then, the penetrations.
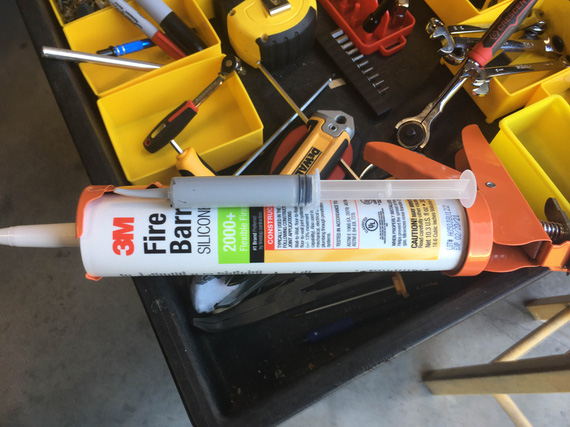
Fancy caulk!
Who said caulk guns have no place in aviation?
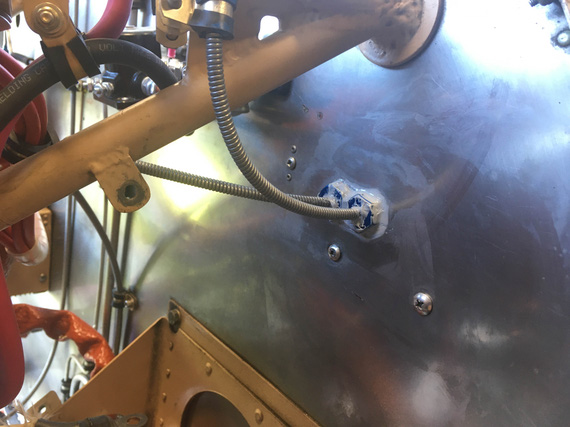
Sealed the big gaps
I wanted to stuff all the gaps with as much of this stuff as I could. I'll probably come back later with much more of the FireBarrier to put a good layer of it around this and other firewall penetrations.
And then, and then... Oh yeah! I could torque the throttle arm nut, and pin that in place!
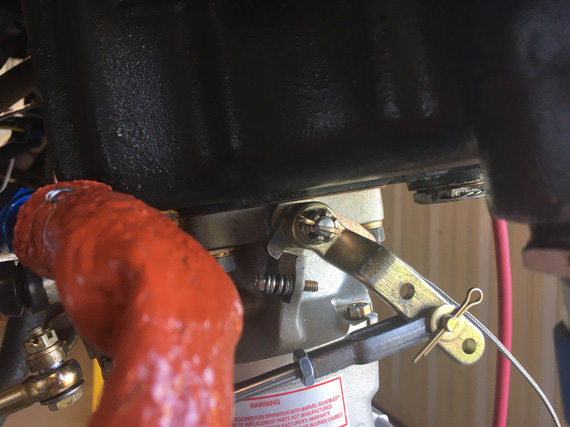
Throttle arm nut pinned
And finally, add more light machine oil to the carb bowl, so that all the rubber stuff won't dry out - all that moving of throttle back and forth pumped most of it out by now via the accelerator pump, I bet.
"Approach, what's our sequence?"
"Calling for the sequence I missed your callsign, but if I find out what it is, you're last."
-ORD ATC
Up ↑
FWF, Side Conduit, and Panel
...messing around trying things
| On: | Sep 08, 2019 |
| In: | [Chickenhouse Charger] Electrical Rebuild |
| Time logged: | 21.5 |
| Tags: | 6781G, MA5 Charger, electrical, fwf, panel |
I was on the fence about making this entry as multiple separate ones versus just one giant one... After all, it covers quite a few, mostly unrelated, things that I did in the last few days, and it would've made sense to keep them separate.
However; finally decided to make just one big article with all of them. None of them are finished; but somewhat a decent chunk of work is - I think I have mostly figured out where everything will go and how it will all come together.
I guess, what I'm trying to say is, if you clicked on the "Panel Layout" entry in the Log, and are trying to figure out why are you seeing notes on Firewall Forward, just keep scrolling :).
Diagram
I have updated the electrical diagram, version 2 is here.
- Main Connector is gone. I was convinced that reliability concerns outweigh the benefits of having it. Plus, I have very little precious room to work with.
- Physically, it's easier to hook up the LR3C Sense wire to a different spot - on the Shunt stud rather than to the Master Contactor/Starter Contactor jumper directly. It makes no difference, it's the same circuit - just a different hookup spot to it.
- I also fixed some typos, and cleaned up a bit.
Firewall Forward
I started trying things around firewall forward while figuring out routing and lengths for carb control cables, and continued afterwards.
Contactors and Beefy Wires
Contactors
It became obvious fairly quickly that I won't be able to use the nice B&C Starter Contactor because of it's mounting holes not being the same as a very common SS581 Starter Solenoid that was set up by Remo. Also, the way terminals were set up on the B&C Starter Contactor would have made them closer to the carb control cables. And, I didn't want to drill more holes in the firewall.
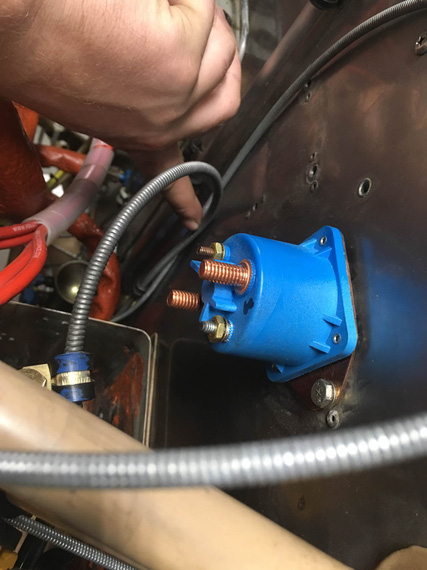
B&C Contactor
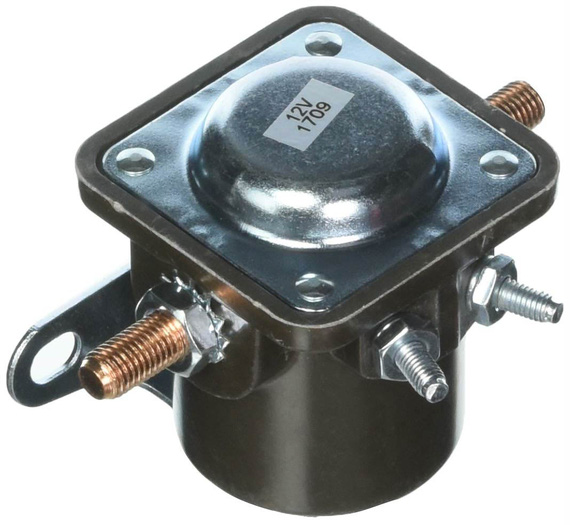
SS581 Contactor
So I decided to go with SS581-style and ordered one from Vans. While waiting for it, I used the old one just to mock things up.
And because it doesn't have the spike catcher diode, I had to get me a couple IN5400s, and soldered an extension lead to one of them.
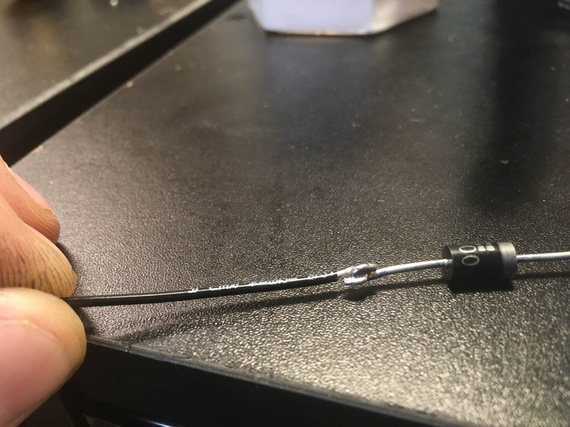
Extension lead
The other leg will get a crimp ring terminal. I had to do that 'cause the diode leads themselves weren't long enough.
Battery and Starter Wires
Those are the thickest wires, and routing them is more complicated than the other ones. In addition, the battery + -> master contactor wire is the only wire that can't be turned off, and therefore needs to be very well thought out and as short as possible.
Here's something else, too. The Charger was set up to ground the battery to the motor. So far, so good - starter is by far the largest consumer in the electrical system. However, nothing was done to ground the motor to the rest of the airplane!
So the rest of the system was probably grounded via whatever metal to metal connections there were on the motor. Control cables and braided fuel and oil hoses? ;) Airbox bowden "carb heat" cable... I can't think of much more else.
Initially, I was planning to run a ground strap braid from the battery negative to one of the bolts holding the battery box to the firewall, but with fuel system components and control cables around, just couldn't figure out a good way to run it and support it. I had to end up settling for running it to the engine mount instead.
So the bottom line is, the negative 4GA cable is gonna go to the motor, and parallel to it a braid will go to the motor mount. I also figured out a clamp arrangement with some standoffs that will keep the wires neat and organized.
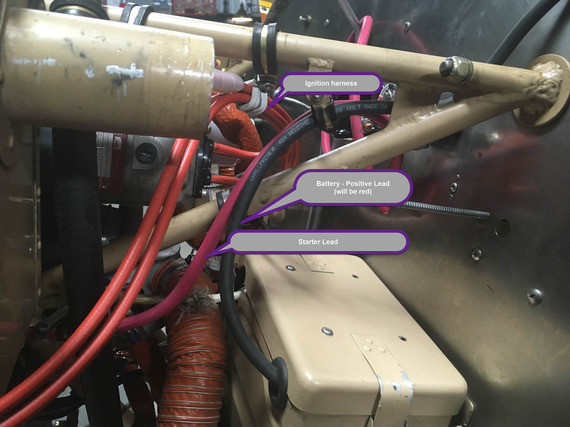
Beefy Wires - side view
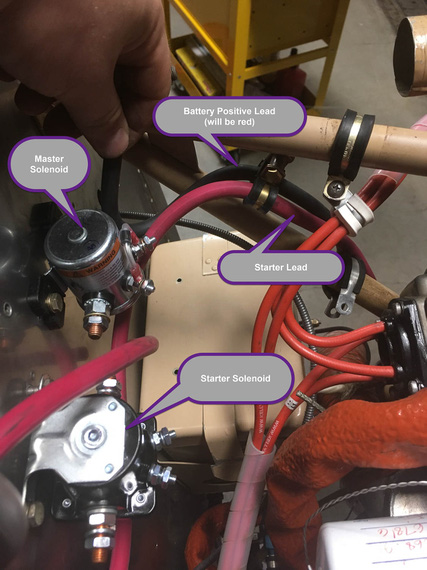
Beefy Wires - top view
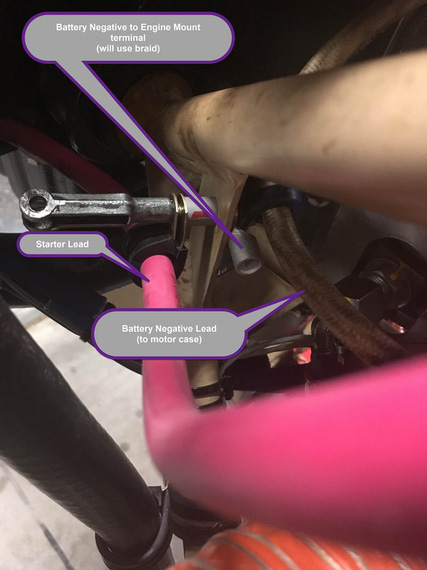
Negative leads and grounding
Oh hey, and I practiced my lacing on those ignition wires. One of my plans is to excise all the zipties I can get to, and replace them with lacing cord ;).
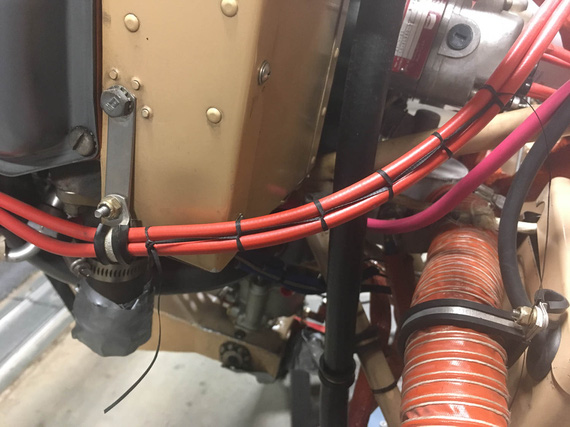
Laces
ANLs and Shunt
ANLs and the Ammeter Shunt will go to where no man had go... 'cuse me, to where the old Voltage Regulator was. Like this:
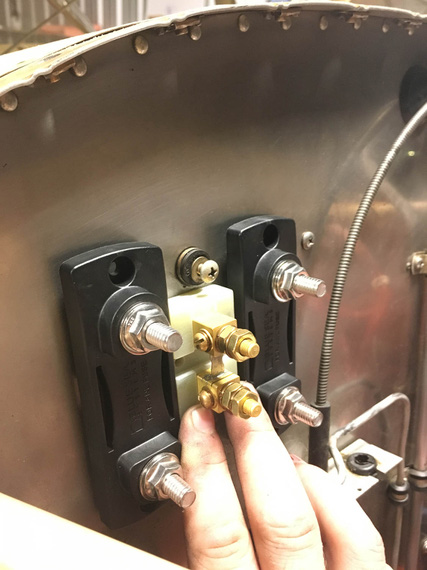
ANLs and Shunt placement
I will need to make a backplate for them to re-use the old voltage regulator mounts, and not have to drill new holes in the firewall. I used my Solidworks templating trick, and made me a nice template...
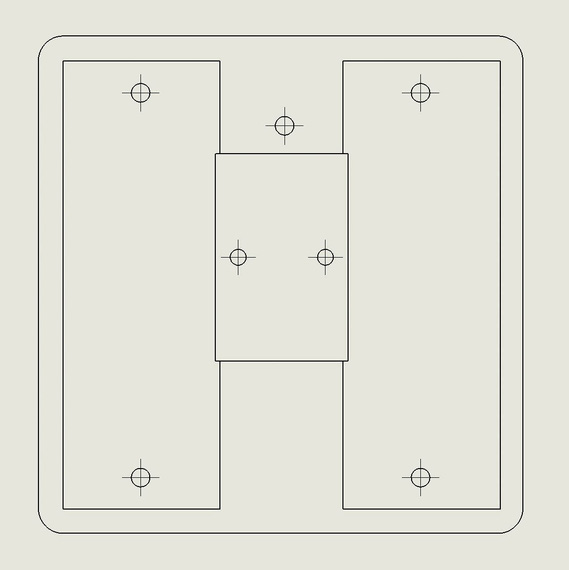
ANL template
... and a mockup (with material, as usual, courtesy of USPS).
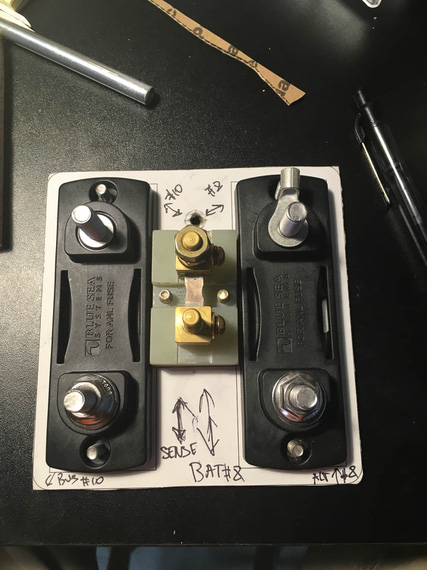
Mockup backplate
The shunt is offset "down" due to the top hole in the backplate (which will have one of three holddown screws to hook up to the old voltage regulator mounts), and I couldn't use buss bar stock to connect the stud terminals on the shunt and ANL bases - if I were to do that, it would not let the ANL covers to come on. So, before doing anything drastic, I decided to check to see how it would look with the wire jumpers
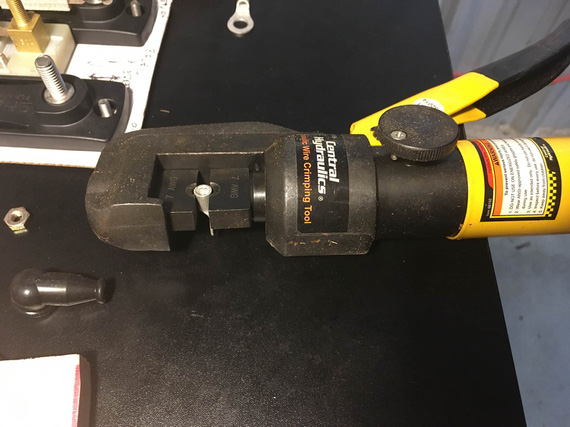
Crimper
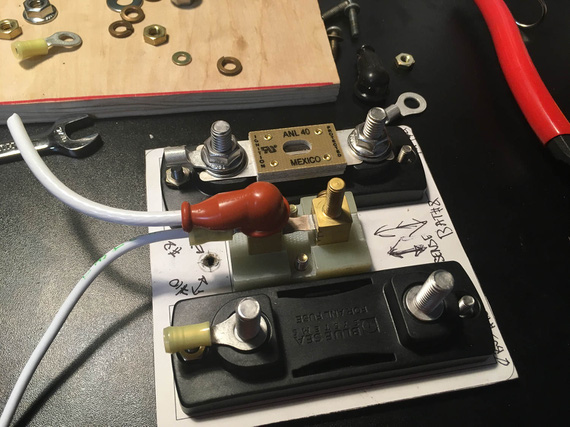
One side done
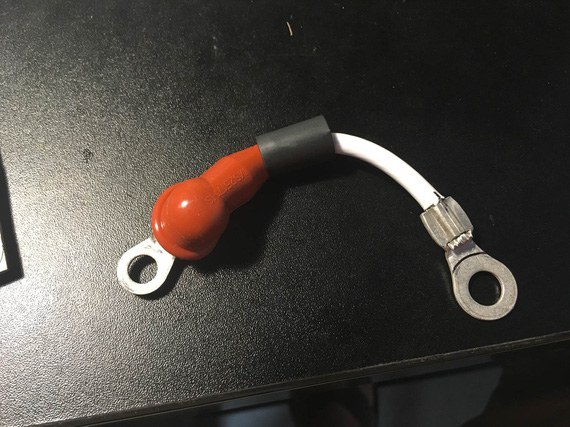
Second ring on the jumper
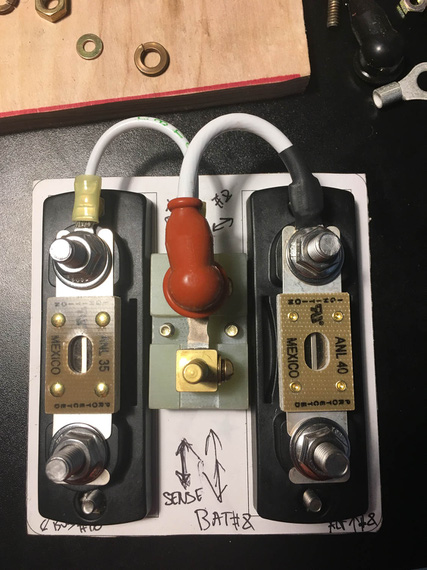
Done
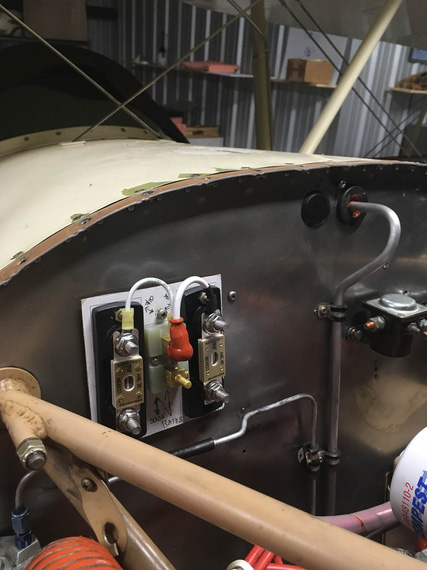
On the firewall
I liked the way jumpers came out a lot, and will probably keep them that way. They do add just a bit of weight, but not enough for me to worry about.
Side Conduit
The Voltage Regulator and the Main Terminal/Fuse Block were to go to the Side Conduit running alongside the fuselage.
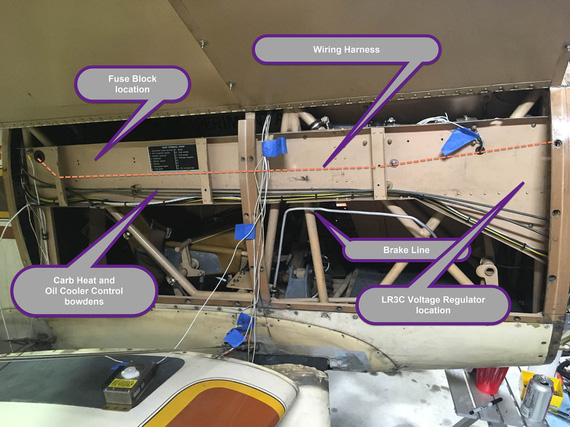
Rough component locations
I had to relocate the bowdens lower to free up some space. The Oil Cooler box on this plane is all sorts of weird, including a flapper valve controlled by one of those bowdens that closes up the airflow to it (which is not enough to begin with; being a 1.5" SCAT takeoff off of back baffle.. but don't get me started on that). That cable turned out to be too short when relocated - but I lucked out - Glenn had a bowden going to the Rotec TBI that I removed for "prime" function, and that bowden was plenty long. I'll trim it to final length when I'm done in that side conduit.
The brake tube was running inside the conduit, and I will have to relocate it to run below the conduit and be supported by adel clamps. For now, I unhooked it and used it to somewhat mock up the new run. Tube and fittings ordered, and tubing bender already here!
Fuse Block
I was gonna use a 20-position fuse block from B&C. Well, that didn't go too well.
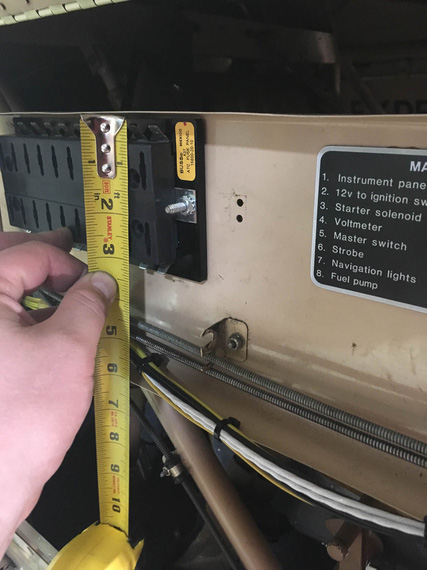
Fuse block
Tight! I basically lose the whole top row of fuses with it. Not enough room....
After poking around the Internets for a bit, came to these nice fuse blocks made by Blue Sea Systems. Longest ones they have are 8 fuses, so I will need two (if I recall correctly, I have 13 fuses in the diagram currently, and I want some spare positions for later if I need them).
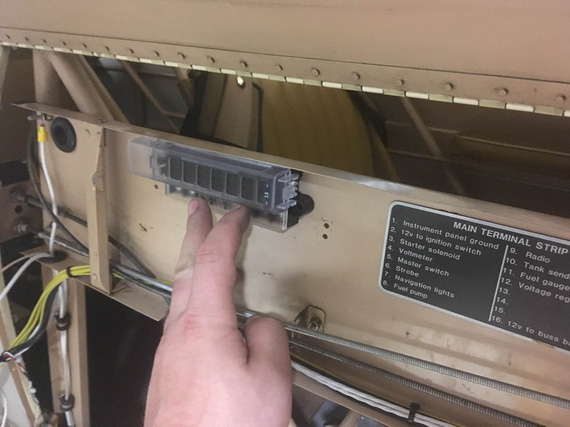
Blue Sea Systems fuse block
Much better! Plus, they use ring terminals rather than tabs - and while tabs are light and simple, I don't like them. Removing them is hard, and, when removed, the terminal loses a lot of it's grip. It's almost like an "assemble once" type deal.
Voltage Regulator
With how the wire harness is gonna go in that conduit, and with bowdens being where they are, the best orientation for the Voltage Regulator would've been "upside down", with terminal strip up.
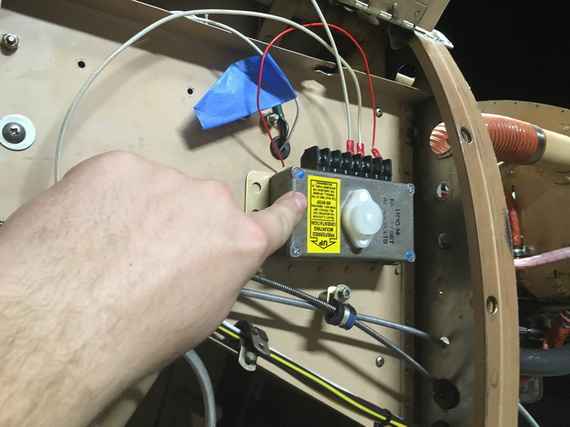
Upside Down orientation
Damn you, the yellow sticker on the regulator! DAMN you! (hint: read it :) ).
Mounting it sideways, I'd have a line of rivet heads under it - which I didn't want to deal with.
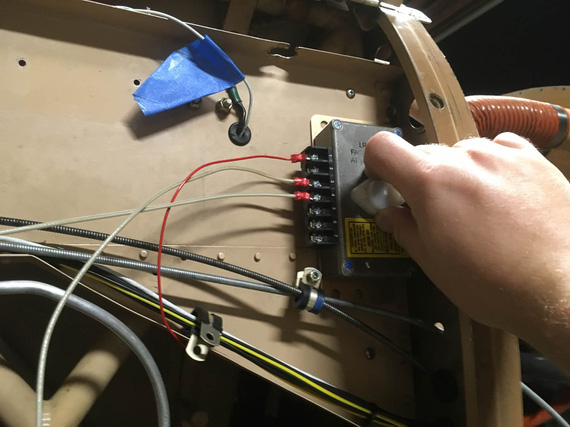
Sideways orientation
And mounting it down... Down was annoying because of the clamp for bowdens and bowdens close there. That would also complicate wiring.
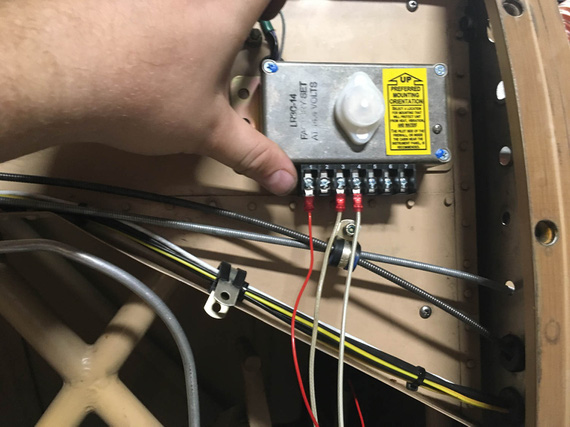
Down orientation
Upside down would've been perfect... except for that yellow sticker :). So, I decided to Hail Mary and asked nice folks at B&C about what they thought.
See, the problem is I know why they wanted the terminal strip to be pointed down. It's so that water won't get into the box in case of condensation accumulating on it. But I thought, maybe I can seal it somehow?
The answer from TJ at B&C was a resounding no. Right side up, sideways - but not upside down.
So I mocked up the right side up mounting...
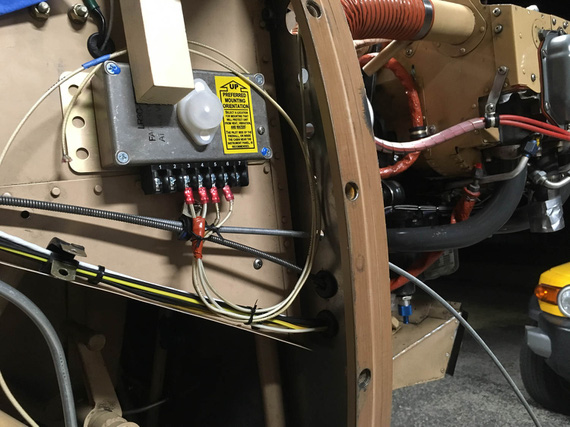
Right side up mockup
Yuck. Yeah; it'd work; but it's ugly as hell.
The only other option would be sideways, but on "standoffs" of sorts to clear the rivet heads. I mentioned that to TJ, and he said that that could work, but I should check if I can access the voltage adjustment screw on the top of the box.
Damn it! I forgot about it. On the top of the box there's a plug over a hole that opens up access to a tiny screw to adjust buss voltage - basically, to fine tune how much volts the battery sees. Not something you do often, but you want to be able to do it.
But then, TJ mentioned that he saw the holes in the firewall and that might be the saving grace.
Bingo!
I tried it out again in vertical, now with mocked up standoffs
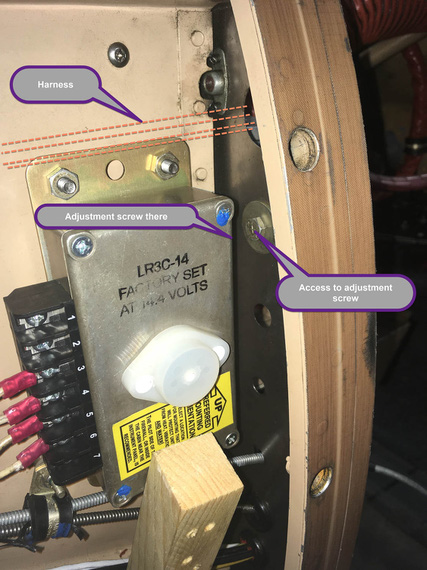
Vertical
With just enough aggravation due to bad access (mandatory in aviation pretty much), you can undo the bolt covering the hole in the firewall (this hole was left over from the brake line relocation), pop the plug on the voltage regulator, and just have enough access to the adjustment screw.
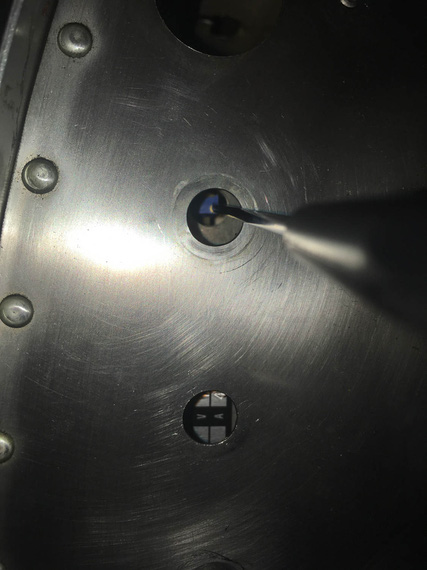
Adjustment screw - firewall side
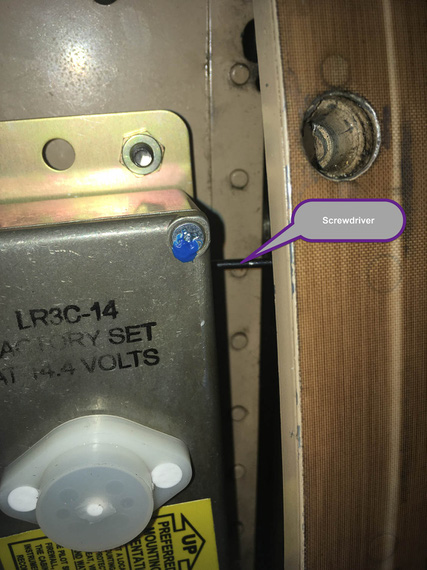
Adjustment screw - conduit side
We got ourselves a winner, I think!
Panels
Hobbs
Hobbs was on the front panel, probably because of space issues on the rear panel.
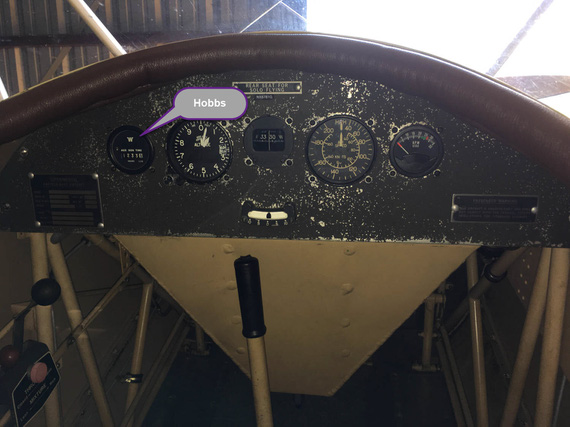
Hobbs meter
"Aux Generator", eh? :) (read what the gauge says).
Well, I had this unsightly hole left over after removing the ignition key switch...
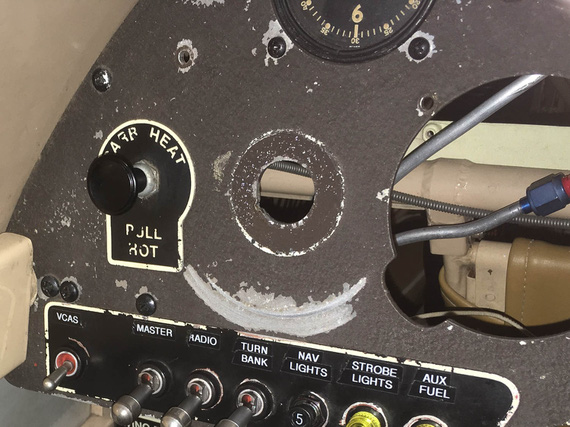
Unsightly hole
... and I thought, maybe I could put the Hobbs back there?
My initial tests with one of the 2 1/4 gauges I have removed seemed to have been okay: there was just enough room in there to get another 2 1/4 gauge in.
So, I got me a very nice panel punch that could make a nice, round, clean hole in place.
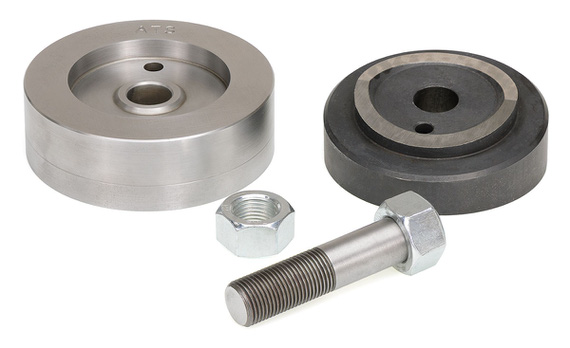
Instrument Hole Punch
Well, next was to remove the Hobbs from the front panel. That was an hour of contortionism. The Hobbs is held by an aluminum backplate and four nylock nuts, so I had to have a wrench over them the whole time. Oh, the screws are way too long BTW, so taking all them out took about five times more turns than it should've, while I was wondering if my wrists will take this much flexing, twisting, and bending any longer.
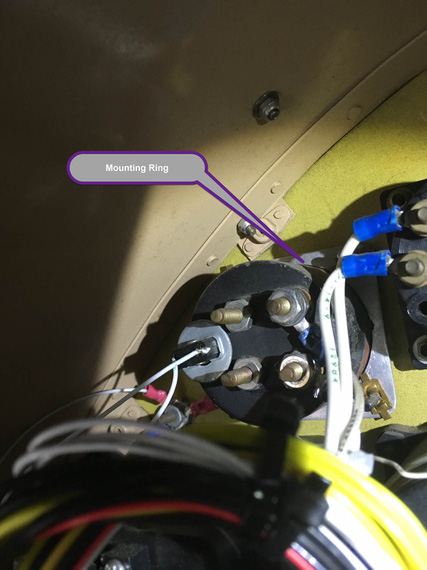
Mounting ring
This is a pic from the fuel quantity gauge held in the same manner, but here he's using brass flat type nuts that you can hold with your fingers. On the Hobbs, it was nylocks.
Anyway, I got it out. And then, started setting up for punching that hole. Removed VSI to give me a bit more room to work with.
I tried to reconstruct exactly what happened next in my memory to write it down here, and could not. I was basically fiddling, checking clearances, making sure I'll be able to hook up the punch and center the hole, have enough room for the mounting ring in the back and clear everything I had to clear, when I discovered that...
The Hobbs was not a standard 2 1/4 inch gauge - it was a touch bigger. So the hole that I would've made would've been too small for it. And that if I punched the hole, I would've been just left with a bigger hole and nothing to put in there.
Damn, damn, damn! Damn you, assumptions that every "small" gauge on an airplane is 2 1/4!
And I had the expensive punch that I had no use for :(.
Oh well. Thanks God I actually did not do it - only to have a larger hole to plug up. I guess, that Hobbs is (thru more contortionism) going back to the front panel.
As they say, Le Sigh.
Switches
Finally, something fun! I put in the switches to play with layout. Here's the first, and (after playing with moving things around and pretend turning them on and off), the best, layout.
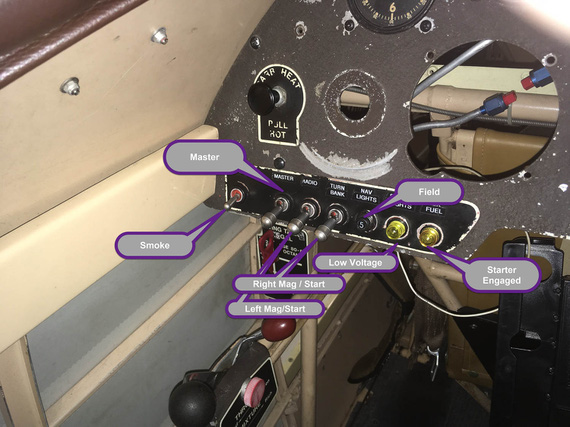
Left side
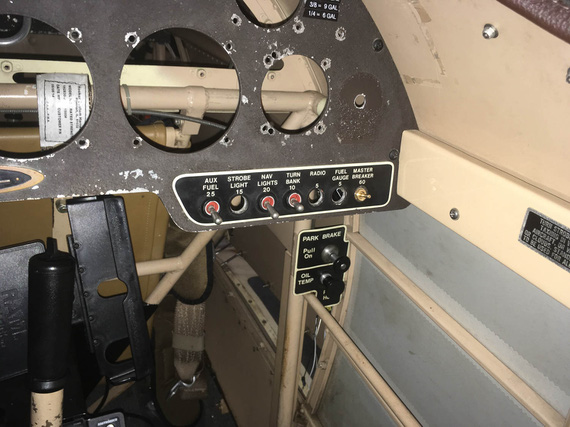
Right side
On the right side, I might clump the switches together, or leave them as on the picture, to "match" the placards (those are left over placards from fuses that were there in the old electrical system). The little brass knob on the right is gonna be panel lighting control pot.
Compass
I am going to replace Pilot's whiskey compass with a vertical card one - yes, I am directionally retarded :) It's not that expensive a mod in the grand scheme of things; and is the only directional instrument available to pilot on this plane (no DG ;) ).
It's a bit taller than the whiskey compass, so I'm playing with different mount locations. I think this is what it will be; with shock isolating rubber pad under the mount where the gap is at the moment.
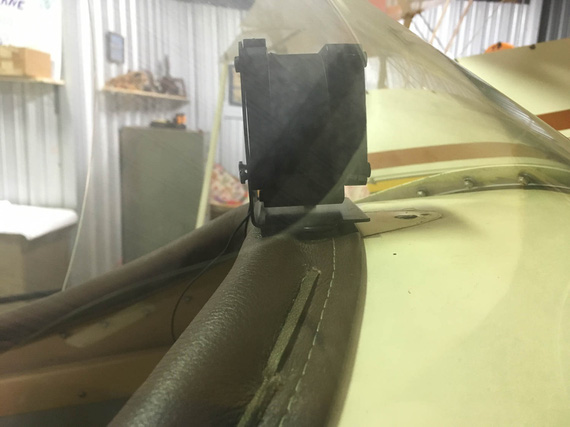
Compass
Fuel Sender Crimps
One of the evenings, I wanted to make sure the Fuel Gauge was still okay (I had a suspicion that it wasn't - turned out to be false).
But first, I wanted to clean up the wiring on the tank sender.
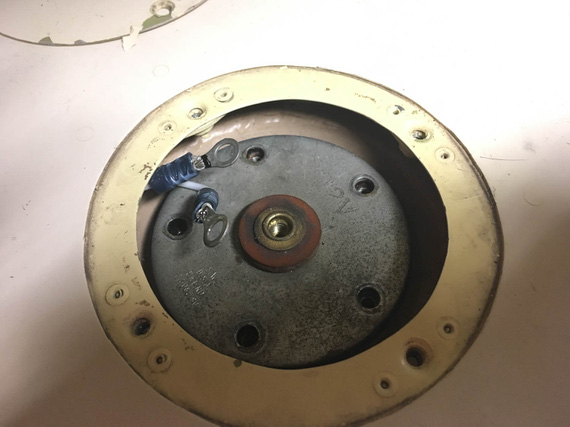
Before
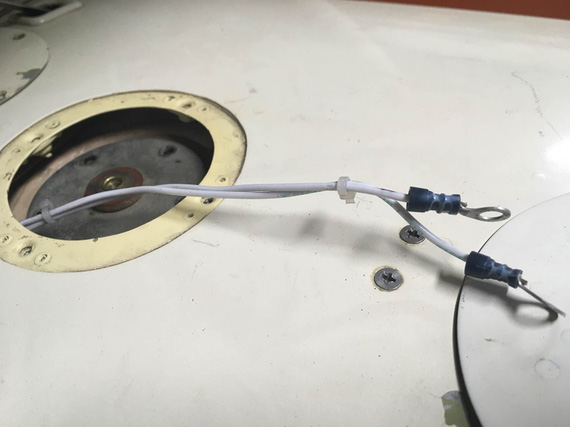
Before
The terminals on it are "automotive" style, without insulation support.
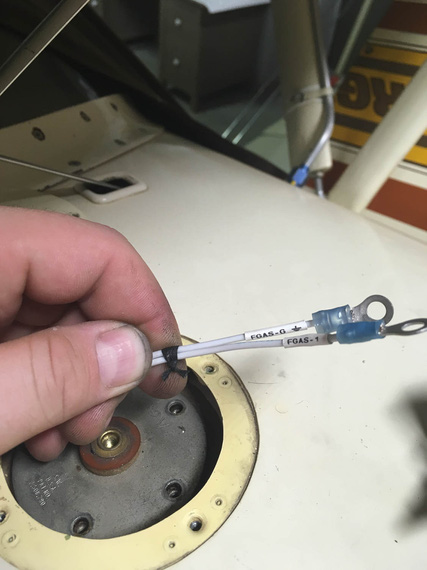
After
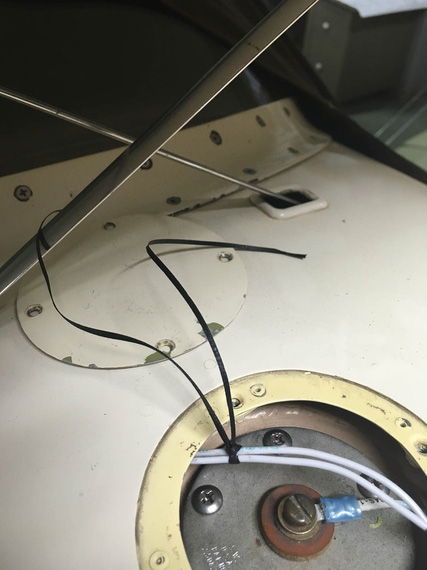
After
There. No zipties, good terminals, and marked :)
Let's make a 360 and get the hell out of here!?!
Up ↑
Carb Control Cables
...just measuring
| On: | Sep 01, 2019 |
| In: | [Chickenhouse Charger] Electrical Rebuild |
| Time logged: | 9.3 |
| Tags: | 6781G, MA5 Charger, carb, throttle, mixture, cables, controls, engine, fwf |
Even before Oshkosh, I have decided to replace the Rotec TBI the Charger had when I got it with a good old MA4-SPA carb. In short, I do not trust the damn thing - especially with it being the sole component providing two out of three vertices of the proverbial fire triangle to the motor. That reminds me, I need to summarize my thoughts on Rotec...
Regardless, one of the things I got at Oshkosh was a rebuilt MA4-SPA from Spruce, and it was sitting in the hangar waiting it's turn. I knew I would need to order new control cables for it, so I decided to get that going, after all the alternator business was finished, because getting those cables will take me a bit.
Here's a fun aside. I knew this motor had a MA4 carb and Glenn "upgraded" it to the Rotec TBI. What I didn't know was precisely what kind of MA4-SPA it had (and there are quite a few models of that carb).
No problem. At Oshkosh, I went to nice folks from Tempest (which now owns MA Carbs) and had a very nice conversation with them. I asked if I should buy the carb from them, and they recommended Spruce instead, because it would be cheaper that way. And, they mentioned the $600 core charge (I'll spell this out - you must provide a good "core" (old carburetor) or get charged extra six hundred bucks). Ouch.
Ha! thought I. I am at Oshkosh! What could be easier than getting an old carburetor, especially since it's one of the most widespread models? No problem at all!
Laughing, I ran that by guys from Tempest. They laughed with me, and actually were very very very helpful, telling me what to look for when picking up an old carb.
No cracks in the body. Control arms should be present. Threads nice and not torn up. Venturi present. Etc etc etc.
Well, to the FlyMart we went, and sure enough, on a bench there laid a number of MA4-SPAs present, ranging from $250 to $450. Of course, I picked up the $250 one (it was yellowtagged by the way! In 1995, if I recall), dragged it over to Spruce, ordered a new carb, and handed them the old one I just picked up. So, $350 saved in about half a mile of walking. Not bad!
Here it is, in all it's glory, hooked up to my motor. You guys should admire my "economizer design" gasket. Hmm... I need to patent that and start selling them for $100/pop. Your fuel costs will go to 0! Now, you might not be going too far... but.. Fuel costs! Zero! With all the benefits, not going anywhere is such an insig.... Ahem.

Economizer Gasket

Carb
Well, okay. The carb was on, and cables came next.
The Rotec had it's control cables for mixture and throttle done completely differently than the carb. Glenn reused Throttle cable for Mixture on the TBI - it worked out well. He added a new cable, routed completely differently, for the TBI's Throttle.
Since this motor was originally carbureted, all I had to do is reverse engineer a bit the way Remo did the hookups.
Hehe.
Well, Throttle on the carb side wasn't that bad.
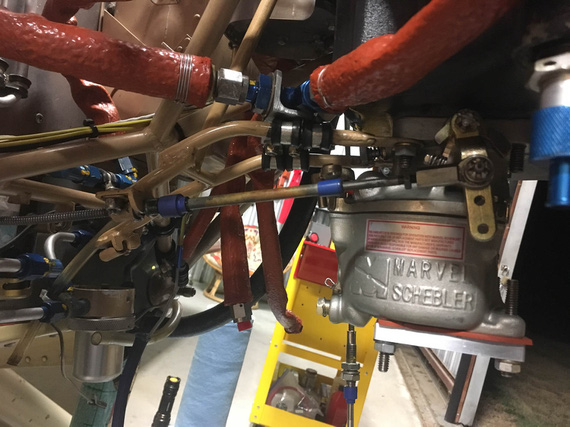
With a Rod End Bearing
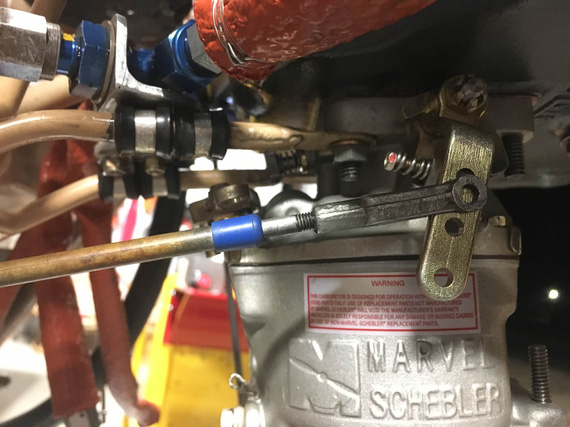
With a Clevis
It actually worked out a bit better with a Clevis, having the cable end centered nicely on the throttle arm. So I decided to do the clevis.
Next was confirming the "throw" - making sure that the throttle control range of motion, whatever it is, is sufficient (in fact, it must have some extra "padding" in it) to move the throttle stop to stop. Boy, was I in for a treat.
This Charger has reversing throttle quadrants, meaning that when the throttle goes forward, the actual control is pulled backward. Since forward on the control must translate into forward on the carburetor, the Charger has bellcranks to reverse the motion once again. These bellcranks are also a nice spot to tune out the range of motion.
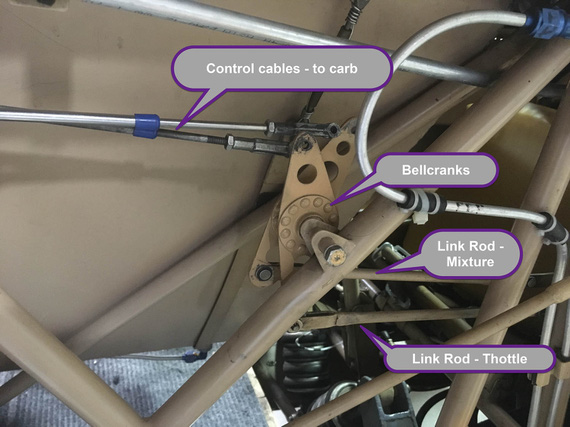
Control linkage
See, the relative distance of the top and bottom holes on the bellcrank to it's pivot point "convert" whatever range of motion is on the control (throttle quadrant) side to an appropriate range of motion on the carburetor side.
And Glenn changed them.
Not a surprise. The Rotec TBI had it's controls set up very differently as compared to a carb. Notice how in the picture the color of those bellcranks is somewhat off from the rest of the fuselage? That was my first clue...
My second clue was finding one of those bellcrank plates (minus the bearing) in the box of parts that I got with the airplane.
My third clue was me not being able to get the full range on the throttle.
Crap!
I am absolutely not set up to redo the bellcranks. Though they look simple, unless I want to make them from 3/16" steel, which would make them very, very, VERY heavy, I'd need a TIG welder. Or to MacGyver things with washers. And do quite a lot of trial and error.
I wanted to see if I could luck out.
Credit goes to Glenn here - he made his new bellcranks perfect for the TBI. The range of motion on them was just right... for the TBI. Because of that, they were asymmetrical - so I thought; maybe, just maybe, if I was to try them in different combinations, I would luck out...
And I did!
Now, these two paragraphs of text and one picture is me describing... about 3 or 4 hours of work - tweaking cables, turning bellcranks, checking, rinsing, and repeating. I think I did find a combination of orientation of these that gave me acceptable (but by no means perfect) ranges of motion. I think I lost about an inch on both of the controls, but that's not so bad, after all - you want extra room in your control's range of movement to make absolutely positive you can move the controlled thing stop to stop.
Okay, Mixture's next.
I hooked up the cable that Glenn used for throttle to the mixture control on the carb, to use as a "mock up", and kinda fished it thru.
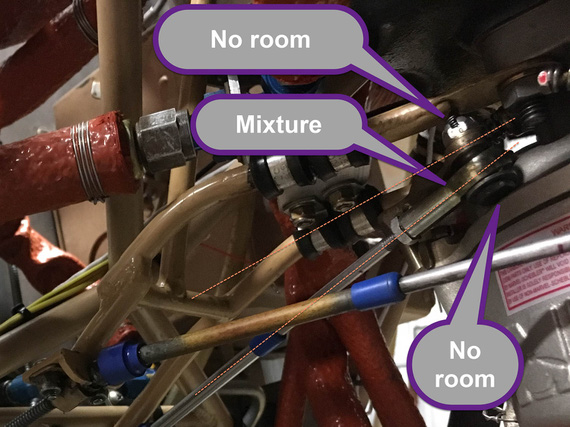
Mixture cable hookup
I had to use a rod end here. The cable wouldn't line up with the control arm on the carb for me to be able to use a Clevis there.... See how angled and offset that hookup is? I think Remo had a solid bowden cable style control there...
Another problem with the Mixture control is that the carb's arm has a 1/4" hole.. the rod ends need a #10 screw; which means that the hole on the carb arm is too large. No biggie though, I'll add a bushing to reduce it.
Yet another problem is that the bolt's head is way too close to the carb bowl, and I had to have it reversed like that (bolt "upside down").
There's not a lot of room on the top either. Planning to fix this problem with using of 1/2 size shear nut, and figuring out the exact bolt length (I ordered every bolt between -4 and -10 sizes).
And now, the routing of those cables.
The throttle cable routing was a given. I did not like too tight a radius in one of it's "turns".
I wanted to try to optimize the routing..... ha. Good luck there buddy! The battery box gets in the way (the battery is in a completely wrong place on this plane... it's reversed with the oil cooler. Oil cooler should be on the left. Battery on the right. This makes controls routing a breeze. But no.....).
I wanted to make sure to keep the mixture cable to not be too close to the beefy 4 AWG cable that will go from the battery to the master relay.
I had to reverse engineer previous routing of the cable, and figure out the best points to hook it up to the firewall.
I wanted to have my ANL fuse bases close to the master and starter relay. Ha! No way, with the control cables the way they would have to be.
All this was an exercise in misery, and lots and lots of time. I wanted too much.
In the end, the routing of the throttle will stay the same; the cable will just be shortened to make one of the turn radiusii bigger. The mixture will go nearby, and curl around the battery box.
I will not be able to use any other arrangement of solenoids and will have to stick to the old one. What's worse, I will not be able to use the new solenoid I got from B&C - it's mounting holes are very different, and, frankly, it's not worth it to drill more holes in already a sieve-like firewall - I'll stick with the classic "style".
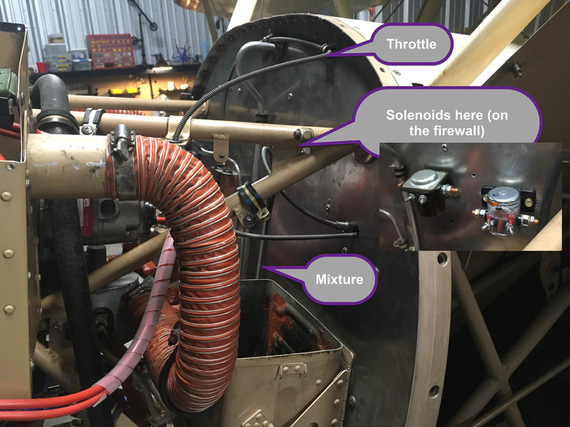
Approx. new routing
The mixture cable does look like it'll interfere with the solenoids, I know. In the final setup, it will be pulled away from the firewall and clamped to a couple of points I found.
...
More bad news? I long noticed a leak from the left brake bleeder valve; and decided to add a new valve to my next order from Spruce. I thought it was a basic valve problem. Well, went to look for it's dimensions, and found out the source of the damn leak, actually... Looks like someone tried to fix a leak there by making a bigger leak. The fun thing was, I didn't notice this before - the brake was too dirty...
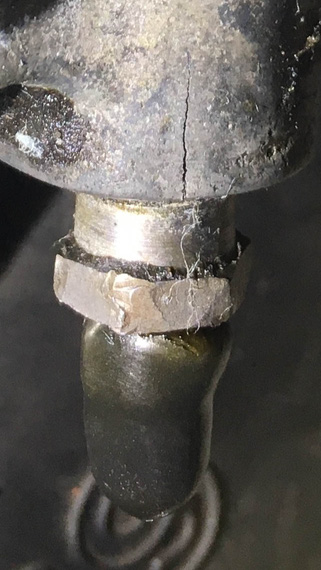
Boo!
Damn.. those cylinder housings are $300 each :(
But hey! I got good news too! I was checking to see if the ANL bases and the shunt will fit where the old voltage regulator was, and they fit perfectly, in just a perfect arrangement!
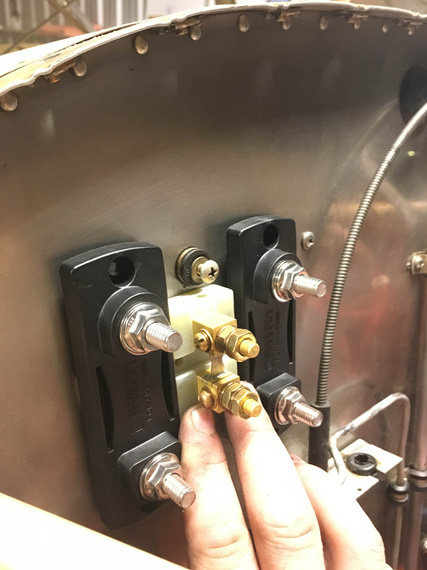
ANL bases and the ammeter shunt
I will reuse old voltage regulator rubber shock isolation mounts (I can't take them out; and they're sufficiently strong), and make a backplate to mount all this goodness to. Frankly, when I found this fit out, I liked it so much I bust out laughing.
And hey! My engine gauges showed up ;) Ain't they pretty?
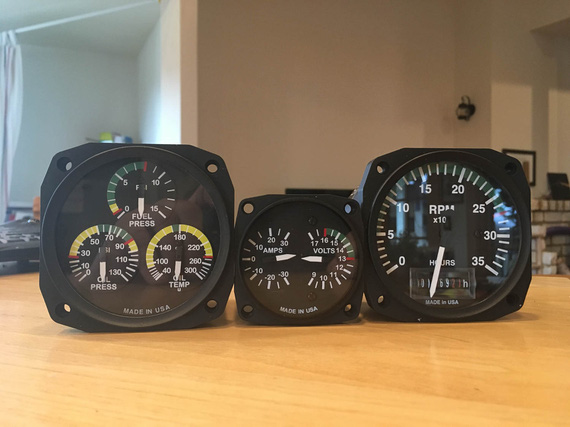
Engine gauges
I’m not speeding officer — I’m just flying low.
© Copyright "79FT". All rights reserved. Feel free to cite, but link back to the pages cited.
This website only shows how I did things in my various projects. These pages are for information and personal entertainment only and not to be construed as the only way, or even the perceived correct way of doing things. You are responsible for your own safety and techniques.