[79FT]: Building Things |
 |
Alternator: Initial Fit-Up
...I almost decided to make new nose baffles
| On: | Aug 16, 2019 |
| In: | [Chickenhouse Charger] Electrical Rebuild |
| Time logged: | 4.8 |
| Tags: | 6781G, MA5 Charger, electrical, alternator |
So most orders have been placed, and a lot of them have arrived already. (Note to self: need to take pictures of all the stuff).
The first thing to be worked on is the heart - the alternator.
Look at this little beauty!
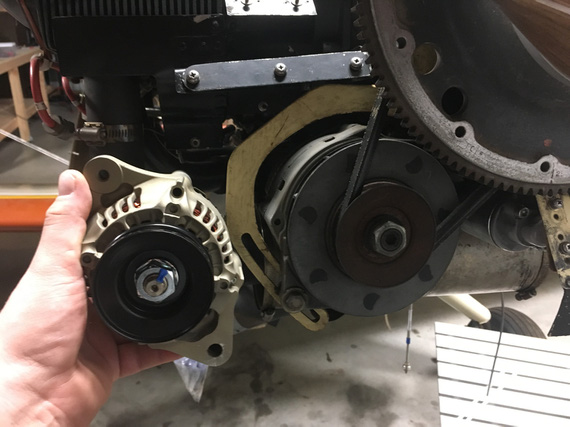
B&C L-40
Tiny, light as a feather, and cute as a button! No, sir, this thing has to get attached to the nose!
The old one needs to come off. Pivot arm bolt undone. Pivot bold undone.
Wait. The pivot bolt can't get out, because the flywheel gets in the way...
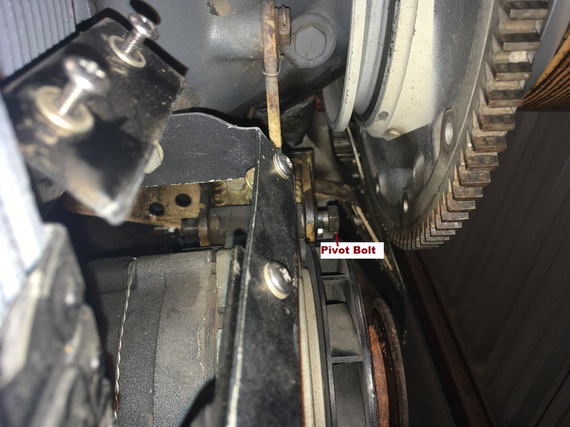
Pivot bolt and interference
Hmm.. No, I can't believe Remo pulled the flywheel off of crank just to install the alternator. There must be a better way.
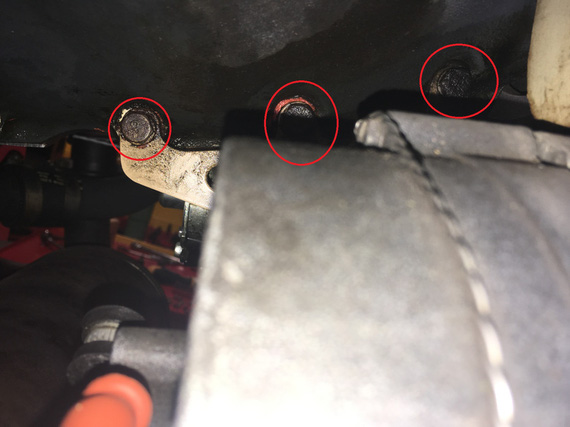
The better way - bracket attach bolts!
Aha! This is case mount, and the bracket is attached to the motor case. Let's see... Yep! It came off.
Now, the new bracket... centers nicely!
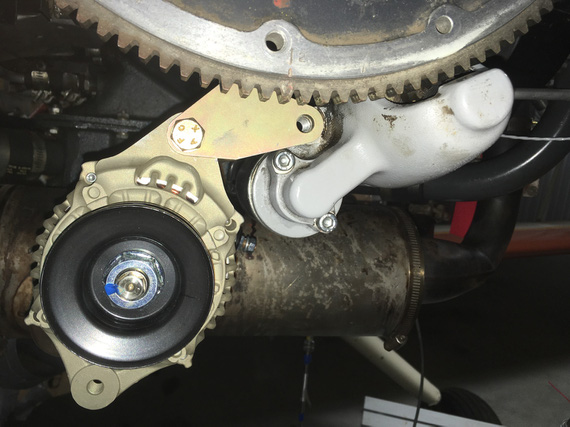
New bracket
See that ear on the right, that touches the starter boss? That one needs to attach to the starter, to prevent the bracket flexing left and right. It lines up great, but, problem number one (but I knew this one), the old alternator bracket didn't have that. Remo used that hole on the starter boss to hook up the front of the nose "ramp" part of the baffle:
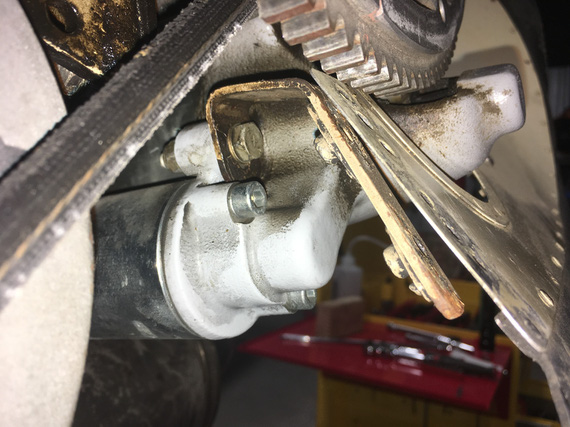
Baffle attach bracket
No matter. I will just bend up a new one, to account for the thickness of the new bracket's "ear" that will get sandwiched between this baffle attach bracket, and the starter boss. Material already ordered!
Now, let's test fit the belt, and the new pivot arm. The belt, the belt.. oh wait. Yep. The prop needs to come off - but this is a non-event now (and I am not leaving the prop off again - learned that one already). I'm becoming quite good at this prop pulling business....
Belt on and prop back on, test-fitting the pivot arm... CRUD!
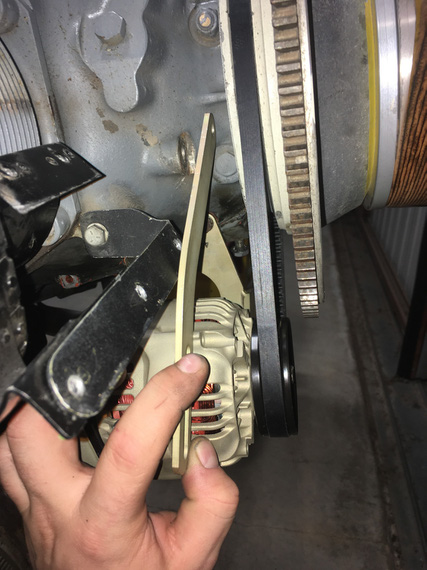
Pivot arm
That black bracket to the left of it holds the hose "ramp" portion of the baffle..... and, it won't let the damn pivot arm go in! No way. And no easy modification here - it's interfering, seriously...
Frankly, at that point I went home (this whole note covers quite a few days of work), with thoughts of remaking the front baffle; and spent the evening researching how baffles are done on planes with similar nosebowl... Frankly, I don't like how this front baffle is done on this plane (see Cowling Conundrum), and thought of this as being a good chance to fix it. I moaned about this to my buddy and colleague Dima D (who's helping me here quite a lot with notes and advice)...
But next nite, I thought that maybe I can get away with remaking just the arm... I am absolutely not set up to do complicated sheet metal work at the moment...
The old alternator had this weird pivot arm that now made way more sense. It "doglegged" around the bracket with which the standard pivot arm interfered:
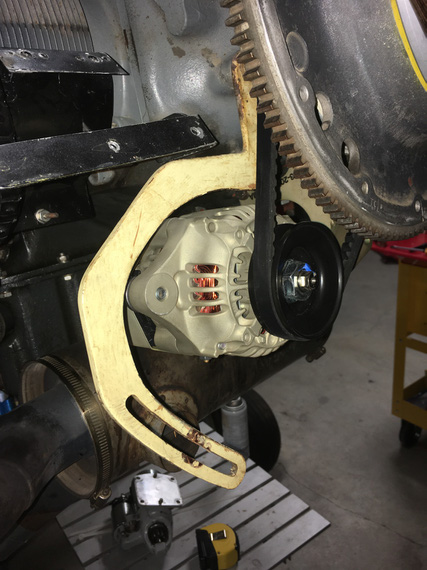
The old pivot arm
Notice how it has this portion that goes down, and then the pivot arm "turns" left to go under the nose baffle ramp attach bracket?
That corner is definitely a large stress riser... but this arm held a much heavier Delco-Remy alternator for almost 40 years... Granted, it's made out of 0.190 steel as opposed to 0.125 steel used in B&C bracket... but I can make a similar one for the new alternator...
We'll see if we can smooth out that corner so that it's arcing better, reducing stress. If I can, I will use 0.125 steel. If I can't, I'll settle with 0.190 - just like the old one. We know this works.
Thanks Dima! You were right. For now. I will redo this nose ramp when I'm redoing the motor, later :).
... and now, to the belt. Let's get this nose ramp back on. It has an opening for the belt to pass thru, and a fairing for the alternator pulley....
Damn. Yep. That one doesn't fit right, either.
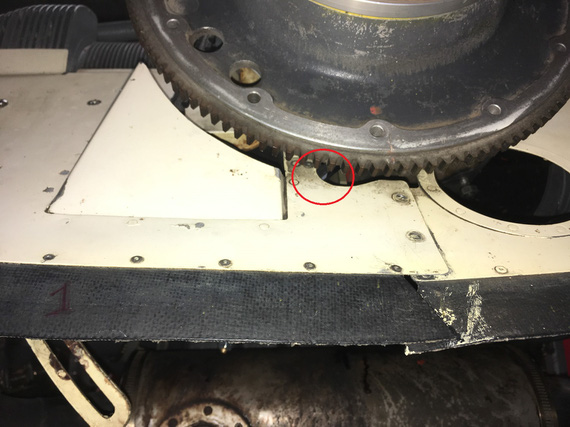
Nose ramp back on
If you look real careful inside the red circle, you can just see the belt there. It will rub on the left edge of that hole. It has to go right, which means the alternator has to go down, which means longer belt.
I used a piece of wire to mock this up. Here are a couple of pictures from the back side.
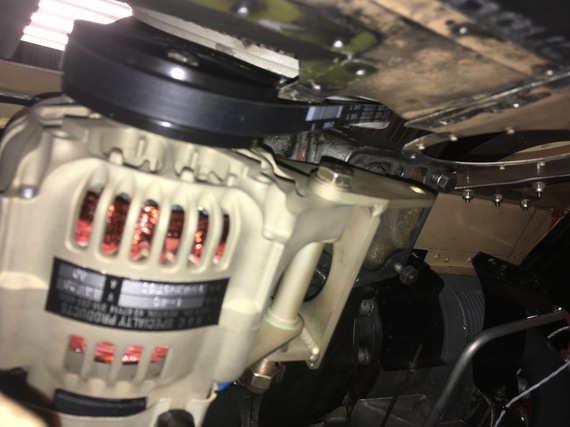
B&C supplied belt - interference
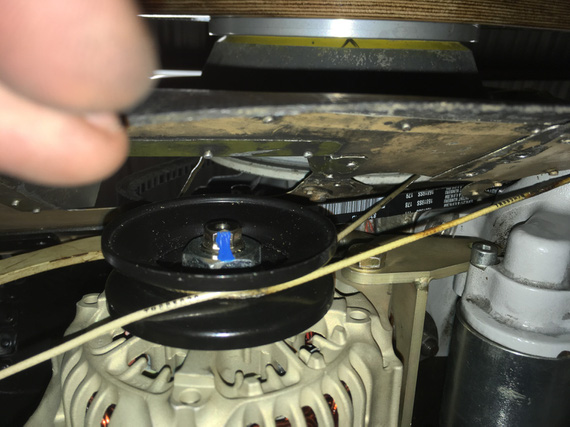
Wire mocking up a longer belt - so that it's centered in the hole
I ordered a couple of longer belts from the same series, to try them out and see how they will work in the end...
So, where are we at?
- I will need a new, smaller, bracket for the front support of that nose baffle ramp (the bracket will attach to the starter, same place as before)
- I will need to design and make a new pivot arm - and to learn how to make nice slots with hand tools
- A different belt
Meanwhile, folks at B&C were extremely helpful and generous with their time, reading my long, ranty, emails, and responding to me with their thoughts. I really appreciated that!
Flying is not dangerous; crashing is dangerous.
Up ↑
© Copyright "79FT". All rights reserved. Feel free to cite, but link back to the pages cited.
This website only shows how I did things in my various projects. These pages are for information and personal entertainment only and not to be construed as the only way, or even the perceived correct way of doing things. You are responsible for your own safety and techniques.