[79FT]: Building Things |
 |
The Fuel System Redo
...hosed!
| On: | Apr 29, 2020 |
| In: | [Chickenhouse Charger] Electrical Rebuild |
| Time logged: | 31.5 |
| Tags: | 6781G, MA5 Charger, fuel system, fwf |
Trying to Get off Easily
After having mounted my transducers, it was time to hook'em up.
I also needed a new engine pump -> carb hose, because the old one was too long.
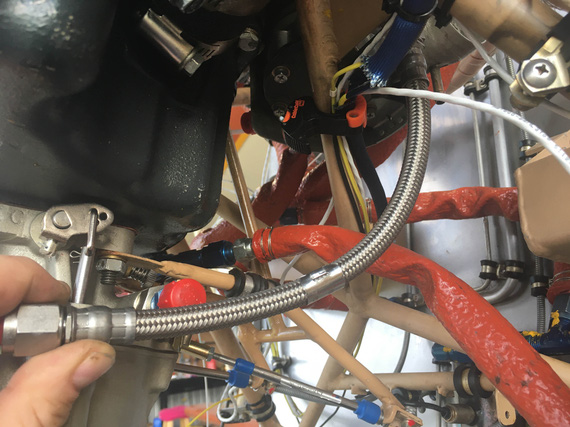
The old pump -> carb hose
And since I was dealing with hoses, I figured I'd clean up this monstrosity of the electric pump -> engine pump hose.
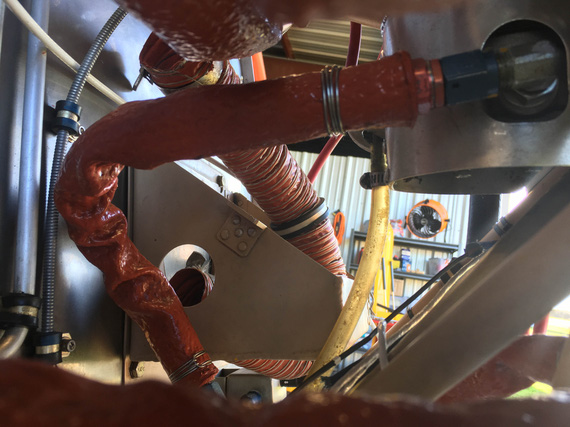
Ugly hose.
There are a few options of course. Pre-fabbed hoses - you gotta measure carefully and they'll be made to the exact sizes you want. You can buy fittings and make your own. You can go with different styles - integrated silicone firesleeve or "crimp on", rubber or teflon, yada yada.
I decided to go with pre-fabbed. I did the math a number of times; and a pre-fabbed hose was cheaper than making my own.
TS Flightlines has a great reputation on the Biplane Forum, and are pretty much the go to guys.
So, time to measure!
I had to re-clock the fittings on the engine fuel pump, so I loosened the jam nuts...
What? .... Jam nuts backed off, and fittings won't turn easily?! They should just unscrew!
Fittings moved with a wrench - and I discovered .. my favorite, The White Schmoo of Death. The teflon dope.
For some inexplicable reason, whomever undid the plumbing last time, re-plumbed it with the sealant everywhere. Okay, NPT fittings need sealant (though, a choice of a crumbly drying type stuff is questionable - because when it's left in a female fitting, getting it out without it getting it's crumbs into the system is almost impossible). But o-ring boss? Where there's a straight thread fitting with a nut and an o-ring? No sir! The o-ring seals it just fine! Siiigh.
Here it is. That lovely sealant.
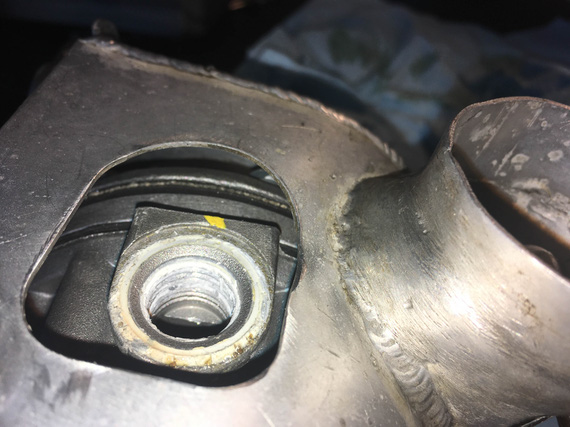
Sealant where it shouldn't be
I already had a ton of questionable fun when trying to get it out of the TBI. Frankly, I was glad I tossed the TBI altogether, hoping that that was the only place I'd find that sealant... Only to.. Oh well.
I had to take the pump out. No way I could clean out that damn stuff out of the hole w/o getting it all inside.
Slowly and steadily, with the hole pointed down, I scraped and scraped and scraped it with my dental pick, followed with a brush wetted in Goof Off that kinda softens it. It was.. hours. For two holes.
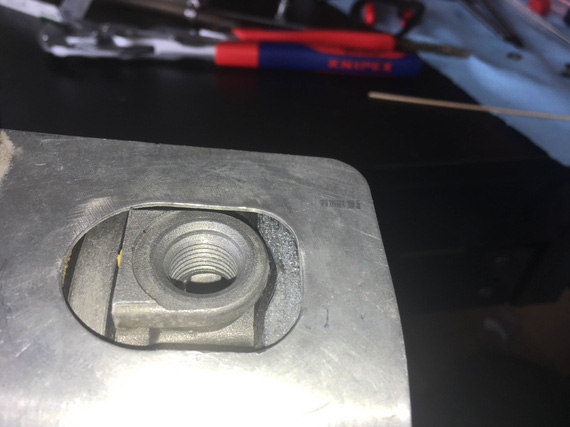
Clean.
Phew. The pump went back on, and finally, I could clock the fittings how I wanted them.
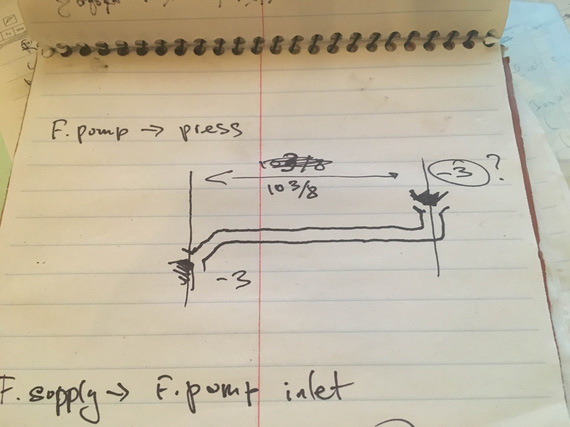
I used a few old hoses I had lying around, and chunks of safety wire to mock up my new ones; measured the mockups, and made a bunch of pictures like this:
A drawing of a hose
Next morning, I called TS.
Tom, the owner, is the guy who answers the phone. A quick email with pictures, a quick conversation about various hose ends (we ended up doing a few -3's instead of -2's as I had before), etc etc - and the order was in.
And, a few days later, a box showed up at my door!
Next time at the hangar, I tried them on. The hoses were perfect! But, something I haven't considered before...
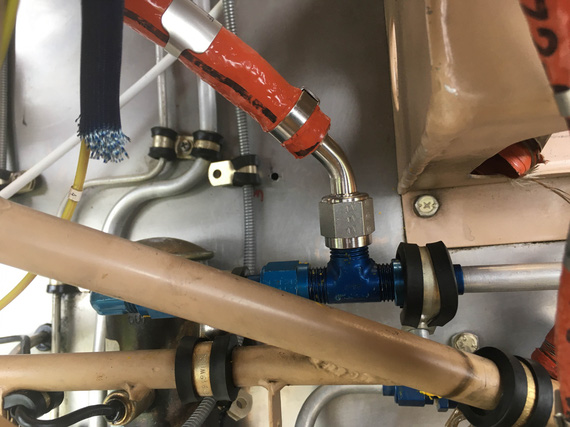
Tee to engine pump
There's a tee. Right side is connected to the gascolator. Left side - to the electrical pump. Both horizontal sides of the tee are connected with aluminum tubing. Notice the adel on the right holding onto the flare nut. The adel on the left, barely visible, is holding onto the tube - motor mount geometry isn't allowing it to grab onto the nut.
And the whole thing is aluminum, and the hose is creating a ton of leverage onto that tee.
It's not the problem with my hose. I should've realized this before I even ventured there. The old hose had the same problem, of course.
Aluminum has fatigue life. The motor shakes. The whole thing shakes, connected by the hose. How that tee didn't crack is... anyone's guess. On top of that, how the tube didn't crack is even more miraculous.
I showed it to Deene Ogden - one of our Chapter's very experienced guys. He agreed with my hunch. His suggested fix was to attempt to tie that hose end somehow into the firewall, so that it doesn't create that much leverage.
Well, easier said than done. Firewall on this thing is .035 - and not rigid at all.
I showed it to Tom (the TS Flightlines guy). He thought that even the fact that there's aluminum tubing between firewall and engine mount is a bad thing - though there the relative motion is small, it still might crack a tube or a flare.
Top that with my general dislike towards the non-firesleeved sections of aluminum tubing firewall forward (I admit, I actually attempted to figure out a nice way to sleeve them), and incorrectly plumbed fuel transducer (it was on the "suction" side - before all the pumps - and it is a restriction - and a restriction on a sucking side is a potential for vapor lock) - and I, in my usual manner, decided to, of course, rebuild the whole thing.
Disassembly
Well, that was easy - except for my favorite white crap everywhere. All the fittings were aluminum, and most of the fittings weren't AN.
Now, similar to a conversation of which sealant to use on NPT threads (you can start a fight amongst best friends by bringing it up!), there's a massive holy war on aluminum vs. steel FWF. I am in the steel camp.
And there's another, smaller holy war, about using "racing" fittings. Folks that do say "if it's good for NASCAR, it's good enough for us". I don't know. I don't buy that. First of, those fittings are of extremely varying quality (AN level all the way down to cheap Chinesium). Second, race cars are rebuilt all the time - and in an airplane, I bet some of those are 40 years old. Or 20. You get the idea.
So I am firmly in the "AN, steel" camp. Even though they are $20 a pop.
Transducer was the hardest to clean out, because I needed to make sure none of that white crud went into it. My friend and hangar neighbor Dick G. suggested running a tap with flutes filled with grease to pick up the crud... hmm... I didn't have the right size tap, and that sounded a bit too extreme.. but the idea..
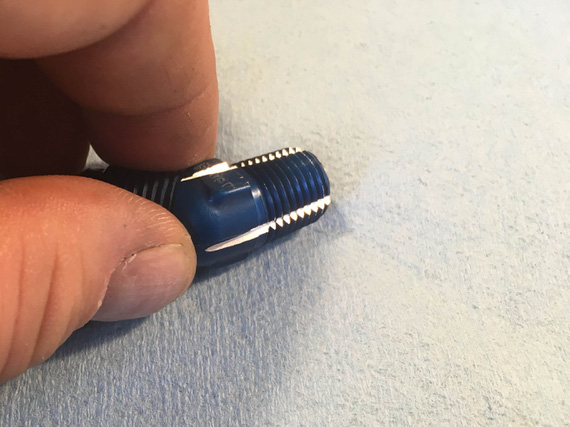
The Schmoo Cleaner
I filed a few grooves into one of those fittings I took out.
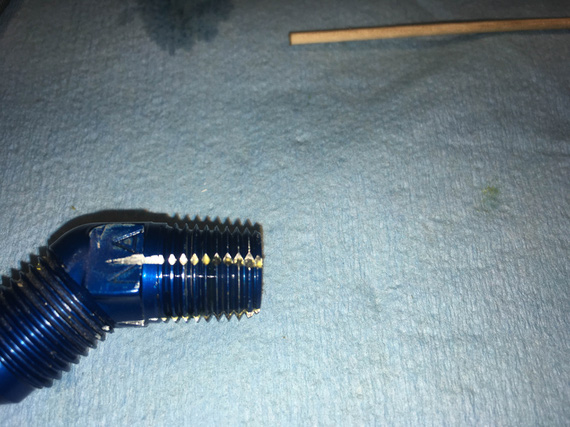
It works!
It worked! See it picked up some grey stuff? Of course, I used it for final scrubbing after fishing out most of the crud with my dental pick.
Thankless work.
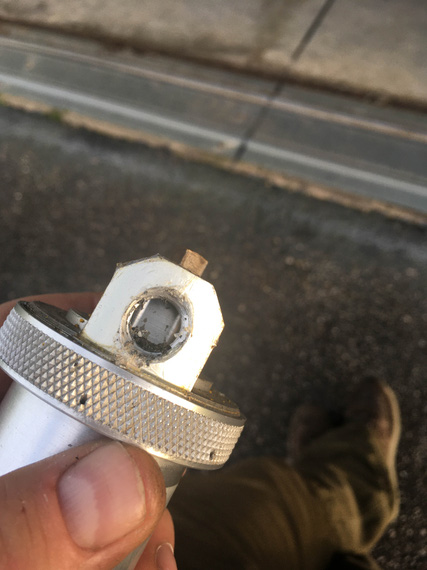
Gasolator
So. Much. Of. It. On the gascolator, I didn't care about it falling inside - I could flush it.
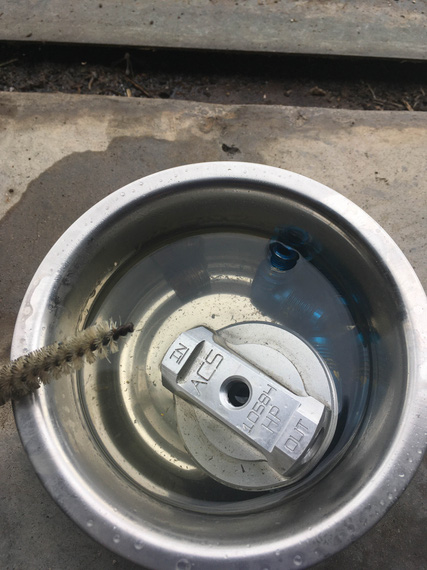
Cleaning the gascolator
Absolutely thankless work.
The Plan, and the Mockups
So since we're redoing the whole thing; first thing I was gonna do is dump the parallel plumbing of the pumps. I guess, Remo's idea was that in case the electric pump fails in a mode where it blocks the flow of fuel thru it, the gas will still be able to go thru the "alternative" branch and still reach the mechanical pump.
Not sure about that. I am very used to Grummans, which are plumbed in series (electrical -> engine pump -> carb), and I have not heard of a single failure there. I have heard of this type failure on an RV, which used a solid state Facet pump that Facet tells you not to use on airplanes.
Okay, actually, this whole Facet pump situation is interesting, apparently. Bendix used to make these electrical pumps, but then Facet bought that part of their business. Nowadays, they explicitly tell you not to use their pumps on airplanes!
But, Dave Fletcher of Fletchair fame buys batches of particular Facet models, and runs tests on them. He sells off the ones that don't pass (apparently, flow rates vary wildly), and tags the ones that pass. He then sells them to Grumman folk.
Hey, good enough for Grumman - good enough for me! I can have my much simpler series system (less hoses, less connections, less fittings, less space), and trust the pump. And they're cheap! (Well, relatively speaking).
So, I got a pump from Fletch and bolted it on.
Transducer was the next big ticket item. It had to go between the engine driven pump, and the carb - the "last step" in the chain.
I needed something to mock things up. I needed hose ends.
... now, what's with those racing hose ends?
I called Mario - a great guy who fixes my cars when I don't want to :). His thing is drag racing.
He knew a place.
Couple hours later, and with a lighter wallet, I had a bag of fittings that were close enough in size, and a chunk of hose to cut up.
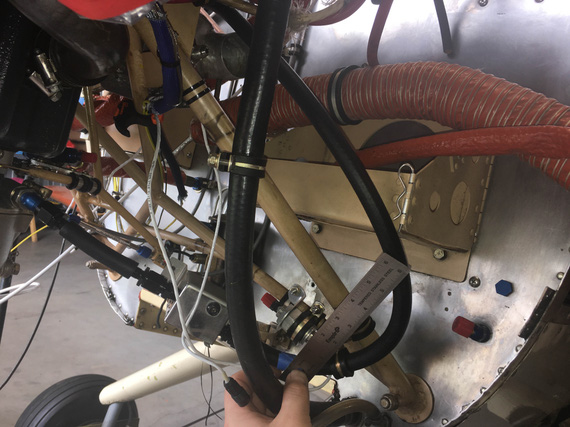
One of the first x-cer mockups
This was the first. Followed what Fletcher did on the Cheetah back when we installed the CGR-30, but on the Cheetah the hose went back towards the firewall and did a nice 180 u-turn, and came back to the carb. Here, I had to go "sideways" to do this "hanging" style if I wanted it. It produced a weird low spot in the loop that I didn't like.
Next!
Could I maybe still have the x-cer on the firewall, and reuse some of the holes?
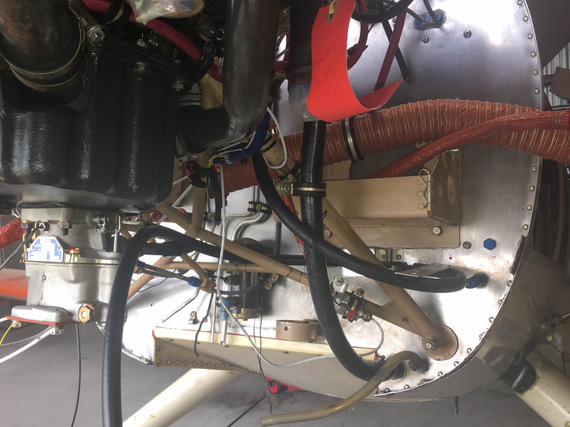
Second mockup
Much better I thought. I ran those by Tom of TS Flightlines. He thought the second setup was better, and recommended using one of his fancy "u-turn" fittings to save on the hose length. He gave me dimensions. I realized that I suck at mocking things up, and asked him if he would be able to send me the fitting (I would gladly pay for it). He said, of course. He could send me whatever fittings I wanted, and just figure the cost in the end. I'd make mockups and send them to him. Heck, he'd send me the hose too - and I'd cut it to size, and make the hoses - then send them back to him, and he'll crimp and firesleeve them.
Wow.
And he was a treasure trove of information. Basically, hand-held me all the way. And I took it, and am very grateful. This was my first plumbing job - so I needed the help.
One big fear I had was running bent fittings before and after the transducer, because they can induce turbulence in the flow. Tom said that they ran them in whichever configuration, and they work fine with the setup he was suggesting. That was a great relief too.
So, I made my "shopping" list, and he put the fittings in the mail.
I got them, and ran over to the nearby auto parts place to get some hose for the mockup (I decided not to fiddle with cutting braided teflon hose). The guy took me back, we found the right I.D. stuff. I asked for ten feet. "This is fuel hose, it's expensive", said the guy. I asked how much. "Two-something a foot", was the response.
I almost cracked up. I then told him that the fitting I brought in to check, that one fitting, was probably twice as much as 10 feet of that hose. We then had a very nice conversation about everything airplanes :).
My final mockup, with fittings from Tom, looked like this:
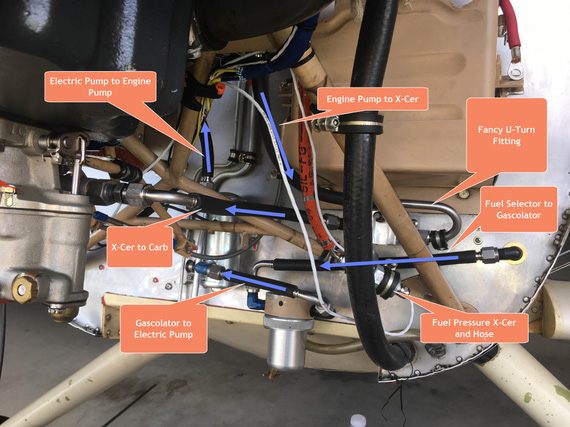
The Final Mockup
The gascolator hookup looks funny, doesn't it? It's "reversed" - because otherwise, I had no room for hoses at all.
And then, the mock hoses were sent back to Tom for final fabrication.
The Gascolator
Somewhere in between all the mocking up and messing around, I had to figure out what to do with the gascolator. See, it had no mount. None.
It was basically "hanging" on the fittings coming into each side, and rigid aluminum tubing. Yeah. Ugh. But that's besides the point - with flexible hoses, it'll be bouncing in that "ring holder" that isn't holding it at all, apparently.
I'll admit, buying a new gascolator with mounting options crossed my mind. But then.. I thought, maybe some kind of latch..
Something that will hook to the bottom of the ring on the gascolator, and the top of that "bracket" and pull it up.
I search McMaster and other catalogues and couldn't find anything... An idea crossed my mind.. maybe..
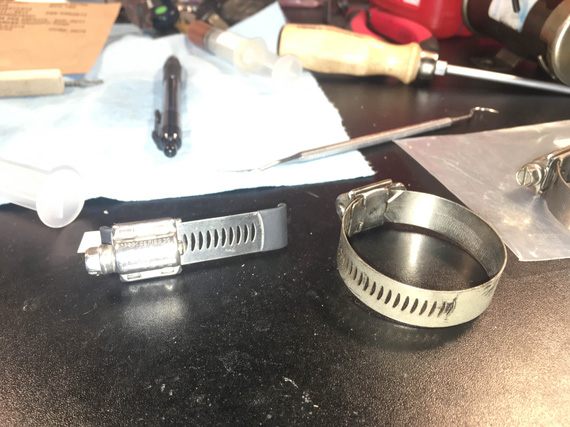
Worm Latch!
That's a worm clamp I cut up, straightened, and bent a couple of hook ends in.
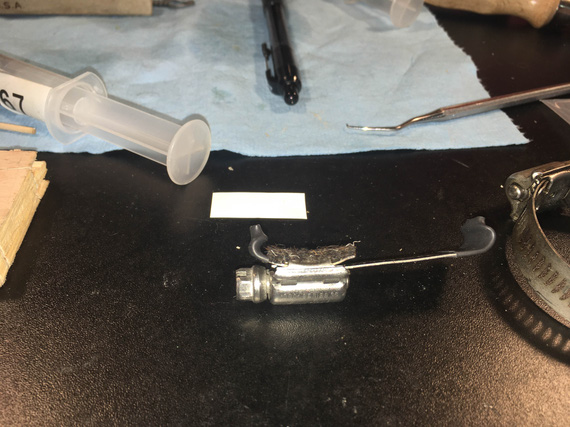
Side view
The felt prevents the worm mechanism housing from scratching the gascolator, and the heatshrink makes the hooks non-marring.
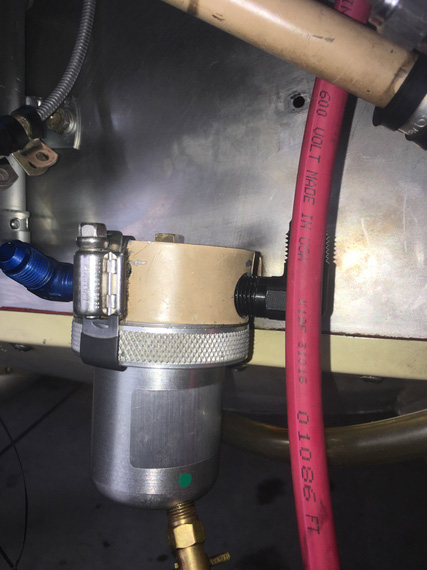
Installed!
It worked! I made two more - planning to have them at 120 degrees to each other around the gascolator.
The diameter of the gascolator's top was a smidge undersized for the ring it was in - Glenn had some kind of a sticky foam in there. I replaced it with proper, aircraft grade felt :).
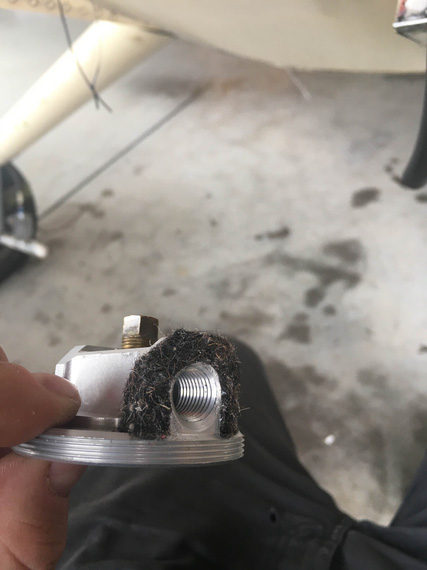
Felt pad
And then, the drain.
The quickdrain on that bowl was leaking. I found that a looong time ago, and attempted to replace it. Obviously, I had to take the old one out....
... only to discover that the threads on the bowl were all chewed up.
No problem, thought I, and ordered a new bowl from Spruce.
The threads on that one.. looked even worse.
I contacted Spruce. No problem! They sent me a new one.....
... slightly better, but still chewed up!
Here's one of the pictures I sent to Spruce back then, just for illustration.
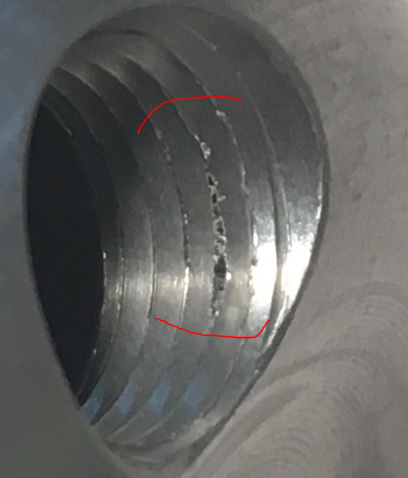
Bad threads
They said, they will talk to the manufacturer, and have them direct ship one to me. Then, they got silent for a long time, and then I somehow ended up with two? I think? All with bad threads.
All and all, I ended up with five bowls. That happened almost a year ago, and frankly, I don't exactly remember how exactly the fifth happend, but I ended up with five. And Spruce didn't want them back. And they refunded me the money.
But that was then. This was now. Now, I had a tap just the right size, and was set up in the hangar.
This is a 1/8" NPT thread - so tapping it just a hair further would re-cut the bad parts and remove a bit more material, fixing the threads.
So I took one of the bowls, re-tapped the hole, and started putting in the quickdrain. Ha! Not so easy. There's nothing on the bowl to grab onto, and I had to tighten the quick drain pretty tight (1 1/2 to 2 turns past hand tight).
I kinda tried to use my vise to help me - holding onto the round thing isn't easy but I tried, using my hand too... Clack! The wrench slipped, and the bowl went bouncing on the floor.
A bit of damage surveillance showed a nick on the lip where it contacts the rubber seal on the gascolator top, and my better part decided that I need to be punished and re-do it. Heck, I had FIVE bowls!
So, I tapped the second one. The quick drain went in. It was annoying, but I managed. 1 1/2 turns.
Hmm.. Why does it look so weird... and not work? Hmm.... Did the torque and compressing the hollow quickdrain with "wedge" action of NPT thread mess it up? Evidently.
But I turned it 1 1/2 turns!!
Idiot me, of course. The 1 1/2 turns is probably too much to begin with (though Vans recommends it in their manual). And besides, they talk about AN plumbing fittings. Not special fittings like this quick drain.
I googled "Curtiss Quick Drain Torque"... Sure enough. Tiny. 40 inch pounds if I remember correctly. Way to be an idiot, dude.
But I have three more bowls to mess up!
Okay, bowl number three.... tap... attempt to hold... slip.. fall... DING! Damn.
This is stupid, I know. I had to stop and figure out a fixture to hold the bowl while torquing the fitting after the first one slipped out of the vice (try holding a round object in a vice w/o a fixture?! Idiot). This was the ... "try to get away with it" mode.
Enough. See, I was in such a weird state of mind I didn't take any pictures?
And the solution was simple and right there, of course.
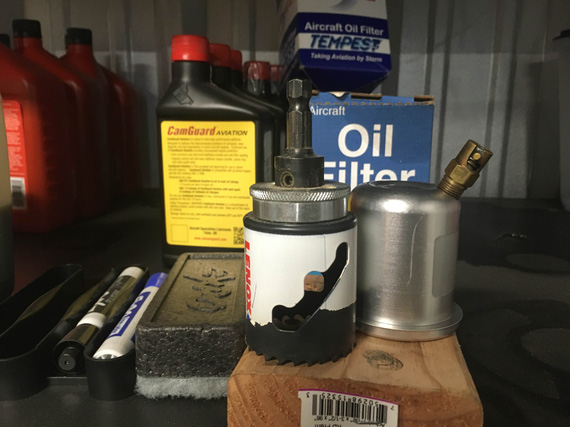
The solution
A 2x4 and a hole saw.
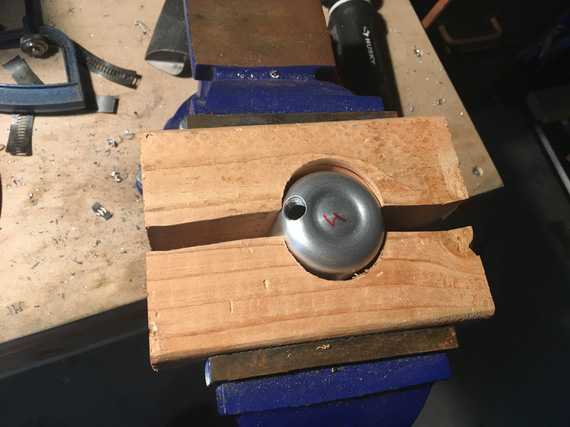
Holding!
See? Not even pretty. Not even the right diameter. But it worked, of course.
So, yeah...
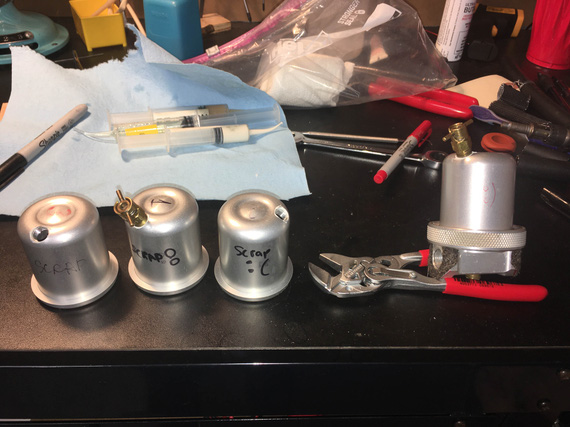
Ugh...
BTW, see that quickdrain all bent out on the second from the left bowl (numbered 1)? That's the overtorqued one.
But hey! I got a pile of bowls to talk about on my bench now. "How not to be an idiot and what happens when you are".
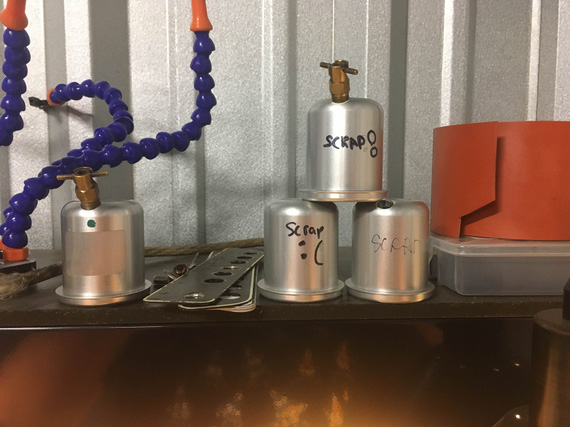
The Pile of Shame
The Hookups
Well, the rest of this was fairly uneventful.
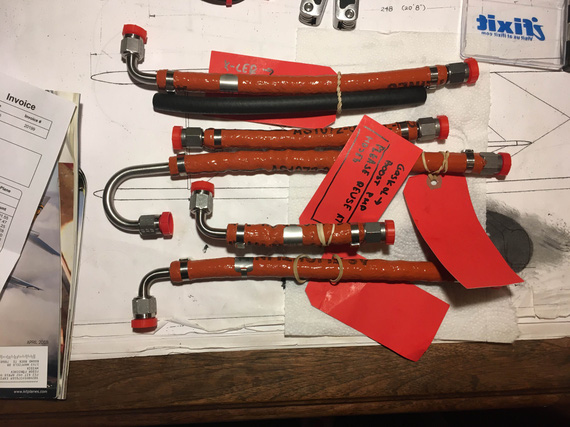
Hoses!
The hoses showed up, and I already had the fittings arrived earlier from Spruce.
I messed with the transducer a ton. That was another hard part to hold - and I'll admit to bending it's outside box (that's non-sequitir but annoying). This transducer is weird - it has it's body and it's brains all in a very thin sheet stainless "box", making it virtually impossible to hold onto and screw the fitting in. But the bend in that body doesn't affect anything - it's like a "cover".
I'll admit to thinking I overtorqued the transducer fittings, too - and removing them to check for cracks (only to find that no, I actually didn't overtorque them - the manufacturer's spec was higher).
But in the end, it all worked out for the initial hookup. I'll have to tighten everything and clean up the angles on the fittings a bit when getting closer to the engine start; but the initial fit up worked great. Tom did a great job!
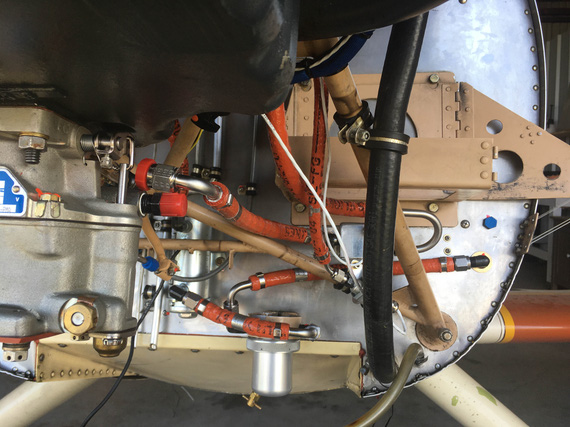
New hoses
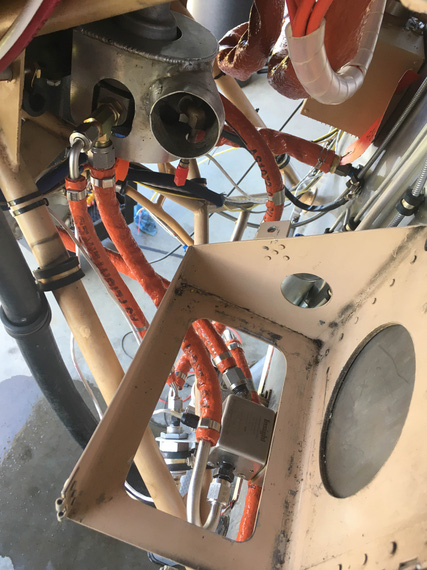
New hoses
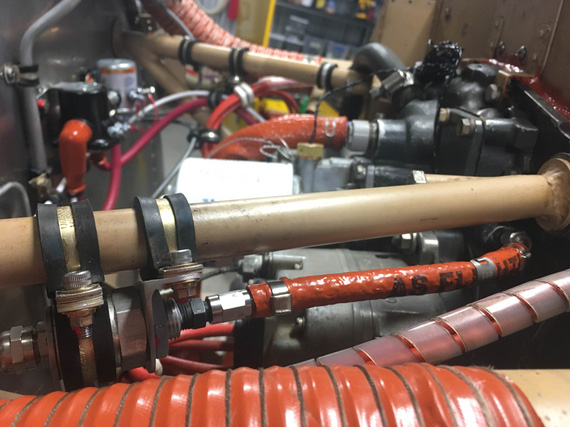
Oil perssure transducer hose
"Expect lower at the end of this transmission."
-ORD ATC
Up ↑
© Copyright "79FT". All rights reserved. Feel free to cite, but link back to the pages cited.
This website only shows how I did things in my various projects. These pages are for information and personal entertainment only and not to be construed as the only way, or even the perceived correct way of doing things. You are responsible for your own safety and techniques.