[79FT]: Building Things

Tagged with "electrical":

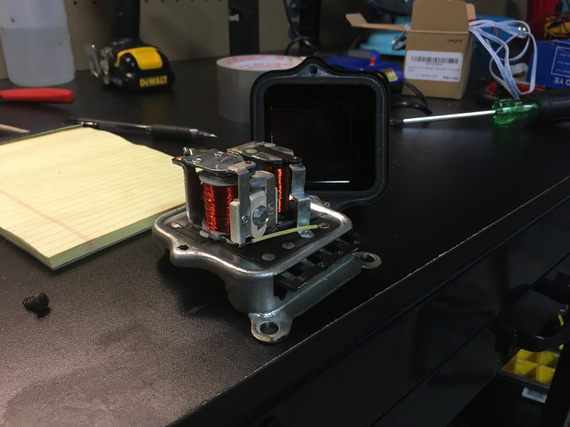
LR3-C

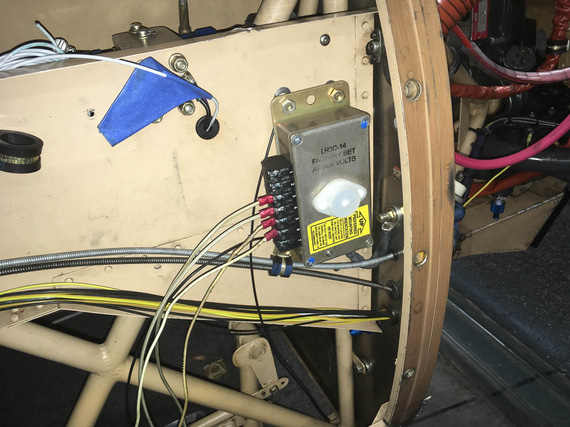
... mounted, and pretty!


On: Oct 09, 2019
In: [Chickenhouse Charger] Electrical Rebuild
Time logged: 6.6
Tags: electrical, 6781G, MA5 Charger

Prior to mounting the newly finished brake line, I wanted to finish fastening everything that's around it - so that I minimize wrenching around the brand new line.

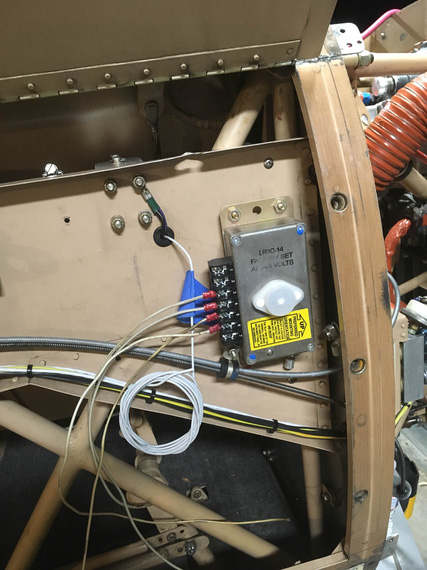
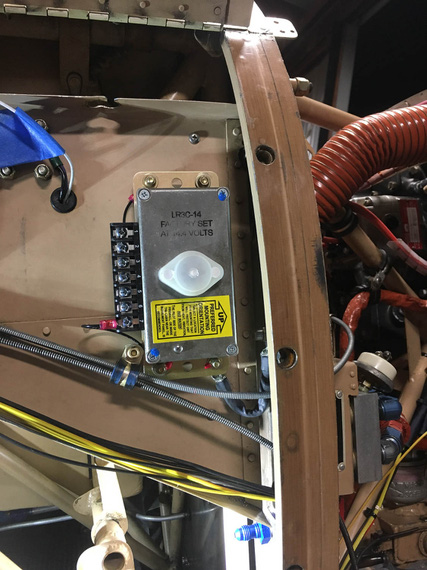
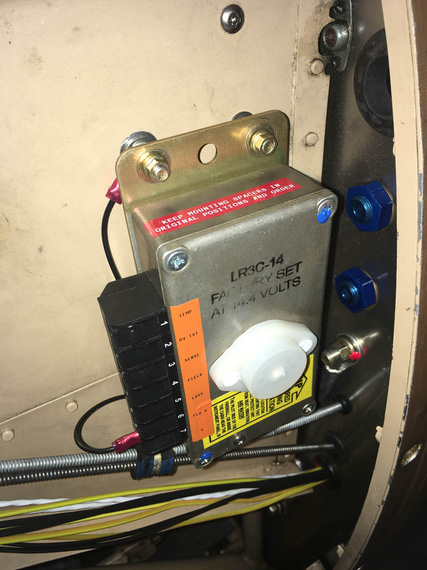
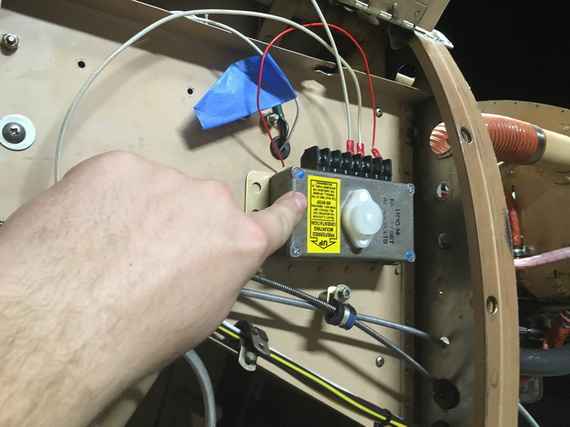
Voltage Regulator is one of the bits that will go right there, so it was to be done.

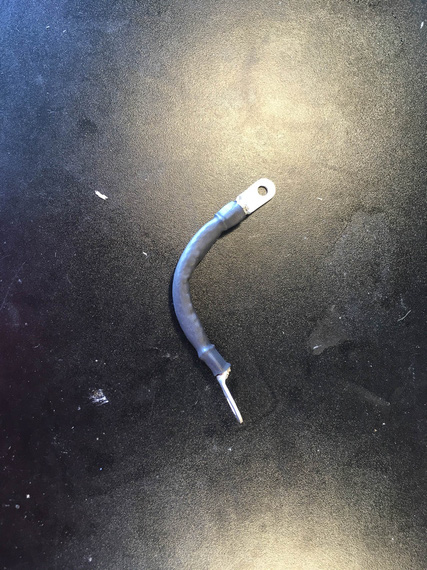
I was working on it's mounting, on and off, and eventually got stuck with attempting to solder a short grounding strap that was to go under one of the "standoffs" for the regulator.

And then, I was making the new brake line - but now that is done too. I also figured out how to make that ground strap. So. nothing prevented me from completing the voltage regulator install.

But, we're getting ahead of ourselves.

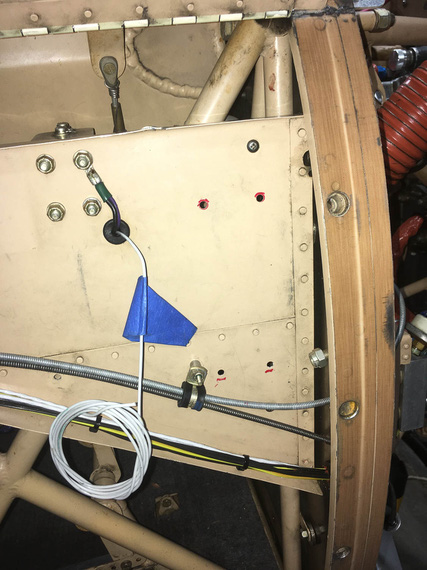
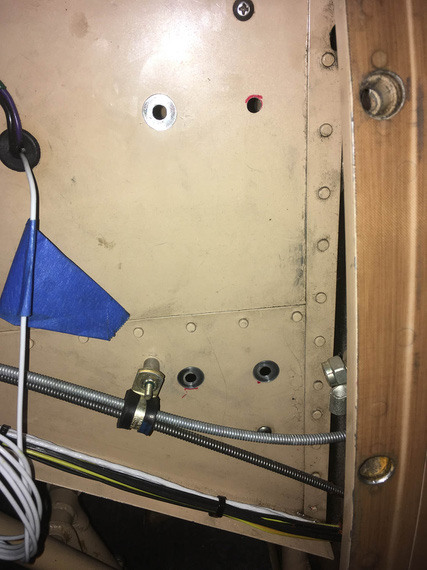
First, the holes.

Holes

Holes

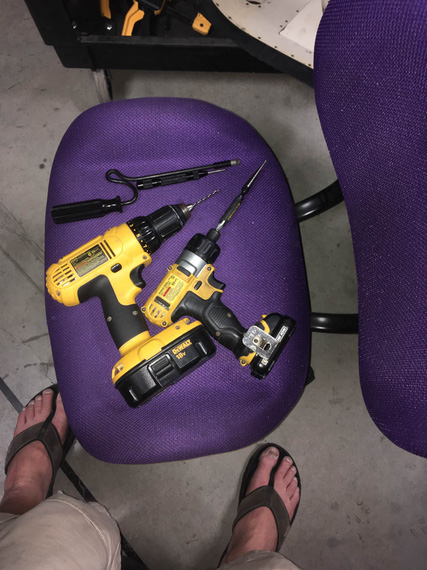
How do you drill real good, round, quality holes, you ask?

Tools!

Tools!

Well. All those tools were participating in making of those holes, in sequence. Here's a game: name that sequence!

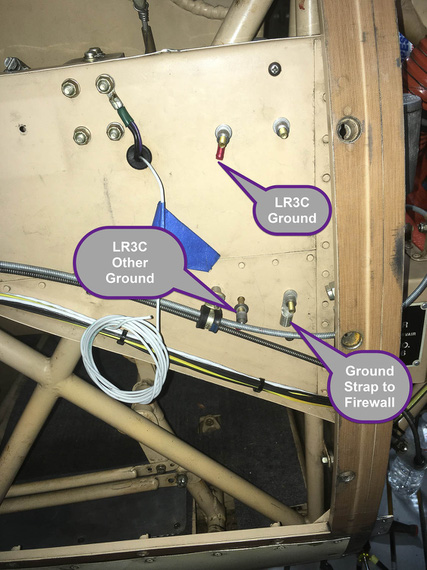
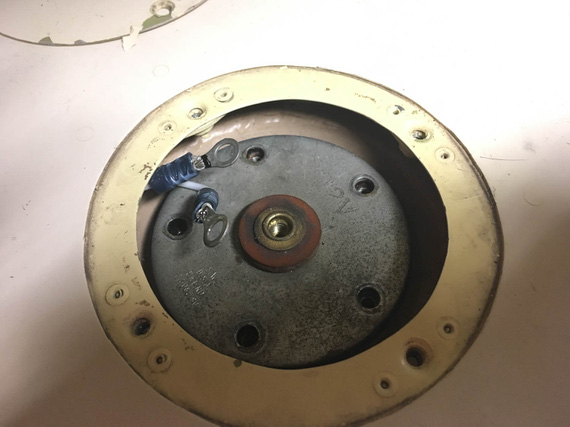
And then, the mounts. The regulator was to be on standoffs, to "raise" it above that rivet line. The regulator wants two grounds, which will go under two of the standoffs. I also wanted to have a ground strap go under a standoff.

Now, I have to explain the ground strap. I already mentioned spending quality time trying to make it.

I want to set up good grounding architecture in my all new electrical. This side conduit, to which the regulator is mounting, is key.

It's continuous, and aluminum - so it presents a really nice grounding point. I am planning to add jumpers between it and the firewall, and it and the instrument panel, tying it all up nicely. Loads will be grounded to the conduit, firewall, and instrument panel only.

Since the voltage regulator is right next to the firewall, it's very logical to have the ground strap under one of it's stands. And besides, there is already a convenient hole right next to it for the firewall side of the grounding strap - which is why the strap is very short.

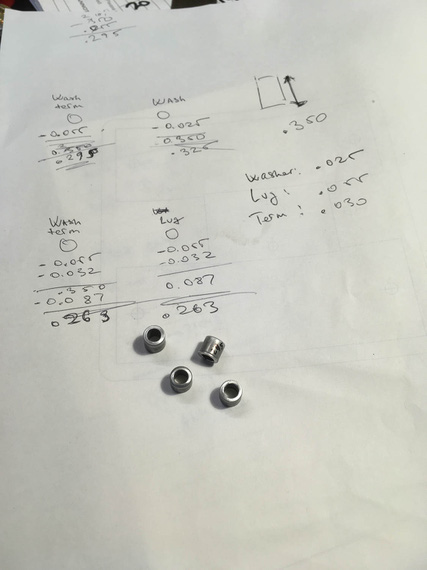
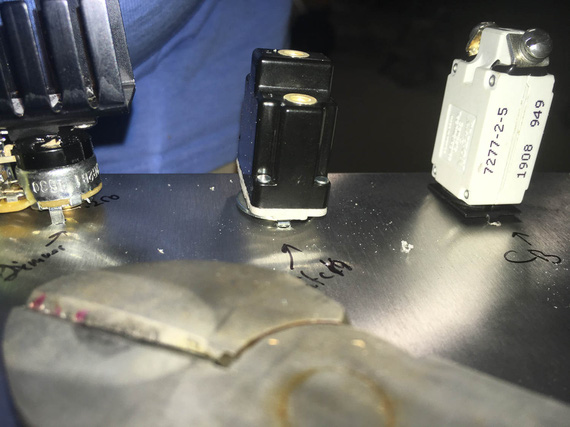
At any rate, those three terminals under three out of four standoffs for the regulator are making hardware stacks of varying thicknesses per standoff, so standoffs need to be individually sized to keep the regulator overall "level" above the conduit.

Another fly in the ointment is that "jog" created by one portion of the conduit riveted on top of another - that has to be accounted for, too.

So four individual standoffs.

Calc and standoffs

Calc and standoffs

If I had a lathe, I'd do them on the lathe; but my lathe is pickled, waiting for the shop - so, tubing cutter and a bit of luck made them all within 5 thou of the right size.

All set up

All set up

Here are the stacks, just to give you an idea of the mess I got into :).

Top and bottom left:

  • Bolt head
  • CAD Plated Washer
  • <side conduit>
  • SS washer
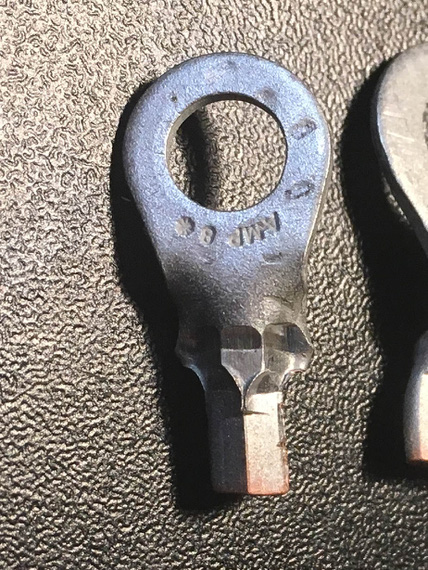
  • Ring Terminal
  • Standoff
  • SS washer
  • <volt reg flange>
  • CAD Plated Washer
  • Nut

Top right:

  • Bolt head
  • CAD Plated Washer
  • <side conduit>
  • SS washer
  • Standoff
  • SS washer
  • <volt reg flange>
  • CAD Plated Washer
  • Nut

Bottom right:

  • Bolt head
  • CAD Plated Washer
  • <side conduit>
  • Ground strap lug
  • Standoff
  • SS washer
  • <volt reg flange>
  • CAD Plated Washer
  • Nut
Test mount

Test mount

Nuts there are temp AN315 nuts.

And now, for the final mounting.

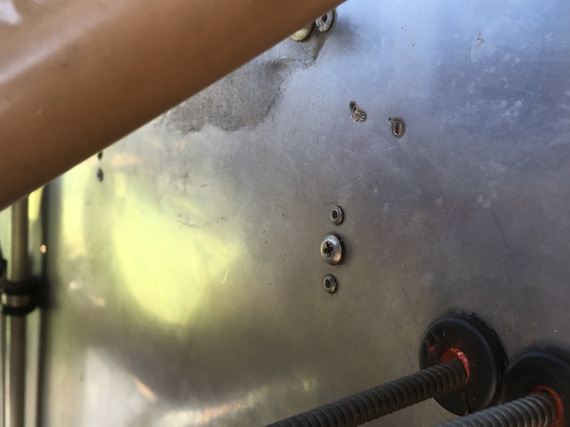
First, scrape all the paint from the side conduit, to ensure good contact (top right doesn't have anything electrical so didn't need to scrape the paint there).

Holes prepped

Holes prepped

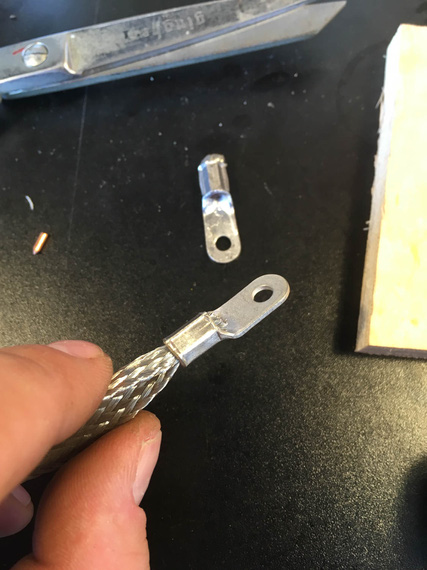
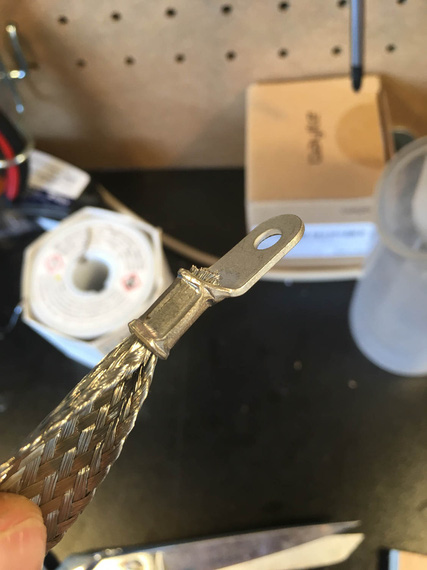
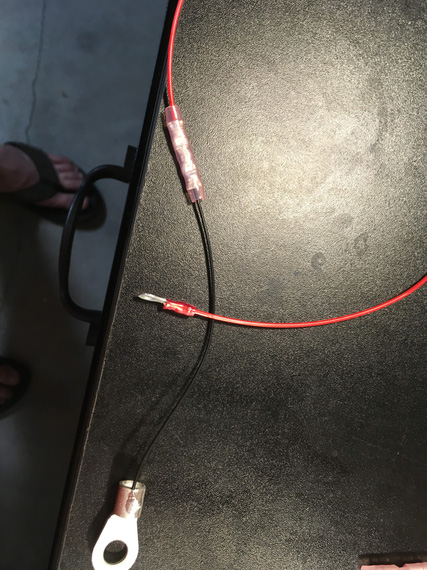
Then, make the ground strap.

Ground strap

Ground strap

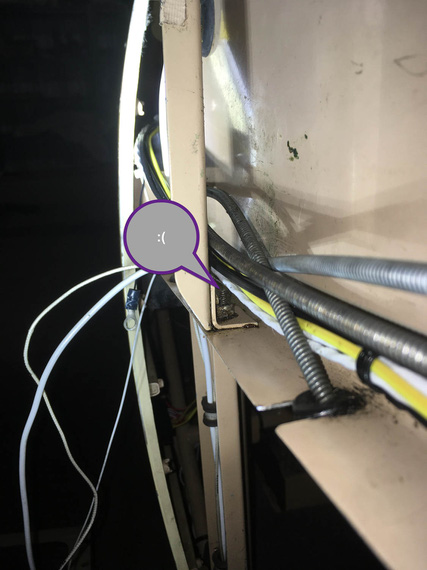
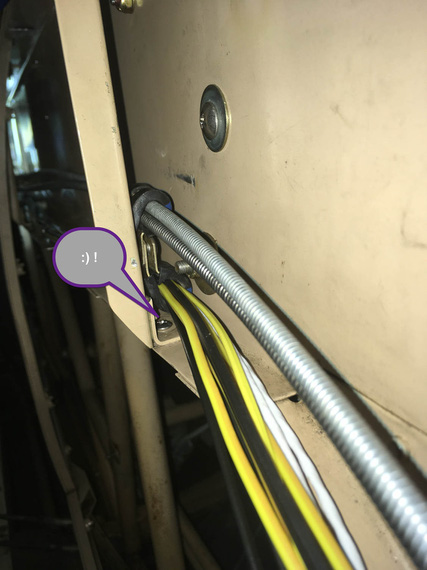
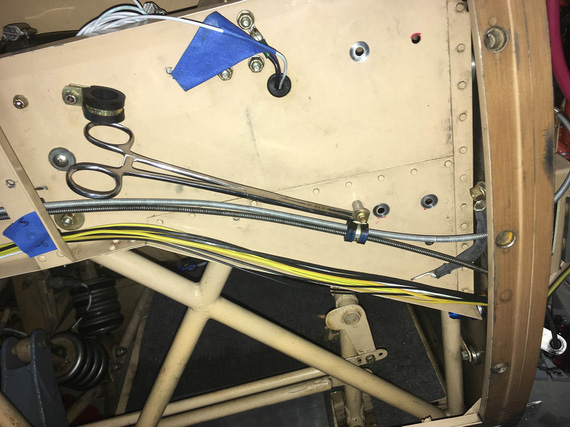
And then.. Well, I wanted to clean up and make sure I mount the bowdens and the engine analyzer harness at least semi-permanently. So, started doing that - discovered that screws in some places, sticking up, were getting in the way of my clamps.

Boo!

Boo!

No matter.

Pretty!

Pretty!

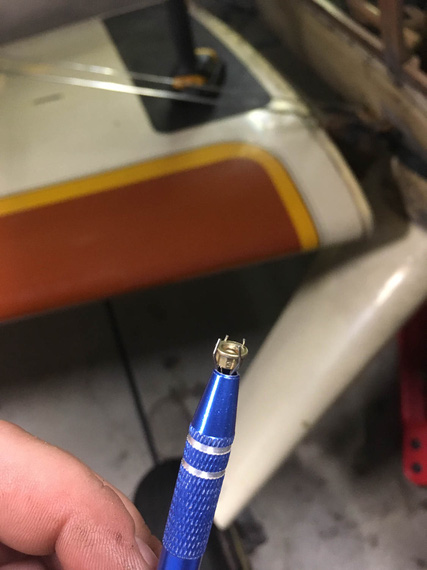
Who said forceps are a doctor's tool?

Mounting an adel

Mounting an adel

At any rate, after making sure that I'm happy with bowdens and probe harness, it was go time!

Intermission

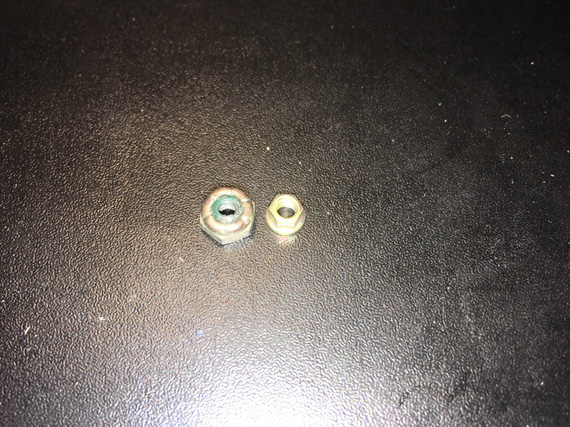
Everywhere I take a nut off, I replace it with MS21042. Half the size, and it supersedes the default AN365 and AN363.

Just nuts!

Just nuts!

And by the way, often times it's convenient to use a "grabby thingie" to start them.

Grabbie

Grabbie

Back to it

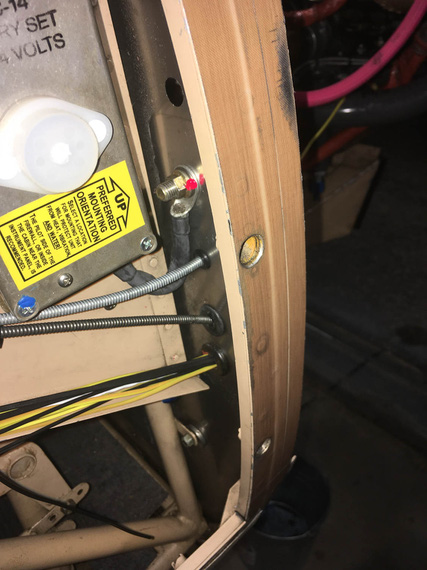
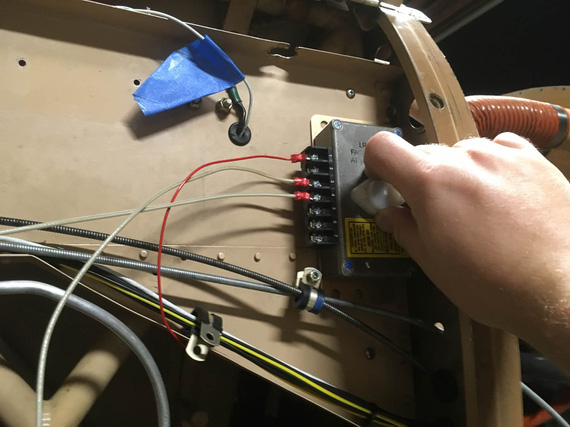
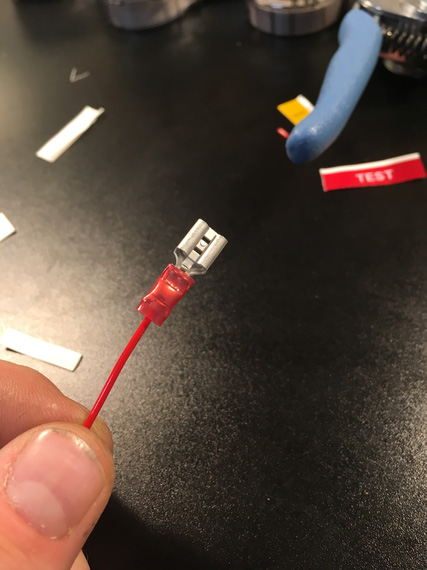
Set up the hardware stacks, crimped short lengths of wires into the terminals, hooked up the ground strap...

Starting to mount

Starting to mount

...and finally, got to use my TorqSeal! I think this is the first fastener I have torqued to it's final state in this project. Milestone!

First dab of torqseal

First dab of torqseal

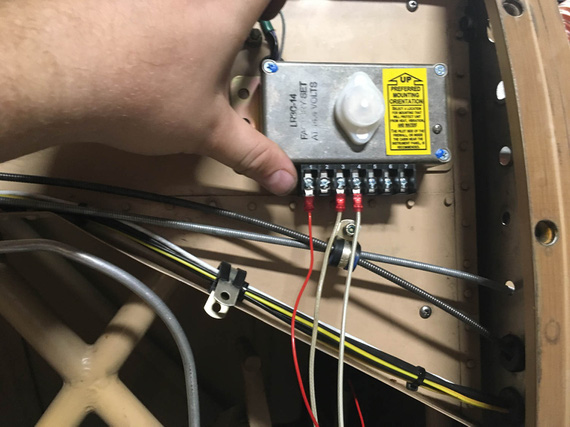
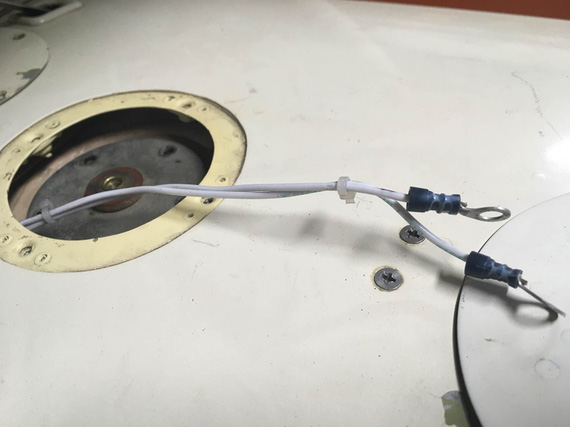
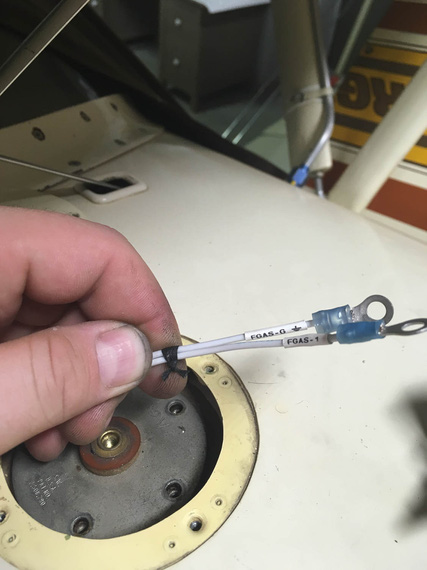
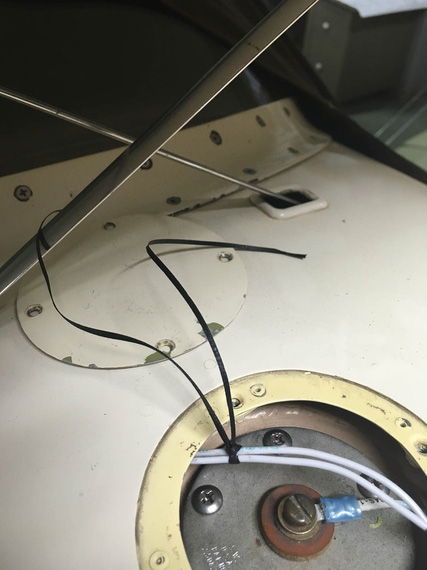
Next, trimmed and crimped the ground wires.

Ground wires

Ground wires

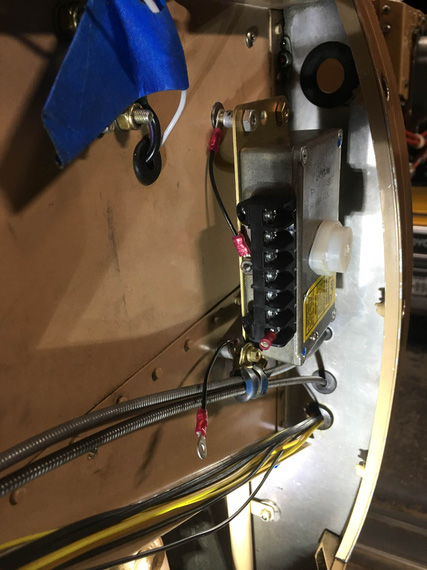
And that was it! Two more dabs of torqseal on the bottom nuts, and installed all the plugs for the holes left over from removing old lines. I'm using AN-6 plugs here.. nice, light, and pretty.

Installed!

Installed!

Why not top ones as well? Well, I have this pesky gutfeeling that I will hook up an adel to at least one of them to hold the main wiring harness to it. It's just too convenient a spot not to do it.

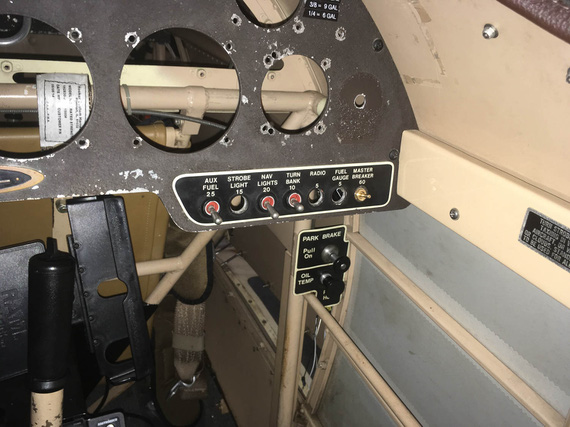
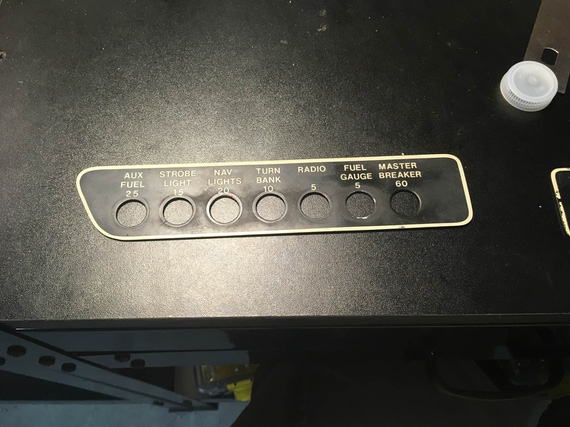
And to top it all off, did a couple of nice placards to remind myself of things :).

Placards!

Placards!


If you’ve got time to spare, go by air.
(More time yet? Go by jet.)


Up ↑
Tagged with "electrical":

Solder, and Good Crimps

... the answer is NOT solder?!


On: Oct 08, 2019
In: [Chickenhouse Charger] Electrical Rebuild
Time logged: 5.5
Tags: tools, electrical, soldering

A while back, I wrote a note on my failures at getting good crimps with the hydraulic crimper I had.

My conclusion then was, "solder".

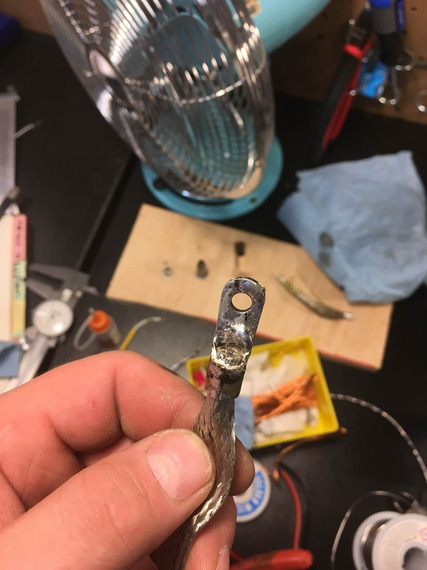
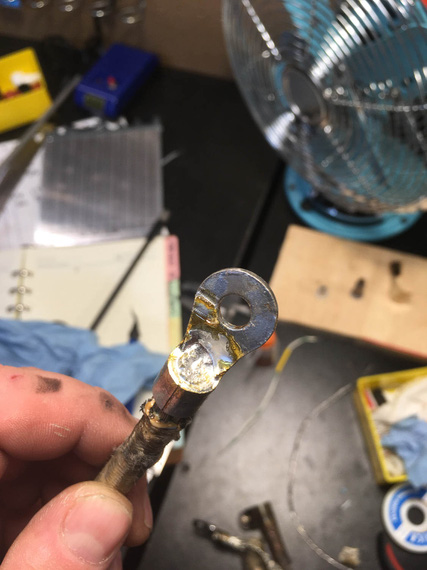
Well, I tried :). I had to make a little bonding strap, maybe 5 inches long.

First time, I cowboyed it - just stuck the strap into the terminal, and soldered away.

In. My. Face.

Ugly!

Ugly!

Second try.. I think

Second try.. I think

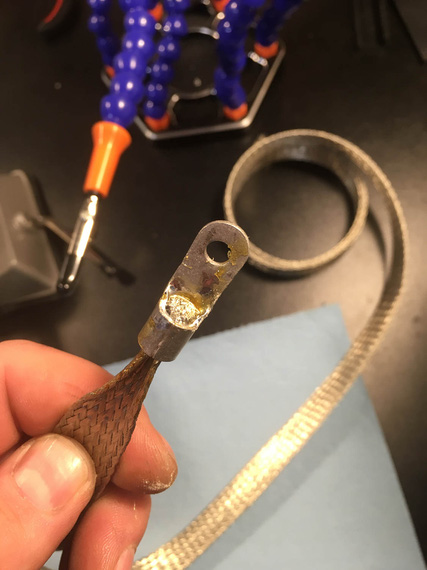
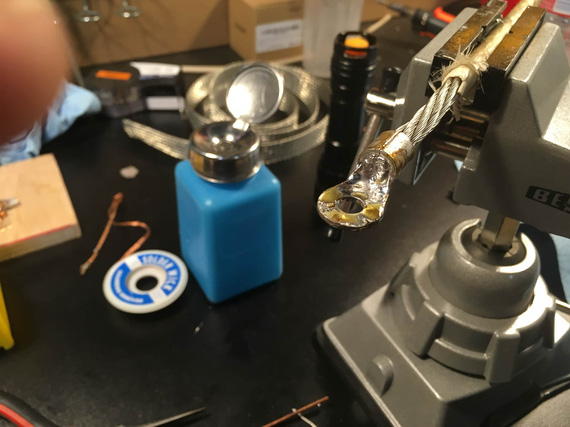
I was soldering, de-soldering, soldering again, etc. Trying different positions, and different heating methods (butane torch worked best).

One of the better ones

One of the better ones

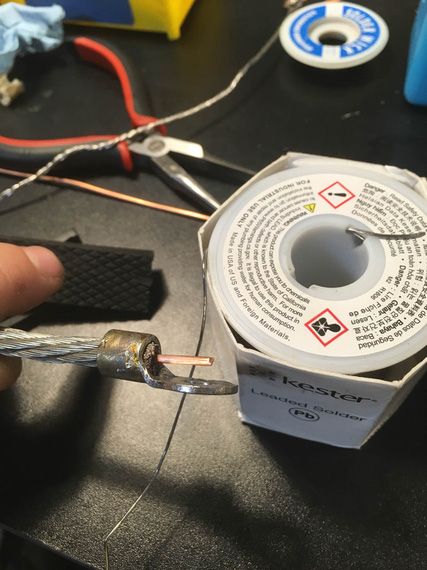
I eventually started using the "wedge" trick - to wedge a piece of thick wire in between the wire strands, so that the wire gets packed into the barrel of the terminal.

Wedge

Wedge

All that yellow crust is rosin flux

All that yellow crust is rosin flux

Back side

Back side

My main problem was, I was trying to prevent solder wicking as much as I could. And I couldn't. It would make 1 inch or more of the wire perceivably "crusty", and I still won't have the barrel filled in. Remember, I was trying to make a small, short grounding strap, that had to be flexible to bend almost 180 degrees. I was trying to achieve a "crimp quality" break between solid metal and strands, and could not.

When I started thinking about it like that, I realized that what I'm trying to do is likely impossible.

Solder will wick - you can control how much with technique and practice, but you can't prevent it. So my current thinking is, if you solder your large lugs, be ready to support first few inches of wire really well, so that that "crusty" portion of it doesn't move.

So, I tried to Hail Mary the crimps again. Previously, I had them just damn ugly (I linked the article above).

I got a small anvil tool (the kind you insert the barrel of the terminal and whack a pin with a hammer) from Spruce. Thought, 25 bucks was worth a try.

Those crimps were even uglier. I don't know what I expected - I guess that was an act of desperation? I didn't even take a single picture.

But then... I had a minor epiphany.

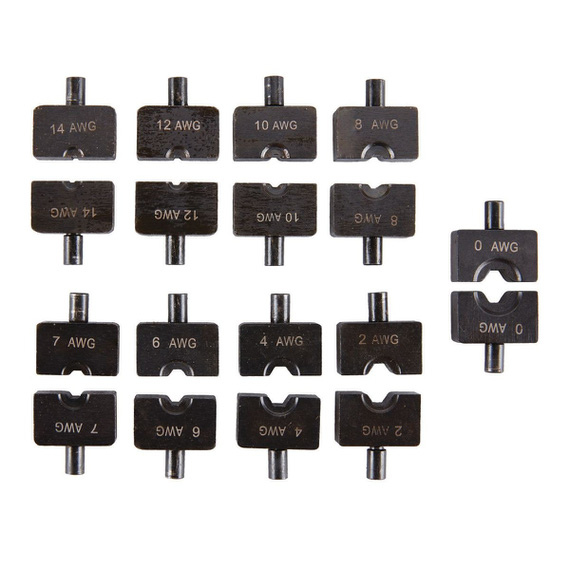
With the Harbor Freight Crimper, dies are not properly ground for wire sizes. But. But.

Just like with hammering, we can crimp progressively until we "flow" all the strands and the barrel into one solid piece!

Here's the approach (okay, this is the final procedure, first try did not include turning - but I did it (admittedly, accidentally), and liked the results a lot).

  • Given wire gauge of, say, 6
  • Use die 2 sizes up - so, die marked for #2 wire
  • Put the wire in the terminal. Start by squeezing the terminal turned 90 degrees (so "side to side" rather then "top to bottom"). Just give it a gentle oval shape
  • Now, turn it 90 degrees and squeeze until the jaws close
  • At this point, you will have a somewhat undercrimped joint, as I described in my notes on the crimper; but it's shape will be a perfect hex.
  • Now, go 1 size "down" (so, dies marked for #4 wire). Squeeze.
  • Stop when you feel it's done shrinking.

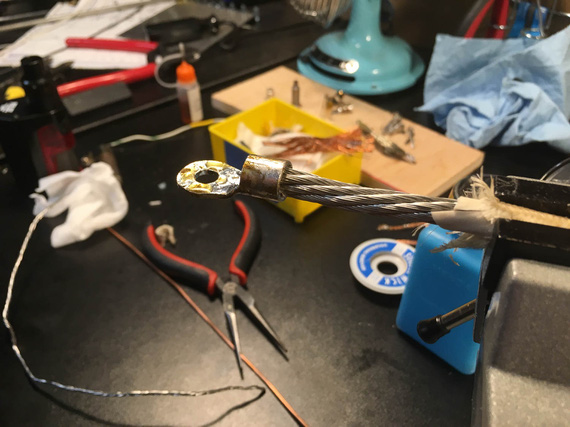
Results?

Pretty!

Pretty!

Pretty, ain't she? And, no "wings".

If you don't do the turning trick, it'll still be pretty; but with just a whiff of those "wings" present:

Pretty!

Pretty!

All all this was what... five and a half hours?

Well, I guess, that's the "education" part of the "Education and Recreation" charter of E/AB aviation ;).


Cessna pilots are always found in the wreckage with their hand around the microphone.


Up ↑
Tagged with "electrical":

Drilling the Panel

...misery turned happy times!


On: Sep 10, 2019
In: [Chickenhouse Charger] Electrical Rebuild
Time logged: 5.9
Tags: 6781G, MA5 Charger, electrical, panel, drilling

...this is important. Stick a pin in it.

Remo had these nice placards all over the airplane. Professionally done. Very well looking. He probably ordered them somewhere, or used a technique I am not aware of.

These placards are mostly glued on, and do not come off.

How do I know?

Well, I needed to remove one, in the side conduit. Here it is,..

Placard

Placard

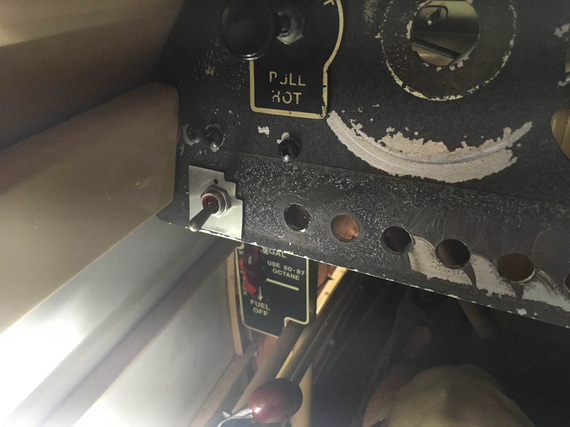
..to the right of the future fuse block. It gets in the way - there will be another fuse block there to the right of the one on the picture. And I can't rip it off! I can't remove the conduit to immerse it into whatever solvent will cut the glue without some major surgery, so I guess the new fuse block will go on top of it.

Why am I telling you this?

Ha!

You'll see.

Read on.

Switch Anti-Rotation Holes

You have probably figured by now that I have a taste for misery, and for ranting about how miserable that or this was :). If you read a few notes in this Dear Diary, you will notice a trend - that I tend to come up with ways of making myself aggravated, very consistently and reliably.

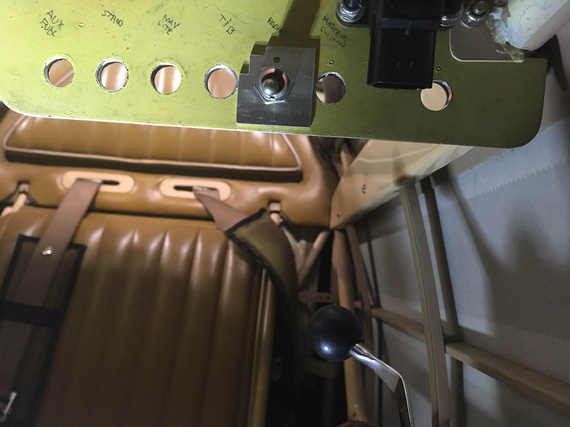
Well, this time it was the "anti-rotation" holes for switches in the panel; and the plan was to drill them from the back side of the panel not quite all the way thru (yay, no access and contortionism again!)

Every switch, circuit breaker, and certainly, a dimmer, comes with a "keyed" washer to prevent it's rotation. That means you're drilling two holes - one for the appliance (switch, or whatever), and the other for the little tab that's on the washer.

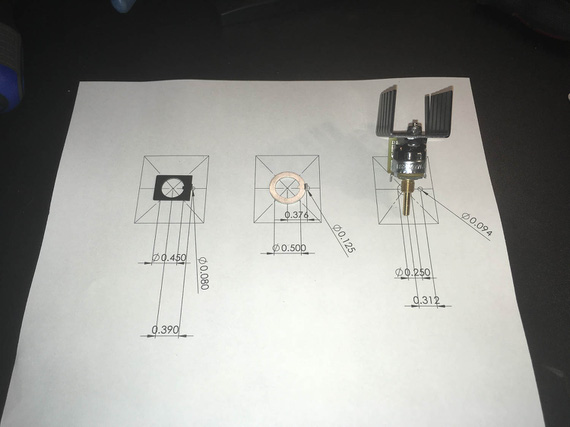
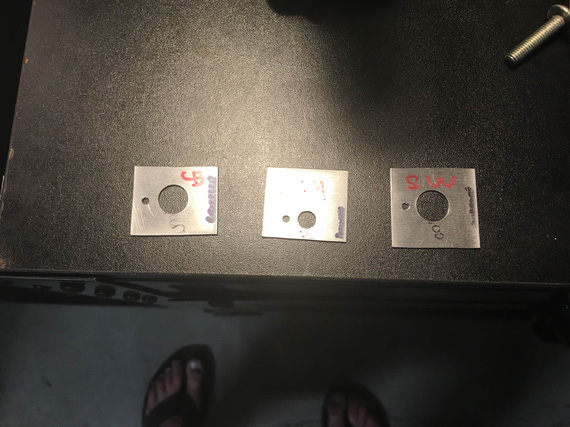
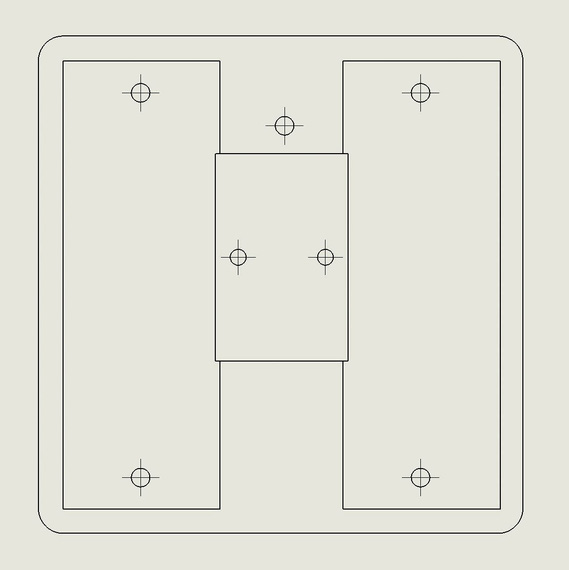
Picture explains this better. Here is a little hole template I quickly drew in Solidworks, properly dimensioned, with washers from (left to right) the circuit breaker, switch, and the dimmer.

Holes template

Holes template

See, Remo didn't have those "secondary" holes on the panel - so I had to drill them (especially for the dimmer).

But wait, you ask. If you drill holes, that will be ugly - a hole next to every switch?

Yup. Aha. Agreed! Though the nuts are supposed to cover them, they, I'm pretty sure, from my testing at least, wouldn't have...

No problem! Remo made the panel from 1/8" thick aluminum, and I needed maybe half that much for the tabs to go in. So the plan was to very carefully drill them just deep enough to house the tabs.

Made me a nice little set of templates...

Templates in the making

Templates in the making

...out of a small piece of aluminum, drilled holes using my paper template, and cut them up...

Templates, cut up

Templates, cut up

...and cleaned up the holes and edges.

The plan was, to put a template like a "washer" around a switch/CB/..., and center punch the secondary, small, hole, thru it. Then, I'll have punch marks to drill, and will have to either get to them from the side of the plane, or, more likely, from the back of the panel while sitting in the seat and not seeing where they are while drilling, using a mirror to position the drill first.

Like I said, I have a taste for misery.

So there we went, punching the back side.

Center-punching on the back side of the panel

Center-punching on the back side of the panel

Click-clickity-clack.

Cling! Ding! Ding dang dong.. it sounded like a chunk of metal just fell off the plane and dropped on the cockpit floor.

!??!?@??!??! What the h... did I break?!

I crawled out from behind the panel and looked into the cockpit.

On the floor, looking at me, and almost smiling, was...

Placard!

Placard!

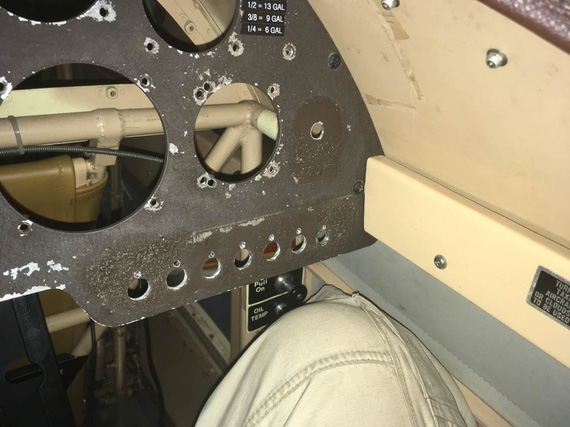
...this. Remo's placard that went around the switches. Like so:

Placards - in place

Placards - in place

Wait, wait wait wait. It came off. But it will be held back by the switches' nuts when the switches are in. And.. cover the holes! That means, I don't need to drill the holes from the back side and worry about punching thru (or not going deep enough) - I can comfortably sit in the cockpit and drill them from the front! All the way thru! The placard will cover them! In my search for misery, did I luck out?! :)

In retrospect, this (and the opposite side's) placard were probably not glued. No need - switches' nuts hold them just fine.

They were stuck because Remo probably installed them on top of the paint that didn't fully cure - and it just stuck to the backside of placards over the years, under the pressure from switches' nuts.

I stuck my nail under the opposite side placard, and it came off with a little force.

Ha!

Well, it was smooth sailing from there...

Marking from the front

Marking from the front

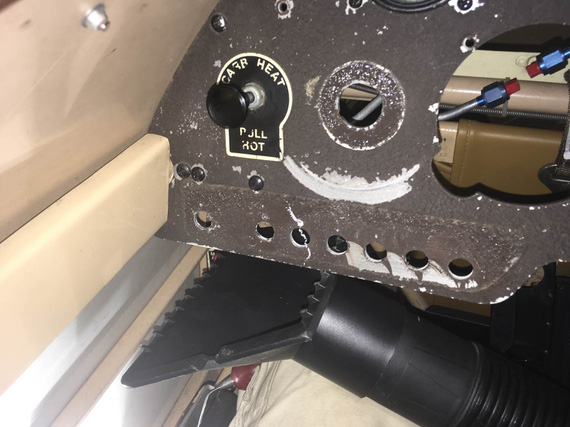
... relatively speaking, of course. I still had to hold up the vacuum with my knee, and maneuver the sharp drill, making sure to be extra careful not to poke it into anything important (like, fabric on the sides).

Curlies!

Curlies!

All drilled!

All drilled!

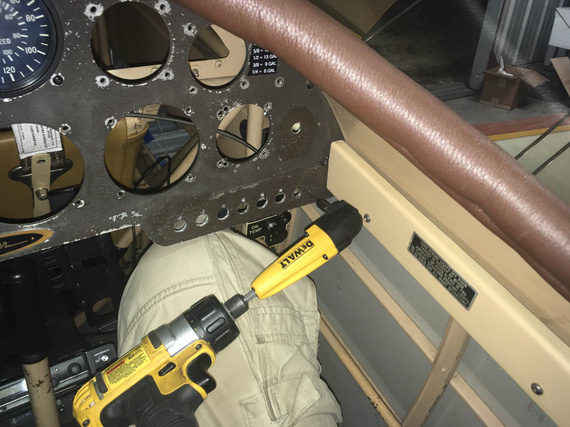
The ones on the corners were annoying; but I already had the drill bit installed into one of my hex drill adapters - so a 90 degree adapter was not an issue. Didn't even need an angle drill.

Angle adapter for the side hole

Angle adapter for the side hole

Happy end!

Dimmer Pot

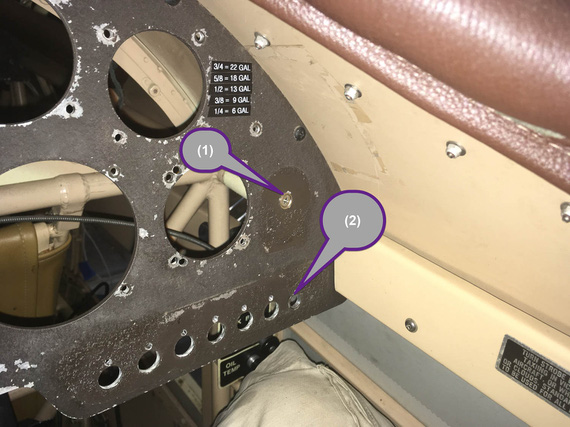
That sucker has 1/4" diameter threads; and all the holes I have in the panel are 1/2... Without some serious bushings, or other mods, or a new hole.. ugh.

Possible pot locations

Possible pot locations

I was hoping to stick it into the old "Master Circuit Breaker" hole (marked (2) above), but it was waaaay too big.

Looking around, looking around.... aha! Here's a number 8 or 10 screw plugging a hole! I can enlarge it and we'll be in business! (marked (1)).

Yep. Good luck, buddy. That was an even bigger hole that was plugged with a #8 screw in a countersunk finishing washer... hmmm... maybe that will work out for the pot too?

You know, drilling a #10 countersunk washer to have a 1/4" hole in it is... hard? Annoying? You can't really grip it in any manner without damaging it, you can't hold it in your fingers... I think I lucked out on my third try, with combination of a Unibit and light clamping of that washer in a vice.

With that re-drilled countersunk washer, the pot mounts just fine in hole #2. And #1 got plugged back :).

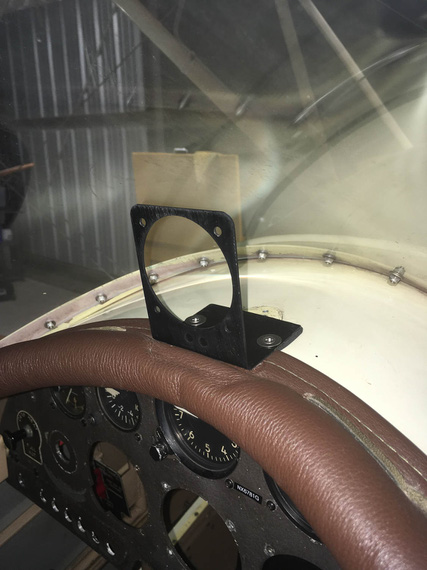
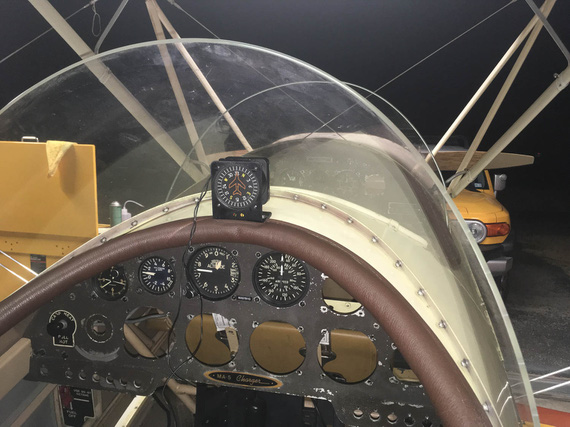
Compass Mount

Well, after all that excitement compass mount was almost anti climactic. I toyed with the idea of putting it into the panel (and relocating G-meter into a new hole I'd cut around where the ignition switch was - see, after having failed relocating Hobbs there, the idea of still making a bigger hole in the panel keeps nagging me :).

No good. When that much down, too much steel around it confuses the compass to the tune of about 30 degrees... No need to add extra problems in already a magnetically problematic plane.

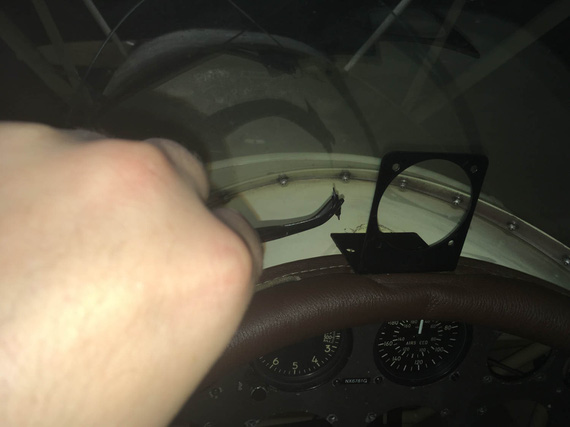
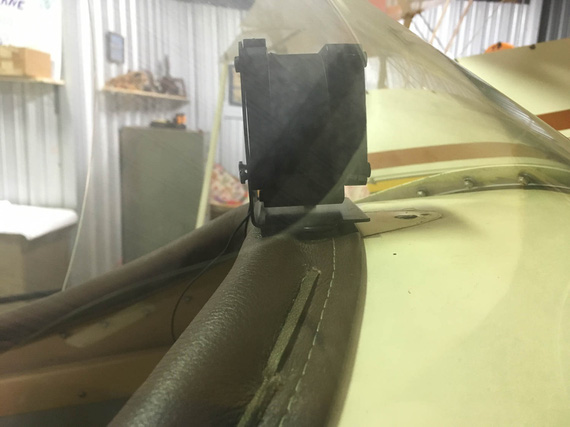
So, top it was to be. The windshield will get in the way, but I really, really didn't want to take it off (~20 #6 screws and nuts in a tight spot is no fun).

Eyeballed the bracket alignment with the fuselage centerline and put it in the right spot...

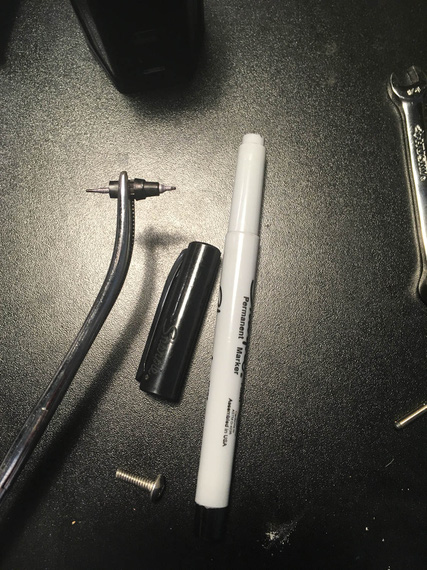
Damn! Sharpie's too tall to get in there to mark the holes vertically. "Angle Sharpie Adapter"... hmm..

I know!

Angle Sharpie Adapter

Angle Sharpie Adapter

A bit of disassembly and forceps do the trick ;).

aaaand, mark!

aaaand, mark!

Holes punched and drilled, I added a bit of rubber foam under a portion of the mount to "eat up" uneven surface created by combing...

Mount mounted

Mount mounted

...and voila...

Vertical card compass!

Vertical card compass!

Side note to attentive folks: yes, I know I need brass hardware - those CSK washers and SS CSK screws are temp fasteners I used to test positioning. It will be brass, I promise :).

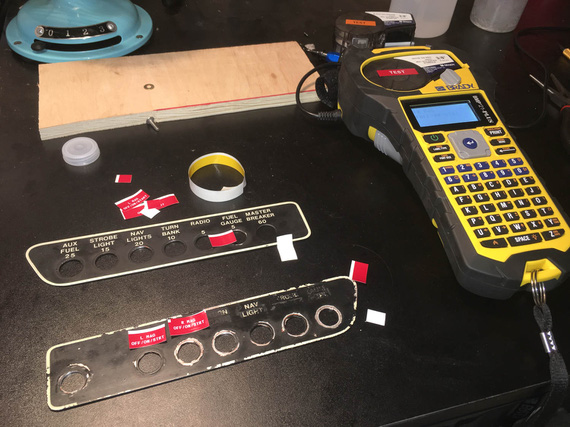
PS

... playing with new switch labels...

Labels

Labels

PPS

Oh, by the way, the best accompaniment (score? ;) ) for working on a biplane is...

... The Chairman, of course!


And the number one actual transmission heard in the O'Hare TRACON is:
-ORD ATC


Up ↑
Tagged with "electrical":

FWF, Side Conduit, and Panel

...messing around trying things


On: Sep 08, 2019
In: [Chickenhouse Charger] Electrical Rebuild
Time logged: 21.5
Tags: 6781G, MA5 Charger, electrical, fwf, panel

I was on the fence about making this entry as multiple separate ones versus just one giant one... After all, it covers quite a few, mostly unrelated, things that I did in the last few days, and it would've made sense to keep them separate.

However; finally decided to make just one big article with all of them. None of them are finished; but somewhat a decent chunk of work is - I think I have mostly figured out where everything will go and how it will all come together.

I guess, what I'm trying to say is, if you clicked on the "Panel Layout" entry in the Log, and are trying to figure out why are you seeing notes on Firewall Forward, just keep scrolling :).

Diagram

I have updated the electrical diagram, version 2 is here.

  • Main Connector is gone. I was convinced that reliability concerns outweigh the benefits of having it. Plus, I have very little precious room to work with.
  • Physically, it's easier to hook up the LR3C Sense wire to a different spot - on the Shunt stud rather than to the Master Contactor/Starter Contactor jumper directly. It makes no difference, it's the same circuit - just a different hookup spot to it.
  • I also fixed some typos, and cleaned up a bit.

Firewall Forward

I started trying things around firewall forward while figuring out routing and lengths for carb control cables, and continued afterwards.

Contactors and Beefy Wires

Contactors

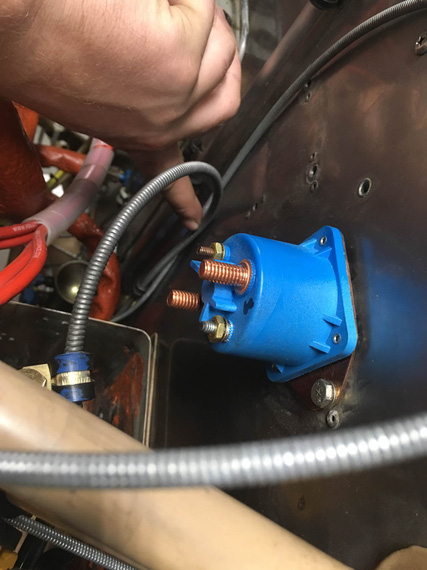
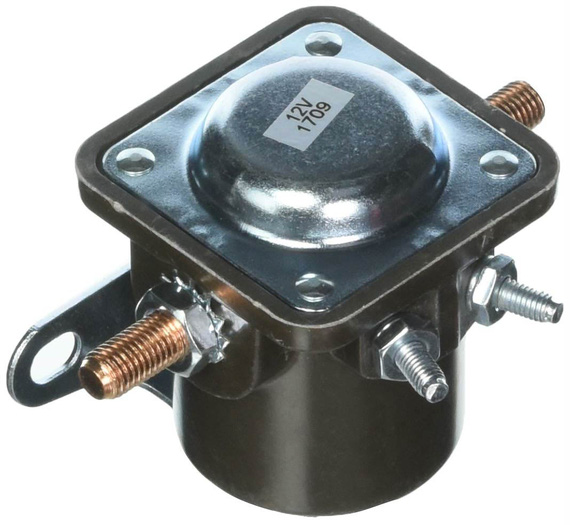
It became obvious fairly quickly that I won't be able to use the nice B&C Starter Contactor because of it's mounting holes not being the same as a very common SS581 Starter Solenoid that was set up by Remo. Also, the way terminals were set up on the B&C Starter Contactor would have made them closer to the carb control cables. And, I didn't want to drill more holes in the firewall.

B&C Contactor

B&C Contactor

SS581 Contactor

SS581 Contactor

So I decided to go with SS581-style and ordered one from Vans. While waiting for it, I used the old one just to mock things up.

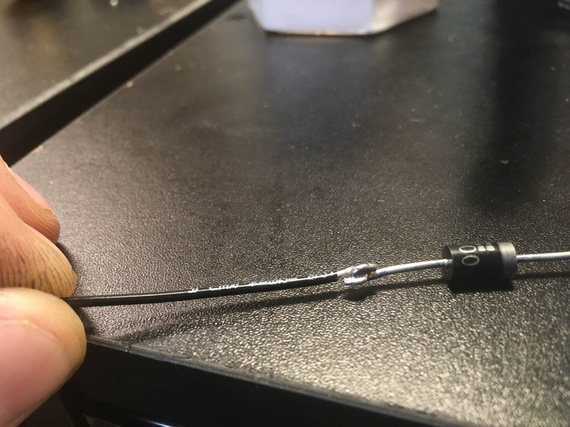
And because it doesn't have the spike catcher diode, I had to get me a couple IN5400s, and soldered an extension lead to one of them.

Extension lead

Extension lead

The other leg will get a crimp ring terminal. I had to do that 'cause the diode leads themselves weren't long enough.

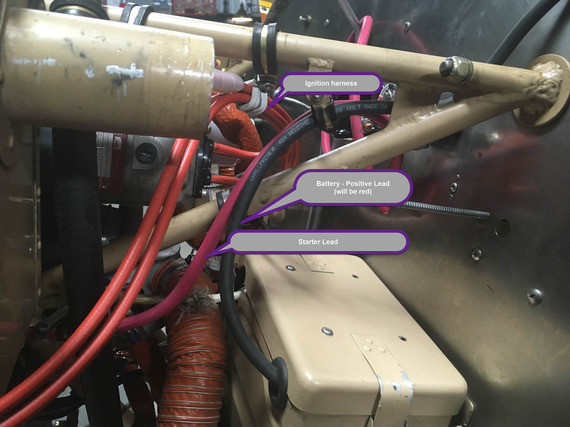
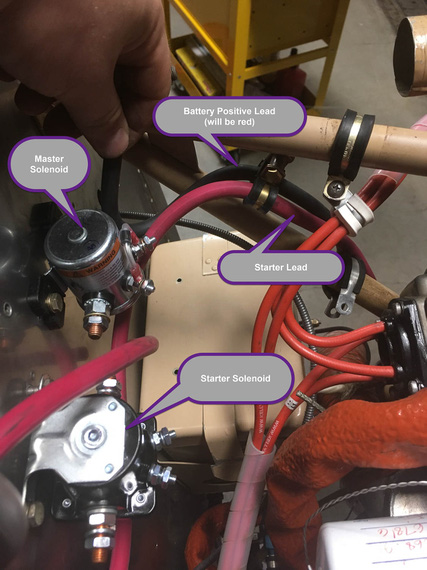
Battery and Starter Wires

Those are the thickest wires, and routing them is more complicated than the other ones. In addition, the battery + -> master contactor wire is the only wire that can't be turned off, and therefore needs to be very well thought out and as short as possible.

Here's something else, too. The Charger was set up to ground the battery to the motor. So far, so good - starter is by far the largest consumer in the electrical system. However, nothing was done to ground the motor to the rest of the airplane!

So the rest of the system was probably grounded via whatever metal to metal connections there were on the motor. Control cables and braided fuel and oil hoses? ;) Airbox bowden "carb heat" cable... I can't think of much more else.

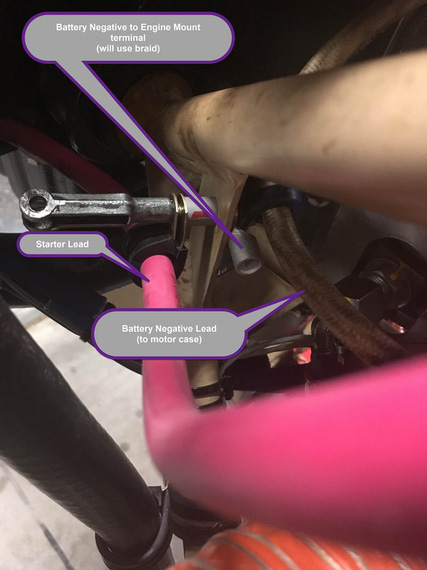
Initially, I was planning to run a ground strap braid from the battery negative to one of the bolts holding the battery box to the firewall, but with fuel system components and control cables around, just couldn't figure out a good way to run it and support it. I had to end up settling for running it to the engine mount instead.

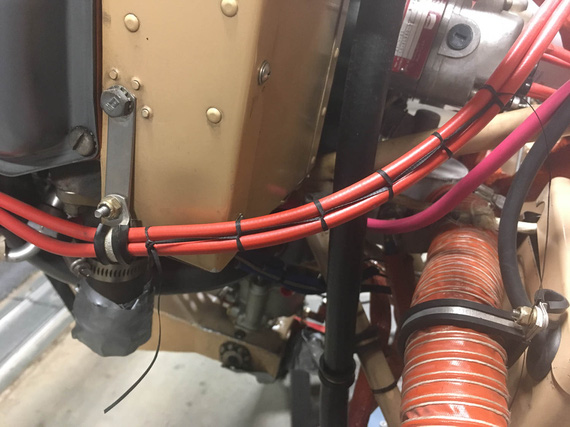
So the bottom line is, the negative 4GA cable is gonna go to the motor, and parallel to it a braid will go to the motor mount. I also figured out a clamp arrangement with some standoffs that will keep the wires neat and organized.

Beefy Wires - side view

Beefy Wires - side view

Beefy Wires - top view

Beefy Wires - top view

Negative leads and grounding

Negative leads and grounding

Oh hey, and I practiced my lacing on those ignition wires. One of my plans is to excise all the zipties I can get to, and replace them with lacing cord ;).

Laces

Laces

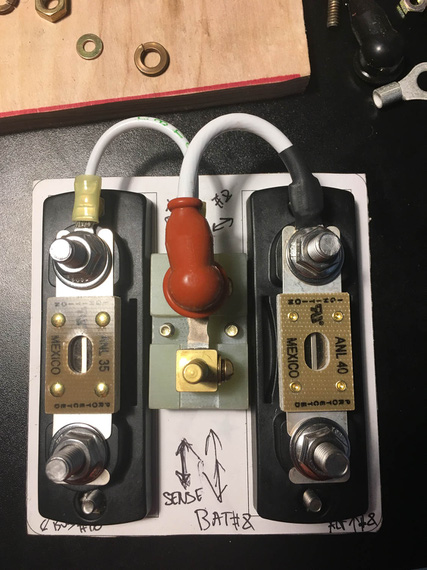
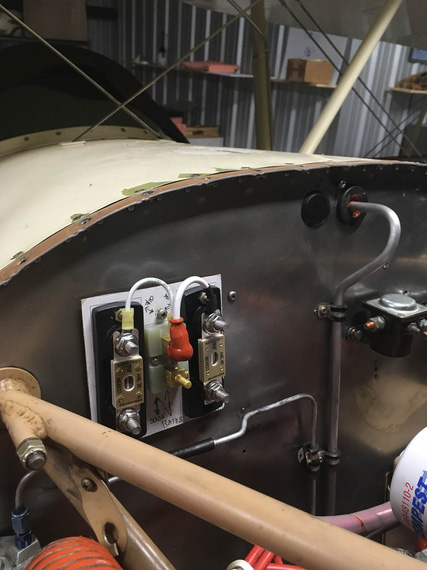
ANLs and Shunt

ANLs and the Ammeter Shunt will go to where no man had go... 'cuse me, to where the old Voltage Regulator was. Like this:

ANLs and Shunt placement

ANLs and Shunt placement

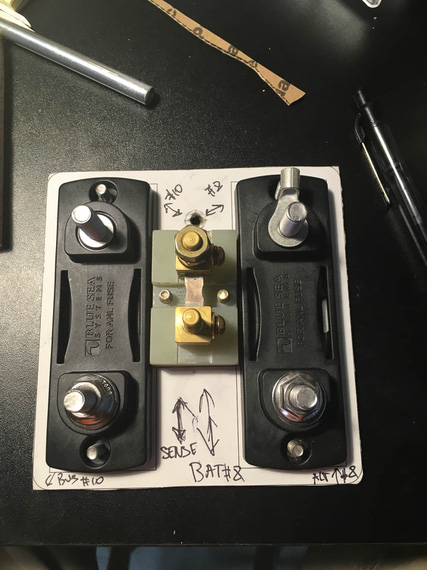
I will need to make a backplate for them to re-use the old voltage regulator mounts, and not have to drill new holes in the firewall. I used my Solidworks templating trick, and made me a nice template...

ANL template

ANL template

... and a mockup (with material, as usual, courtesy of USPS).

Mockup backplate

Mockup backplate

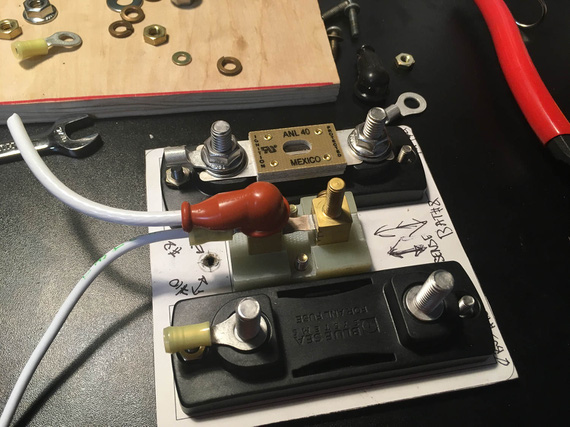
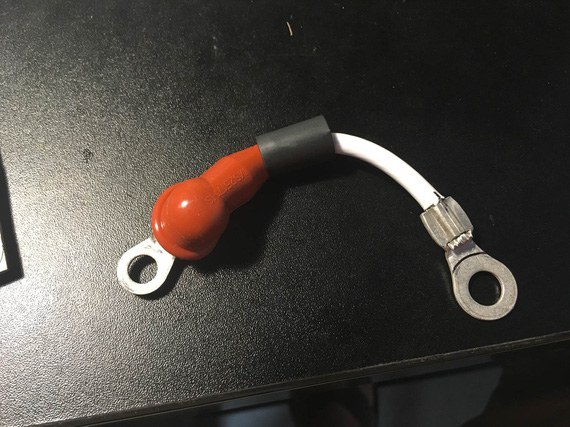
The shunt is offset "down" due to the top hole in the backplate (which will have one of three holddown screws to hook up to the old voltage regulator mounts), and I couldn't use buss bar stock to connect the stud terminals on the shunt and ANL bases - if I were to do that, it would not let the ANL covers to come on. So, before doing anything drastic, I decided to check to see how it would look with the wire jumpers

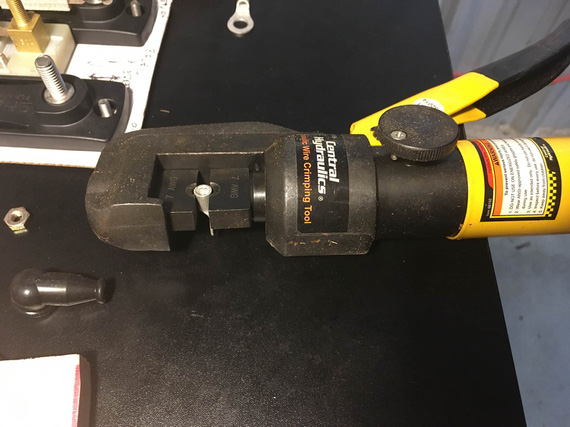
Crimper

Crimper

One side done

One side done

Second ring on the jumper

Second ring on the jumper

Done

Done

On the firewall

On the firewall

I liked the way jumpers came out a lot, and will probably keep them that way. They do add just a bit of weight, but not enough for me to worry about.

Side Conduit

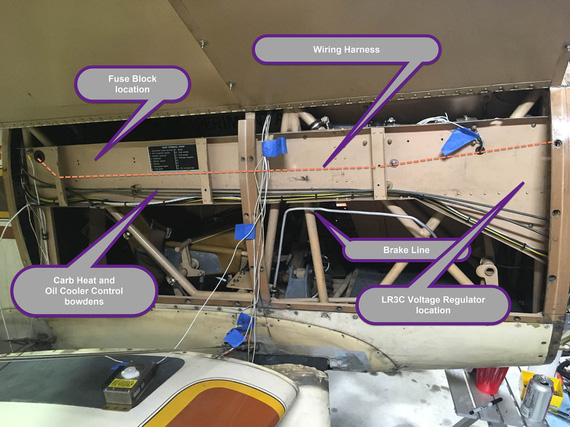
The Voltage Regulator and the Main Terminal/Fuse Block were to go to the Side Conduit running alongside the fuselage.

Rough component locations

Rough component locations

I had to relocate the bowdens lower to free up some space. The Oil Cooler box on this plane is all sorts of weird, including a flapper valve controlled by one of those bowdens that closes up the airflow to it (which is not enough to begin with; being a 1.5" SCAT takeoff off of back baffle.. but don't get me started on that). That cable turned out to be too short when relocated - but I lucked out - Glenn had a bowden going to the Rotec TBI that I removed for "prime" function, and that bowden was plenty long. I'll trim it to final length when I'm done in that side conduit.

The brake tube was running inside the conduit, and I will have to relocate it to run below the conduit and be supported by adel clamps. For now, I unhooked it and used it to somewhat mock up the new run. Tube and fittings ordered, and tubing bender already here!

Fuse Block

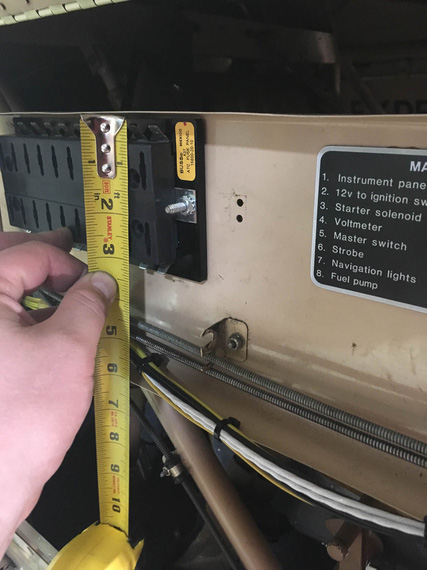
I was gonna use a 20-position fuse block from B&C. Well, that didn't go too well.

Fuse block

Fuse block

Tight! I basically lose the whole top row of fuses with it. Not enough room....

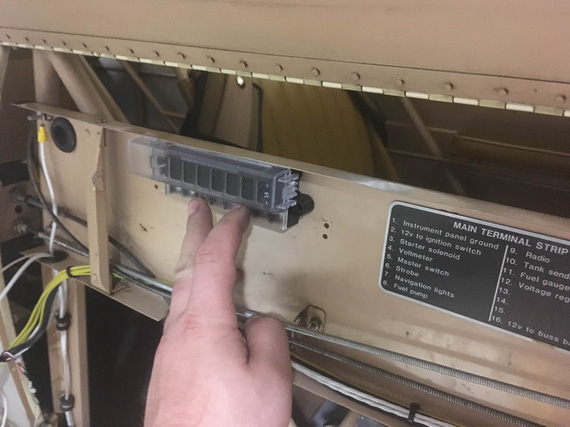
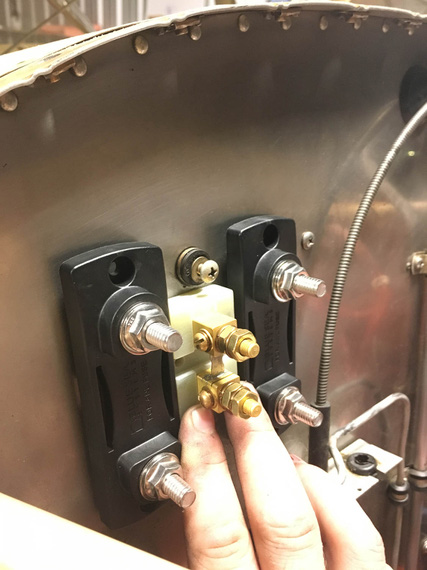
After poking around the Internets for a bit, came to these nice fuse blocks made by Blue Sea Systems. Longest ones they have are 8 fuses, so I will need two (if I recall correctly, I have 13 fuses in the diagram currently, and I want some spare positions for later if I need them).

Blue Sea Systems fuse block

Blue Sea Systems fuse block

Much better! Plus, they use ring terminals rather than tabs - and while tabs are light and simple, I don't like them. Removing them is hard, and, when removed, the terminal loses a lot of it's grip. It's almost like an "assemble once" type deal.

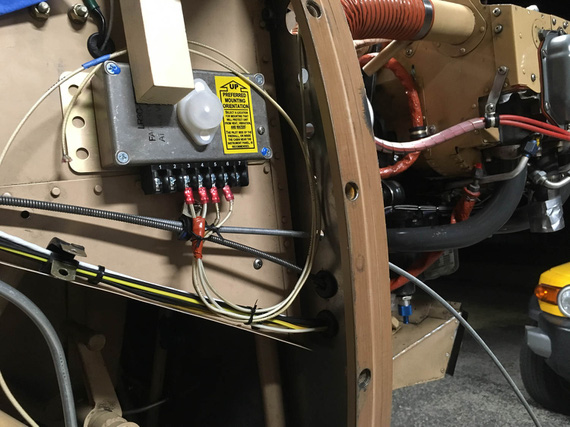
Voltage Regulator

With how the wire harness is gonna go in that conduit, and with bowdens being where they are, the best orientation for the Voltage Regulator would've been "upside down", with terminal strip up.

Upside Down orientation

Upside Down orientation

Damn you, the yellow sticker on the regulator! DAMN you! (hint: read it :) ).

Mounting it sideways, I'd have a line of rivet heads under it - which I didn't want to deal with.

Sideways orientation

Sideways orientation

And mounting it down... Down was annoying because of the clamp for bowdens and bowdens close there. That would also complicate wiring.

Down orientation

Down orientation

Upside down would've been perfect... except for that yellow sticker :). So, I decided to Hail Mary and asked nice folks at B&C about what they thought.

See, the problem is I know why they wanted the terminal strip to be pointed down. It's so that water won't get into the box in case of condensation accumulating on it. But I thought, maybe I can seal it somehow?

The answer from TJ at B&C was a resounding no. Right side up, sideways - but not upside down.

So I mocked up the right side up mounting...

Right side up mockup

Right side up mockup

Yuck. Yeah; it'd work; but it's ugly as hell.

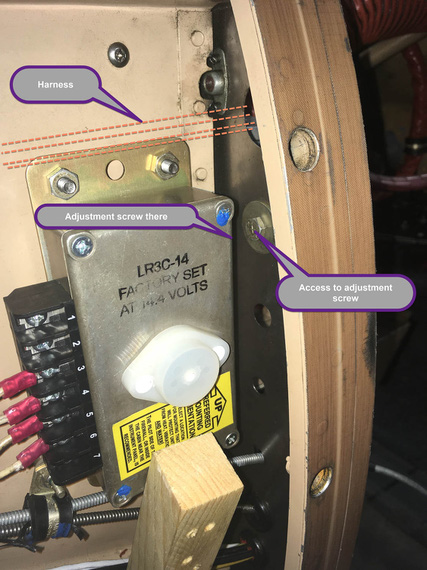
The only other option would be sideways, but on "standoffs" of sorts to clear the rivet heads. I mentioned that to TJ, and he said that that could work, but I should check if I can access the voltage adjustment screw on the top of the box.

Damn it! I forgot about it. On the top of the box there's a plug over a hole that opens up access to a tiny screw to adjust buss voltage - basically, to fine tune how much volts the battery sees. Not something you do often, but you want to be able to do it.

But then, TJ mentioned that he saw the holes in the firewall and that might be the saving grace.

Bingo!

I tried it out again in vertical, now with mocked up standoffs

Vertical

Vertical

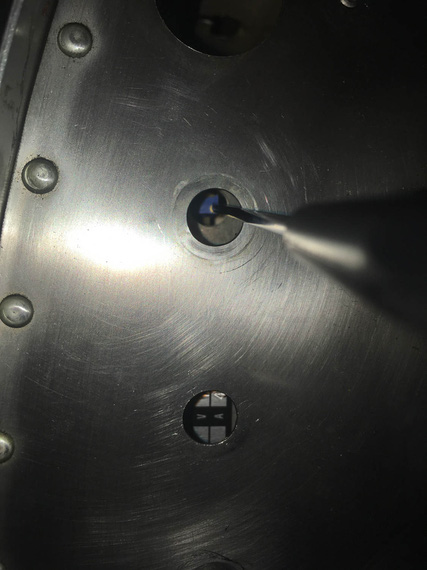
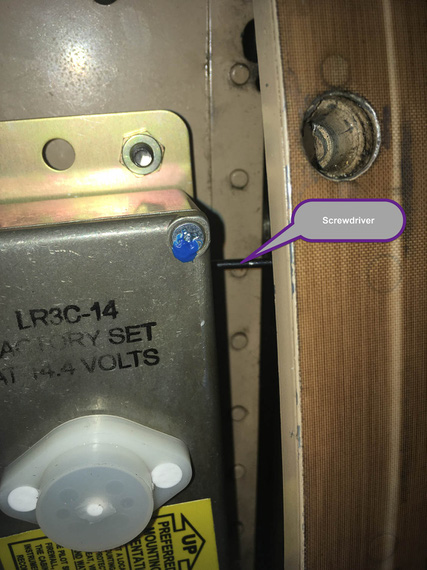
With just enough aggravation due to bad access (mandatory in aviation pretty much), you can undo the bolt covering the hole in the firewall (this hole was left over from the brake line relocation), pop the plug on the voltage regulator, and just have enough access to the adjustment screw.

Adjustment screw - firewall side

Adjustment screw - firewall side

Adjustment screw - conduit side

Adjustment screw - conduit side

We got ourselves a winner, I think!

Panels

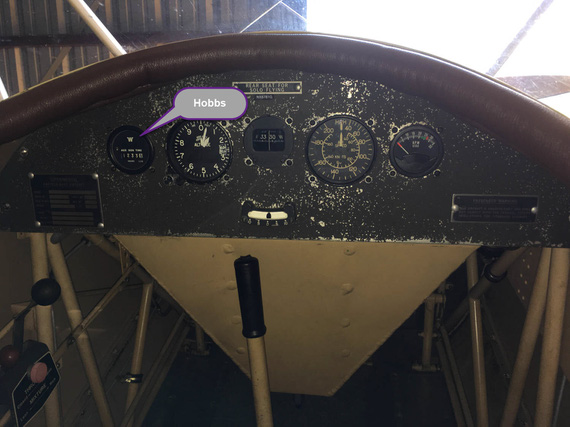
Hobbs

Hobbs was on the front panel, probably because of space issues on the rear panel.

Hobbs meter

Hobbs meter

"Aux Generator", eh? :) (read what the gauge says).

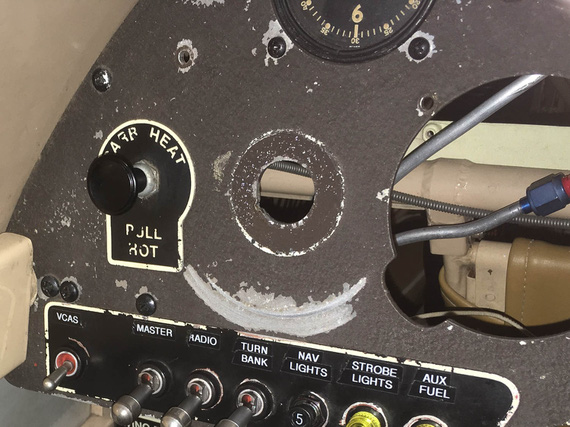
Well, I had this unsightly hole left over after removing the ignition key switch...

Unsightly hole

Unsightly hole

... and I thought, maybe I could put the Hobbs back there?

My initial tests with one of the 2 1/4 gauges I have removed seemed to have been okay: there was just enough room in there to get another 2 1/4 gauge in.

So, I got me a very nice panel punch that could make a nice, round, clean hole in place.

Instrument Hole Punch

Instrument Hole Punch

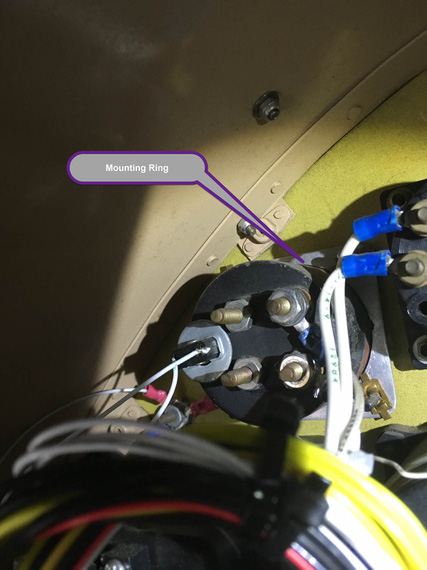
Well, next was to remove the Hobbs from the front panel. That was an hour of contortionism. The Hobbs is held by an aluminum backplate and four nylock nuts, so I had to have a wrench over them the whole time. Oh, the screws are way too long BTW, so taking all them out took about five times more turns than it should've, while I was wondering if my wrists will take this much flexing, twisting, and bending any longer.

Mounting ring

Mounting ring

This is a pic from the fuel quantity gauge held in the same manner, but here he's using brass flat type nuts that you can hold with your fingers. On the Hobbs, it was nylocks.

Anyway, I got it out. And then, started setting up for punching that hole. Removed VSI to give me a bit more room to work with.

I tried to reconstruct exactly what happened next in my memory to write it down here, and could not. I was basically fiddling, checking clearances, making sure I'll be able to hook up the punch and center the hole, have enough room for the mounting ring in the back and clear everything I had to clear, when I discovered that...

The Hobbs was not a standard 2 1/4 inch gauge - it was a touch bigger. So the hole that I would've made would've been too small for it. And that if I punched the hole, I would've been just left with a bigger hole and nothing to put in there.

Damn, damn, damn! Damn you, assumptions that every "small" gauge on an airplane is 2 1/4!

And I had the expensive punch that I had no use for :(.

Oh well. Thanks God I actually did not do it - only to have a larger hole to plug up. I guess, that Hobbs is (thru more contortionism) going back to the front panel.

As they say, Le Sigh.

Switches

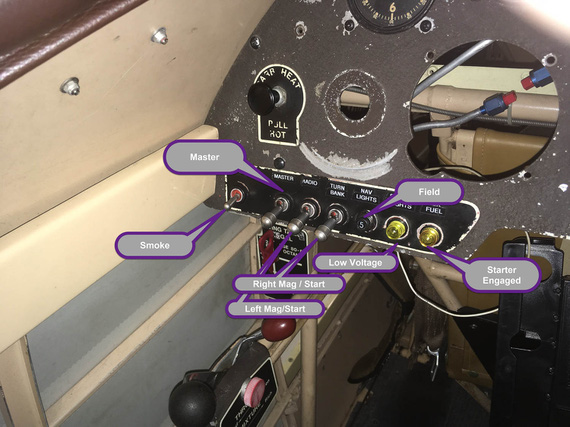
Finally, something fun! I put in the switches to play with layout. Here's the first, and (after playing with moving things around and pretend turning them on and off), the best, layout.

Left side

Left side

Right side

Right side

On the right side, I might clump the switches together, or leave them as on the picture, to "match" the placards (those are left over placards from fuses that were there in the old electrical system). The little brass knob on the right is gonna be panel lighting control pot.

Compass

I am going to replace Pilot's whiskey compass with a vertical card one - yes, I am directionally retarded :) It's not that expensive a mod in the grand scheme of things; and is the only directional instrument available to pilot on this plane (no DG ;) ).

It's a bit taller than the whiskey compass, so I'm playing with different mount locations. I think this is what it will be; with shock isolating rubber pad under the mount where the gap is at the moment.

Compass

Compass

Fuel Sender Crimps

One of the evenings, I wanted to make sure the Fuel Gauge was still okay (I had a suspicion that it wasn't - turned out to be false).

But first, I wanted to clean up the wiring on the tank sender.

Before

Before

Before

Before

The terminals on it are "automotive" style, without insulation support.

After

After

After

After

There. No zipties, good terminals, and marked :)


A groundschool instructor understands piloting the way an astronomer understands the stars.


Up ↑
Tagged with "electrical":

Harbor Freight Hydraulic Crimper

... the answer is: solder!


On: Sep 07, 2019
In: [Blog]
Tags: tools, electrical

Doing the electrical rebuild on the Charger, I needed to terminate quite a few of heavy wires with large lug type Amp terminal rings.

I had a Harbor Freight hydraulic crimper lying around that I got to crimp a couple wires when I was installing CRG-30P on the Cheetah, and was planning on using it; though the type of crimps produced by it kinda bugged me.

After doing a few crimps, I decided to burn a few terminals and do a proper test.

The Crimper

Normally, crimpers for large size terminals are super expensive; but Harbor Freight, as usual, sells a hydraulic crimper with large dies for just about fifty bucks.

Here it is, in it's full glory.

Crimper

Crimper

Dies

Dies

Technically, the way it's designed is it's supposed to produce these nice hexagonal crimps. Or at least, I think that's what they were trying to do.

But those familiar with crimpers know that the key is in good dies; and that's were most of the money is. Damn, "regular" stripping dies for StripMaster are what, $10; while milspec dies are what, $150? Now; of course there's diminishing returns there - in the case of StripMaster, regular dies work just fine for most applications.

Here's the problem with HF Crimper dies. The holes in them are severely undersized, which makes them produce "flat", rather than hexagonal crimps. We can't know if this is by design. What I tried to do is to research what others are doing, and to run a few "is this a good crimp" tests.

The Test Setup

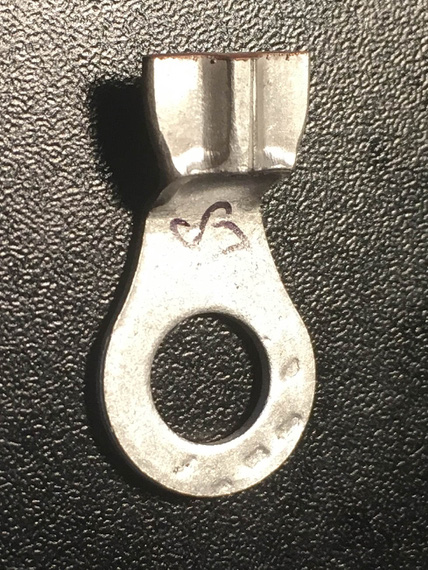
I was crimping chunks of 8 AWG MIL-W-22759/16 wire into AMP Battery Terminals.

The Terminal

The Terminal

After crimping, the terminals were hacksawed in the middle of the crimp, and polished to see if there were any voids or visible wire strands. A good crimp must be "gas tight". In other words, all the metal has to be pushed together hard enough to become a single piece of metal for all intents and purposes.

Using 8 AWG dies

For baseline, I used the HF die marked for 8 AWG.

8 AWG die / crimp

8 AWG die / crimp

8 AWG die / crimp

8 AWG die / crimp

As you can see, using the "nominal" die produces this weird, flattish-with-a-bulge crimp. What's worse is it adds this strange "jog" to the terminal lengthwise, and scrapes the metal inward where the crimp starts. That's lots of stress risers.

8 AWG die / cutaway

8 AWG die / cutaway

The crimp quality is good though. There are a few specks of shavings I didn't clean off - those are not defects.

Using 6 AWG Dies

I went next size up, to dies marked for 6 AWG. That produced the same crimp as for 8 AWG, but with "wings" being thinner - almost paper-thin. I also didn't like how it mangled the terminal even more.

Somebody online mentioned that they rotated the crimp 90 degrees and did it again to "push the wings in" and I tried that.

6 AWG die / crimp

6 AWG die / crimp

6 AWG die / crimp

6 AWG die / crimp

I think the resulting crimp, while tight, is too rough to be acceptable. It almost feels tortured.

6 AWG die / cutaway

6 AWG die / cutaway

Inside though, it's all nice and compressed.

Using 4 AWG Dies

Finally, I tried 4 AWG dies.

4 AWG die / crimp

4 AWG die / crimp

This crimp almost looks good. The jog is almost not there, and it has nice hexagonal shape. "Wings" are almost not present.

However, the dies closed fully and it felt to me that the metal was not compressed enough (I recall the resistance I felt in the crimper doing the previous two tests, and the resistance I felt on this one was much less).

The cutaway confirmed that.

4 AWG die / cutaway

4 AWG die / cutaway

Those imperfections on the cutaway are voids left from not enough compression force applied.

Conclusion

Well, it's a sad one really. If you want to use the HF tool, then you probably should use dies that make those "winged" style crimps (like the one produced in my first test), and suck up the jog and other imperfections.

I have posted my findings on AeroElectric list, and the conclusions seems to be supported - the dies are horrible, and to make them real good one would need to rework them significantly.

Or, alternatively, just solder them (here's a nice howto by Mr. Nuckolls) , which is what I am seriously considering.

Update - October 2019

After trying and failing the soldering approach, I have devised a technique of using this crimper to achieve good results. Musings linked in the previous sentence, and here's the jist:

  • Given wire gauge of, say, 6
  • Use die 2 sizes up - so, die marked for #2 wire
  • Put the wire in the terminal. Start by squeezing the terminal turned 90 degrees (so "side to side" rather then "top to bottom"). Just give it a gentle oval shape
  • Now, turn it 90 degrees and squeeze until the jaws close
  • At this point, you will have a somewhat undercrimped joint, as I described in my notes on the crimper; but it's shape will be a perfect hex.
  • Now, go 1 size "down" (so, dies marked for #4 wire). Squeeze.
  • Stop when you feel it's done shrinking.
Pretty!

Pretty!


There are two types of tailwheel (or retractable gear) pilot, those who have ground-looped (landed gear up) and those that will.


Up ↑
Tagged with "electrical":

Alternator: Initial Fit-Up

...I almost decided to make new nose baffles


On: Aug 16, 2019
In: [Chickenhouse Charger] Electrical Rebuild
Time logged: 4.8
Tags: 6781G, MA5 Charger, electrical, alternator

So most orders have been placed, and a lot of them have arrived already. (Note to self: need to take pictures of all the stuff).

The first thing to be worked on is the heart - the alternator.

Look at this little beauty!
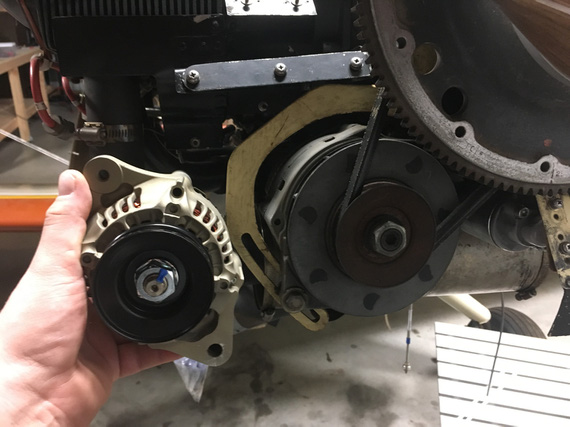
B&C L-40

B&C L-40

Tiny, light as a feather, and cute as a button! No, sir, this thing has to get attached to the nose!

The old one needs to come off. Pivot arm bolt undone. Pivot bold undone.

Wait. The pivot bolt can't get out, because the flywheel gets in the way...
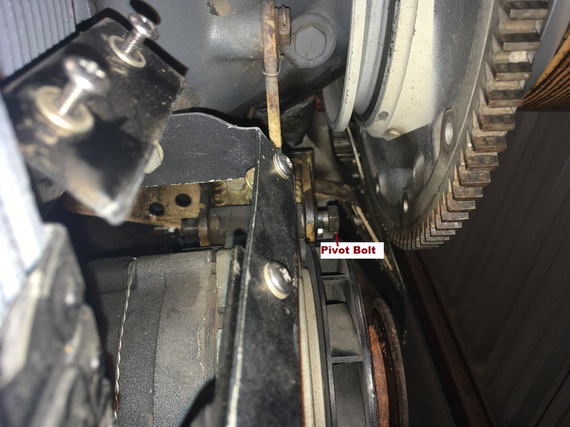
Pivot bolt and interference

Pivot bolt and interference

Hmm.. No, I can't believe Remo pulled the flywheel off of crank just to install the alternator. There must be a better way.
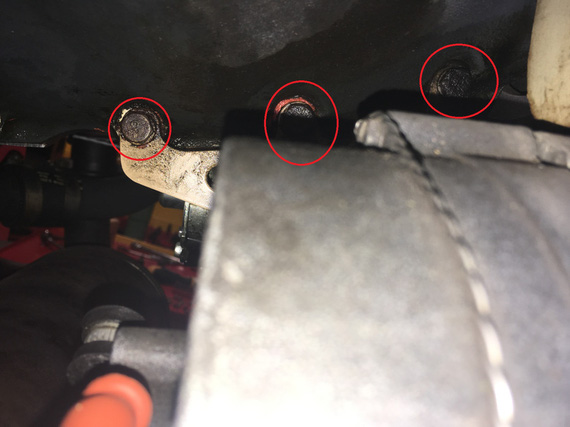
The better way - bracket attach bolts!

The better way - bracket attach bolts!

Aha! This is case mount, and the bracket is attached to the motor case. Let's see... Yep! It came off.

Now, the new bracket... centers nicely!
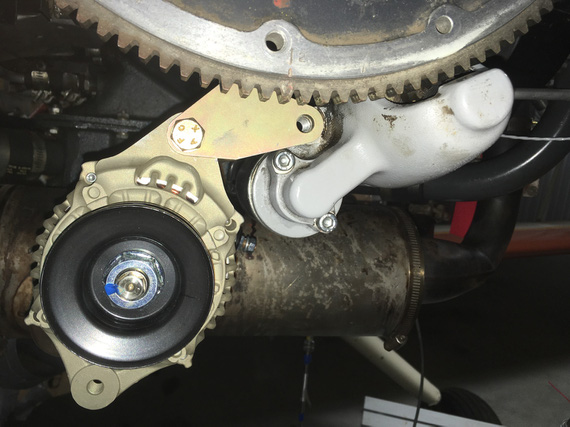
New bracket

New bracket

See that ear on the right, that touches the starter boss? That one needs to attach to the starter, to prevent the bracket flexing left and right. It lines up great, but, problem number one (but I knew this one), the old alternator bracket didn't have that. Remo used that hole on the starter boss to hook up the front of the nose "ramp" part of the baffle:
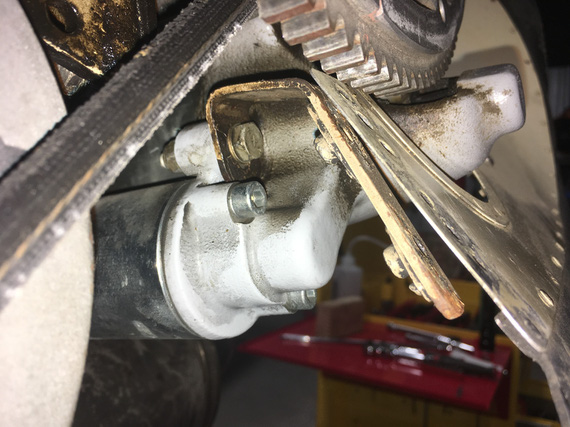
Baffle attach bracket

Baffle attach bracket

No matter. I will just bend up a new one, to account for the thickness of the new bracket's "ear" that will get sandwiched between this baffle attach bracket, and the starter boss. Material already ordered!

Now, let's test fit the belt, and the new pivot arm. The belt, the belt.. oh wait. Yep. The prop needs to come off - but this is a non-event now (and I am not leaving the prop off again - learned that one already). I'm becoming quite good at this prop pulling business....

Belt on and prop back on, test-fitting the pivot arm... CRUD!
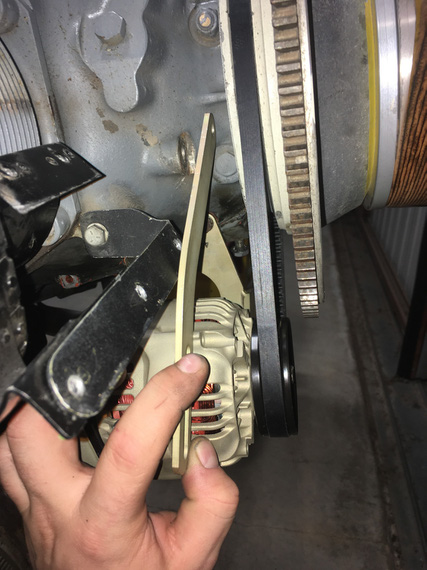
Pivot arm

Pivot arm

That black bracket to the left of it holds the hose "ramp" portion of the baffle..... and, it won't let the damn pivot arm go in! No way. And no easy modification here - it's interfering, seriously...

Frankly, at that point I went home (this whole note covers quite a few days of work), with thoughts of remaking the front baffle; and spent the evening researching how baffles are done on planes with similar nosebowl... Frankly, I don't like how this front baffle is done on this plane (see Cowling Conundrum), and thought of this as being a good chance to fix it. I moaned about this to my buddy and colleague Dima D (who's helping me here quite a lot with notes and advice)...

But next nite, I thought that maybe I can get away with remaking just the arm... I am absolutely not set up to do complicated sheet metal work at the moment...

The old alternator had this weird pivot arm that now made way more sense. It "doglegged" around the bracket with which the standard pivot arm interfered:
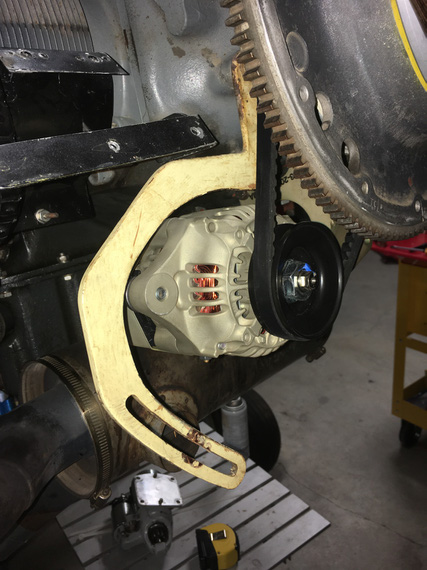
The old pivot arm

The old pivot arm

Notice how it has this portion that goes down, and then the pivot arm "turns" left to go under the nose baffle ramp attach bracket?

That corner is definitely a large stress riser... but this arm held a much heavier Delco-Remy alternator for almost 40 years... Granted, it's made out of 0.190 steel as opposed to 0.125 steel used in B&C bracket... but I can make a similar one for the new alternator...

We'll see if we can smooth out that corner so that it's arcing better, reducing stress. If I can, I will use 0.125 steel. If I can't, I'll settle with 0.190 - just like the old one. We know this works.

Thanks Dima! You were right. For now. I will redo this nose ramp when I'm redoing the motor, later :).

... and now, to the belt. Let's get this nose ramp back on. It has an opening for the belt to pass thru, and a fairing for the alternator pulley....

Damn. Yep. That one doesn't fit right, either.
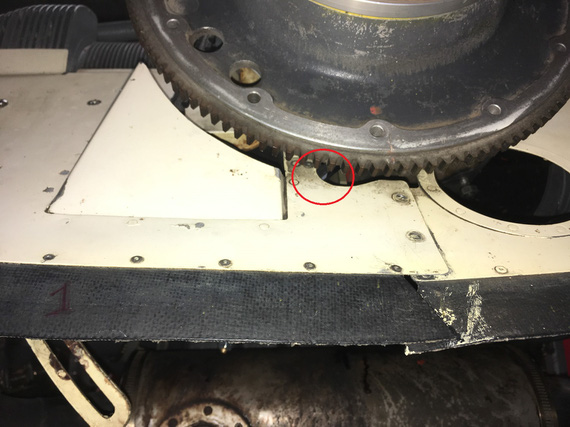
Nose ramp back on

Nose ramp back on

If you look real careful inside the red circle, you can just see the belt there. It will rub on the left edge of that hole. It has to go right, which means the alternator has to go down, which means longer belt.

I used a piece of wire to mock this up. Here are a couple of pictures from the back side.
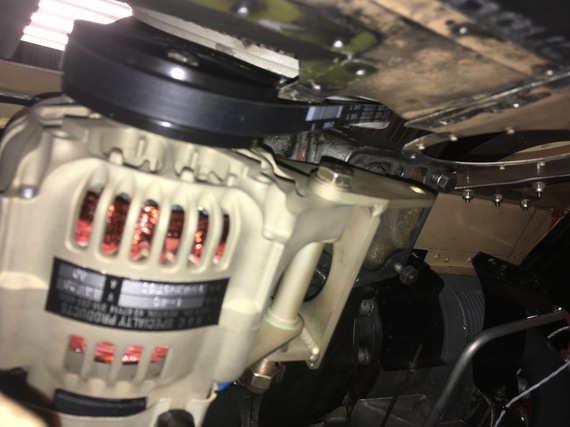
B&C supplied belt - interference
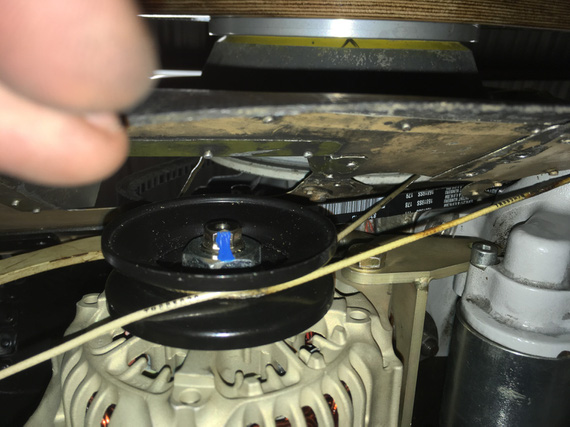
B&C supplied belt - interference

Wire mocking up a longer belt - so that it's centered in the hole

Wire mocking up a longer belt - so that it's centered in the hole

I ordered a couple of longer belts from the same series, to try them out and see how they will work in the end...

So, where are we at?

  • I will need a new, smaller, bracket for the front support of that nose baffle ramp (the bracket will attach to the starter, same place as before)
  • I will need to design and make a new pivot arm - and to learn how to make nice slots with hand tools
  • A different belt

Meanwhile, folks at B&C were extremely helpful and generous with their time, reading my long, ranty, emails, and responding to me with their thoughts. I really appreciated that!


Flying is not dangerous; crashing is dangerous.


Up ↑
Tagged with "electrical":

Wiring Diagram, v1

...proposed


On: Aug 11, 2019
In: [Chickenhouse Charger] Electrical Rebuild
Time logged: 28.5
Tags: 6781G, MA5 Charger, electrical

So this was quite an effort - not because it was a sophisticated design, but rather because it took quite a bit of time to lay out in a reasonable fashion...

Oh, and also, somewhere in between I had a break for Oshkosh and a work trip :).

I decided to post this in a form of design notes, so that I can go around asking people what they think...

The New Wiring Diagram

I have posted it in PDF over here.

Wire length / drop / load calculations are in the Excel spreadhseet over here.

  • The design is based on Figure Z-11 from AeroElectric Connection by Bob Nuckolls, with the following tweaks:
    • I'm using the B&C LR3C Voltage Regulator, so it's wiring has been incorporated
    • I dropped the Endurance and Main Battery busses
    • I have tweaked the starting switches circuit, main buss feeder, and how ammeter is hooked up - see below for discussion
  • The diagram is laid out to generally clump the components together as they would be on the airplane. It initially might seem convoluted - but it has a certain flow to it matching the locations of components. Start in bottom right corner for battery/starter/alternator circuitry and go counter clockwise - this will effectively take you "thru the airplane" as the components will be laid out; roughly

Review Items and Commentary on Specifics

Starter Circuitry

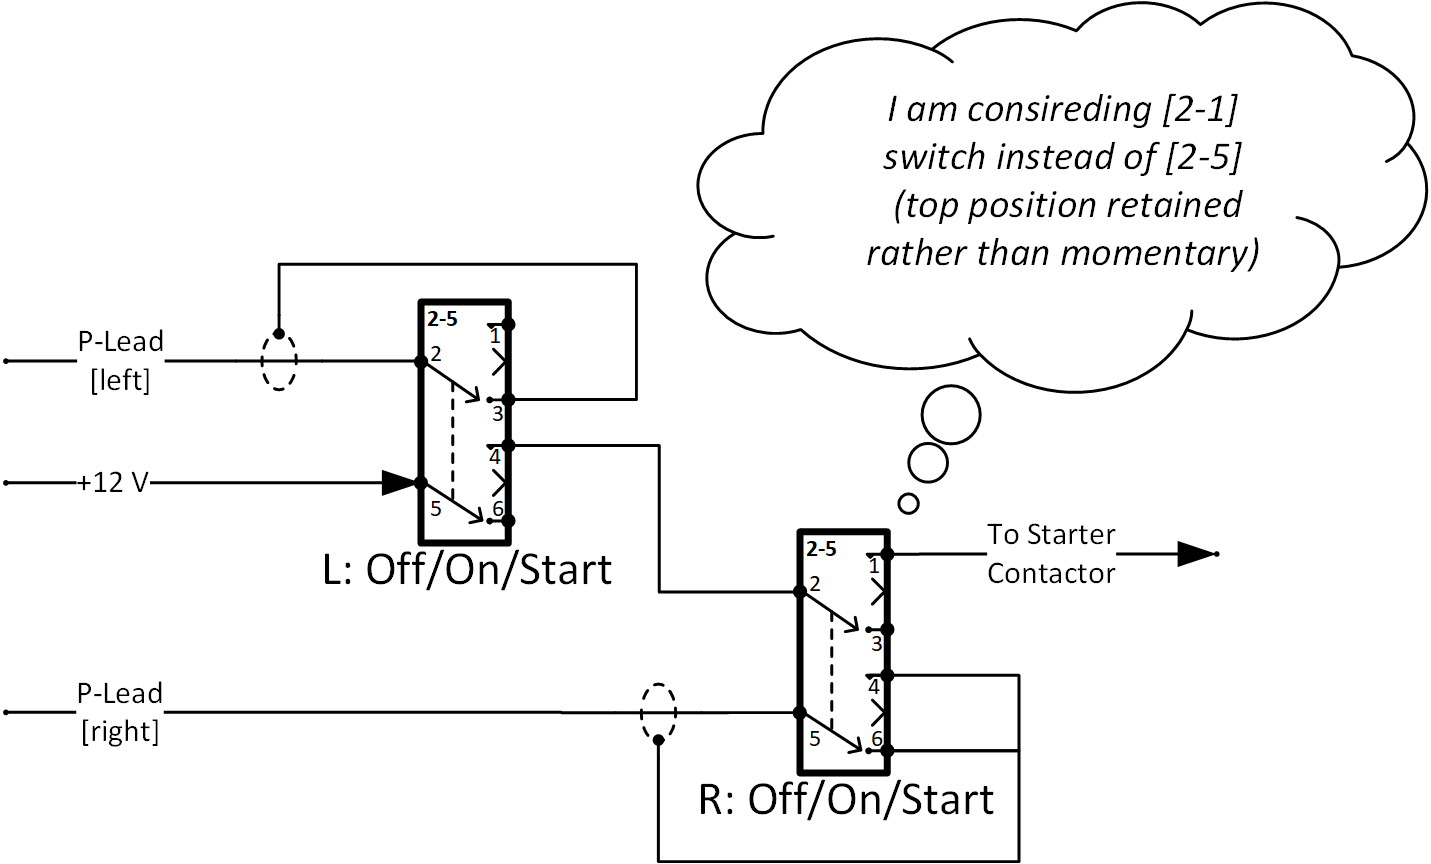
My current take on my Starter and Mags circuitry is this:

Starting and Mags Circuit

Starting and Mags Circuit

This is a deviation from Z-11, with both switches having to be in the momentary up position for starter to engage. I like this better for two reasons:

  • It makes the act of starting the motor more explicit
  • It returns back to correct "running" position automatically

I need to test the ergonomics of pressing up a couple switches together. If I don't like it, another alternative would be to replace the "Right Mag" switch circuitry from -5 to -1: making the top position on it non-momentary (as noted on the diagram). This will reduce the "user-friendliness" but will still keep the explicitness, especially with my using pull-to-unlock switches from Honeywell.

Main Power Distribution

The Charging and Buss circuitry excerpt below:

Power Distribution

Power Distribution

Note that:

Shunt is set up to be in the "battery" lead. I like "battery lead" style ammeters, showing charge current on the 12-o-clock-plus segment, and discharge current on the 12-o-clock-minus segment.

Note that the buss feeder wire is protected by a slow-burn 35A current limiter. In Z-11, that wire is not protected at all. My reasoning for this decision is that this wire is relatively long on my plane (around 4 feet), since fuse block is near the rear cockpit. I wanted to protect it.

One area of concern here is that in the event of alternator short, the Ammeter Shunt will be a part of the alternator circuit that will see a lot of current while the 40A slow burn opens up. My gutfeel says it should be able to handle it, but I am not sure. At any rate, figure Z-11 has the same setup with shunt on the alternator's B-Lead.

Voltage Regulator Sense Wire

LR3C Voltage Regulator needs a separate "voltage sense" wire that one would normally connect to the main buss. Since the regulator in my case is closer to the firewall than to the buss (fuse) block, I am connecting it to the main battery circuitry (jumper wire between Starter and Master contactors). This is somewhat a shorter run and seems that it will be more logical to measure as close to the battery as possible (especially since I'm saving on wire lengths this way). Seems sensible to me.

The sense wire will be 20 AWG, about 3' long, and connected via 24 AWG fuselink.

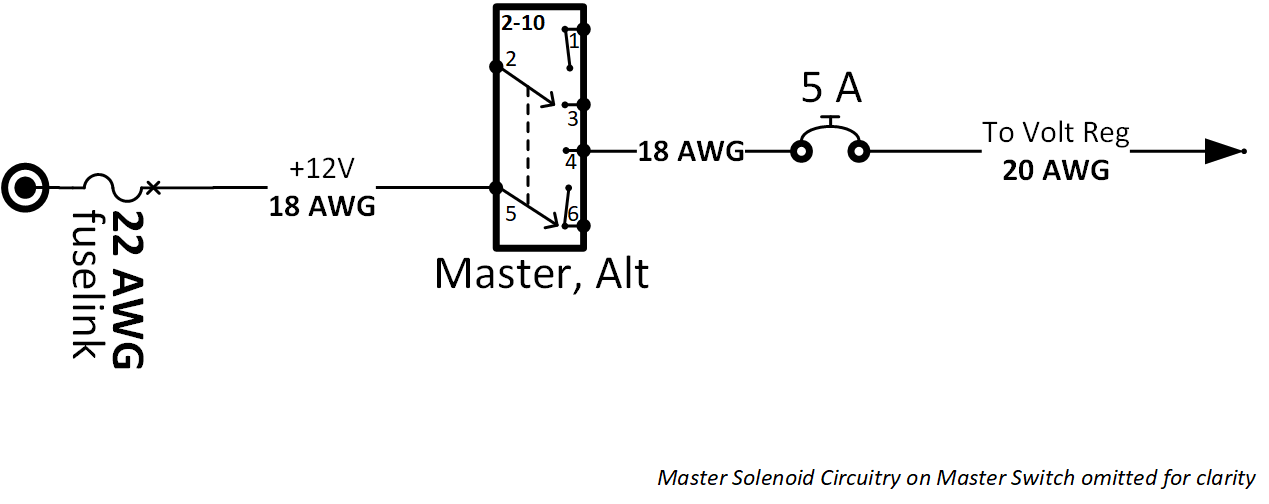
Voltage Regulator Field Supply Circuit

The circuit looks like this:

Field Supply Circuit

Field Supply Circuit

I copied the AeroElectric's figure Z-11 wire gauges here. In Z-11, everything upstream of Breaker is 18 AWG, and everything downstream is 20 AWG, but it's not explained why.

Is this driven by a requirement to ensure that fuselink survives the short in the circuit in case of crowbaring, and the breaker pops first, w/o endangering the fuselink much (18 AWG allows for 22 AWG fuselink instead of 24 AWG)?

Components Location and Main Connector

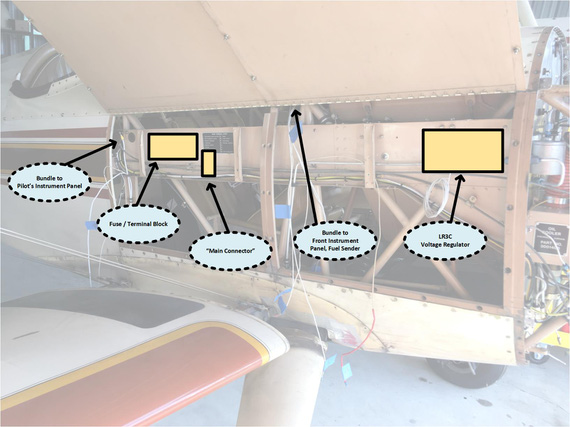
Here's a relative diagram of components location, that is necessary for explaining what Main Connector is. Click it for larger version.

Key component locations

Key component locations

Note that logically, the way one would wire this airplane would be to pre-wire switches and other items that go into the pilot's (back) instrument panel with long pigtails, then install the switches, and tie down wiring behind the panel. Then, the pigtails can be connected to fuse block and loads.

Some of the load wires already exist (lighting for example), and they will have to be spliced to wires coming from switches.

I have decided instead to locate a kind of "Main Connector" right there near the Fuse Block. A wire comes off of the Fuse Block, goes to the switch on the panel, then switched power is returned to the "Main Connector". Load is on the other side of Main Connector.

This serves a couple purposes:

  • Create a logical "access point" into the main wire bundle, for reading labels, tracing wires later, and such
  • Simplify installation process
  • Connect to existing load wires that are not being replaced

For now, I am thinking about using Molex 0.093 pins in two housings (I have 13 circuits total to connect via this thing, and want to have room for further expansion). I would love suggestions here. One of the requirements is that it should be easily workable with a multimeter for tracing / testing purposes (I technically could've used D-Sub here , but am not due to this precise reason).

Separate Switch for Turn and Bank

Yes, it's weird to have that. The original electrical had it. I guess, the logic was to be able to shed half an amp of unnecessary load in the event of alternator failure, or it was just done for no good reason.

I'm keeping it :).

Front Panel Tach

It's a Westach gauge that feeds off of a magneto P-Lead. No separate power going to it.

Westach asks for a 1/4 A inline fuse. But why? Seems unnecessary (we don't need to fuse P-Leads).

Wire going to this tach in my opinion need to be shielded P-Lead wire. Not sure if I'm correct here.

I need to tie into one of the P-Leads. I have three options:

At magneto: I will effectively have two P-Leads coming off of one of them. I have Bendix mags, and connectors on those might make the whole hookup look ugly. Adds extra wire.

At mag switch in the rear panel: just adds extra ~4 feet of wire for no reason.

Y-Split the P-lead as it goes along the fuselage: this seems the most optimal wire-management wise, but I am not sure if splicing into a P-lead is kosher. I don't see any good reasons why that would be bad, but I don't know everything. This will likely be a soldered splice unless I find or someone suggests something better. This is my solution of choice at the moment.

Panel Lighting

I am on the fence on this one. On one hand, I can add a nice LED strip light and dimmer to light the panel up.

On the other hand, this is extra weight, and "this is a biplane! you won't fly it at night!" vs. "well what if you find yourself out late" keeps nagging me. Note: I do not have a landing light (though in a biplane... that's somewhat a non-necessity ;) ).

I am leaning towards doing it, because doing it now will be easy, and I will have the option to see my gauges at night, even if that Dark and Stormy Night will be a result of bad planning rather than an intentional thing.

10 AWG Feeder for Radios

Radio stack was wired via the "Radio Master" switch prior. I was initially going to run separate power feeds to each of the things in the radio stack, but to get to it, I'll need to pull the wings off (yeah...). It's in between pilot's legs attached to the bottom of the cockpit.

So, the feeder is staying. The stack has been wired by previous owner recently, and isn't wired badly - with individual fuses for each radio, and a 10 AWG feeder to it and ground "return" from it.

I'm just putting this "hose" on a 30A fuse, which is more than enough to protect the wire and support all the loads from that stack.

Strobe and Nav on the Same Circuit

I am replacing (TailNav, WingNav) + (old heavy strobe on belly) with SkyBeacon and SkySensor on wingtips and nav/strobe on the tail, but I don't have enough wiring in the fuselage and wings to have a separate circuit for strobes. I do not plan to fly IFR (biplane!) so "strobes in the clouds" is not really an issue. When I will have the rag off the airplane, I will add a separate switching circuit for just the strobes.


Flying is the perfect vocation for a man who wants to feel like a boy, but not for one who still is.


Up ↑
Tagged with "electrical":

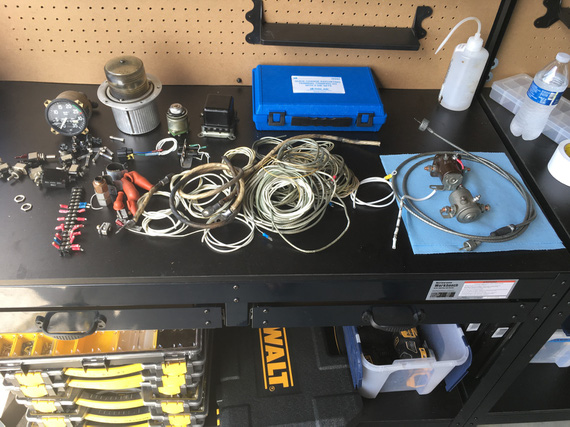
Electrical Disassembly

...fun with wires


On: Jul 01, 2019
In: [Chickenhouse Charger] Electrical Rebuild
Time logged: 13.1
Tags: 6781G, MA5 Charger, electrical, soldering

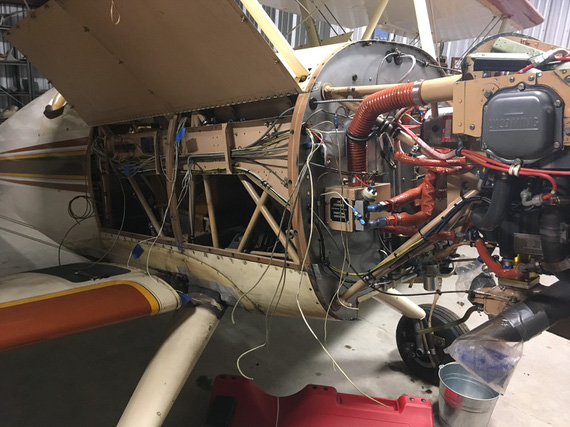
Well, all the electrical on the Charger is disassembled now. I logged about 24 hours doing it.

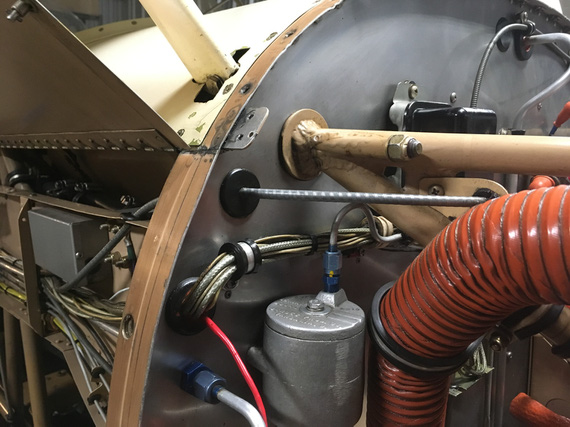
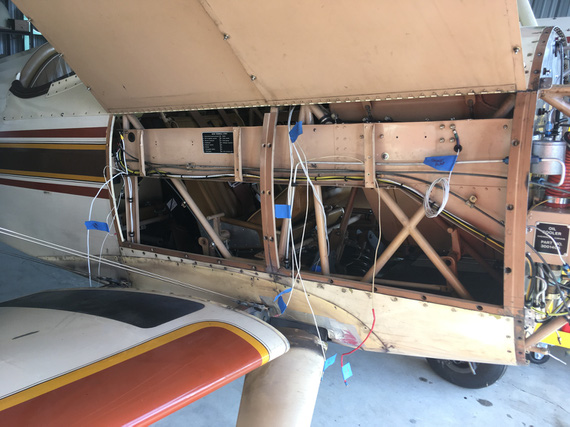
Firewall wire harness, looking into the side conduit

Firewall wire harness, looking into the side conduit

I have started with wires on the terminal block and in the side channel, and was moving back and forth between various locations - get bored in one, move on to the next.

The disassembly has begun!

The disassembly has begun!

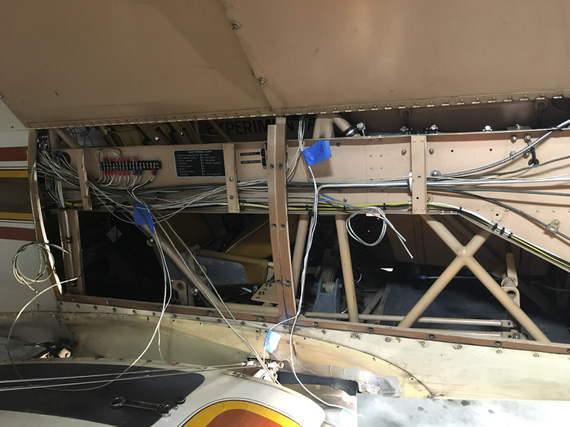
In the side conduit, going on the right side of the plane to the back cockpit, I was slowly removing the wires, and the oil and fuel pressure lines.

Had to be careful to mark the wires I wanted to keep - all the wires going to the lights, and some instruments in the front and back.

Wire by wire...

Wire by wire...

I would cut them off, and pull them out one by one.

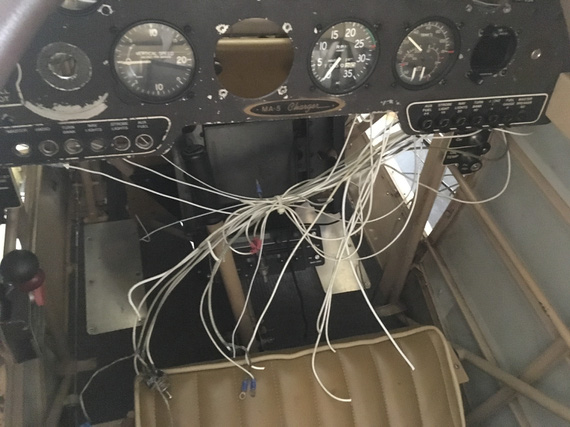
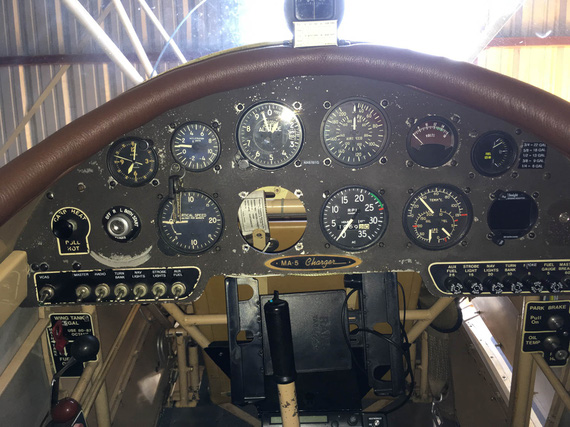
Behind the panel is a rat's nest!

Behind the panel is a rat's nest!

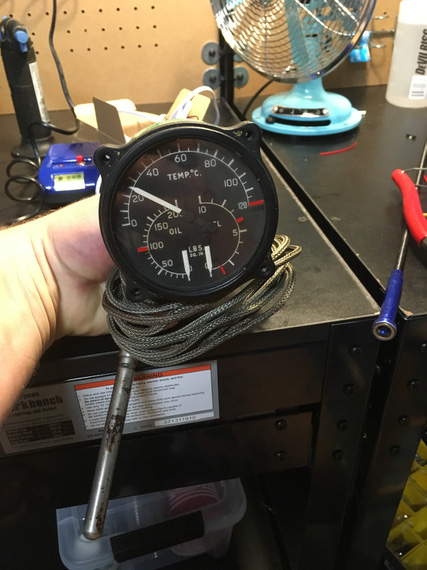
I pulled the mechanical tach and it's cable, and the oil temp and pressure and fuel pressure gauge.

By the way, the oil temp gauge was unpowered! And still ran on a thermocouple - but it's huge, to generate enough power to move the needle.

Old school!

Old school!

Heck, I'm keeping it as my IHT Gauge!!! (Internal Hangar Temperature, that is). It just looks too cool.

Eventually, all the wires were gone from there, aside from the ones I'm keeping; and the ones I'm keeping got temporarily marked.

All done!

All done!

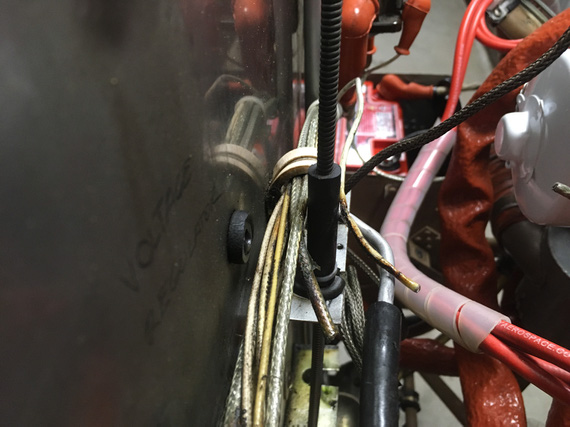
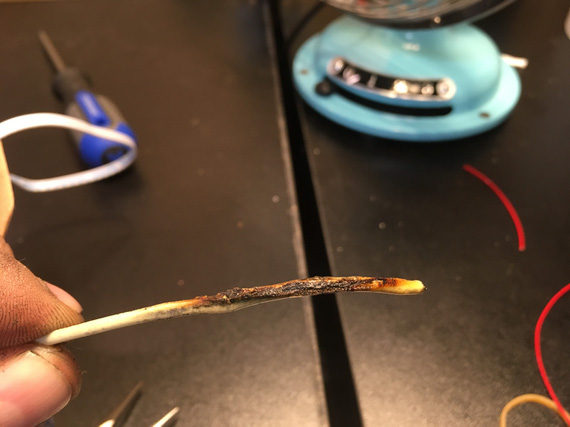
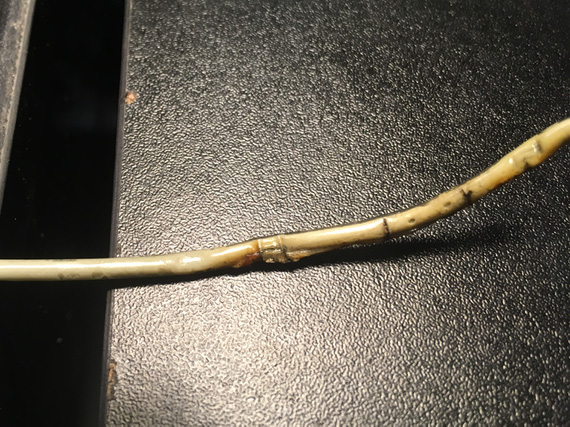
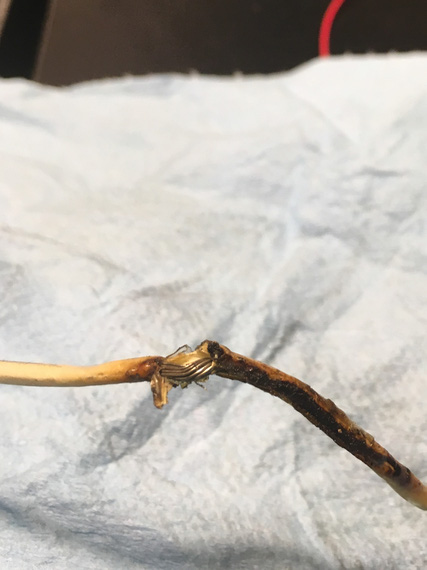
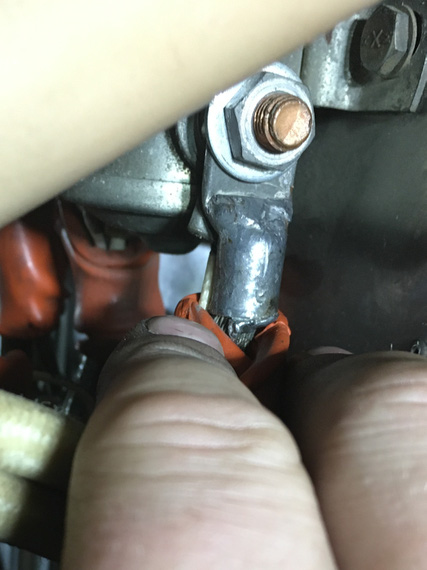
By the way, I found a burnt wire! Was one of the unfused wires going to the voltage regulator.

Burnt wire - can you see it?

Burnt wire - can you see it?

I cut off the burnt chunk.

Front

Front

Back

Back

See those little "boil bubbles" on the back side? Insulation was super brittle, and just a minor twist cracked it open.

Cracked

Cracked

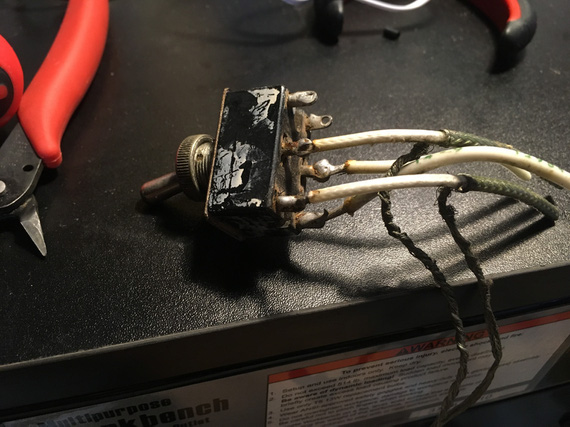
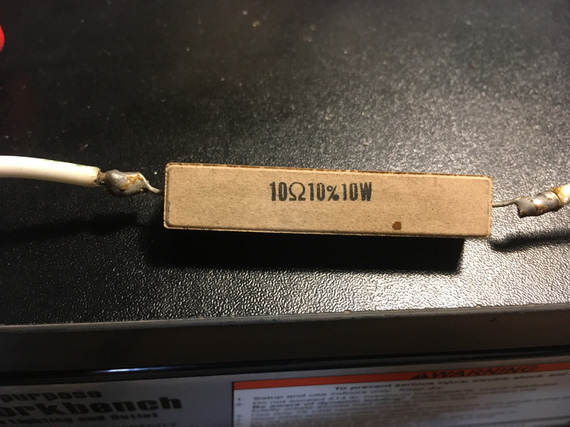
Meanwhile, behind the panel were a couple of soldered things - with wires unsupported. One of them was the master switch, the other one was this weird resistor in the voltage regulator circuit where the low voltage alarm light was supposed to be.. go figure.

But look at the solder joints:

Master Switch

Master Switch

Resistor

Resistor

Notice, they were not done very carefully (especially the ones on the Master Switch). Flux was not cleaned. But! The joints look, and are, solid. They are almost 40 years old.

I think I am officially now in the "no soldering on airplanes is an old wife's tale" camp.

At some point, I decided to take a break, and try on the new Voltage Regulator I'm planning on installing.

....it's not up to scale, and I did not have the time to paint it...

....it's not up to scale, and I did not have the time to paint it...

FWF location

FWF location

Side Conduit location

Side Conduit location

I'm thinking I'm gonna mount it in that conduit on the side. It'll stay cooler, and generally be tidier. I'll use the space occupied by the old voltage regulator for my current limiters and the ammeter shunt, though still need to think a bit more about placement. Maybe those will go somewhere else, too.

By the way, the old voltage regulator in all it's glory:

A Mechanical Switching Voltage Regulator

A Mechanical Switching Voltage Regulator

I also completely removed the strobe - I'll be replacing nav lights with SkyBeacon/SkySensor; which will cover my blinking needs.

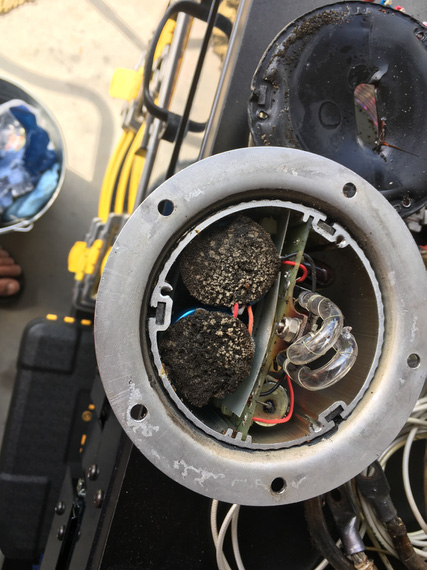
Wanna see a couple old electrolytic caps? The strobe power supply still worked, by the way!

The Strobe power supply and bulb

The Strobe power supply and bulb

I have disassembled the charging and starting circuits completely, too. Since I'm redoing everything anyway, adding better wires, and new terminals would not add too much expense, and be good for the system. I also want to modify how battery is grounded.

Found this next to the Master Contactor

Accidental welding on firewall

Accidental welding on firewall

Do you see it? Two spots, above the screw? Someone didn't disconnect the cable when working on her! :). (And, no, that wasn't me)

And finally, here's how almost the entirety of electrical system looks like.

Most of the electrical of a biplane

Most of the electrical of a biplane

Some swithces, some fuses, some wire, and that's it!


In thrust I trust.


Up ↑
Tagged with "electrical":

Wire Markings, Fuselinks, Load Measurements, and Turn-and-Slip

tested fuselinks, measured loads, removed and diagnosed turn-and-slip indicator


On: Jun 18, 2019
In: [Chickenhouse Charger] Electrical Rebuild
Time logged: 6.5
Tags: 6781G, MA5 Charger, electrical, experiments, research, instruments, soldering

Finally, doing some actual work on the airplane, and having fun! And I decided to start logging time.. because, why not!

Wire Marking

I like marked wires. I used to be a networking guy, and I was very meticulous about marking every single wire in my cabinets, so that I knew exactly what was plugged in where.

It took a bit of upfront time, but saved a bunch of it later on.

So naturally, I was planning to do the same on the Charger, and, more importantly, make it look professional.

Thanks to living in this day and age, that is simple. No, I'm not gonna pay someone to laser etch my wires - that's a cop out :). It's like paying someone to paint your plane.

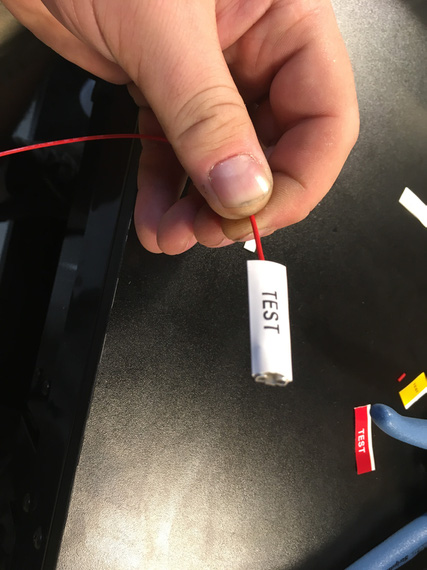
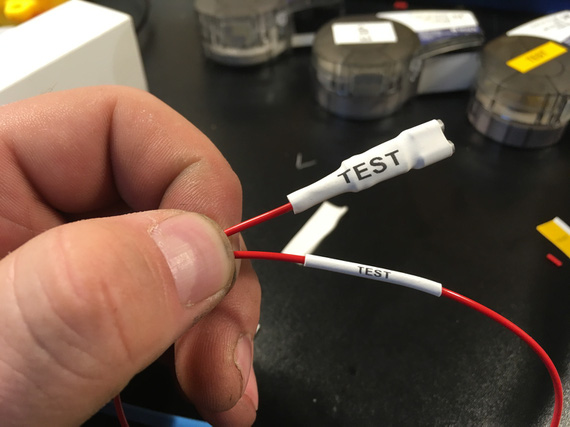
Instead, I have researched and found a perfect label maker - Brady BMP21 (not including a link here because it will probably go dead after some time... just search for it). This thing has 3:1 heatshrink tube cartridges.

The proverbial coupon

The proverbial coupon

Prior to shrinking

Prior to shrinking

Shrunk!

Shrunk!

Load Measurements

Prior to ripping the old wiring out, I wanted to take some real life load measurements with various things turned on, so that I don't get any nasty surprises.

But this plane has no ammeter... damn. I searched around, and found this little doodad:

Hall Effect ammeter

Hall Effect ammeter

Very nice. It basically measures current on the wire passing thru this big white ring using Hall effect. Very cool! No need to splice into the battery leads and install a temp shunt.

So, I rigged it up and took some numbers.

Rigged up

Rigged up

  • Master On: 1.5 amps
    • Includes: Master Solenoid, and a couple of gauges
  • Fuel Pump: 0.2 amps
  • "Radios" switch (turns on engine monitor, and power to radios: turning backlighting on them): 0.8 amps
  • I-Com Radio, Transmit: 2.6 amps
  • Intercom: 0.1 amps
  • Transponder: 1.1 amps
  • Smoke Oil pump: 2.2 - 2.6 amps (high on startup)

So couple interesting things here. I think the x-der number is too low, but it wasn't being interrogated, and I can't make it be interrogated without flying the plane or using a transponder tester which I don't have. Also, Master On is too high seemingly... Will need to double check later and isolate things (master solenoid, hobbs, voltmeter, voltage regulator, fuel gauge) if I care enough - I don't think I do. Also, fuel pump is too low seemingly. Need to double-check the spec.

And then, I could not turn on the Turn-Slip Indicator...

Turn-Slip Indicator

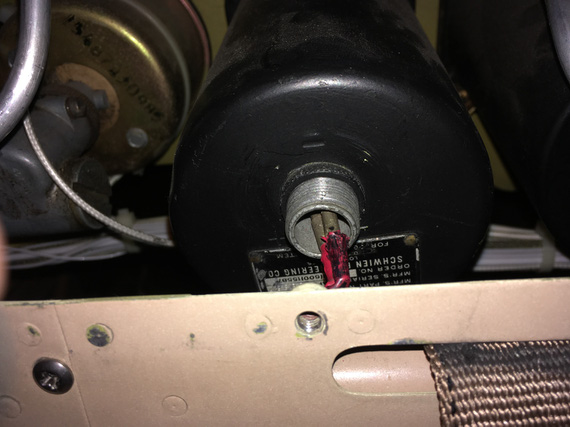
Sad, sad indicator... see, it's long. And it's wire connector is sticking out. And it's right behind the front seat's headrest, and there's just not enough room for it, and the connector.

So whomever put it in... did this:

Sad, sad wiring

Sad, sad wiring

It's hard to see; but basically, those wires are bent "down" at a very sharp 90 degrees angle. Notice how he just used pins without the actual connector. The distance between them is tiny! I am surprised they haven't shorted over all these years. I really am.

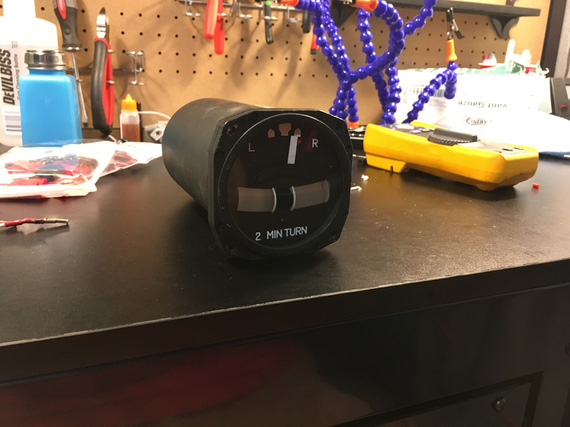
Initially, I thought the gauge didn't turn on because that wiring was all bust up, so to test it, I decided to pull it out.

On the bench

On the bench

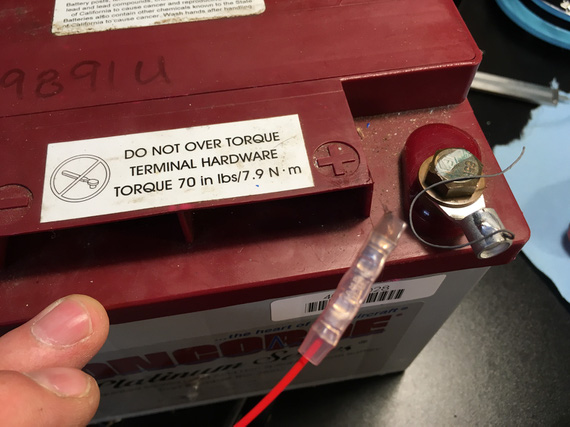
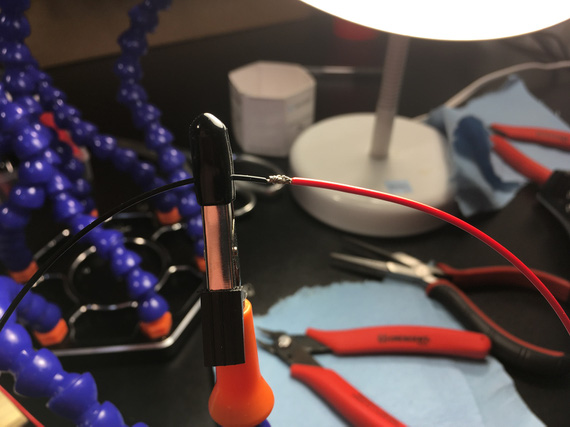
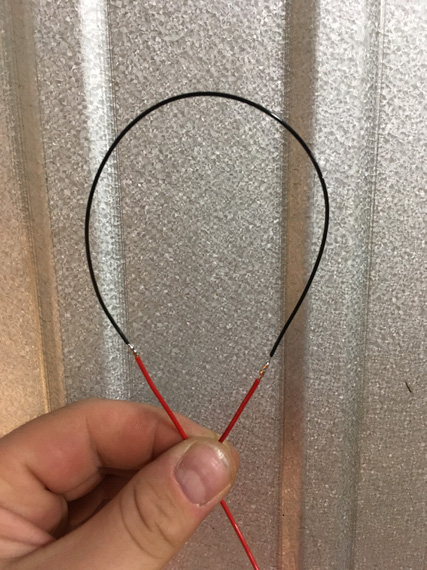
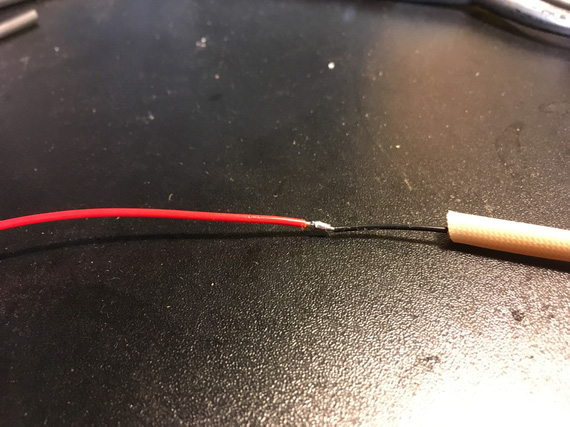
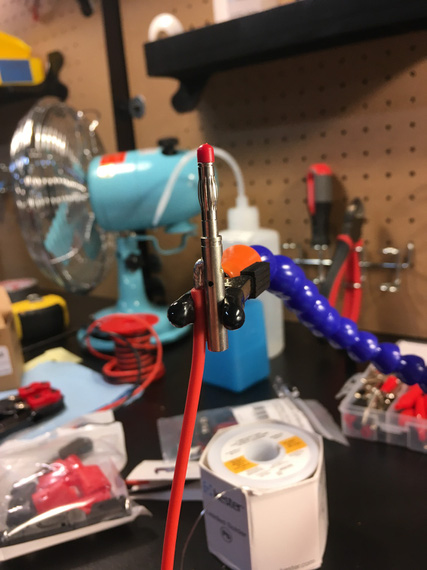
I cut off the wires with those pins on them to hook it up to my testing battery... hmm.. but I needed some leads! Well, I was gonna make a bunch of various test leads - so this is as good a time as any! Man, I love soldering...

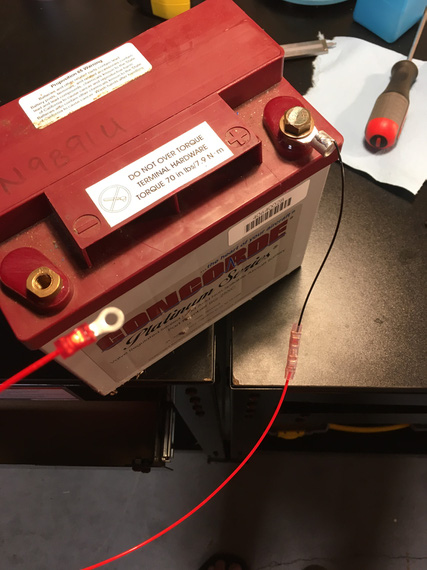
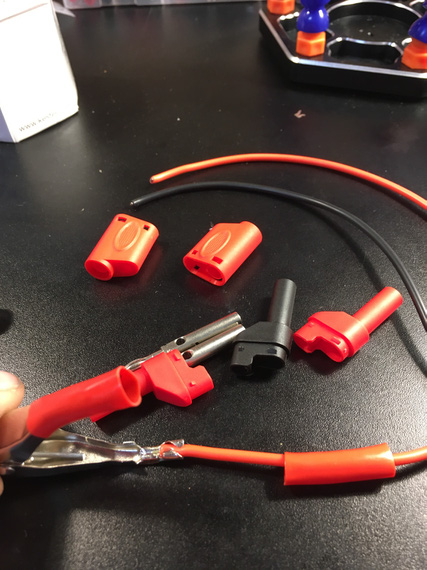
I long decided to make a bunch of leads with "passthru" banana plugs on one end, and something (a crocodile clamp, a battery clamp, a ring terminal) on the other. This way, I could mix and match, and plug them into my multimeter; daisy chain, and have multiples depending on what and how I needed to hook up. I had all the bits (clamps, crocodiles, banana plugs), and even got a roll of very nice super flexible silicone coated probe wire.

Components, and the battery clamp crimped on

Components, and the battery clamp crimped on

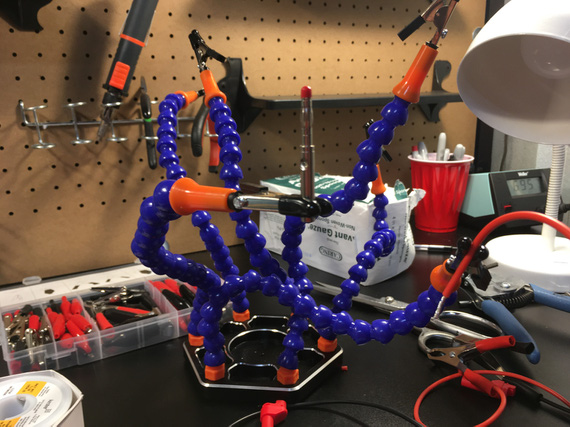
Release the Soldering Kraken!

Release the Soldering Kraken!

The banana plug pin

The banana plug pin

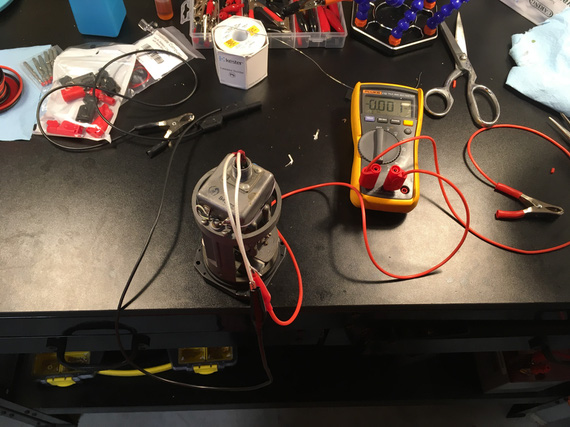
All hooked up

All hooked up

The gyro in the gauge didn't start. Damn.

But I had resistance between + and -. And I had voltage! Hmmm..

Second time I hooked it up, I saw a bit of a spark when I put the positive clamp to the battery, and heard something.

I spun the gyro with my finger.... it spun up!

Well, well. So that gyro "froze" in a bit... Yep, it was hard to turn over with a finger - no doubt a small motor in there had a hard time!

I probably "cleared it up" a bit when turning it over with my fingers - but that won't last long... damn.

Are we looking at the overhaul for this thing too now? Sigh.... Maybe I can find parts to do that myself, but not so sure about that.... It's not common for owners to overhaul their instruments - they're precision clockwork, after all...

Oh well.

And I will have to figure out how to solve that wiring problem with no space to hook up the right type connector. I am thinking along the lines of maybe routing a wire from inside of the gauge down thru a hole I'd drill, a grommet it it, and covering the whole business with with some sealant or something, so that the dust doesn't get in. we'll see. Need to ponder this a bit more.

PS

... and here's what happens to airplanes that aren't flown enough...

Dinner for someone...

Dinner for someone...


Standard checklist philosophy requires that pilots read to each other the actions they perform every flight, and recite from memory those they need every three years.


Up ↑
Tagged with "electrical":

The Flying Fire Hazard

...sparks galore!


On: May 16, 2019
In: [Chickenhouse Charger] Electrical Rebuild
Tags: 6781G, MA5 Charger, Annual, electrical

This thing nagged me for a while. The Charger did not have the Field breaker. For that matter, it didn't have the Alternator master breaker, either.

It had this weird "main buss" breaker for 60 amps, but that didn't look like the Alternator breaker to me.

So in between dealing with other things after having decided to put her thru Annual in 2019 a bit early, I was running around with my multimeter, tracing wires.

Initially, I quickly discovered that some lines were definitely not fused; like Battery -> Main Buss line, and thought I'd put inline fuses into them, and be done.

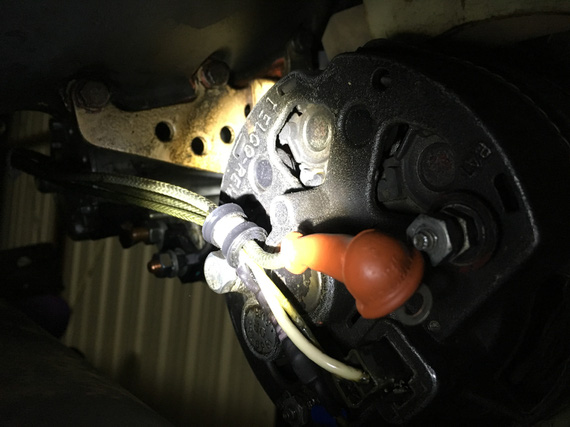
She has an old charging system; a mechanical switching voltage regulator, and a Delco Remy alternator seemingly from a tractor:

The old Delco-Remy

The old Delco-Remy

Voltage regulator didn't make sense. It had 4 wires (should be 2: supply and field output, or 3: supply, sense, and field output).

Alternator didn't make sense. Instead of 1 wire for Field input, it had two wires.

Additionally, Battery Contactor didn't make sense. One terminal had a wire going to it. The other was grounded....

Interlude

Battery Contactor is an interesting point here. Normally, one terminal is connected to the "always hot" side of it (basically, directly to the battery) and the other goes to the Master Switch. Master Switch turns the Battery Contactor on by grounding that wire, providing the negative side to the circuit. It's a safety thing. If that wire breaks, it'll either turn the electrical off (open circuit), or it will keep it turned on (short to ground). That's it.

But, one of the terminals on the Battery Contactor was grounded... that means, that the other terminal (the wire coming from the Master Switch) must provide positive side??? Huh? But where does it get it's power from?

Tracing

So to tracing we went. I spend maybe 10 hours trying to find diagrams and understand that alternator and voltage regulator hookups.

And me tracing it spelled my doom.

The Diagram

Now, I didn't trace the rest of it. Just the main distribution system. That was enough.

Shall we?

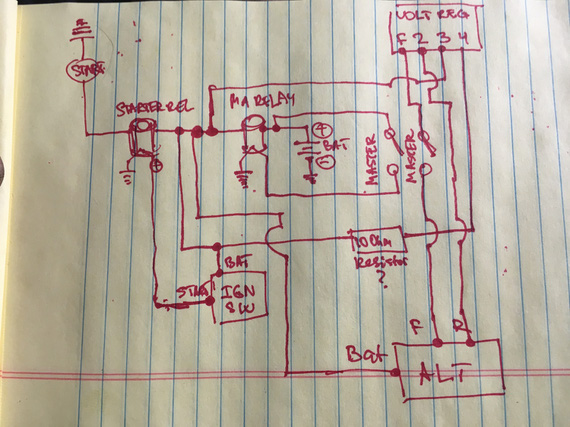
The current  main power system of the Charger

The current main power system of the Charger

Yep, the diagram is missing the main power buss. It's dangling off of the same spot where everything else that's interesting is - the Battery Contactor (marked MA RELAY) <-> Starter Contactor (marked STARTER REL) link.

So let's see what we have here.

  • Lots of unfused wires. Do you see a single fuse here? Nope. That's because there aren't any. All the fuses are further downstream, off of the main buss.
  • Voltage Regulator has this extra wire running to / from cockpit that isn't really necessary and could've been kept on the hot side of the firewall (terminal 4 wire)
  • Alternator field broken at output (F->ALT) rather than at input (battery -> terminal 3)
  • And the best part? Always hot wire that you can't turn off between the battery and the Master Switch to turn the Master Solenoid on.

That last bit bugged me. I couldn't find the damn thing. Even before actually tracing it, I knew that if the Master Solenoid is switched on the "hot" side, it needs to get the power from somewhere, and that only could be battery. But I didn't see any wires on the always hot side of the Master Solenoid. Only when I traced it, I actually traced the physical wire to where it goes, and then found it. It was so tucked behind the battery -> Master Solenoid wire that it was invisible:

This little !@#!S@#....

This little !@#!S@#....

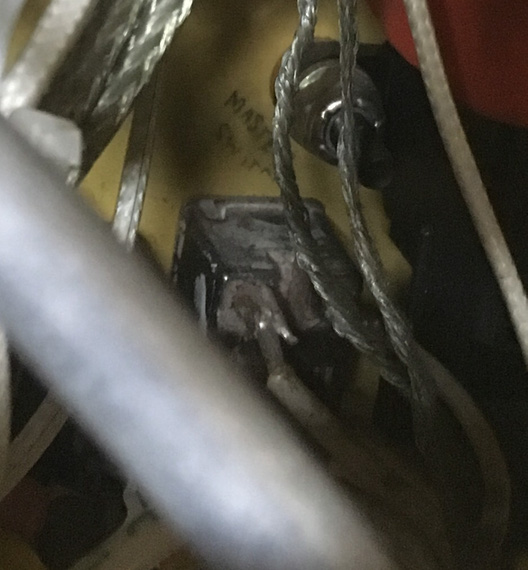
Oh; and by the way, the Master Switch is the only switch that's soldered in, and w/o any good insulation around the terminals, and over-stripped wires. So that's just waiting to short, and the magic smoke that'll be let out behind the panel when that shorts can't be stopped (always hot wire, remember?)

Master Switch

Master Switch

The Wires

So I kinda went backwards here; but I thought it'd be easier to see the diagram first.

Let's see.

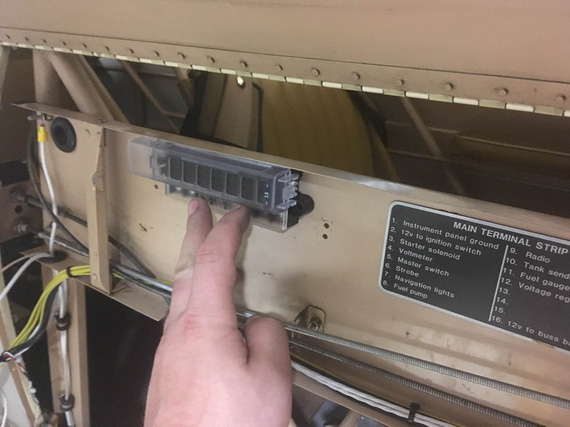
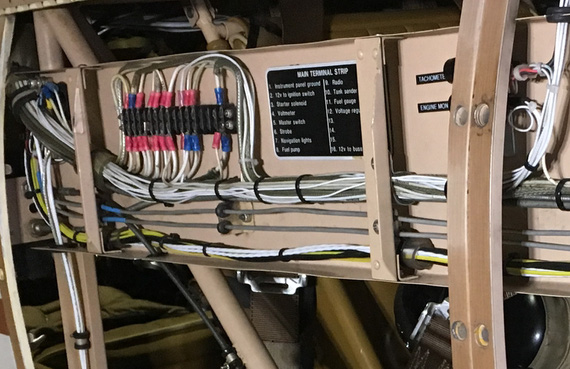
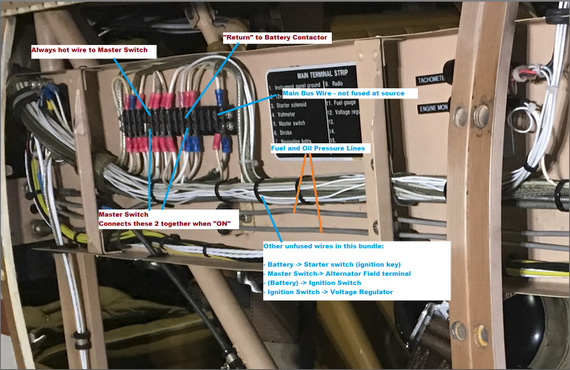
Most of connections are made on this very nicely marked terminal block:

The terminal block

The terminal block

All the switched power comes out there, and every wire is marked. This actually helped a lot in tracing. This block is on the side of the plane, right next to the front hole's backrest.

You know what threw me off the most with that damned always hot wire (I ended up tracing it physically)? It's how it's hooked up.

Yep, it is hooked up to that terminal block. To the terminal... that is marked.. (drumroll).... "Master Switch".

Wait.. this actually makes sense... But where's the "return" from the switch?

Ah! It's the wire that's marked.... drumroll... "Fuel Gauge"!

So really, let's look at what's going on, shall we? Zoom in the image below, it's annotated.

Untangled

Untangled

So let's see. We've got this bundle of wires, a lot of which are not fused, and one of which is always hot.

The Main Buss wire is the thickest one (10 gauge maybe?) that's not fused between this buss bar and the source (engine compartment).

Oh, did I mention that this buss bar is on the side of the plane near the rear instrument panel (so that 10 gauge run, and the rest of the harness between firewall and the panel is about 30 inches long)?

What else do we see there? Oh! The two little 1/16inch thick aluminum lines carrying.. fuel pressure (and oil pressure).

Shall I say more?

Shall I say that there's a fuel tank in between the front hole (passenger) and the firewall?

That the wires run along between firewall and rear cockpit along that fuel pressure line (to fuel pressure gauge)?

That if one shorts to this very nearby fuel pressure line, it'll burn a hole straight thru it, and then ignite the gas that'll start coming out?

Yep.

Can I fix all of that?

Sure. But rewiring will be much much easier, because I have to touch pretty much everything. Re-running half of individual wires in a bundle is much harder than re-running them all.

So, I made a decision to rewire the plane... Sigh. Looks like I won't be flying for a looooong time.

Oh, and tell you what. Tracing wires on a biplane is dangerous. I ended up twisting my knee and pulling a muscle while trying to get behind the panel so badly that I couldn't walk (or sit) for 2.5 days :(.


Some pilots will make an emergency out of a bad magneto check. Others, upon losing a wing, will ask for a lower altitude.


Powered by B-Log, which is based on Pelican, heavily plugged and themed.

© Copyright "79FT". All rights reserved. Feel free to cite, but link back to the pages cited.

This website only shows how I did things in my various projects. These pages are for information and personal entertainment only and not to be construed as the only way, or even the perceived correct way of doing things. You are responsible for your own safety and techniques.