[79FT]: Building Things |
 |
Carb Control Cables
...just measuring
| On: | Sep 01, 2019 |
| In: | [Chickenhouse Charger] Electrical Rebuild |
| Time logged: | 9.3 |
| Tags: | 6781G, MA5 Charger, carb, throttle, mixture, cables, controls, engine, fwf |
Even before Oshkosh, I have decided to replace the Rotec TBI the Charger had when I got it with a good old MA4-SPA carb. In short, I do not trust the damn thing - especially with it being the sole component providing two out of three vertices of the proverbial fire triangle to the motor. That reminds me, I need to summarize my thoughts on Rotec...
Regardless, one of the things I got at Oshkosh was a rebuilt MA4-SPA from Spruce, and it was sitting in the hangar waiting it's turn. I knew I would need to order new control cables for it, so I decided to get that going, after all the alternator business was finished, because getting those cables will take me a bit.
Here's a fun aside. I knew this motor had a MA4 carb and Glenn "upgraded" it to the Rotec TBI. What I didn't know was precisely what kind of MA4-SPA it had (and there are quite a few models of that carb).
No problem. At Oshkosh, I went to nice folks from Tempest (which now owns MA Carbs) and had a very nice conversation with them. I asked if I should buy the carb from them, and they recommended Spruce instead, because it would be cheaper that way. And, they mentioned the $600 core charge (I'll spell this out - you must provide a good "core" (old carburetor) or get charged extra six hundred bucks). Ouch.
Ha! thought I. I am at Oshkosh! What could be easier than getting an old carburetor, especially since it's one of the most widespread models? No problem at all!
Laughing, I ran that by guys from Tempest. They laughed with me, and actually were very very very helpful, telling me what to look for when picking up an old carb.
No cracks in the body. Control arms should be present. Threads nice and not torn up. Venturi present. Etc etc etc.
Well, to the FlyMart we went, and sure enough, on a bench there laid a number of MA4-SPAs present, ranging from $250 to $450. Of course, I picked up the $250 one (it was yellowtagged by the way! In 1995, if I recall), dragged it over to Spruce, ordered a new carb, and handed them the old one I just picked up. So, $350 saved in about half a mile of walking. Not bad!
Here it is, in all it's glory, hooked up to my motor. You guys should admire my "economizer design" gasket. Hmm... I need to patent that and start selling them for $100/pop. Your fuel costs will go to 0! Now, you might not be going too far... but.. Fuel costs! Zero! With all the benefits, not going anywhere is such an insig.... Ahem.
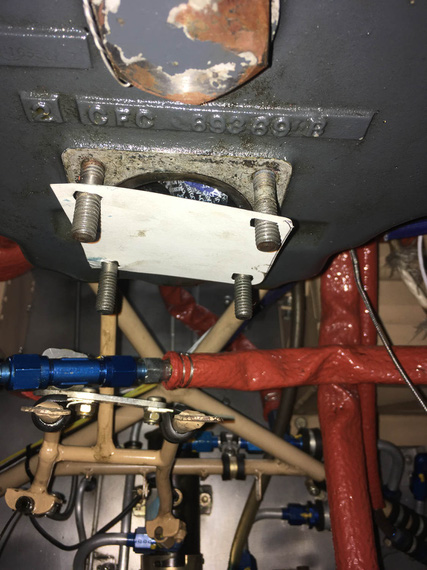
Economizer Gasket
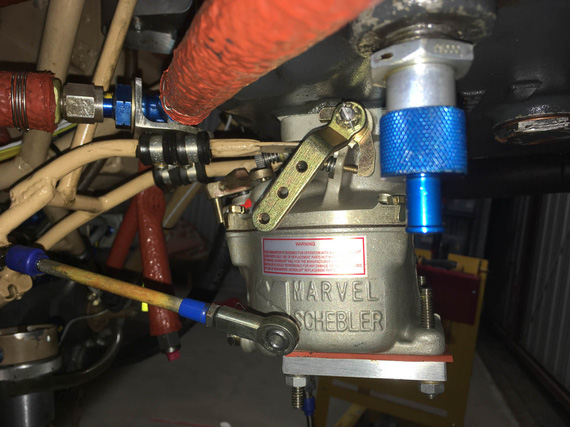
Carb
Well, okay. The carb was on, and cables came next.
The Rotec had it's control cables for mixture and throttle done completely differently than the carb. Glenn reused Throttle cable for Mixture on the TBI - it worked out well. He added a new cable, routed completely differently, for the TBI's Throttle.
Since this motor was originally carbureted, all I had to do is reverse engineer a bit the way Remo did the hookups.
Hehe.
Well, Throttle on the carb side wasn't that bad.
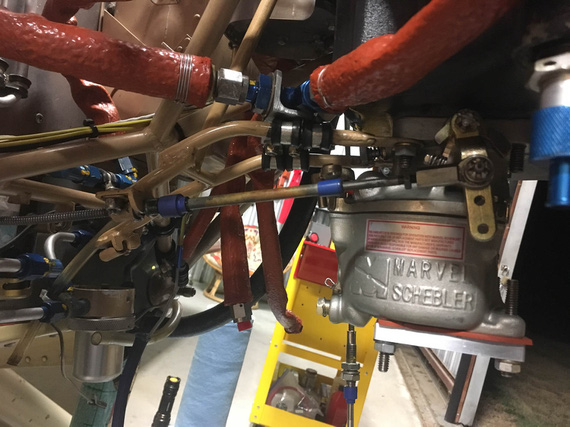
With a Rod End Bearing
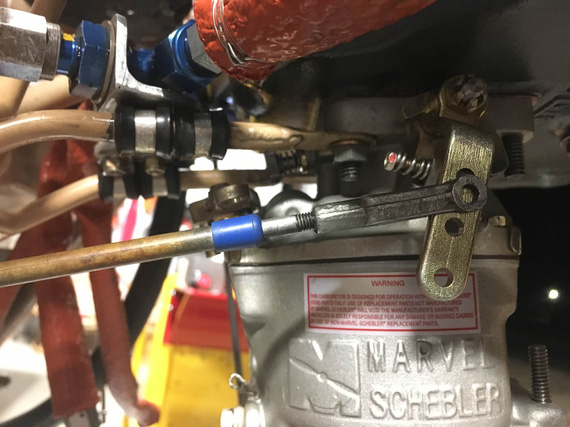
With a Clevis
It actually worked out a bit better with a Clevis, having the cable end centered nicely on the throttle arm. So I decided to do the clevis.
Next was confirming the "throw" - making sure that the throttle control range of motion, whatever it is, is sufficient (in fact, it must have some extra "padding" in it) to move the throttle stop to stop. Boy, was I in for a treat.
This Charger has reversing throttle quadrants, meaning that when the throttle goes forward, the actual control is pulled backward. Since forward on the control must translate into forward on the carburetor, the Charger has bellcranks to reverse the motion once again. These bellcranks are also a nice spot to tune out the range of motion.
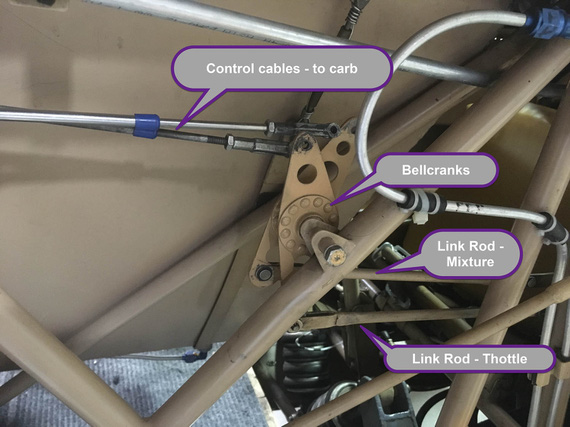
Control linkage
See, the relative distance of the top and bottom holes on the bellcrank to it's pivot point "convert" whatever range of motion is on the control (throttle quadrant) side to an appropriate range of motion on the carburetor side.
And Glenn changed them.
Not a surprise. The Rotec TBI had it's controls set up very differently as compared to a carb. Notice how in the picture the color of those bellcranks is somewhat off from the rest of the fuselage? That was my first clue...
My second clue was finding one of those bellcrank plates (minus the bearing) in the box of parts that I got with the airplane.
My third clue was me not being able to get the full range on the throttle.
Crap!
I am absolutely not set up to redo the bellcranks. Though they look simple, unless I want to make them from 3/16" steel, which would make them very, very, VERY heavy, I'd need a TIG welder. Or to MacGyver things with washers. And do quite a lot of trial and error.
I wanted to see if I could luck out.
Credit goes to Glenn here - he made his new bellcranks perfect for the TBI. The range of motion on them was just right... for the TBI. Because of that, they were asymmetrical - so I thought; maybe, just maybe, if I was to try them in different combinations, I would luck out...
And I did!
Now, these two paragraphs of text and one picture is me describing... about 3 or 4 hours of work - tweaking cables, turning bellcranks, checking, rinsing, and repeating. I think I did find a combination of orientation of these that gave me acceptable (but by no means perfect) ranges of motion. I think I lost about an inch on both of the controls, but that's not so bad, after all - you want extra room in your control's range of movement to make absolutely positive you can move the controlled thing stop to stop.
Okay, Mixture's next.
I hooked up the cable that Glenn used for throttle to the mixture control on the carb, to use as a "mock up", and kinda fished it thru.
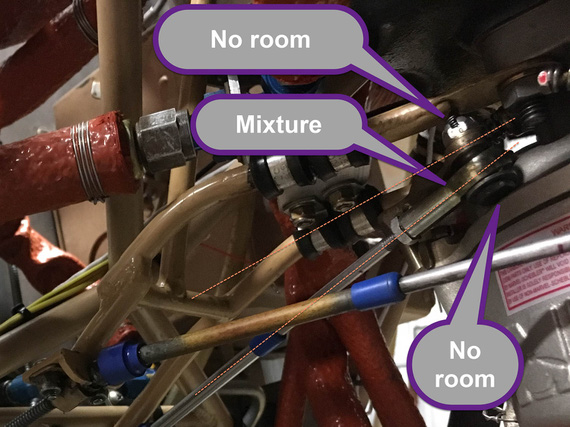
Mixture cable hookup
I had to use a rod end here. The cable wouldn't line up with the control arm on the carb for me to be able to use a Clevis there.... See how angled and offset that hookup is? I think Remo had a solid bowden cable style control there...
Another problem with the Mixture control is that the carb's arm has a 1/4" hole.. the rod ends need a #10 screw; which means that the hole on the carb arm is too large. No biggie though, I'll add a bushing to reduce it.
Yet another problem is that the bolt's head is way too close to the carb bowl, and I had to have it reversed like that (bolt "upside down").
There's not a lot of room on the top either. Planning to fix this problem with using of 1/2 size shear nut, and figuring out the exact bolt length (I ordered every bolt between -4 and -10 sizes).
And now, the routing of those cables.
The throttle cable routing was a given. I did not like too tight a radius in one of it's "turns".
I wanted to try to optimize the routing..... ha. Good luck there buddy! The battery box gets in the way (the battery is in a completely wrong place on this plane... it's reversed with the oil cooler. Oil cooler should be on the left. Battery on the right. This makes controls routing a breeze. But no.....).
I wanted to make sure to keep the mixture cable to not be too close to the beefy 4 AWG cable that will go from the battery to the master relay.
I had to reverse engineer previous routing of the cable, and figure out the best points to hook it up to the firewall.
I wanted to have my ANL fuse bases close to the master and starter relay. Ha! No way, with the control cables the way they would have to be.
All this was an exercise in misery, and lots and lots of time. I wanted too much.
In the end, the routing of the throttle will stay the same; the cable will just be shortened to make one of the turn radiusii bigger. The mixture will go nearby, and curl around the battery box.
I will not be able to use any other arrangement of solenoids and will have to stick to the old one. What's worse, I will not be able to use the new solenoid I got from B&C - it's mounting holes are very different, and, frankly, it's not worth it to drill more holes in already a sieve-like firewall - I'll stick with the classic "style".
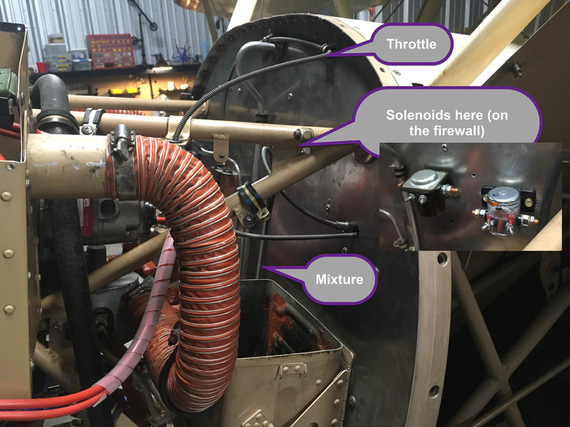
Approx. new routing
The mixture cable does look like it'll interfere with the solenoids, I know. In the final setup, it will be pulled away from the firewall and clamped to a couple of points I found.
...
More bad news? I long noticed a leak from the left brake bleeder valve; and decided to add a new valve to my next order from Spruce. I thought it was a basic valve problem. Well, went to look for it's dimensions, and found out the source of the damn leak, actually... Looks like someone tried to fix a leak there by making a bigger leak. The fun thing was, I didn't notice this before - the brake was too dirty...
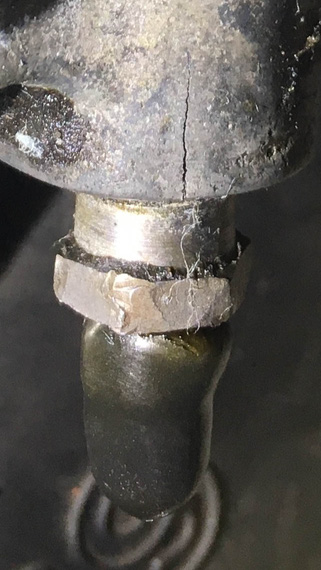
Boo!
Damn.. those cylinder housings are $300 each :(
But hey! I got good news too! I was checking to see if the ANL bases and the shunt will fit where the old voltage regulator was, and they fit perfectly, in just a perfect arrangement!
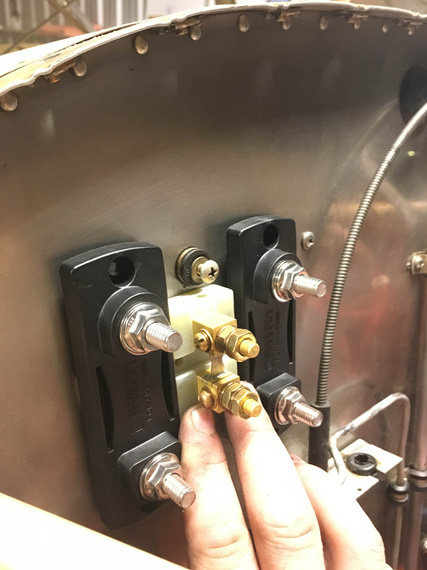
ANL bases and the ammeter shunt
I will reuse old voltage regulator rubber shock isolation mounts (I can't take them out; and they're sufficiently strong), and make a backplate to mount all this goodness to. Frankly, when I found this fit out, I liked it so much I bust out laughing.
And hey! My engine gauges showed up ;) Ain't they pretty?
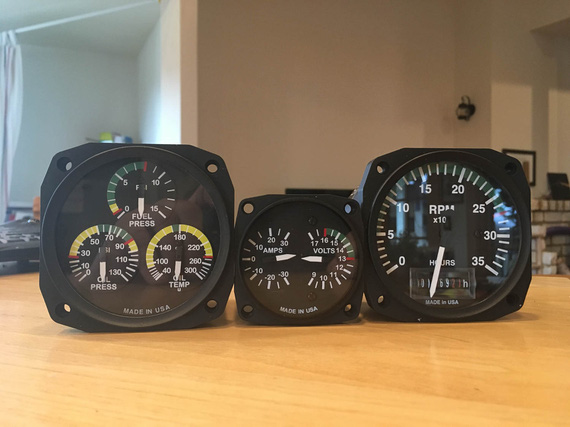
Engine gauges
If God had wanted me to fly, he would have made me flush riveted.
Up ↑
© Copyright "79FT". All rights reserved. Feel free to cite, but link back to the pages cited.
This website only shows how I did things in my various projects. These pages are for information and personal entertainment only and not to be construed as the only way, or even the perceived correct way of doing things. You are responsible for your own safety and techniques.