[79FT]: Building Things |
 |
Fat Wires Firewall Forward
basic setup
| On: | Apr 30, 2020 |
| In: | [Chickenhouse Charger] Electrical Rebuild |
| Time logged: | 29.4 |
| Tags: | 6781G, MA5 Charger, electrical, alternator, starter, contactors, fwf |
Fat wires firewall forward. Battery leads, shunts, alternator, contactors, and the like.
I was doing them along with the fuel hoses mostly, in between waiting for shipments to arrive.
Mounting the Current Limiters and the Shunt
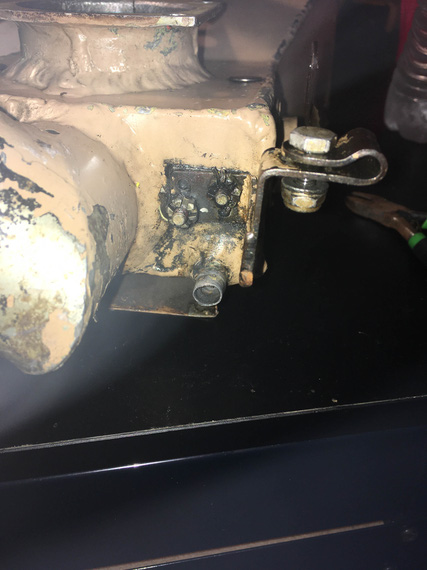
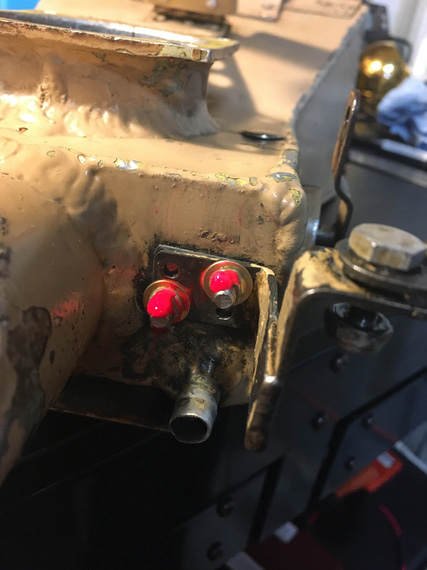
They were to take place of the old voltage regulator, onto the same mounting pads. I needed a backplate...
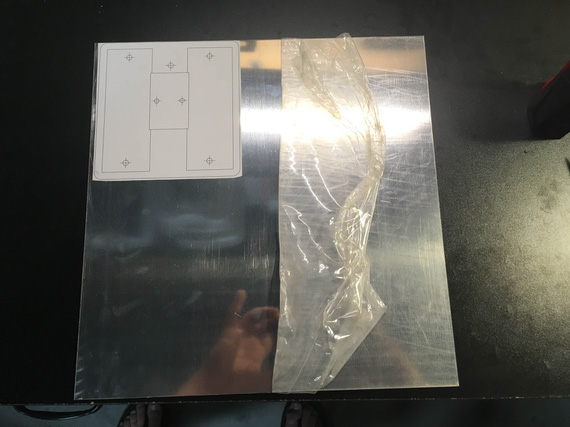
Pattern
...and a very basic one at that. Basically, a "hole pattern adapter".
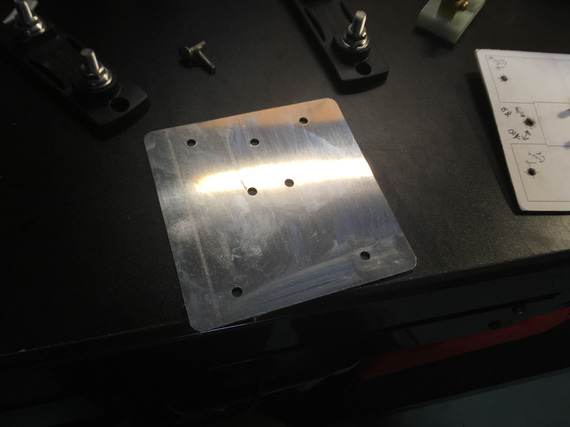
Cut
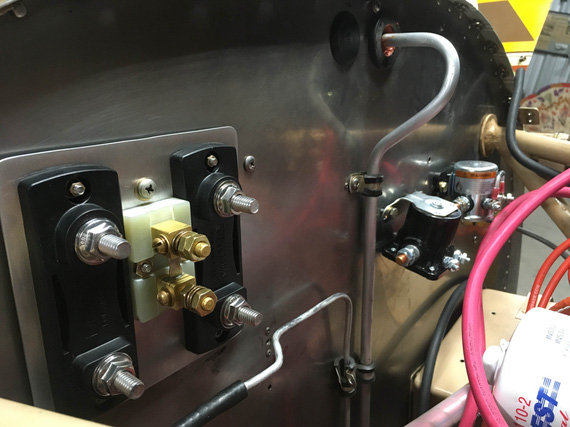
Mounted
I also needed to plug the nearby hole left by the removed mechanical tach cable. That one needed a large plug, and, as before, I decided to use a pipe plug with straight threads. It's nice, light, and aluminum.
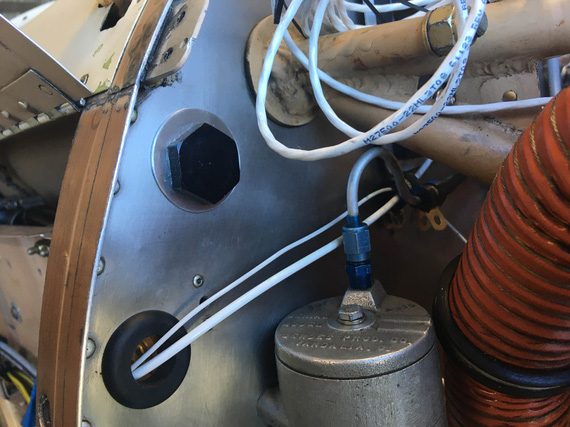
Tach cable hole plug
There, the black one. Above the grommet with a couple wires.
That washer took a couple tries to make BTW. First one was functional, but too ugly.
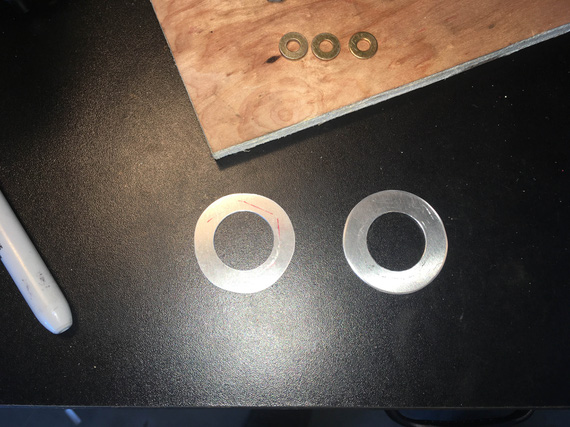
The washers
Plugging the Holes
There were some more holes left after removing some old things. They were for #6 or #8 screws; and I could barely access the other side (fuel tank that's right behind the firewall makes it super hard).
Instead of attempting to maneuver nuts back there, I wanted to try something along a rivnut.. but a bit better. Steel.
Spruce sells these steel "nutserts", which seemed to fit the bill. Got a set, with install tooling.
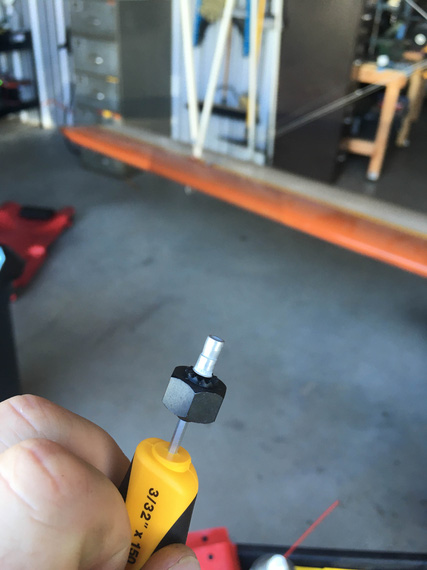
A nutsert with an installation nut
I had to enlarge the holes on the firewall a bit to fit even the smallest nutserts; and used #4 screws to "plug" them.
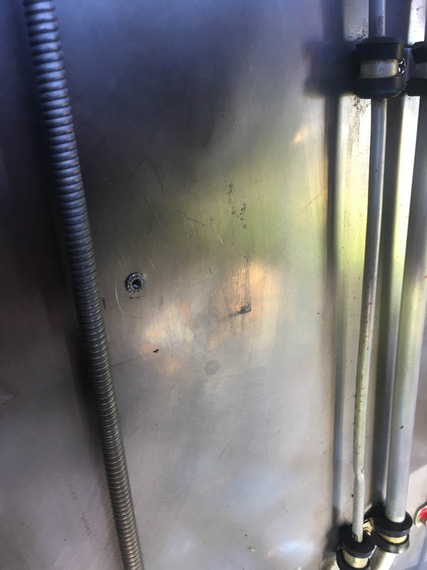
Nutsert installed
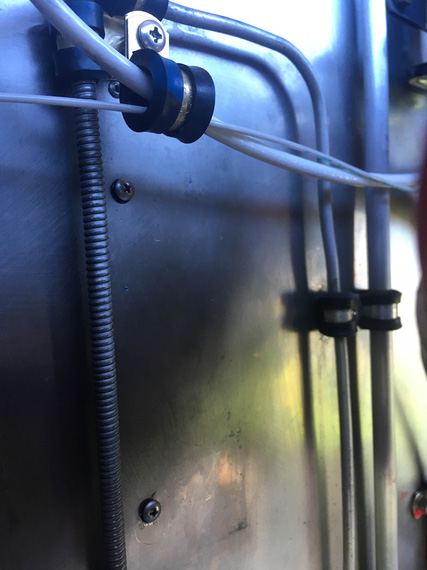
Nutserts with screws
Fat Wires
The contactors got mounted and torque sealed (of course I forgot to add a diode jumper to the starter contactor, will have to add later). Next, came figuring out the alternator wire and battery contactor -> shunt jumper (main buss feeder from the battery basically).
Initially, I thought I could route the alternator wire on the right side of the motor; keeping the starter on the left (remember, the firewall layout on this plane is reversed of sorts - with battery and oil cooler having their locations swapped and producing all sorts of grief due to that).
While not bad, holding the alternator wire on the firewall would've required more holes, and it'd go straight down, at 90 degrees to the main harness on the firewall (going left to right), kinda "crossing" it under. So I gave that idea up pretty quick, instead deciding to run it along that main harness - neatness and 1 less hole/clamp instead of a shorter by about a foot run.
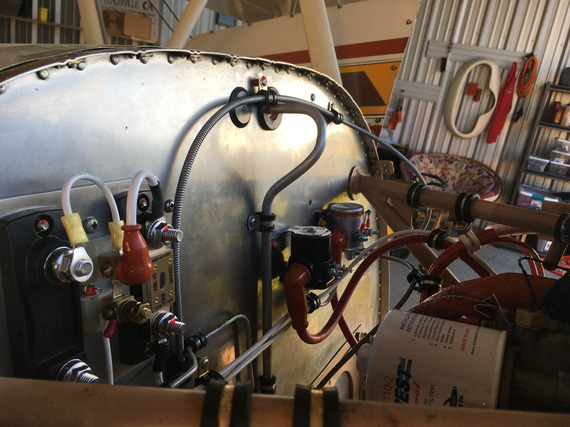
Initial alternator and starter hookups
Alternator wire is the white one going into the ANL current limiter, and starter wire is the red one joining it after coming off of the starter contactor (black) there.
And then, I needed the battery -> starter jumper. That was the spot to hook up the buss feeder too, with other end on the shunt.
I made this fancy thing...
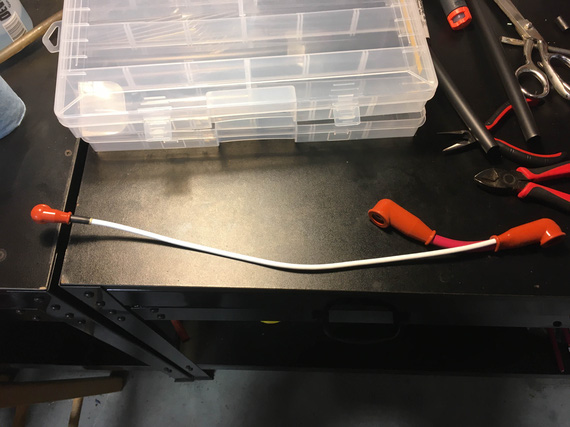
Contactor jumper and buss feeder
... and of course, a mandatory pile of shame...
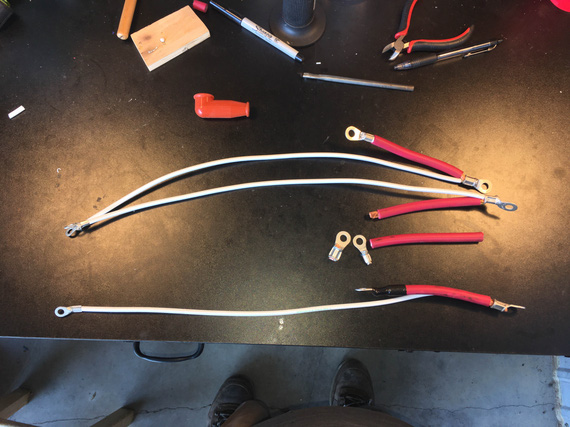
The Pile of Shame
Clocking of terminals is critical on these fat wires. If you're doing two wires, relative position of them in the terminal is critical too. You lose concentration for one moment and clock them wrong; and you're redoing the lead.
The first one I didn't like the crimps on.
The second one I messed up the clocking on.
The third one (bottom one) is the good one.
Mr. Max made a comment that it's the music that's distracting me (he was busy building his "water system" out of the old fuel system hoses and fittings I took out at the time).
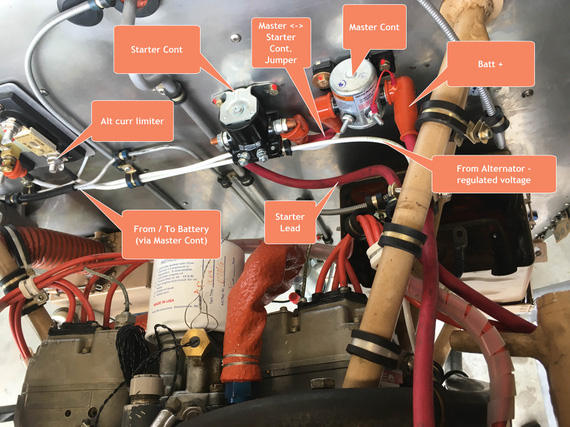
The initial setup
I did not like this. See how tight that Master <-> Starter contactor jumper is? It was very tight. The rigid alternator wire hooked into the ring on the master contactor side was too tight too (that adel clamp that I needed to hold stuff under the starter contactor had to be there - there will be other wires bundled there later). It was so tight that it bent the ring when I attempted to set it up.
No, that wasn't good at all.... hmmm..
Aha! I did a similar trick with the gascolator! Reverse the flow.
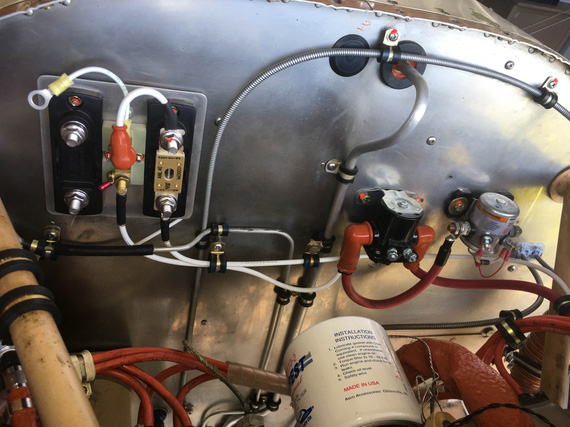
Flow reversed starter contactor
Much better! All I did was swapped the jumper from the Master contactor, and the starter lead on the starter contactor; and, while that made the fat red wire jumper much longer, it made the whole setup much, much cleaner. It made the buss feed wire a bit less pretty, arguably, with that weird "dip", but there's no avoiding it. I'll live with that.
The pile of shame grew.
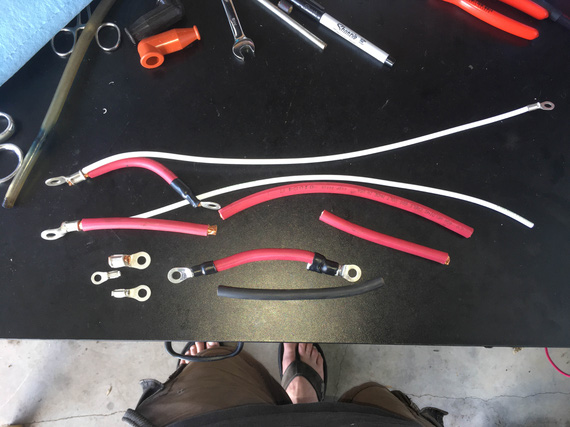
Growing Pile of Shame
By the way, here's how a crimped end looks up close.
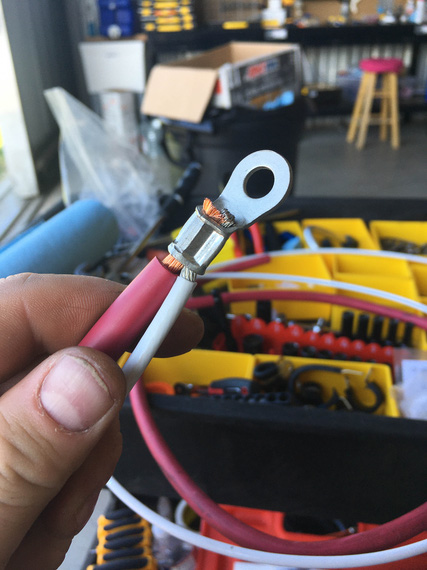
Crimped ring
Even with heatshrink, I had these thoughts of water weeping in between the strands on the ring end, and staying there, and slowly eating up the wire. Probably a non-issue; but it didn't sit well with me. So I used that as an excuse to whip out my small soldering torch, and add "solder caps".
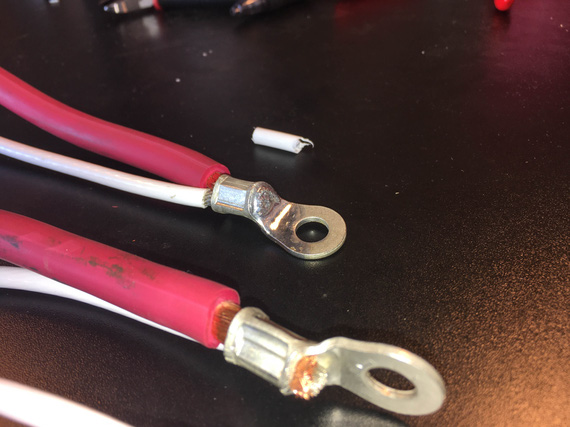
Solder cap
Much better and neater, don't you think? Solder here acts as a filler between the strands and to "tin" the bare copper wire of the welding cable I'm using for those fat red wires. Much; much cleaner and prettier this way.
Ground Strap
This plane didn't have any. The battery was grounded to the motor (good - the biggest current demand is from the starter). The motor wasn't grounded to anything else at all, making the current flow thru probably the control cables and fuel hoses to the rest of the plane. Not good.
So, one was needed. That took more thinking and fiddling. I had a plan initially to ground the battery to the motor and the motor mount (Grummans do something similar - battery to firewall; and motor mount to motor) - but I wasn't sure about how good a connection there is between the motor mount and the firewall. So I decided to jump the motor to the firewall - a very common setup.
Simple braid will suffice.
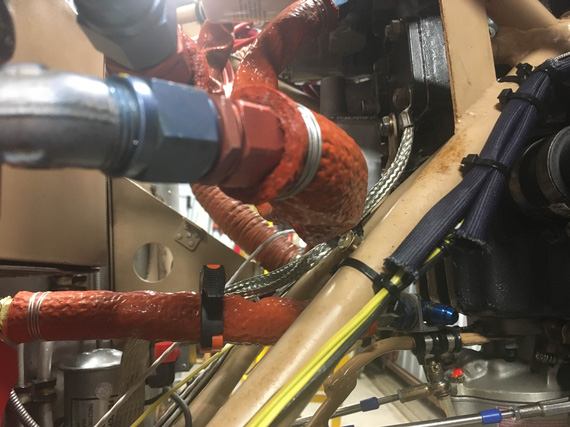
Braid - one end
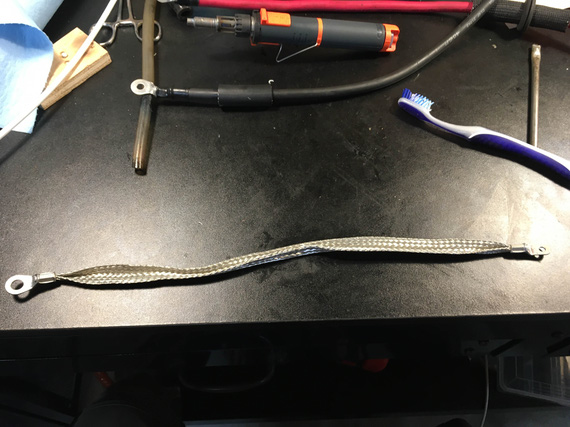
Braid done
I used a super flexible Raychem SFTW tubing and heatshrunk it. Doesn't affect the flexibility, but protects the strands a bit.
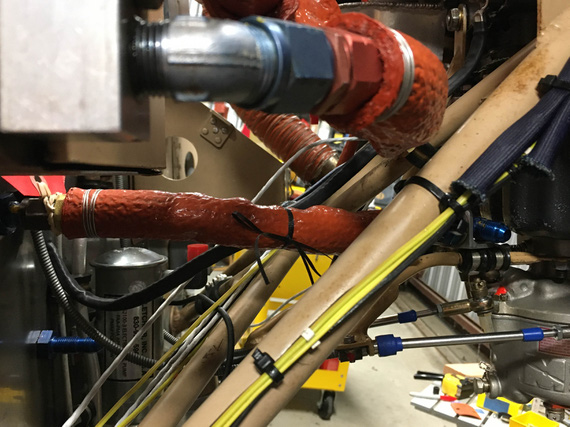
Braid installed
Battery Box
Battery leads were easy to make. Had to fiddle a bit with grommets (holes in the box are much larger than wires, and I had to use a "hose section around a wire in the grommet" trick to keep the wire tight and nice.
The battery box was another matter though.
Glenn had replaced the original large ("standard") battery with a small Odyssey - and took out the space with a bunch of chunks of random foam...
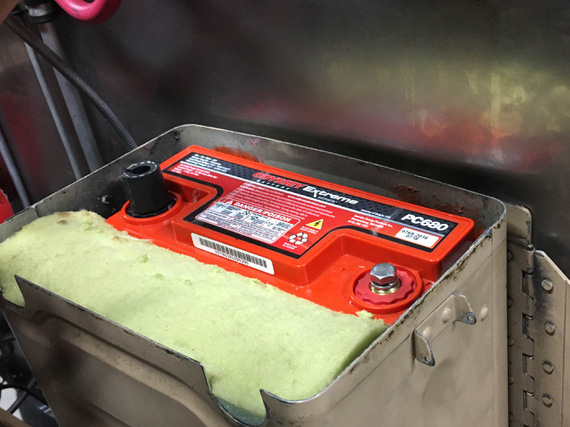
Foam
The box had "dimples" for the battery to stand on, lifted off the bottom (the bottom was made into a funnel of sorts that ended in a drain - setup for an old school battery that could leak acid). Those dimples were sized for a full size battery, so Odyssey couldn't stand on them.
So, .. ahem.. the solution was?
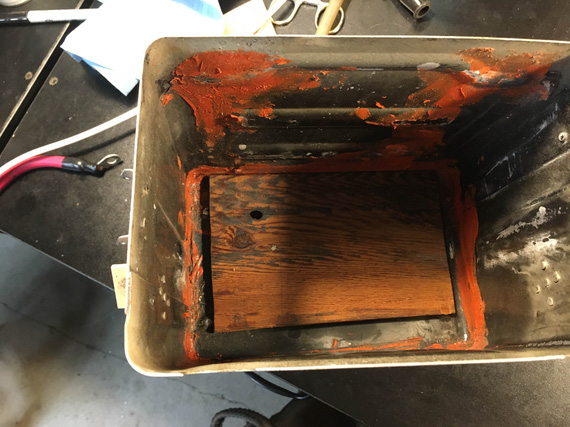
Bottom
Yyyyeah. No. Come on now.
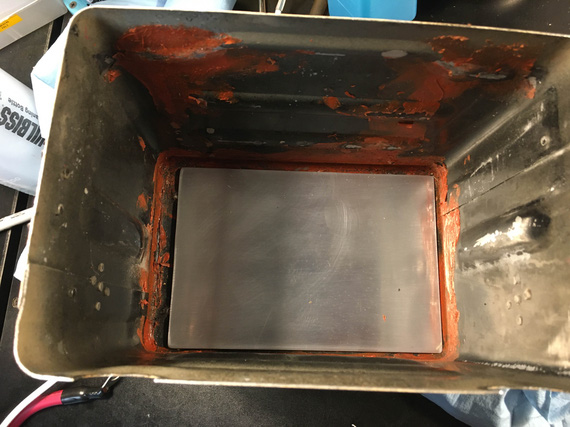
Proper bottom
And that chunk of whatever it was? Belongs here:
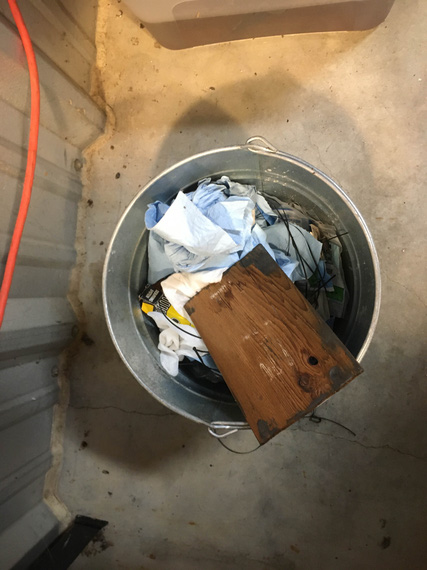
Right there
Now, the checks...
I hooked up the leads, routed them out of the box, and closed it up, only to realize that the battery was loose in the "up and down" direction. Not good at all, but the solution was simple.
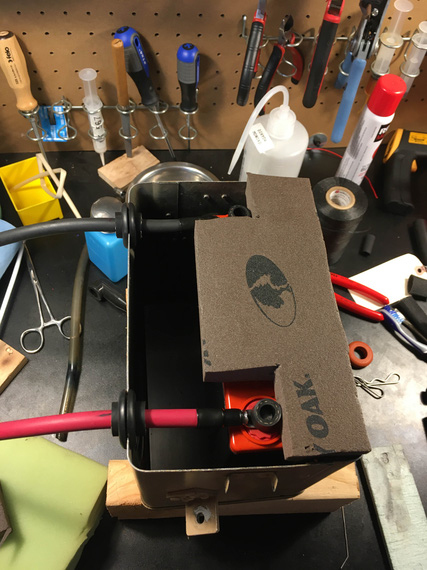
Mock up
I mocked up something quick out of some foam I had around, and closed the lid. Much nicer! No more bouncing. See, I didn't want the battery to hit the top and be bouncing if the airplane all of a sudden went to <0G (in turbulence, trivially possible - and it is aerobatic after all!)
Ordered some foam from McMaster, and padded the top of the box, and the battery sides.
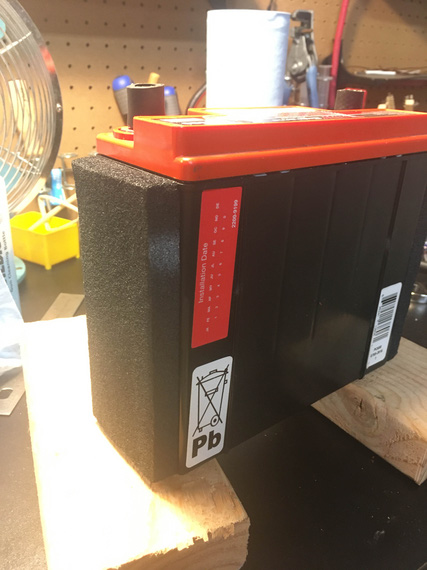
Battery sides padded
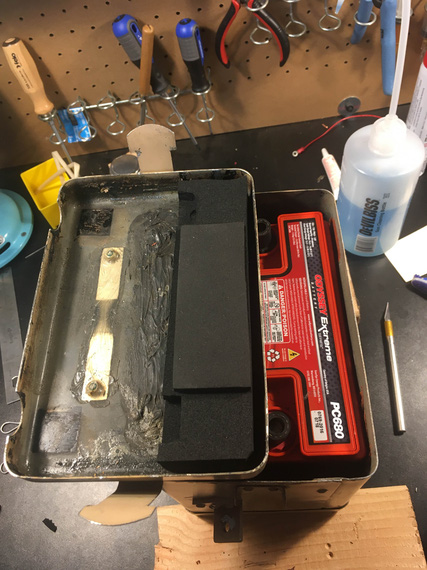
Box top padded
Now, the battery was sitting solid. No more bouncing.
And with that, I moved on. The main layout was done - the rest of tightening, tying, and strapping has to be done when all the wires are in, close to the end of this rebuild.
"N07K you look like you're established on the localizer and I don't know the names of any of the fixes, you're cleared for the ILS approach. Call the tower."
-ORD ATC
Up ↑
The Fuel System Redo
...hosed!
| On: | Apr 29, 2020 |
| In: | [Chickenhouse Charger] Electrical Rebuild |
| Time logged: | 31.5 |
| Tags: | 6781G, MA5 Charger, fuel system, fwf |
Trying to Get off Easily
After having mounted my transducers, it was time to hook'em up.
I also needed a new engine pump -> carb hose, because the old one was too long.
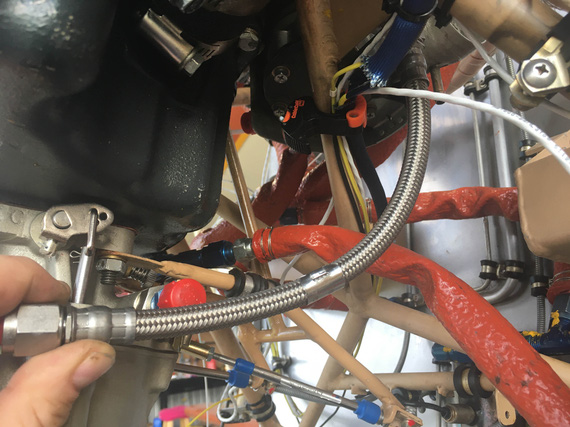
The old pump -> carb hose
And since I was dealing with hoses, I figured I'd clean up this monstrosity of the electric pump -> engine pump hose.
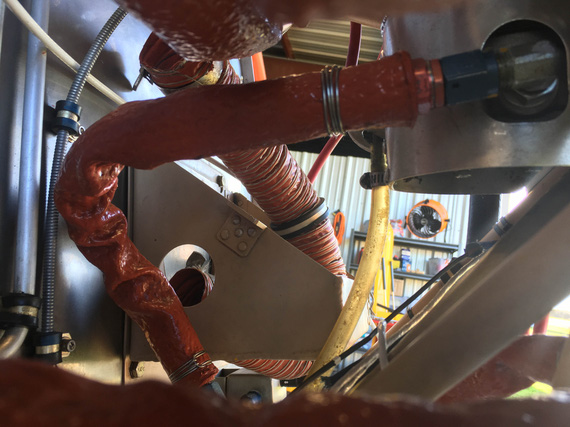
Ugly hose.
There are a few options of course. Pre-fabbed hoses - you gotta measure carefully and they'll be made to the exact sizes you want. You can buy fittings and make your own. You can go with different styles - integrated silicone firesleeve or "crimp on", rubber or teflon, yada yada.
I decided to go with pre-fabbed. I did the math a number of times; and a pre-fabbed hose was cheaper than making my own.
TS Flightlines has a great reputation on the Biplane Forum, and are pretty much the go to guys.
So, time to measure!
I had to re-clock the fittings on the engine fuel pump, so I loosened the jam nuts...
What? .... Jam nuts backed off, and fittings won't turn easily?! They should just unscrew!
Fittings moved with a wrench - and I discovered .. my favorite, The White Schmoo of Death. The teflon dope.
For some inexplicable reason, whomever undid the plumbing last time, re-plumbed it with the sealant everywhere. Okay, NPT fittings need sealant (though, a choice of a crumbly drying type stuff is questionable - because when it's left in a female fitting, getting it out without it getting it's crumbs into the system is almost impossible). But o-ring boss? Where there's a straight thread fitting with a nut and an o-ring? No sir! The o-ring seals it just fine! Siiigh.
Here it is. That lovely sealant.
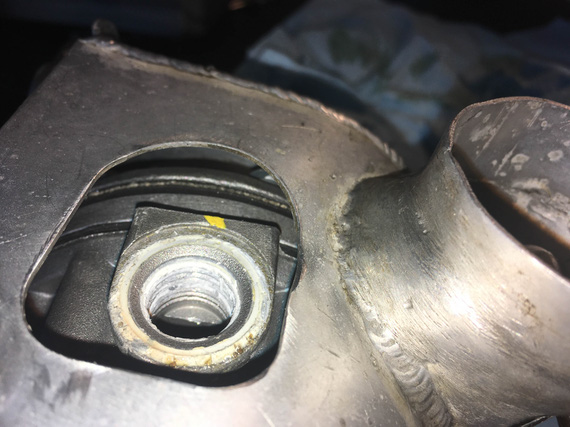
Sealant where it shouldn't be
I already had a ton of questionable fun when trying to get it out of the TBI. Frankly, I was glad I tossed the TBI altogether, hoping that that was the only place I'd find that sealant... Only to.. Oh well.
I had to take the pump out. No way I could clean out that damn stuff out of the hole w/o getting it all inside.
Slowly and steadily, with the hole pointed down, I scraped and scraped and scraped it with my dental pick, followed with a brush wetted in Goof Off that kinda softens it. It was.. hours. For two holes.
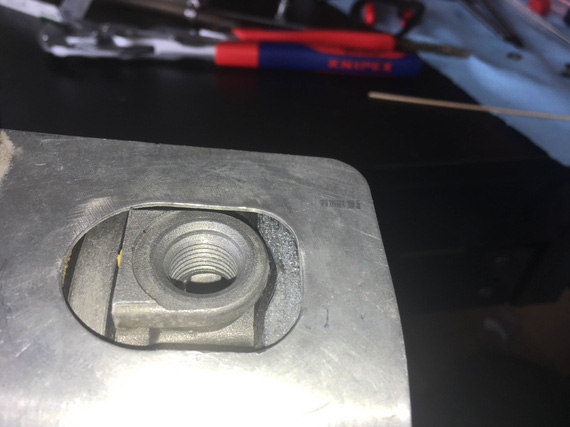
Clean.
Phew. The pump went back on, and finally, I could clock the fittings how I wanted them.
I used a few old hoses I had lying around, and chunks of safety wire to mock up my new ones; measured the mockups, and made a bunch of pictures like this:
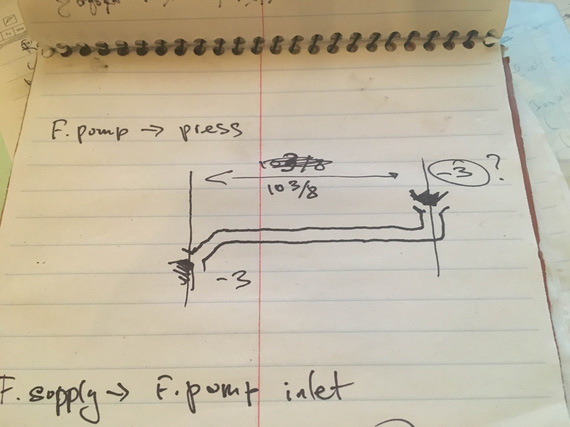
A drawing of a hose
Next morning, I called TS.
Tom, the owner, is the guy who answers the phone. A quick email with pictures, a quick conversation about various hose ends (we ended up doing a few -3's instead of -2's as I had before), etc etc - and the order was in.
And, a few days later, a box showed up at my door!
Next time at the hangar, I tried them on. The hoses were perfect! But, something I haven't considered before...
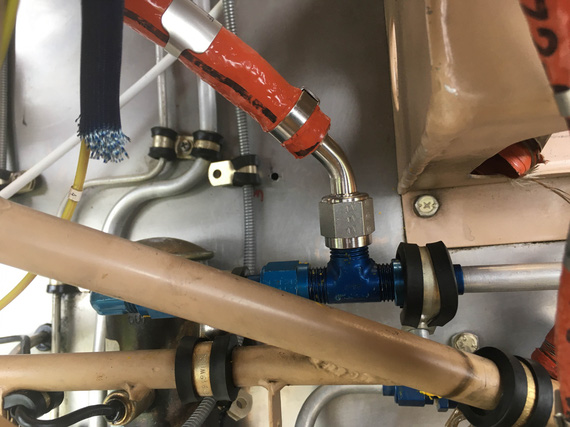
Tee to engine pump
There's a tee. Right side is connected to the gascolator. Left side - to the electrical pump. Both horizontal sides of the tee are connected with aluminum tubing. Notice the adel on the right holding onto the flare nut. The adel on the left, barely visible, is holding onto the tube - motor mount geometry isn't allowing it to grab onto the nut.
And the whole thing is aluminum, and the hose is creating a ton of leverage onto that tee.
It's not the problem with my hose. I should've realized this before I even ventured there. The old hose had the same problem, of course.
Aluminum has fatigue life. The motor shakes. The whole thing shakes, connected by the hose. How that tee didn't crack is... anyone's guess. On top of that, how the tube didn't crack is even more miraculous.
I showed it to Deene Ogden - one of our Chapter's very experienced guys. He agreed with my hunch. His suggested fix was to attempt to tie that hose end somehow into the firewall, so that it doesn't create that much leverage.
Well, easier said than done. Firewall on this thing is .035 - and not rigid at all.
I showed it to Tom (the TS Flightlines guy). He thought that even the fact that there's aluminum tubing between firewall and engine mount is a bad thing - though there the relative motion is small, it still might crack a tube or a flare.
Top that with my general dislike towards the non-firesleeved sections of aluminum tubing firewall forward (I admit, I actually attempted to figure out a nice way to sleeve them), and incorrectly plumbed fuel transducer (it was on the "suction" side - before all the pumps - and it is a restriction - and a restriction on a sucking side is a potential for vapor lock) - and I, in my usual manner, decided to, of course, rebuild the whole thing.
Disassembly
Well, that was easy - except for my favorite white crap everywhere. All the fittings were aluminum, and most of the fittings weren't AN.
Now, similar to a conversation of which sealant to use on NPT threads (you can start a fight amongst best friends by bringing it up!), there's a massive holy war on aluminum vs. steel FWF. I am in the steel camp.
And there's another, smaller holy war, about using "racing" fittings. Folks that do say "if it's good for NASCAR, it's good enough for us". I don't know. I don't buy that. First of, those fittings are of extremely varying quality (AN level all the way down to cheap Chinesium). Second, race cars are rebuilt all the time - and in an airplane, I bet some of those are 40 years old. Or 20. You get the idea.
So I am firmly in the "AN, steel" camp. Even though they are $20 a pop.
Transducer was the hardest to clean out, because I needed to make sure none of that white crud went into it. My friend and hangar neighbor Dick G. suggested running a tap with flutes filled with grease to pick up the crud... hmm... I didn't have the right size tap, and that sounded a bit too extreme.. but the idea..
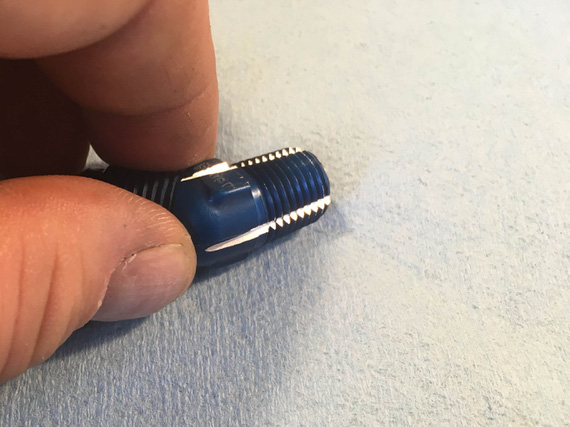
The Schmoo Cleaner
I filed a few grooves into one of those fittings I took out.
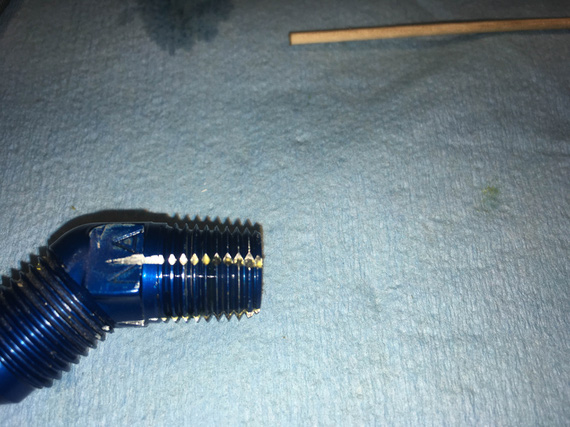
It works!
It worked! See it picked up some grey stuff? Of course, I used it for final scrubbing after fishing out most of the crud with my dental pick.
Thankless work.
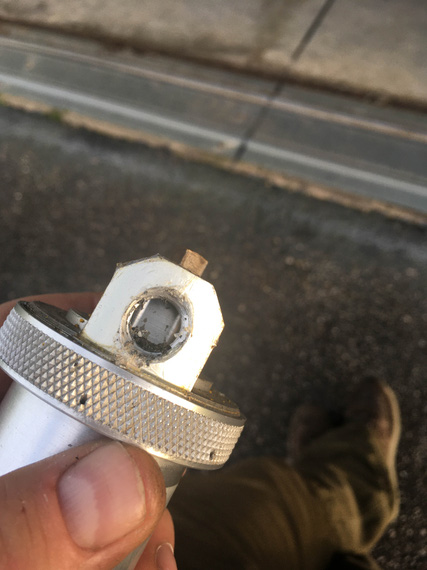
Gasolator
So. Much. Of. It. On the gascolator, I didn't care about it falling inside - I could flush it.
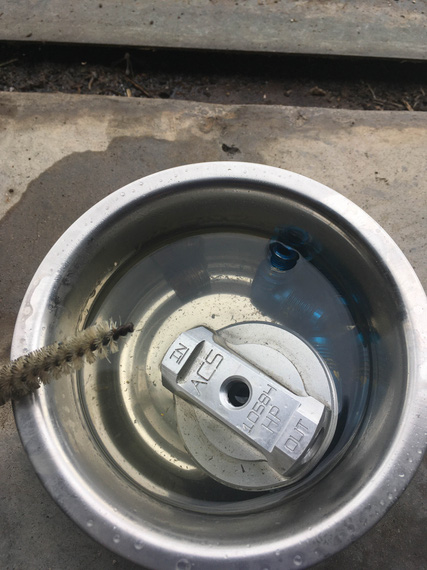
Cleaning the gascolator
Absolutely thankless work.
The Plan, and the Mockups
So since we're redoing the whole thing; first thing I was gonna do is dump the parallel plumbing of the pumps. I guess, Remo's idea was that in case the electric pump fails in a mode where it blocks the flow of fuel thru it, the gas will still be able to go thru the "alternative" branch and still reach the mechanical pump.
Not sure about that. I am very used to Grummans, which are plumbed in series (electrical -> engine pump -> carb), and I have not heard of a single failure there. I have heard of this type failure on an RV, which used a solid state Facet pump that Facet tells you not to use on airplanes.
Okay, actually, this whole Facet pump situation is interesting, apparently. Bendix used to make these electrical pumps, but then Facet bought that part of their business. Nowadays, they explicitly tell you not to use their pumps on airplanes!
But, Dave Fletcher of Fletchair fame buys batches of particular Facet models, and runs tests on them. He sells off the ones that don't pass (apparently, flow rates vary wildly), and tags the ones that pass. He then sells them to Grumman folk.
Hey, good enough for Grumman - good enough for me! I can have my much simpler series system (less hoses, less connections, less fittings, less space), and trust the pump. And they're cheap! (Well, relatively speaking).
So, I got a pump from Fletch and bolted it on.
Transducer was the next big ticket item. It had to go between the engine driven pump, and the carb - the "last step" in the chain.
I needed something to mock things up. I needed hose ends.
... now, what's with those racing hose ends?
I called Mario - a great guy who fixes my cars when I don't want to :). His thing is drag racing.
He knew a place.
Couple hours later, and with a lighter wallet, I had a bag of fittings that were close enough in size, and a chunk of hose to cut up.
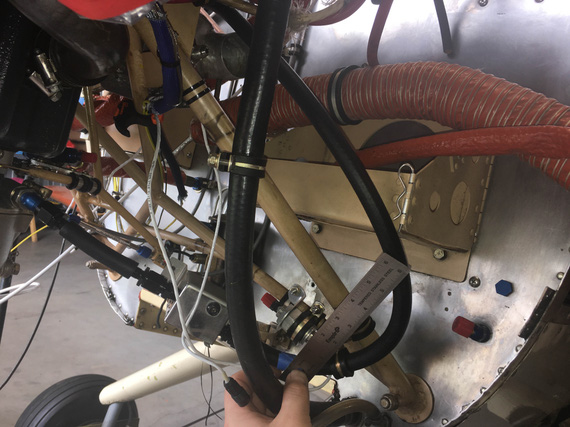
One of the first x-cer mockups
This was the first. Followed what Fletcher did on the Cheetah back when we installed the CGR-30, but on the Cheetah the hose went back towards the firewall and did a nice 180 u-turn, and came back to the carb. Here, I had to go "sideways" to do this "hanging" style if I wanted it. It produced a weird low spot in the loop that I didn't like.
Next!
Could I maybe still have the x-cer on the firewall, and reuse some of the holes?
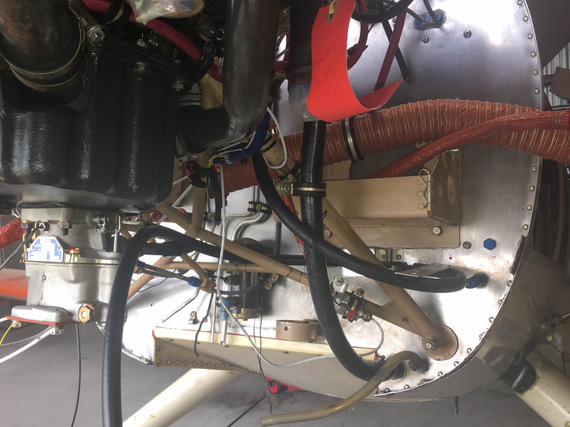
Second mockup
Much better I thought. I ran those by Tom of TS Flightlines. He thought the second setup was better, and recommended using one of his fancy "u-turn" fittings to save on the hose length. He gave me dimensions. I realized that I suck at mocking things up, and asked him if he would be able to send me the fitting (I would gladly pay for it). He said, of course. He could send me whatever fittings I wanted, and just figure the cost in the end. I'd make mockups and send them to him. Heck, he'd send me the hose too - and I'd cut it to size, and make the hoses - then send them back to him, and he'll crimp and firesleeve them.
Wow.
And he was a treasure trove of information. Basically, hand-held me all the way. And I took it, and am very grateful. This was my first plumbing job - so I needed the help.
One big fear I had was running bent fittings before and after the transducer, because they can induce turbulence in the flow. Tom said that they ran them in whichever configuration, and they work fine with the setup he was suggesting. That was a great relief too.
So, I made my "shopping" list, and he put the fittings in the mail.
I got them, and ran over to the nearby auto parts place to get some hose for the mockup (I decided not to fiddle with cutting braided teflon hose). The guy took me back, we found the right I.D. stuff. I asked for ten feet. "This is fuel hose, it's expensive", said the guy. I asked how much. "Two-something a foot", was the response.
I almost cracked up. I then told him that the fitting I brought in to check, that one fitting, was probably twice as much as 10 feet of that hose. We then had a very nice conversation about everything airplanes :).
My final mockup, with fittings from Tom, looked like this:
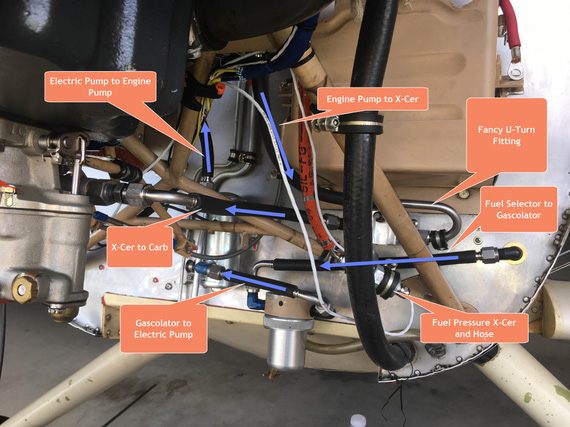
The Final Mockup
The gascolator hookup looks funny, doesn't it? It's "reversed" - because otherwise, I had no room for hoses at all.
And then, the mock hoses were sent back to Tom for final fabrication.
The Gascolator
Somewhere in between all the mocking up and messing around, I had to figure out what to do with the gascolator. See, it had no mount. None.
It was basically "hanging" on the fittings coming into each side, and rigid aluminum tubing. Yeah. Ugh. But that's besides the point - with flexible hoses, it'll be bouncing in that "ring holder" that isn't holding it at all, apparently.
I'll admit, buying a new gascolator with mounting options crossed my mind. But then.. I thought, maybe some kind of latch..
Something that will hook to the bottom of the ring on the gascolator, and the top of that "bracket" and pull it up.
I search McMaster and other catalogues and couldn't find anything... An idea crossed my mind.. maybe..
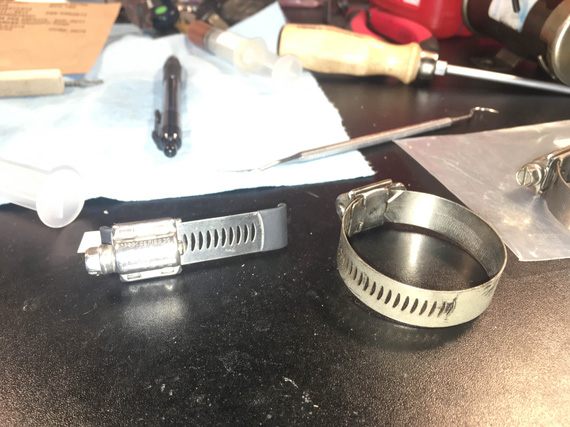
Worm Latch!
That's a worm clamp I cut up, straightened, and bent a couple of hook ends in.
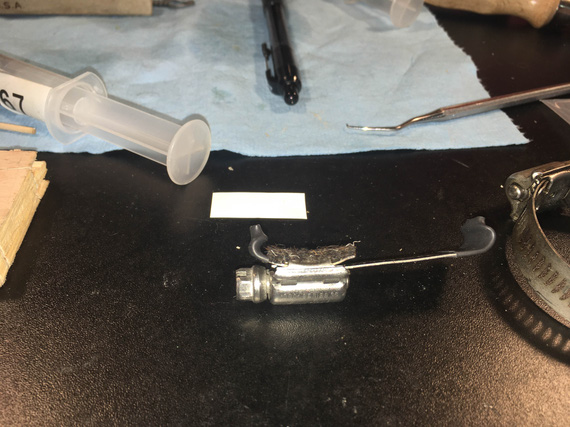
Side view
The felt prevents the worm mechanism housing from scratching the gascolator, and the heatshrink makes the hooks non-marring.
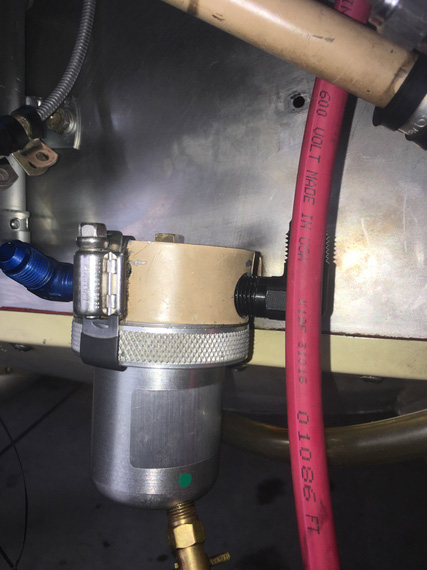
Installed!
It worked! I made two more - planning to have them at 120 degrees to each other around the gascolator.
The diameter of the gascolator's top was a smidge undersized for the ring it was in - Glenn had some kind of a sticky foam in there. I replaced it with proper, aircraft grade felt :).
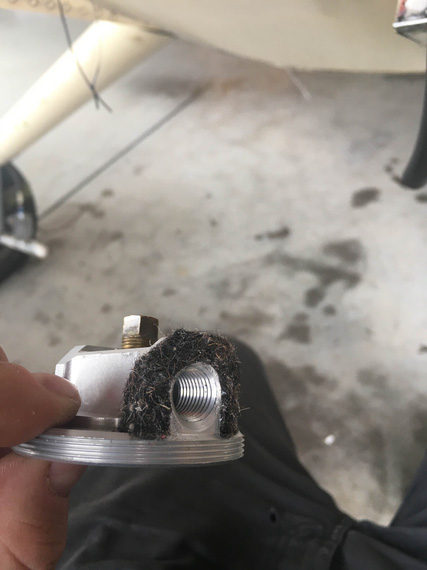
Felt pad
And then, the drain.
The quickdrain on that bowl was leaking. I found that a looong time ago, and attempted to replace it. Obviously, I had to take the old one out....
... only to discover that the threads on the bowl were all chewed up.
No problem, thought I, and ordered a new bowl from Spruce.
The threads on that one.. looked even worse.
I contacted Spruce. No problem! They sent me a new one.....
... slightly better, but still chewed up!
Here's one of the pictures I sent to Spruce back then, just for illustration.
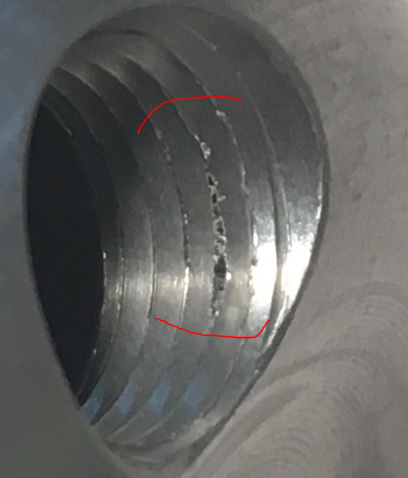
Bad threads
They said, they will talk to the manufacturer, and have them direct ship one to me. Then, they got silent for a long time, and then I somehow ended up with two? I think? All with bad threads.
All and all, I ended up with five bowls. That happened almost a year ago, and frankly, I don't exactly remember how exactly the fifth happend, but I ended up with five. And Spruce didn't want them back. And they refunded me the money.
But that was then. This was now. Now, I had a tap just the right size, and was set up in the hangar.
This is a 1/8" NPT thread - so tapping it just a hair further would re-cut the bad parts and remove a bit more material, fixing the threads.
So I took one of the bowls, re-tapped the hole, and started putting in the quickdrain. Ha! Not so easy. There's nothing on the bowl to grab onto, and I had to tighten the quick drain pretty tight (1 1/2 to 2 turns past hand tight).
I kinda tried to use my vise to help me - holding onto the round thing isn't easy but I tried, using my hand too... Clack! The wrench slipped, and the bowl went bouncing on the floor.
A bit of damage surveillance showed a nick on the lip where it contacts the rubber seal on the gascolator top, and my better part decided that I need to be punished and re-do it. Heck, I had FIVE bowls!
So, I tapped the second one. The quick drain went in. It was annoying, but I managed. 1 1/2 turns.
Hmm.. Why does it look so weird... and not work? Hmm.... Did the torque and compressing the hollow quickdrain with "wedge" action of NPT thread mess it up? Evidently.
But I turned it 1 1/2 turns!!
Idiot me, of course. The 1 1/2 turns is probably too much to begin with (though Vans recommends it in their manual). And besides, they talk about AN plumbing fittings. Not special fittings like this quick drain.
I googled "Curtiss Quick Drain Torque"... Sure enough. Tiny. 40 inch pounds if I remember correctly. Way to be an idiot, dude.
But I have three more bowls to mess up!
Okay, bowl number three.... tap... attempt to hold... slip.. fall... DING! Damn.
This is stupid, I know. I had to stop and figure out a fixture to hold the bowl while torquing the fitting after the first one slipped out of the vice (try holding a round object in a vice w/o a fixture?! Idiot). This was the ... "try to get away with it" mode.
Enough. See, I was in such a weird state of mind I didn't take any pictures?
And the solution was simple and right there, of course.
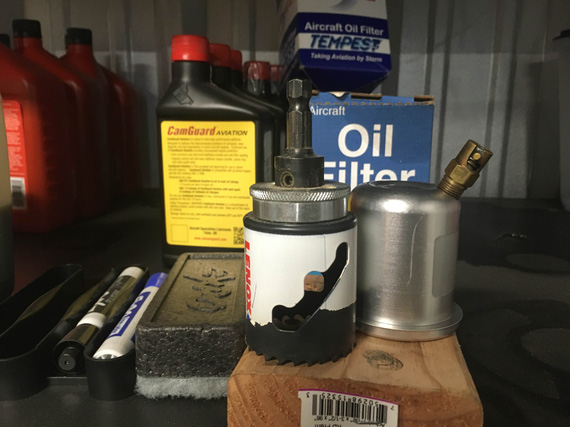
The solution
A 2x4 and a hole saw.
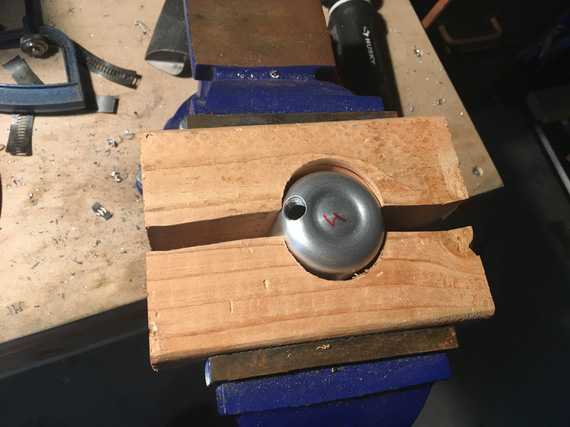
Holding!
See? Not even pretty. Not even the right diameter. But it worked, of course.
So, yeah...
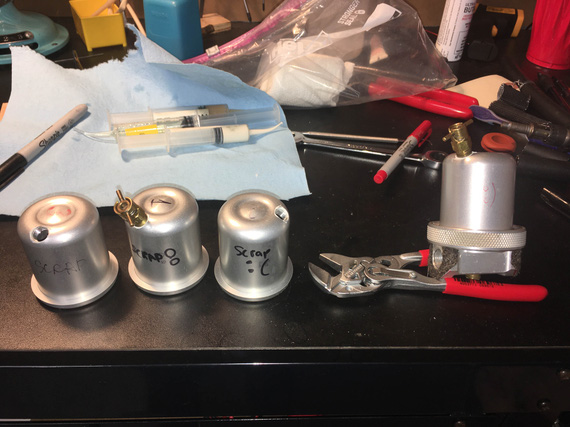
Ugh...
BTW, see that quickdrain all bent out on the second from the left bowl (numbered 1)? That's the overtorqued one.
But hey! I got a pile of bowls to talk about on my bench now. "How not to be an idiot and what happens when you are".
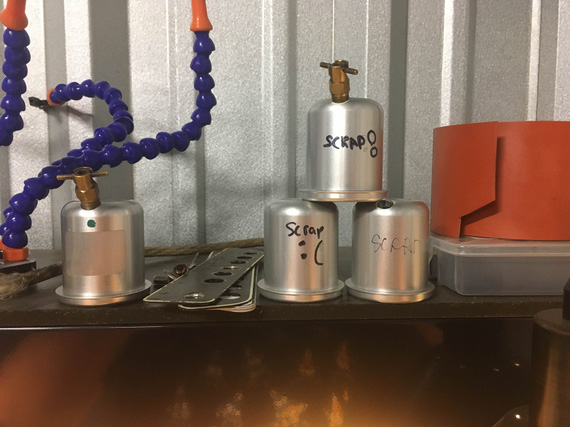
The Pile of Shame
The Hookups
Well, the rest of this was fairly uneventful.
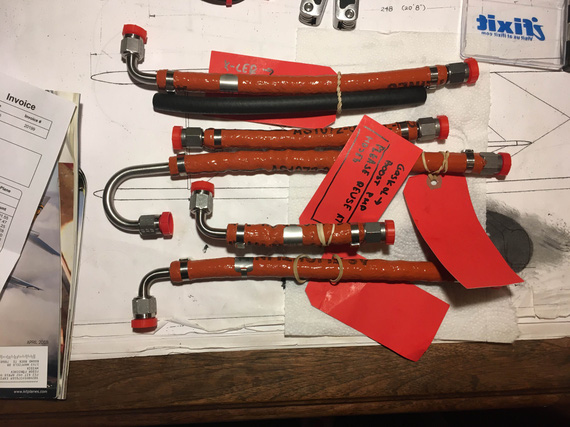
Hoses!
The hoses showed up, and I already had the fittings arrived earlier from Spruce.
I messed with the transducer a ton. That was another hard part to hold - and I'll admit to bending it's outside box (that's non-sequitir but annoying). This transducer is weird - it has it's body and it's brains all in a very thin sheet stainless "box", making it virtually impossible to hold onto and screw the fitting in. But the bend in that body doesn't affect anything - it's like a "cover".
I'll admit to thinking I overtorqued the transducer fittings, too - and removing them to check for cracks (only to find that no, I actually didn't overtorque them - the manufacturer's spec was higher).
But in the end, it all worked out for the initial hookup. I'll have to tighten everything and clean up the angles on the fittings a bit when getting closer to the engine start; but the initial fit up worked great. Tom did a great job!
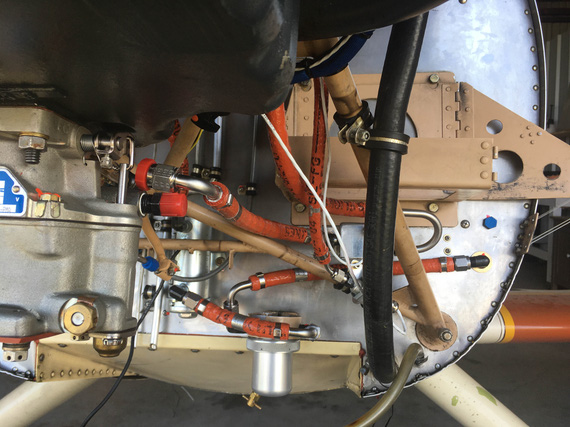
New hoses
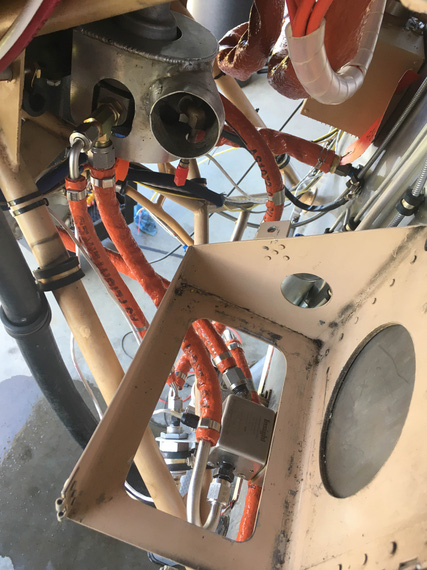
New hoses
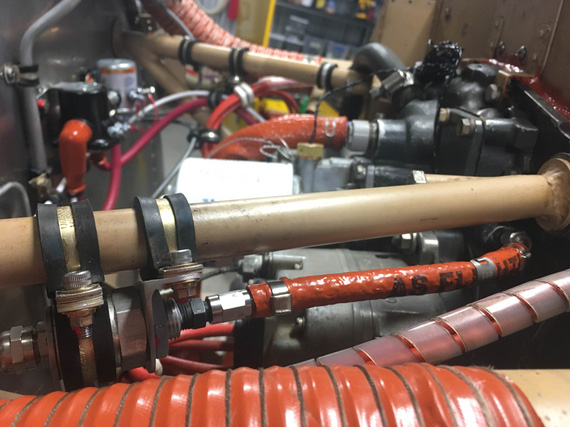
Oil perssure transducer hose
Hovering is for pilots who love to fly but have no place to go.
Up ↑
Brackets for Transducers
fun litte project
| On: | Feb 23, 2020 |
| In: | [Chickenhouse Charger] Electrical Rebuild |
| Time logged: | 5.1 |
| Tags: | 6781G, MA5 Charger, fabrication |
Pressure transducers. Those little doodads that take liquid pressure and transform it into electrical pixies on the wire...
The ones I got are from UMA. I'm replacing the mechanical engine gauge with electric - same 3-in-1 (oil temp, pressure, fuel pressure); but the fluids stay under the cowling. Pixies run in the wires to the gauge and rat those fluids out to it.
Ahem.
Well, this was always a part of the plan:
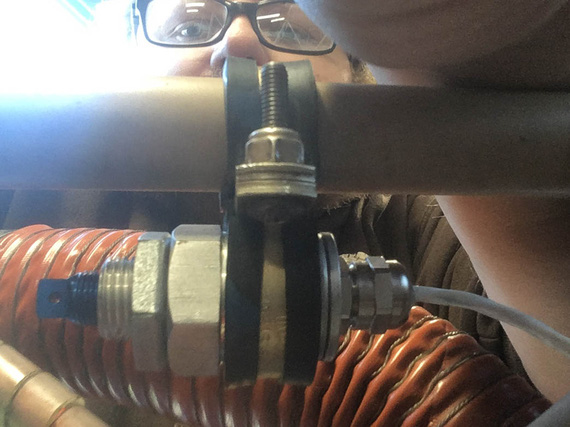
Pressure transducer on adels
but this never felt like sufficient. Only rubber (will harden up pronto) and screw torque (well, not too shabby, but still) prevent it from rotating. Plus, a single point of failure - and I am probably over too sensitive to a probability of dangling fluid hoses with transducers at the end under the cowling in flight.
No sir, we can do better!
Long time ago, I have installed a CGR-30 onto my Cheetah, and back then I mounted the transducers on two adels - but those were different style transducers, much longer than the ones UMA makes.
But they have that threaded "neck" and a nut on it.. hmm... Let's see if we can make some kind of a bracket?
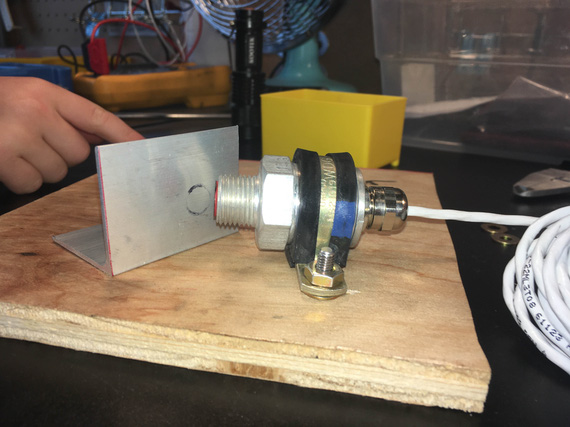
Marking the hole
Start with our good old friend aluminum angle. Now, the "tab" on the bracket will screw with another adel on the motor mount; that was the idea (so the bracket basically was replacing a second adel around the transducer that didn't fit). Therefore, the tab off of my bracket would have to be co-planar with the adel. It did not have to be super precise - I figured, 1/32" of mistake was fine.
A bit of black sharpie transferred the imprint quite nicely.
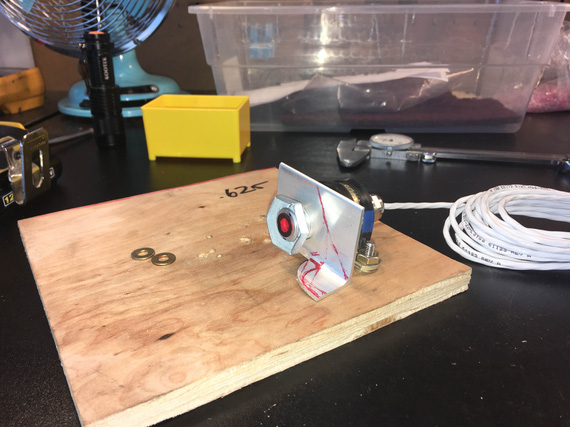
The bracket taking shape
And then, bandsaw and sander. Had to break out my good files to clean up the "fillet" that remained after cutting off one side of the angle under the nut (otherwise, the nut won't fit).
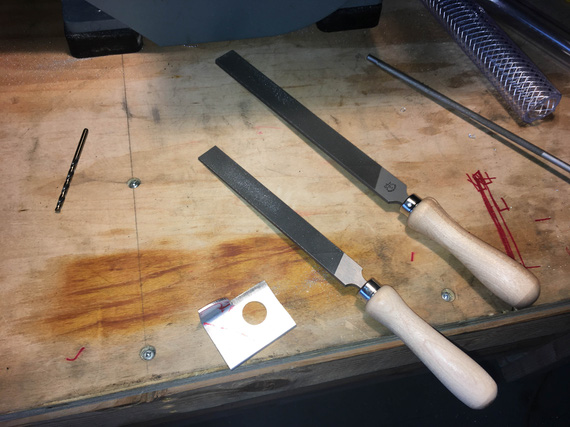
Pferd and Grobet, the two buddies at work
OKay, now, let's add a bit more fanciness to it. Using the nut to draw out circumference and to make sure to stay well clear for now
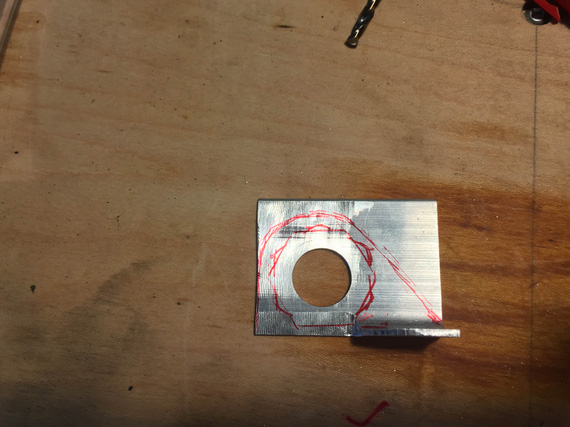
Now, make it "flow"
This above picture also shows the filed area real well - bottom left.
Finally, need to drill the hole for the adjoining adel in the horizontal portion - that one needs to be somewhat precise too, if the transducer is to sit straight. So, we'll test mount it on one adel, and mark out the second hole using the second adel.
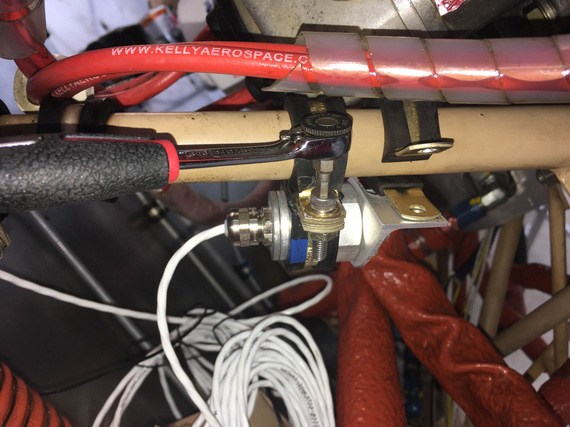
Marking hole location
Okay, drill it, and then clean up, deburr, round over all the corners, yada yada - the usual drill.
Tadaa!
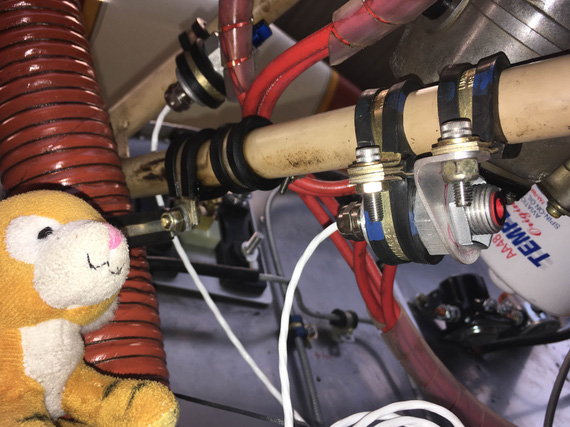
Jack likes the bracket very much.
But we have another transducer. That one's bracket will have to be "mirror image" of the first one.
I used the first bracket to kinda "estimate" the second.
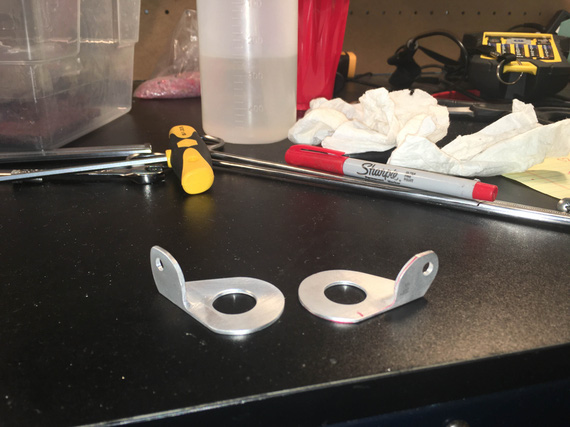
Now, both brackets.
Are they the same? Hell no. But I wasn't trying to make them the same. Just close enough to do the job.
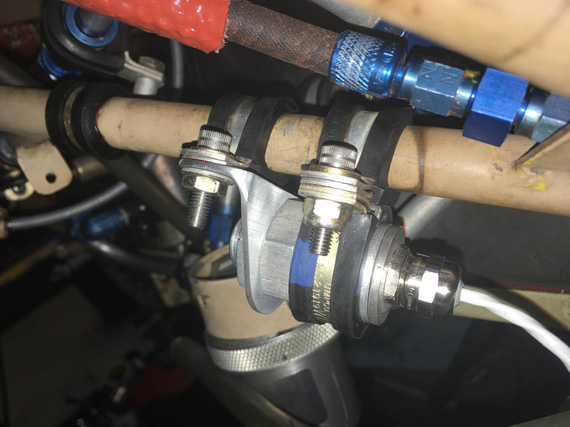
Second, fuel pressure, transducer
Fun little Sunday project, and I broke in the new fancy files :).
A kill is a kill.
Up ↑
Carb Controls
...finished!
| On: | Feb 21, 2020 |
| In: | [Chickenhouse Charger] Electrical Rebuild |
| Time logged: | 15.95 |
| Tags: | 6781G, MA5 Charger, carb, throttle, mixture, cables, controls, engine, fwf |
Quite a while back I have measured the control cables and ordered them.
They took a long time to show up, and then I was working on this amongst other things. Just finished now :).
So, right to it, shall we?
First things first was to get thru the firewall. I had these fancy penetration trims for cables called 'CableSafe' from Spruce
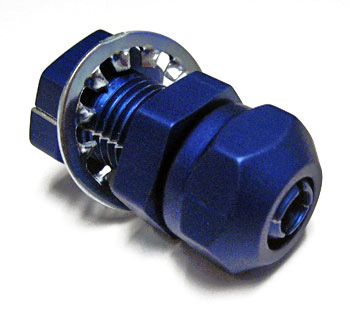
Cable Safe
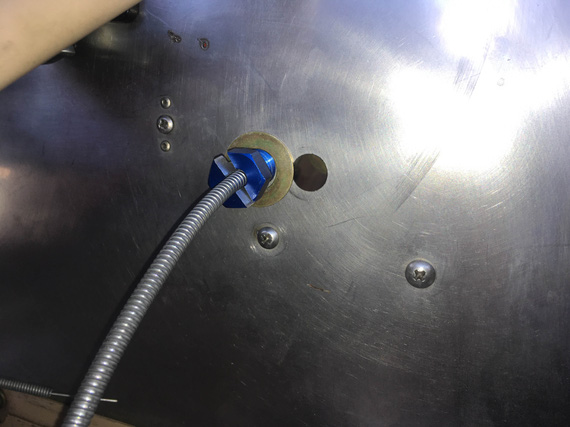
Throttle cable with it
Hmm... problem one. Washers clearly won't fit given the old holes in the firewall (Remo had grommets there, but I wanted something a bit more substantial).
No worries - we'll make me a special washer!
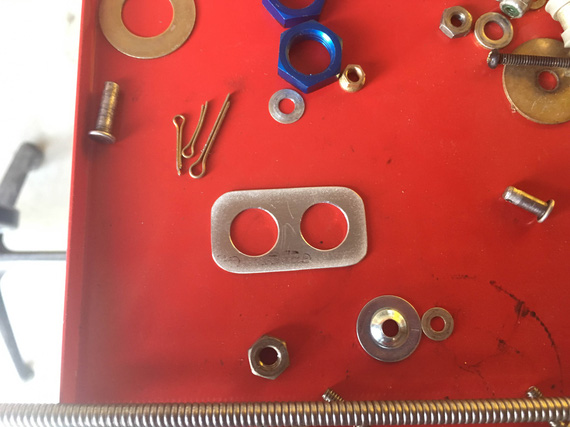
Special washer
Here's how this looks from the "airplane" side (ie, opposite the motor side of the firewall).
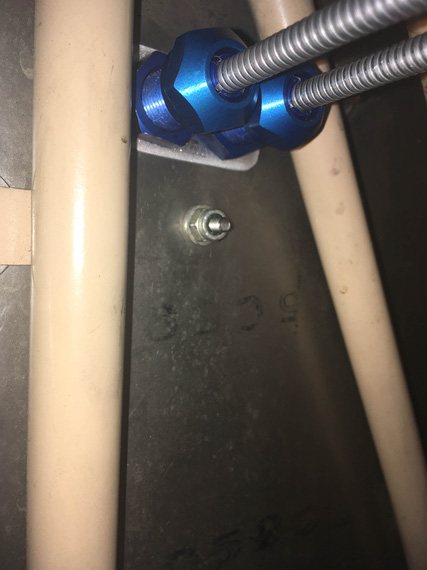
Cabin side of the firewall
And then, came fiddling. Most of it was done before ordering the cables, but I still wanted to check and re-check everything.
Hooked the clevis ends to the control cables, and the cables to the carb to verify everything.
When measuring, I figured I'd need a rod end for the mixture arm due to misalignment of the cable rod and the control arm. And the damn bushing, too - because the hole in the carb is 1/4", and the bolt is #10. I got some bushing stock from McMaster, but it was too long - had to shorten it with some creative sanding.
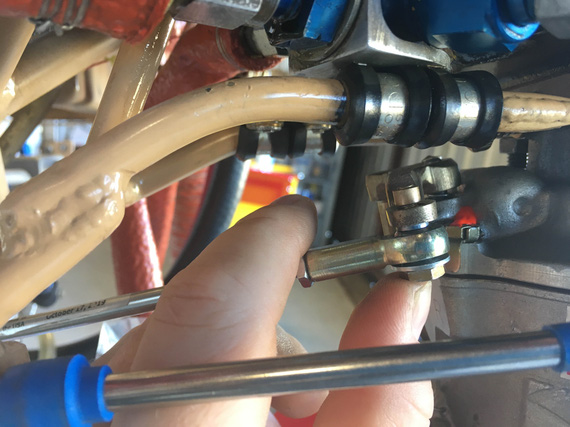
Mixture rod end hardware stack
Fun hardware stack, isn't it?
Bolt -> Large Washer -> Rod End -> Shim -> Bushing (inside control arm) -> Washer -> Shear Nut + Pin
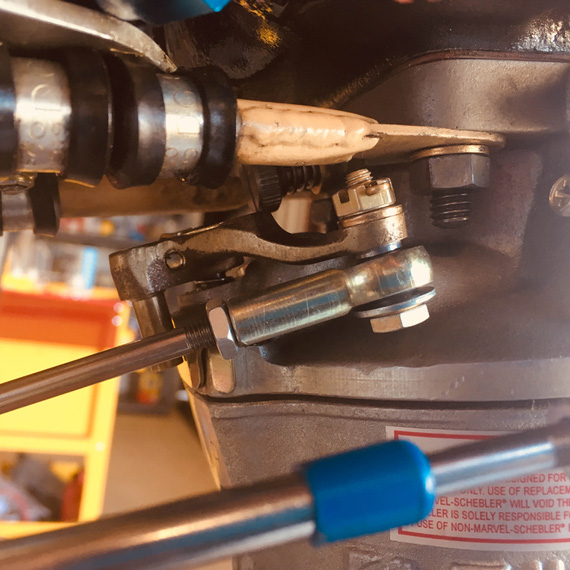
Bolted together
Throttle's clevis looks way more dull.
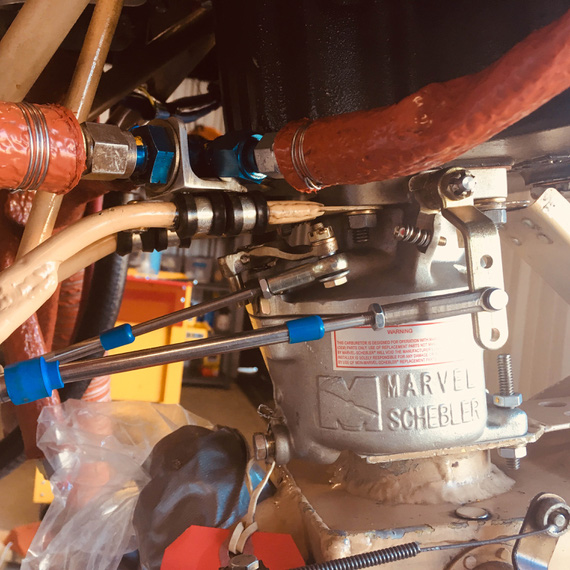
Throttle arm
Then, the airbox went on and I noticed something.
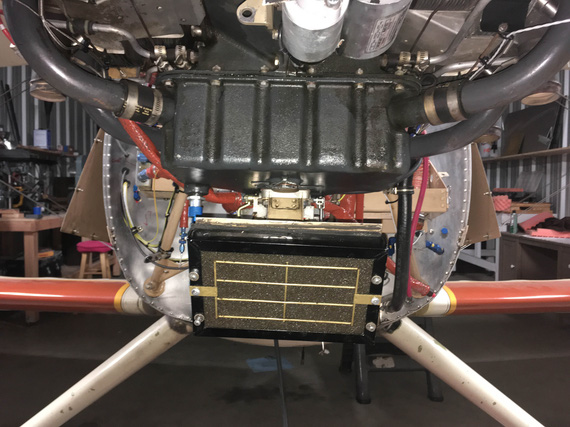
Airbox - do you see it?
See how it's tilted to the right (clockwise)?
I spent quite a bit of time there trying to figure out what's wrong. I put the cowling back on!!
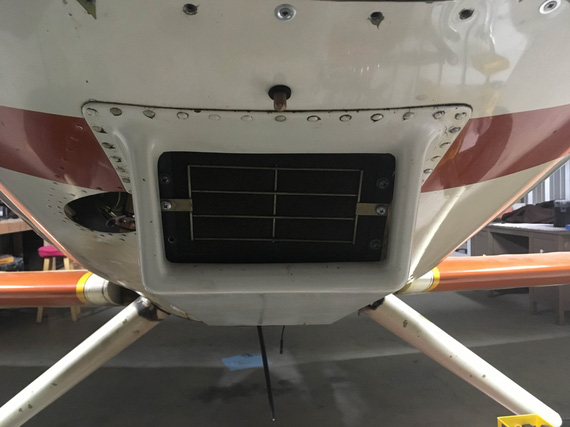
With cowling
Still crooked.
I kept thinking and thinking. It's motor -> oil sump -> carb -> airbox -> filter. That's how everything's bolted together. The first three are not "home buit", so I didn't think they were off. So it must've been the airbox and / or the filter mount.
Upon closer examination, I realized that the airbox was welded together way off, and is crooked itself. And the filter is mounted even more crooked in the same clockwise direction.
To confirm, searched all the pics I could find online of the plane prior to my having it (and disassembling the front).
It was hard to tell, but.. I think it was like this from the very beginning.
Phew.
--
Meanwhile, we had a night of a kind of weather when it rains without actually raining - you know, as if you are in a cloud with large droplets. Everything in the hangar got soaked, obviously. Including my clevis ends.
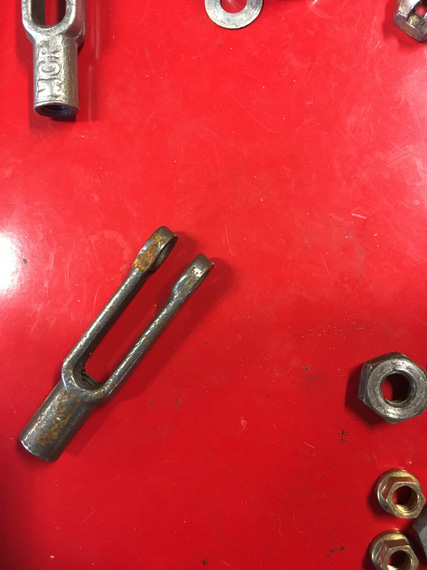
Rust on a new rod end?!
Aren't they supposed to be cad plated? Oh; and that was the first time I really noticed how cad plating sacrifices itself to prevent rust on steel - a lot of my hardware was covered in little white stains, which were cadmium having corroded and saved steel.
At any rate, I double checked the order paperwork. "Cad plated". Hmmmm. They definitely were not.
Called Spruce. She checked and doublechecked - and confirmed that indeed, their vendor stopped doing cad plated clevis forks specifically in that dimension - #10 end, #10 rod. They refunded my money, and let me keep the forks.
Called SkyGeek, asking about the clevis forks they sell. The lady goes, "yep, plated". I ask her to triple-confirm.
She takes about 10 minutes, and gets back to me - nope, not plated. She's sorry. No longer made.
John F., a local IA, confirmed. Only plain steel now, seems that cad plated forks are unobtanium. Crap! Oh well, I guess, paying attention and making sure to put oil or something similar on them from time to time is in my future.
--
Glenn had a carb temp probe in the Rotec TBI I am replacing, and I decided to try to keep it. Wire was cut way too short for how everything's on the carb (vs. the TBI), so I spent a bit of time pondering if:
- The probe was a thermistor, or a thermocouple
- If latter, could I successfully extend it
Pouring thru (mostly AeroLectric Bob Nuckoll's) notes on thermocouples, realized that some are magnetic. Let's see.. score! Magnetic indeed.
Got some multi-strand thermocouple wire of the same kind (red/yellow - I forget which metals those are :) ), and did some "back-bench" testing.
- Hook up the probe direct to the gauge
- Pour solvent onto the probe tip, watch for rate of temp change and lowest point
- Extend the wire now, do the pour again
- Subjectively decide if the indications were "roughly matching"
They seemed to have been indeed matching, so I decided to attempt to keep the probe.
But, problem. It'd interfere with the airbox'es mounting bracket (and for some reason, I didn't take a picture of that :( ).
So first, let's cut a slot that will let that bracket clear the wire.
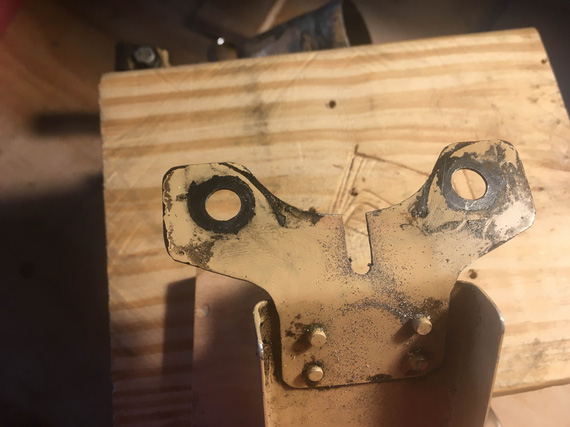
Slot
A bit of drilling, a bit of hacksawing, and a bit of filing.
Then,
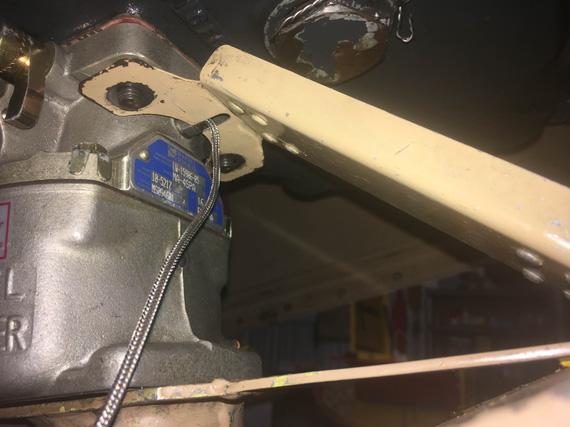
Trial fit
Nope, still not good. The carb temp probe there is the little thing that looks like a bolt with a wire sticking out of it - and it's hex was interfering a bit. But we cleared the wire now.
So, a touch more cutting was in order.
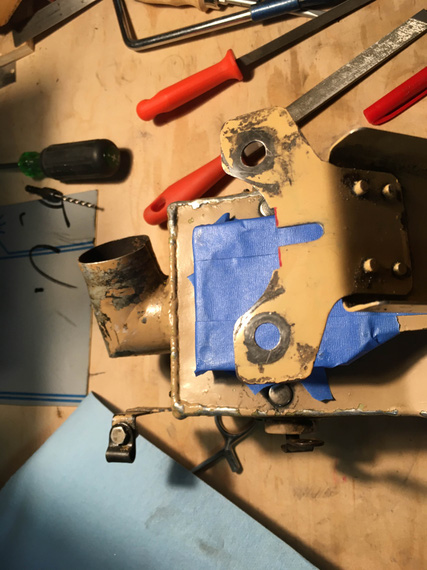
A touch more cutting
... and it fit.
---
Since I was messing with the airbox, needed to finish one last thing on it.
Carb heat bowden bracket
That bracket holds the carb heat bowden cable. Notice something weird? Yep, castellated shear nuts and pins. And, no, they weren't tight either, so the whole bracket business was wobbling around.
I spent quite some time pondering why would it be set up like that. Castellated, pin, not tight, wobble - all of that adds up to "he wanted that bracket to move around". It adds up really well too! The setup makes total sense if he wanted to have this arm move around - but there is absolutely no reason for it to do that! In fact, it's not good at all - steel bracket with steel bolts moving around holes drilled thru aluminum airbox - that would elongate and tear up those holes!
I decided that no. It should not move around, in fact. So,
Hardware replaced
--
And then, the final hookups of everything after a long break. Routed the cables, and hooked them up with adel clamps where necessary (doing that conforms them to their final shape, which causes some changes in positions of the cable and controls and the range of motion).
Then, fine-tuned positioning of the controls, and tightened the pivot bolt on the bellcranks. Clevis pins might still need to come out - and that's why cotter pins aren't bent yet - just in case I'll need to unhook them again.
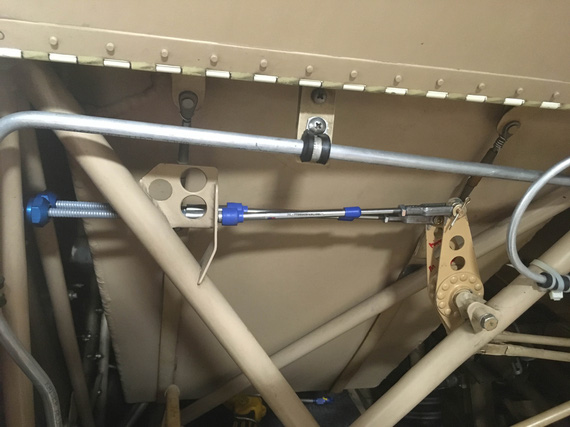
Bellcranks all done
Then, the penetrations.
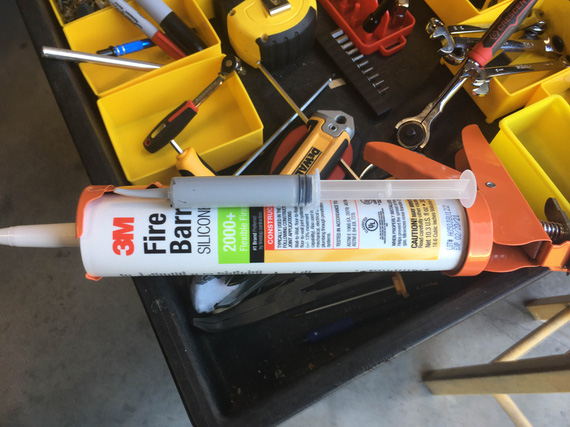
Fancy caulk!
Who said caulk guns have no place in aviation?
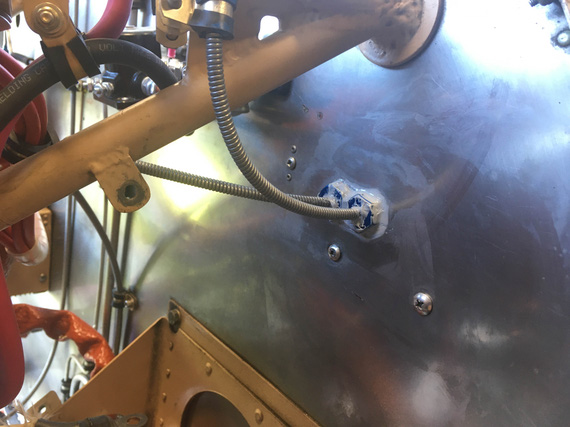
Sealed the big gaps
I wanted to stuff all the gaps with as much of this stuff as I could. I'll probably come back later with much more of the FireBarrier to put a good layer of it around this and other firewall penetrations.
And then, and then... Oh yeah! I could torque the throttle arm nut, and pin that in place!
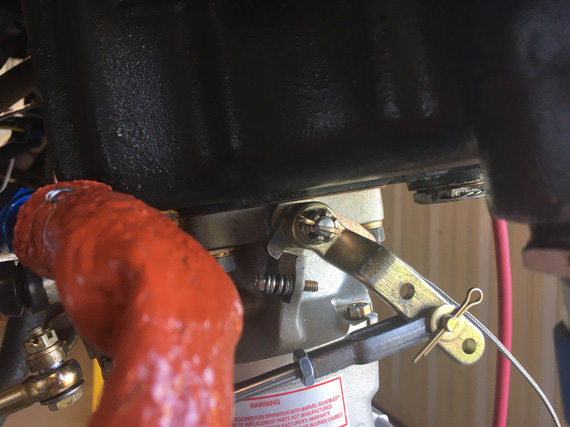
Throttle arm nut pinned
And finally, add more light machine oil to the carb bowl, so that all the rubber stuff won't dry out - all that moving of throttle back and forth pumped most of it out by now via the accelerator pump, I bet.
"Approach, what's our sequence?"
"Calling for the sequence I missed your callsign, but if I find out what it is, you're last."
-ORD ATC
Up ↑
Exhaust...
...full circle
| On: | Feb 17, 2020 |
| In: | [Chickenhouse Charger] Electrical Rebuild |
| Time logged: | 17.25 |
| Tags: | 6781G, MA5 Charger, exhaust |
So finally, The Thing That Took Since November and That is Finally Done. Done?
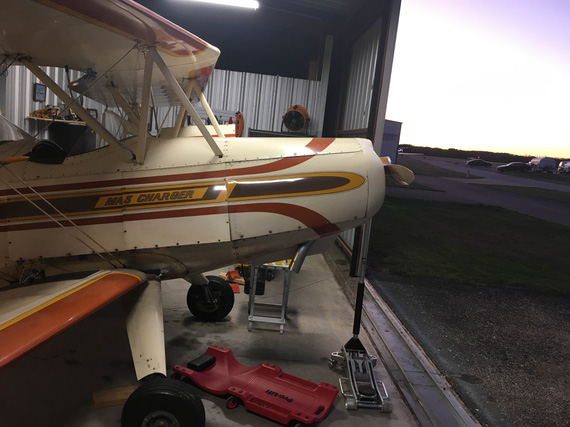
Tadaa!
Wait, what? The cowling's back on? Am I.. am I.. done?
Ha!
Nowhere near.
You see, one of the things I wanted to fix prior to putting the plane back in the air was this.
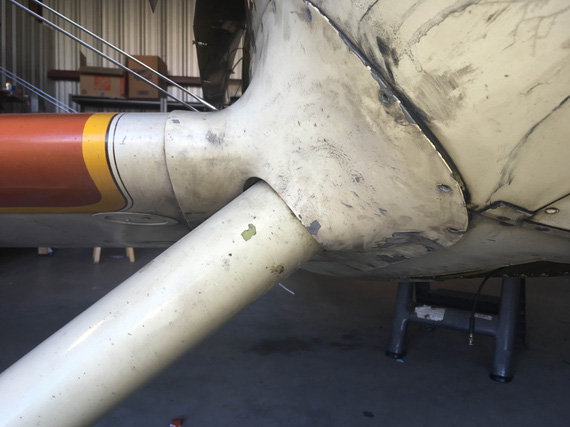
Wing root fairing
You're looking at the bottom right wing root fairing, all oily and burnt up, with paint flaking. It is bad. Really bad.
Why?
Because it is bathed in the exhaust, and because Glenn added the smoke system on top of that.
Here's the best couple pictures I have to illustrate what's going on.
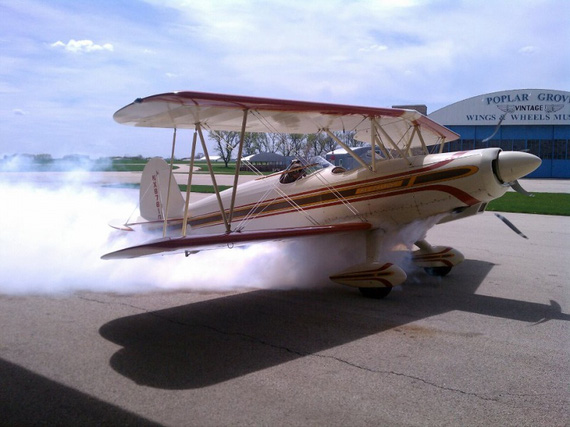
Glenn's "Smoke On" picture
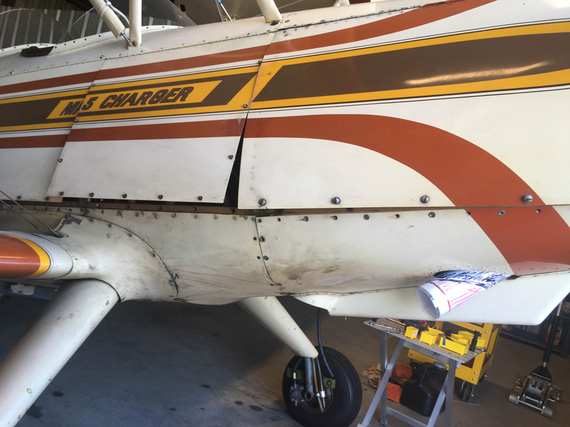
Old exhaust tailpipe
You can visualize what happens using the second picture. Black shading on the paper shows the original tailpipe. You can see how in the slipstream this will hit the wing root and the side, which is very much evidenced by the stains, oil streaks, and, well, burnt up paint on the fairing.
I wanted to fix this very, very, very much.
Research
As much as I am absolutely not afraid of electrical systems, I am very afraid of exhaust systems (and a few other things). I just don't know enough or have enough experience.
What turned up to be even worse was trying to find someone who does know what they're talking about. I poked around, and couldn't find anyone around or in our Chapter that knows this stuff well to be able to tell me "do this, and I got a TIG machine in the corner to weld up whatever you need".
So, I did the second best thing I could.
A couple years back, I met a gentleman at Oshkosh at our Biplane Forum gathering, Mr. T., who wrote a series of articles on motors, including exhaust.
He agreed graciously to listen to me (well, "read", technically) rant, and maybe guide me a bit.
So, to the drawing board!
I had to put the system back on, and hang the cowling back on the airplane as well, so that I could check everything in place.
When I took the exhaust system off, I plugged the stubs coming off of cylinders with duct tape. Big mistake!
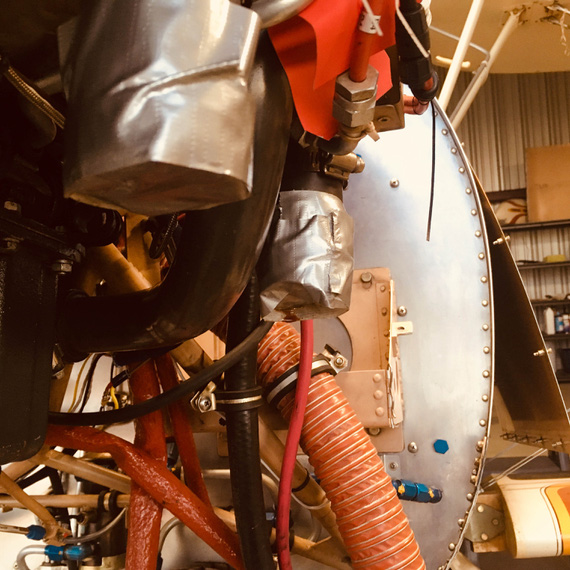
Duct tape on the stubs
Cleaning that crap off took GoofOff and about an hour.
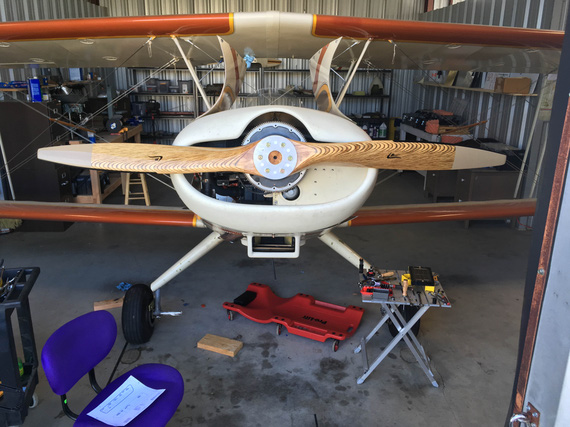
Old tailpipe
That's the head on picture of the old stub.
The first and the easiest possibility was, what would happen if I just extended it straight out?
Straight extension - head on
Straight extension - side view
I used a piece of paper to mock that up. Mind you, that'd be about a 10" extension! Lots of pipe, considering that the original tailpipe was maybe 16 inches long total.
It was obvious that doing this would move the exhaust outboard way more than moving it down. Why is this bad? Well, the bulk of it was hitting the aluminum side of the fuse and the plastic (okay, okay, fiberglass :) ) root fairing. Moved out this way, it would be hitting the fabric-covered leading edge. Somehow, that didn't sit well with me, and Mr. T. concurred.
So, I went on a scavenging run, and borrowed a nice piece of exhaust grade 3" SCAT from Mr. Dick G., my friendly neighbor, and attempted to mock something up with that.
Now that went way better!
Approx 45 degrees
That moved the exhaust point downward, and I realized that I could play with it even more by bringing it closer to the airbox via cutting progressively more off of the old tailpipe (at this point with SCAT I haven't yet cut anything, because I was just playing and wasn't committed).
That seemed like a way to go. So, next step was to mock this up with a real 45 degree bend.
I got the cheapest slip-on 45 degree mandrel bend from Summit.
At this point, I had to commit, because using this slip-on would require some cutting.
Some cutting
I was committed!
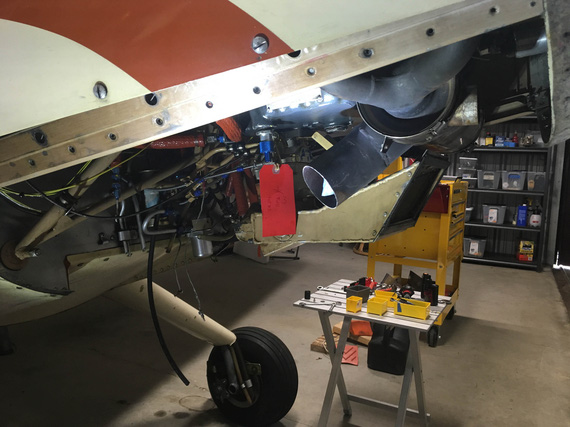
And some more cutting
And then, the fit with the bottom cowl on.
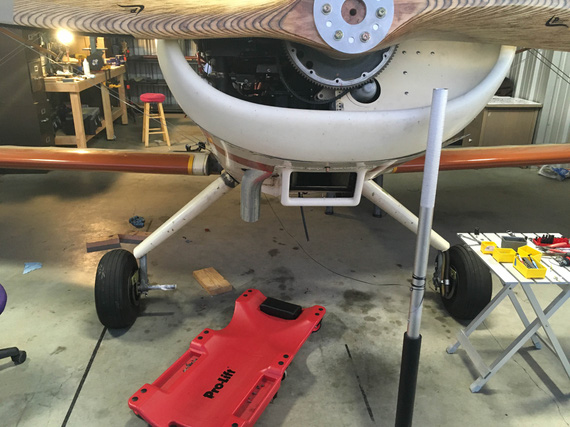
Front view
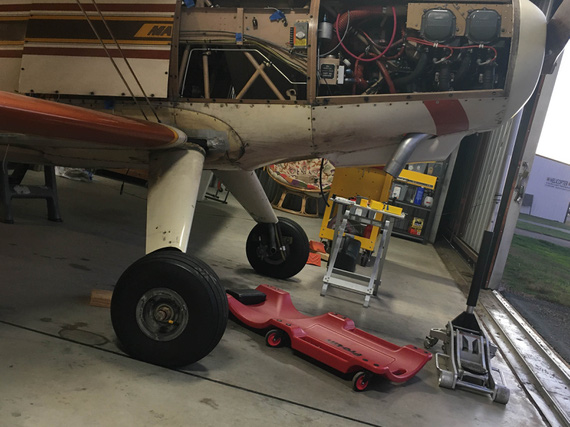
Side view
That looked just perfect! A total of about 8 inches of tube added overall, and the exhaust actually moved inboard, and way down into the slip stream.
All that was left to do was to buy the actual 45 degree bend I'd be using, and find a welder.
Unobtanium
I was looking around for welder who'd be willing and able while playing with the geometry. Asking around the airport didn't yield much.
Backup plan was Seth from Marioshop - the guy I take my cars to (his boss is a dragster, and Seth welded a lot of tube and exhaust - although, automotive, much thicker kind, with MIG).
I contacted folks from another EAA Chapter, the Waco 59, a great and dynamic EAA Chapter which I am also a member of, and scored - their very experienced Tech Counselor and metalworker Mike M. agreed to help me with the project. He welded himself, and also knew a gentleman that was "very artistic with his welds", as he put it.
I just had to get the material, jig it up to position it, and come over to weld everything up.
My tailpipe was 3 inches in diameter (jumping a bit ahead of myself, unusual for a motor of my size - too big). I measured .049 with my dial calipers, which translated into 18GA, and ordered the nicest shiny new bend from Summit. When it came, I realized...
It was the wrong thing.
Way thicker than what I had.
I think I mis-measured. Maybe I was asleep when I did it, maybe there was a lot of crud on the old pipe and I didn't pay attention, maybe .. but I needed 0.035 material. 20 gauge.
Quick Internet search - nothing.
More Internet searching - nothing.
I could buy all kinds of bends in smaller diameter tubing with 0.035 wall thickness. I could buy 3" tubing with 0.049 wall. I could not find 3" 45 degree bend in 0.035.
One company offered to sell me a straight piece. That was a good backup - we could've mitered and welded up the 45 degree bend in sections, but I wanted to see if I could find a bend. That same company offered to make me one - at a low price of about 600 bucks. Yikes!
Attempting to Hail Mary again, I posted on the Biplane Forum. Guys came back with a bunch of phone ##s of their contacts, and I started calling around!
Nope, nope, nope. I don't remember who it was, but one of the guys I called suggested contacting Custom Aircraft Parts.
A nice lady answered. "You gotta talk to Clint", she said, and transferred me.
Clint
Clint picked up. I asked if they could sell me the bend. Clint asked, "What are you trying to do"?
I explained.
He asked for pictures. A bit weirded out, I sent them over.
"I have two things I wanna tell you", said Clint.
"Buy yourself a bottle of soap and a nice rag".
"Be careful what you wish for".
Clit knew this 4-into-1 setup with a muffler in between very well. He told me that even with me trying to keep the extension as short as possible, I was running a risk of it cracking off at the muffler. Would it for sure? He didn't know. But the risk was increasing a lot.
I called my old friend and a Grumman aficionado Ben the same night. Grummans have this style mufflers (mine didn't by the way because it was sporting Powerflow - a very different system).
"Hey, do you recall welding cracked off tailpipes?"
"For sure".
Damn! Damn damn damn.
More mulling over ensued. I did not want to risk a tail pipe cracked off at the muffler. No way. That puts hot exhaust into a very tight cowling. On a biplane. With my having elevated fear of any in flight fire. Remember, I embarked on the electrical rebuild because I judged this airplane to be a flying fire hazard.
I talked with Ben more. I talked with Mike from Waco 59 more.
The attempted fix solidified.
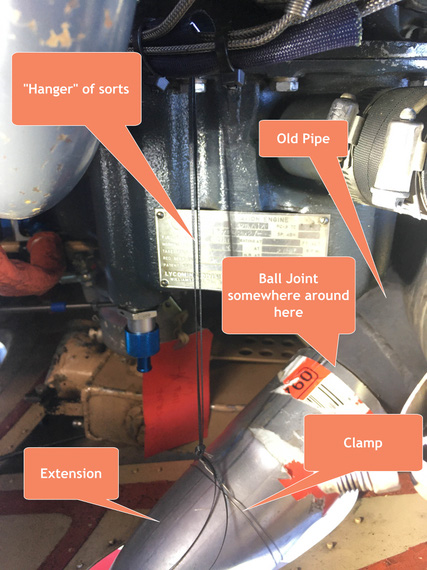
Exhaust hanger
I would put a ball joint somewhere close to the muffler, with one end on the old pipe, and one end on the new extension that includes the bend. That ball would isolate the extension from the existing system, and allow them to move relative to one another.
I would then hang the new extension to the oil sump on some kind of hanger with a clamp - likely, a kind of tube with ends flattened and bent as required.
I sent this schematic to Clint. Well, no, not this one. This is a nice one I did when writing this post, over a picture I took when mocking up this solution. The one I sent to Clint was this. But, same idea.
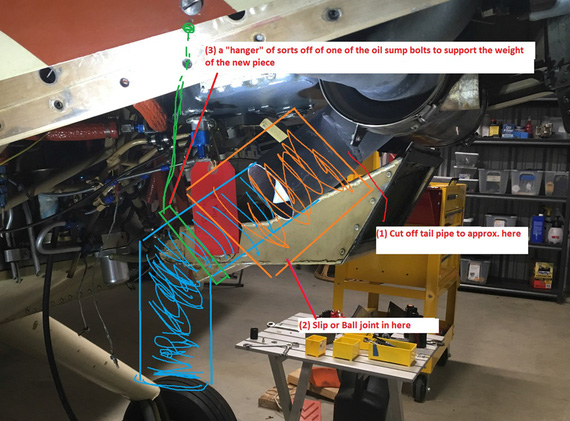
Schematic I sent to Clint
Clint's response? Verbatim:
Adding a ball joint and brace solves all of my concerns, you are free to do anything you want to the tailpipe. If you weld the bend on as your latest drawing shows, looks more reasonable. When adding a support brace it is imperative that it stabilizes the tailpipe to the engine, they must move together.
WOOT! Did I find a way to do what I wanted?
One thing to absolutely ensure was that the ball joint would fit.
We went back and forth a bit, me asking about dimensions. Then, I threw together a quick drawing of the widest part of the ball joint - the clamp holding it together - and tried it next time I was in the hangar.
No way. No way it hell it would fit. Airbox would get in the way.
Here's probably the best picture I have of why.
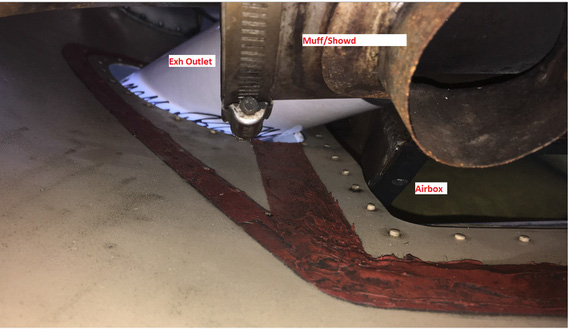
Clearances
That little triangle of "air" in between the cowling (bottom), exhaust pipe, and airbox is probably 1 inch on sides. No way a ball would fit in there. No freaking way.
So, what am I left with?
Putting it Back Together, the Way It Was
I gave up.
Called Clint on the way back from the airport, and asked him to sell me a straight length of pipe with a slip fit on one end.
Got it a week later.
Called Mike, got a contact for his welder, and went there.
The gentleman didn't like the fit - too loose - and wanted to make sure I pinned it exactly where I wanted (and actually, I should've done that in the first place, because the opening in the cowling is very tight, and just a degree of being off would make it interfere with the cowling). He also wanted me to clean all the gunk off.
So, back to the hangar, and fun fun fun with a die grinder, deburring wheel, wire brush... This 40 year old exhaust is gunky!!!
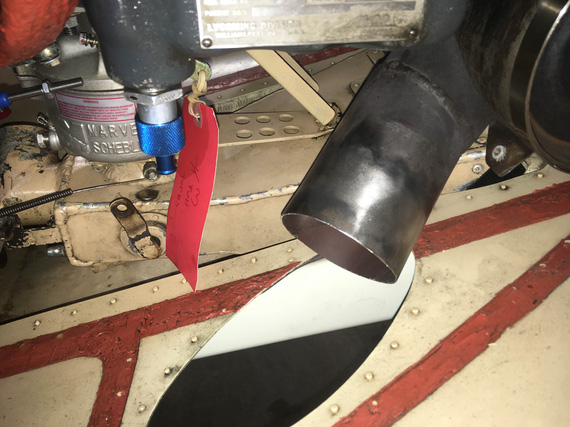
Back on for tailpipe fit
Put new section of pipe on, clocked it just right, drilled a couple of holes thru, and put in a couple screws.
Putting a nut on the inside of a 3" pipe about 10 inches "in" is .. exciting!
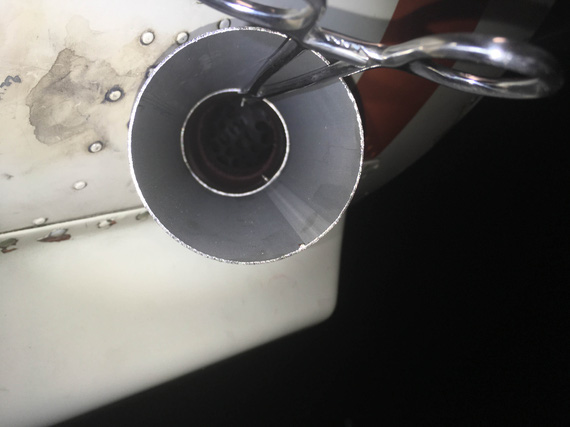
Nuts on the inside of the pipe
Then, pulled it off and put in more screws, to be absolutely sure that if it had to come apart, it would come back together in the exact clocking I needed.
Mike's welder fell thru, and that cost me a couple weeks at least. I focused on some other work - panels, compass, etc.
One of those days, I was on the phone with D. when a gentleman I didn't recognise walked over from the hangar next door housing a PT-19, and asked to borrow a hex key. When I hung up, I walked over to introduce myself.
"Hi, I'm M."
M.?! The M.?
Yep.
He's somewhat of a local celebrity, having built a ton of airplanes, and having worked on more. I met him on a couple occasions in passing, but not really, and I didn't remember his face when he walked over. He's a sheet metal and generally a metal guy. He was working on the PT-19's electrical (ha, fun coincidence, eh?)
A lot of hangar flying ensued.
He looked over the biplane. He told me of his building a replica Hughes H-1. Of his own design basically.
When parting ways, I asked, "Hey, do you have a welder by any chance?" Asking doesn't hurt right? "Yep, I got a TIG machine".
Ha! Of course :) I meant to ask if he knew a welder. But he was one. I should've thought of that myself.
He agreed to help me weld the damn thing back on, of course. He asked for me to clean the insides. It kinda made sense, too - you want full penetration when welding, and you don't want all that crud on the inside of the tube to "float up".
So, lots more of a die grinder time, with flapwheels, with a compressor barely large enough to run the damn thing for a minute straight.
Then, drove to M's shop, drooled over the H-1 and the MP-14 that he had on it.
And then, the final fit of the tailpipe to put it where it was when I cut it off.
We put the exhaust back on the plane,..
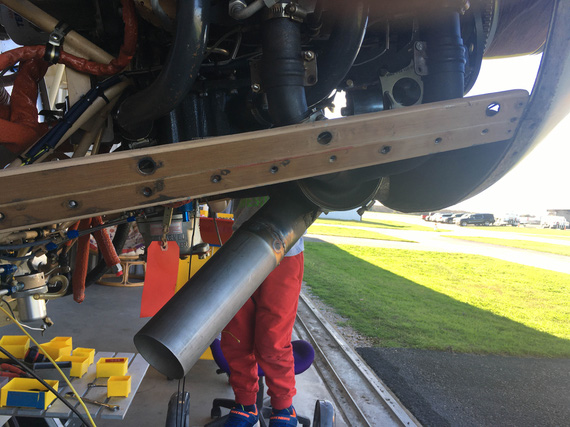
Back on the plane
...put the cowling back on, and I started fiddling around with things to try to figure out how to mark an even line to cut it off on.
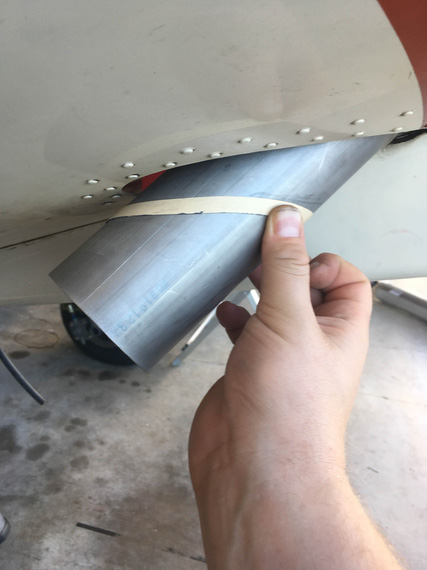
Rubber band maybe?
Rubber bands actually worked quite well. The kind I had was too tight, and I was playing with it trying to make it work and considering running to a nearby Office Depot, when I was offered a schematic to help guide me.
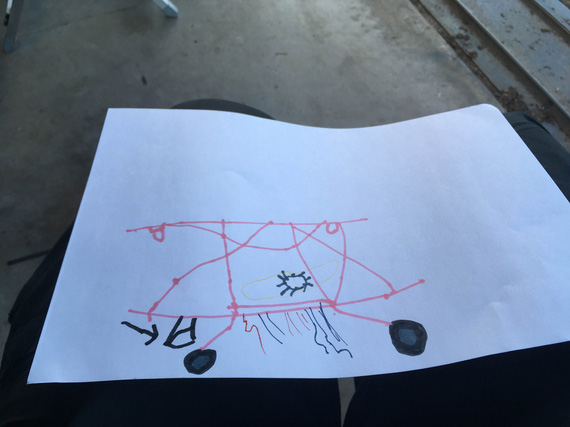
Exhaust cutoff schematic
But prior to emptying local stationery stores' rubber band supplies, I tried something else - pieces I cut off from the old pipe. Had to trim them a bit more to fit them over the new pipe, but that worked quite well in the end.
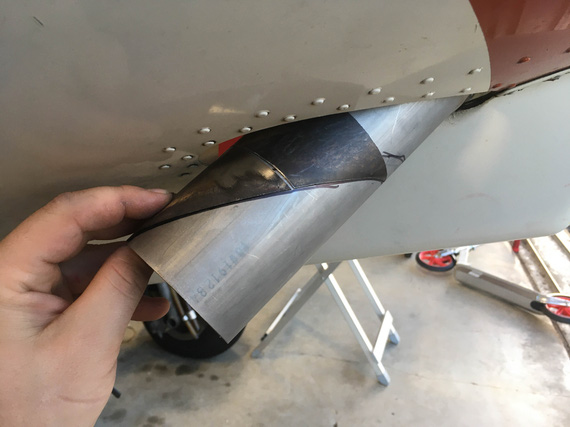
Using chunks of old pipe
Starting the hacksaw at this shallow an angle is... annoying? Is that the right description?
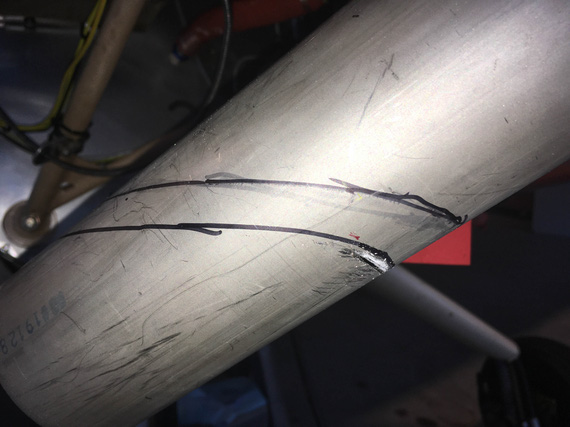
Starting a cut
I suck at hacksawing.
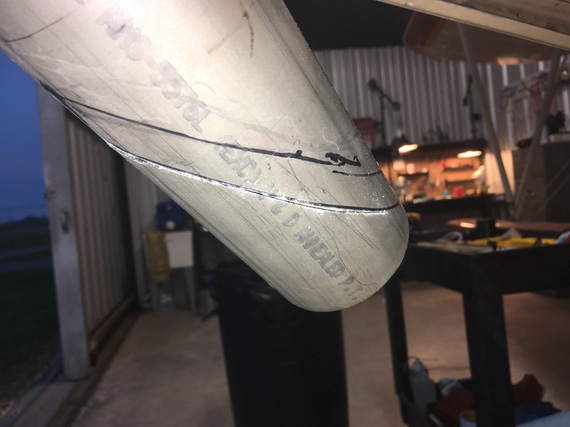
Ugly cut
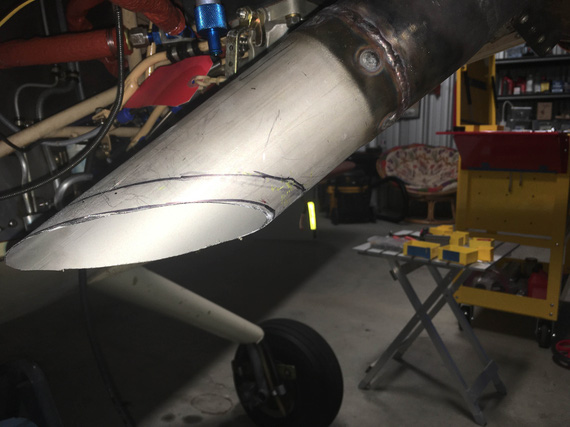
Ugly edge
My punishment? 30 minutes of grinding.
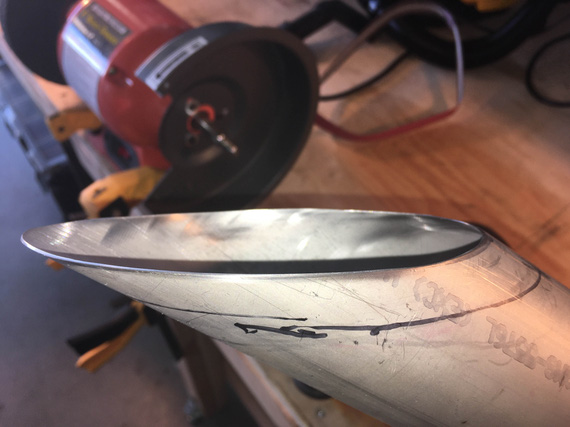
Finished edge.
And so, I am back to where I have started with this little project. My supply of rags is large, and my soap came in a 5 gallon pail (okay, okay, I do have some old stock is all :) ).
But, on the other hand, I think this is the Hump. It's when in a project, there are no more unknowns. You now just have to finish doing everything you've started.
Truly superior pilots are those who use their superior judgment to avoid those situations where they might have to use their superior skills.
Up ↑
Tying Loose Ends
...fuse blocks, and oil cooler bowden
| On: | Feb 16, 2020 |
| In: | [Chickenhouse Charger] Electrical Rebuild |
| Time logged: | 3.7 |
| Tags: | 6781G, MA5 Charger, electrical, cables |
A couple things have been always on the back burner - fuse blocks, and finishing up the oil cooler bowden hookup.
In between waiting for completion of The Thing I Am Yet To Write About, finally, checked those off the list.
Fuse Blocks
Location was figured out a long time ago, and I just clamped them in place, center punched the holes, and drilled them.
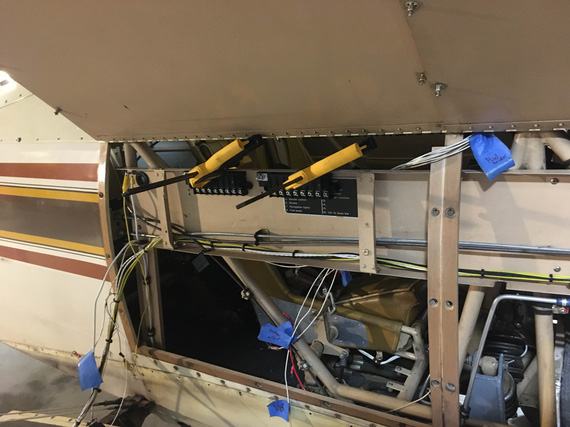
Clamped in place for hole marking
One little bit was to figure out the exact fastener lengths and washer stacks, because the right one had it's right (forward most) end riding on top of a reasonably thick aluminum placard you will see much better in the following picture.
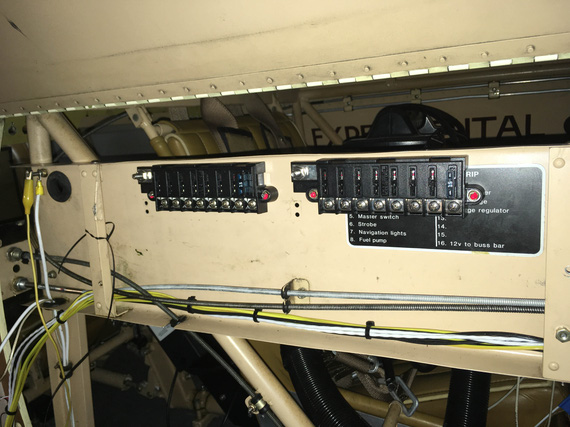
Fuse blocks: mounted
Done! Done?
You are forgetting, my Dear Reader. We here are in the misery business. Look carefully at the curvature of the fuselage. Imagine the side panel, open on the pictures, closed over our "conduit", on which the fuse blocks are installed. Do you see how the available "depth" will be bigger in the middle of the conduit as compared to the top?
Yep.
Of course, the panel won't close. With fuses installed, they would rub on the side panel. Not Good.
But relocating them down? What's the problem? Bowden cables, of course! I'd be too close to them, and I wanted very much to isolate my wire bundle and my bowdens; but even if I didn't, I still won't have enough room there for a terminal, and a nice 90 degree "turn" for the wire to go sideways (either towards the panel, or towards the firewall).
Solution?
Well.. there weren't any good ones, so I ended up taking the best of the crappy ones.
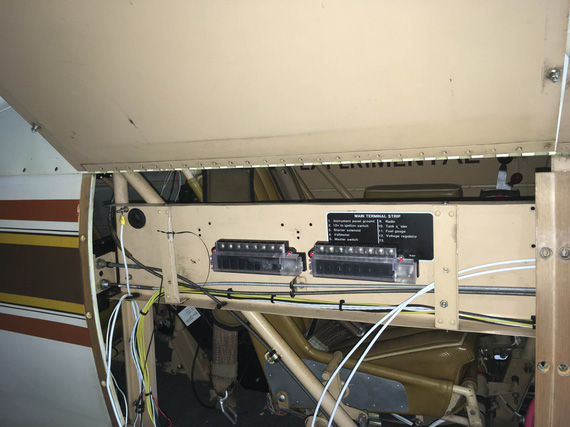
Final fuseblock mount locations
Not ideal, because they're flipped over - so technically, condensation can run down and into the fuse socket. Not a good situation to be in, but I can't do anything here. I guess, inspecting this area for corrosion is going to be on my Regular Maintenance List.
Oh, and I ended up with four extra perfectly drilled and deburred holes, right in the passenger's cockpit. That's what is on the other side of that "conduit".
I guess, I will attach a placard to them stating that those are "hole samples" or something (my friend Dick Gossen placarded a missing screw in his instrument panel once, so I figure I am allowed as well).
Oil Cooler Bowden
When headscratching about, and later installing the voltage regulator, Oil Cooler Air Shutoff Valve bowden was relocated (and because of that, I had to use a longer Bowden, which, gladly, I had an extra of after removing the Rotec's Throttle Body Injector).
All that was left was cut it to size, and install it into the valve's pivot arm.
Cutting bowdens? I don't know, I think it's easy. Pull out the actual control wire, and use bolt cutters. Push the wire back in, and trim to desired length.
Done.
Here's the pivot arm.
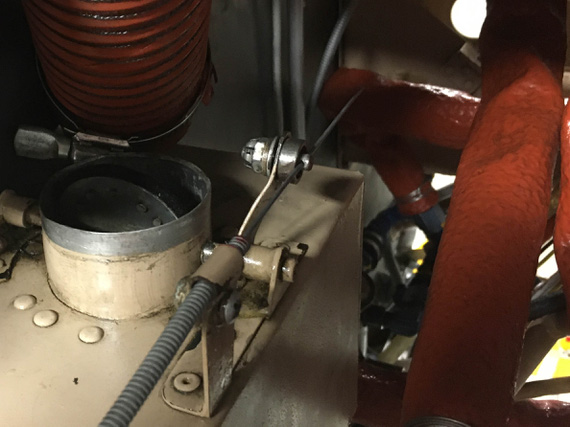
Oil Cooler Air Valve Pivot Arm
Notice the gap between the washer and the arm? Yep, the arm's too thin for the little bushing that's used here.
This guy:
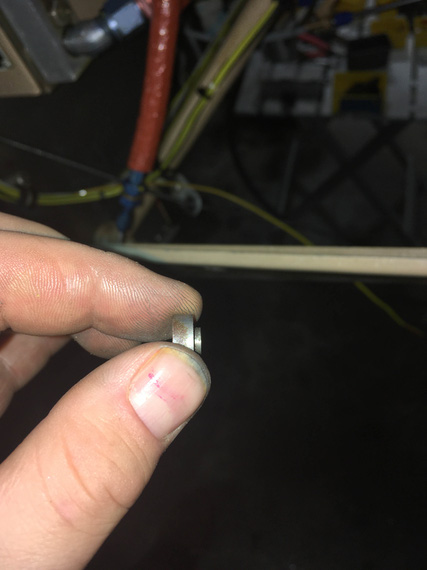
Pivot Arm Wire Bushing
No worries, we can file that shoulder down....
The other minor problem? The hole that clamps the "eye" that holds the bowden's outer housing in place was drilled too close to the place where the eye begins. Result? Flat washer was too big to lay flat.
Oh well.
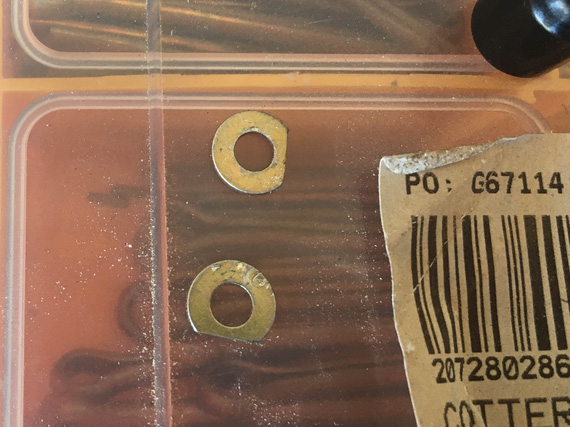
Custom washers
Put everything together, a bit of TorqSeal, a cotter pin, and we're done! (TorqSeal applied by a steady hand of a four year old, so please easy on your judgements, gentlemen!)
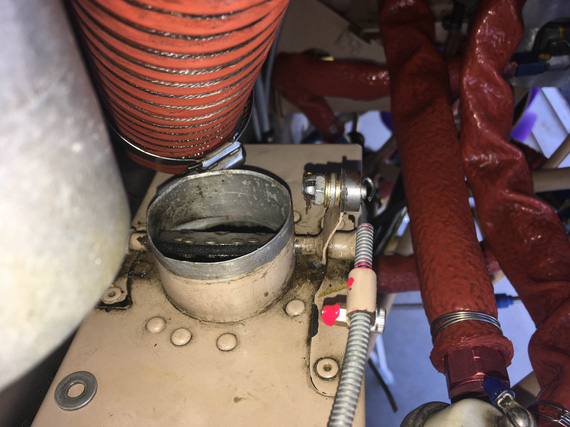
Done.
By the way, beats me why that oil cooler would need a shutoff.. It's way too small to begin with; and the SCAT feeding it is the whole 2 inches. I feel that I will excitingly find out how hot my oil gets in a Texas summer very soon....
Flying is not dangerous; crashing is dangerous.
Up ↑
Finishing Panel Prep
...placards and switches
| On: | Feb 04, 2020 |
| In: | [Chickenhouse Charger] Electrical Rebuild |
| Time logged: | 5.0 |
| Tags: | 6781G, MA5 Charger, electrical |
Since all my tools were already in the vicinity of the back hole, decided to finish doing everything around the panel in preparation for actually running the wires (which will come at the very end).
Placards
They were done quite some time ago. I center punched the holes in the panel for the #2 attach screws when test-fitting the placards, and left them at that.
Well, 't was the time!
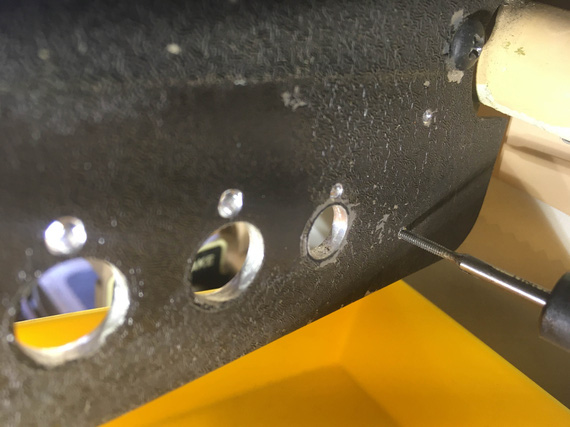
Tappy-tap-tap!
That is a #2 tap, mind you! Tiny! I used a ratchet adapter; and didn't even need a ratchet - was just rotating it with my fingers. 1/2 turn in, 1/4 turn back. Slooooowly.
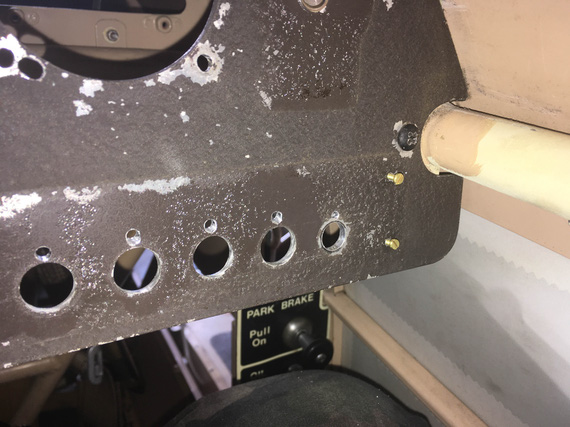
Done!
..and the placard went on nicely, too.
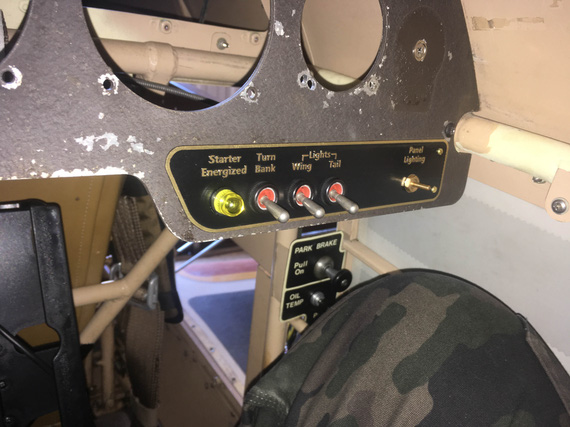
Placard set up.
Switches will be coming out one by one one last time later, to get wires attached to them, and to get all the hardware locked with washers/Loctite.
Harness Brackets
In the original setup, switches and fuses were on opposites sides of the panel (now both sides are occupied with switches), and the harness ran kinda loosely in between those sides.
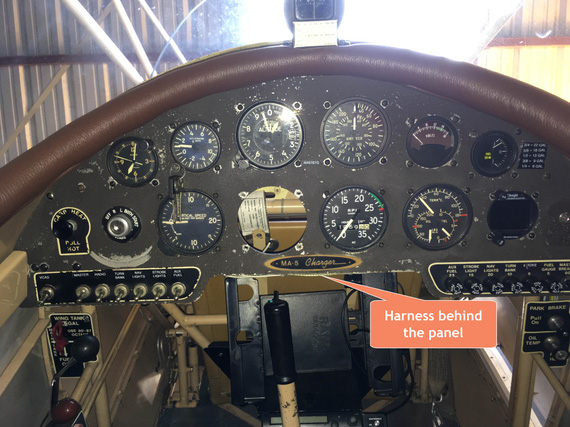
Old harness
I didn't like that bunch of wires not having any kind of support, and wanted to add something.
Having all those gauges clustered right above the harness, I wouldn't have had any room for the "raw" clamps attached to the panel in any reasonable way.. but, if I put together some kind of "standoff".. kinda like...
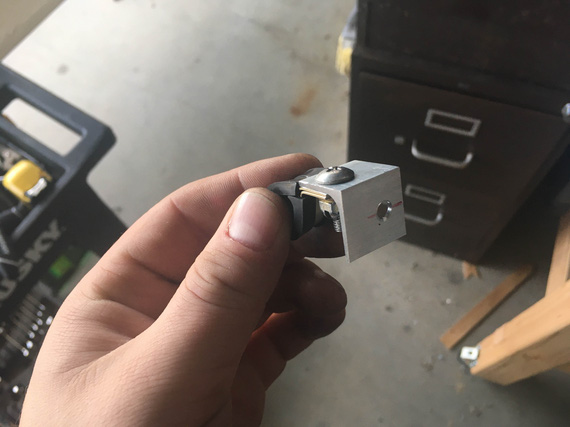
Clamp on the bracket
that! (This bracket courtesy of my Polish friend Mr. Wojciech.)
I made another one, and took some weight reduction measures, too.
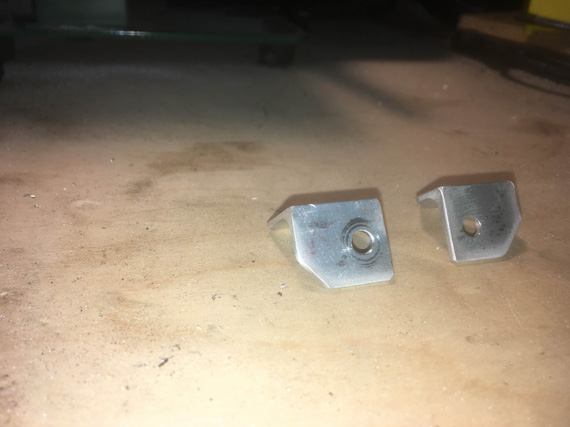
Brackets - cleaned up
Then, located and drilled the holes in the panel for them.
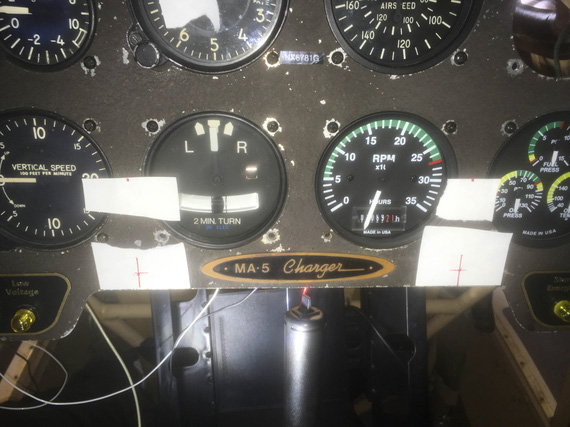
Using tape to mark out the holes
And, here they are. Notice how harness will end up below the gauges, not interfering with them.
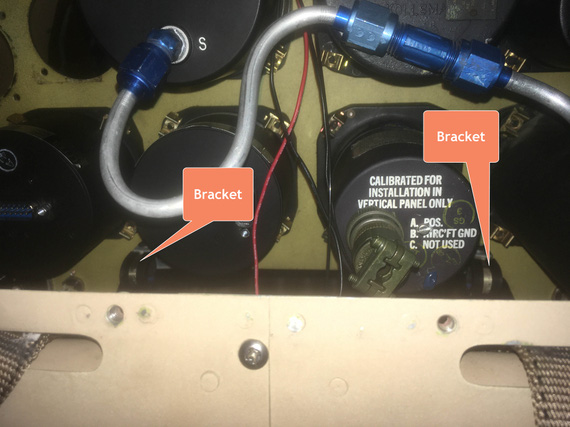
Brackets test installed
Here is how they look from the back, with some "test wires" run from the switches thru the ADELs.
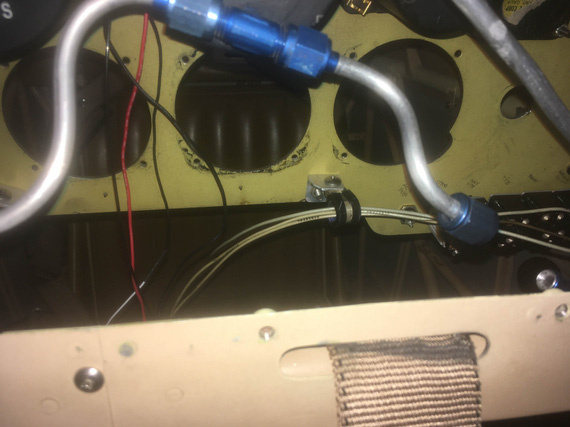
Test installed with wires.
Nice, short, concise, and almost no misery this time!
Keep looking around; there's always something you’ve missed.
Up ↑
Light and Compass
...panel work
| On: | Jan 29, 2020 |
| In: | [Chickenhouse Charger] Electrical Rebuild |
| Time logged: | 10.5 |
| Tags: | 6781G, MA5 Charger, electrical |
While waiting for someone else to get back to me to help me finish <the thing that took last month and a half and is yet to be written about>, I decided to work on the panel a bit.
Lighting strip seemed like a nice place to start.
It's a simple LED strip that I planned to glue right behind coaming on the underside of the eyebrow. This way, it'd be invisible from pretty much any angle.
But, the wires! The wires in front of the panel, that have to go to the behinds.. No worries I thought, I'd make a small hole / slit in the top of the panel, also invisible - and fish the wires thru there.
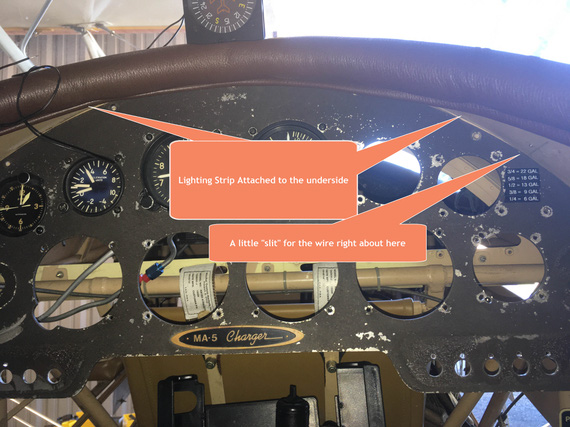
The Plan
That was the plan.
Reality, of course, decided to disagree.
The plan was to take out all the screws that went around the top of the panel, and tilt it "down" - so that I could use a drill comfortably to make the little slit for the wires.
Couple screws came out nice.
I think the third one came out like...
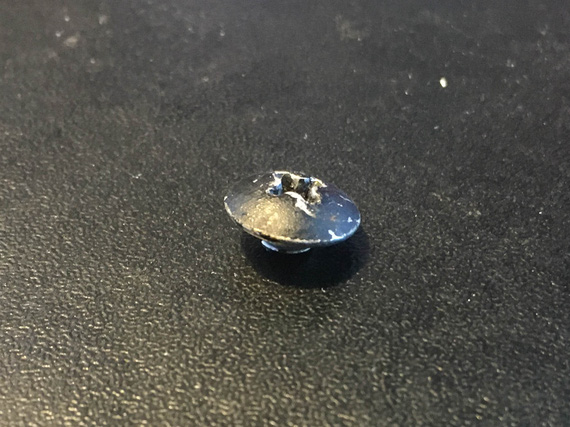
?!
Did I just bust a screw? I looked into the hole. Empty?!
Upon further examination, I found... glue? What? The screw head was... glued into the hole? That's a first.
After taking the rest of the screws out, I realized what happened.
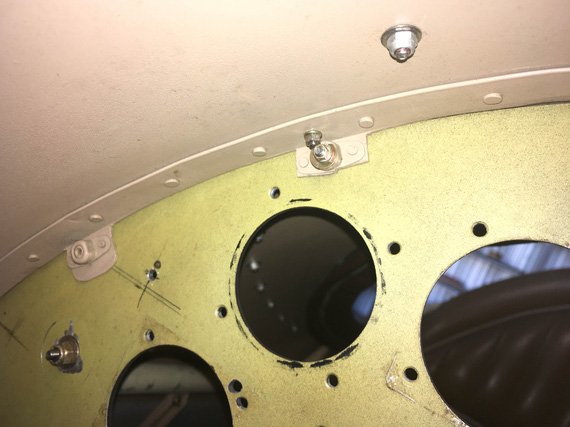
Backside of the panel
This is the back side of the panel. The panel is attached thru those little tabs and nutplates.
Notice the nutplates using rigid (not floating) style nuts? A slight misdrilling of the holes in the panel, and screws won't go in at all.
So, there were two "screws" that were just heads glued in - yep - and two more that used #6 screw in a #8 nut - the TPI on those is the same, and the holes were drilled sufficiently close enough to let a #6 screw pass thru; but not a #8. Le.. Sigh.
To top it all off, the panel won't fold down for me to get access to where I wanted to be, and to fish it out I'd have to take out the carb heat bowden cable that was attached to it. Too much trouble if I can avoid it (that carb heat cable would've been a 3-4 hour affair just by itself).
Plan B solidified; but first the panel had to be put back.
I ended up putting #6 screws into all the misdrilled holes (sorry, but glueing heads into holes is.. not my thing :)); but I installed nuts on them on the back. Effectively, set up like this the nutplates don't do anything - just add weight. See the picture above - it has the nut over that nutplate. That nut, by the way, was a pain to get in - see how close another nut is to it?
I think all the fiddling with the panel, screws, nuts, washers (losing a few of them and going on fishing expedition to pull them out of the guts of the plane included, of course), and trying to get it back in right took what.. around 6 hours?
The plan B, now executable after the panel was back in, was to route the wire under the eyebrow, and fish it thru behind the coaming to the "top" side right in the middle, where the compass was to be. It then would join the compass light wire, and go to behind the panel land.
So, the strip was glued, and the wire attached to under the eyebrow with HVAC duct sealing tape, ahem, aircraft grade glue backed aluminum sheeting from the local friendly Aerospace Depot.
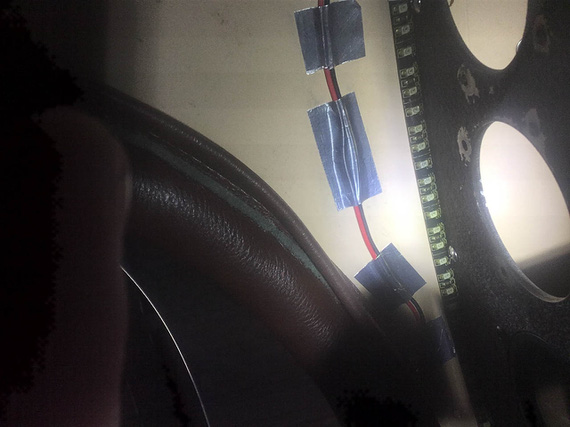
Strip glued - looking up
That picture's taken "from under, looking up". Ugly? Well, not too easy to make it pretty doing it basically blind with an inspection mirror the only view. Like this:
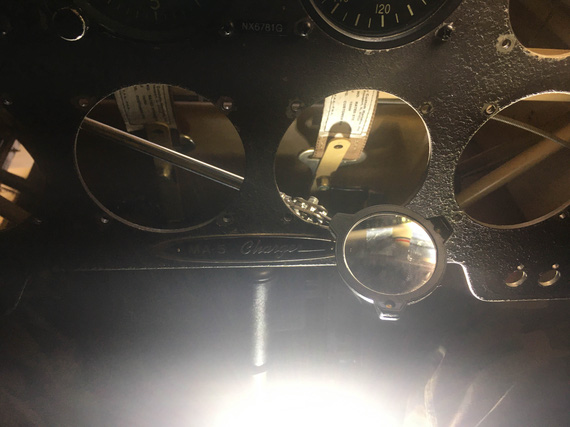
The only way to see it
The wire was fished thru to the "top side", and it was time to test.
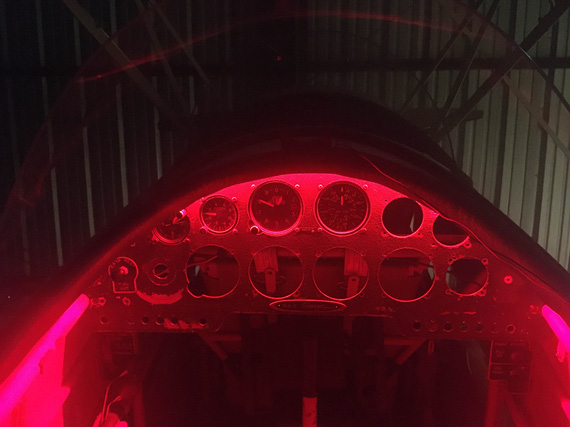
Lights on!
Pretty, huh? :)
Since I was working on that area, I decided to finish it off. Compass was prepped...
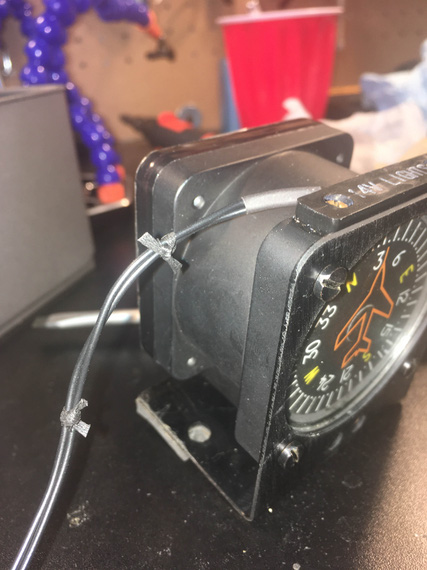
Screw those zipties!
... and installed.
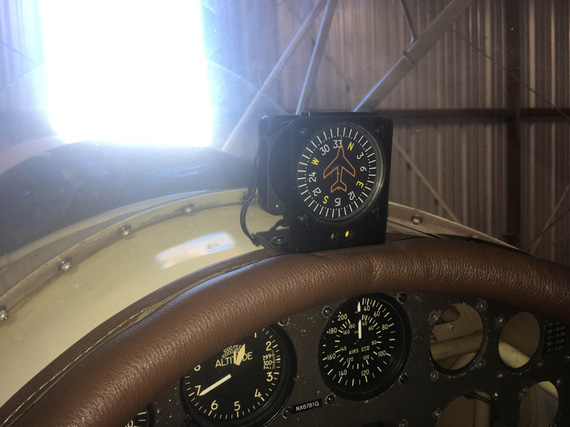
Compass installed
The compass bracket is pinning the compas lighting wires there, and ...
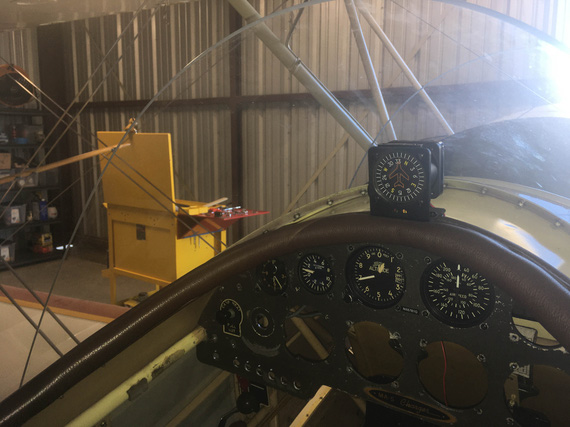
Other side (see the red wire)?
... the fished thru wire for the panel lighting strip (see the little red wire? that's it).
Done, and done.
"The first officer says he's got you in sight."
"Roger, the first officer's cleared for a visual approach runway 27 Right...you continue on that 180 heading and descend to three thousand."
-ORD ATC
Up ↑
Placards for Switches
...the biplane way
| On: | Nov 23, 2019 |
| In: | [Chickenhouse Charger] Electrical Rebuild |
| Time logged: | 20.7 |
| Tags: | 6781G, MA5 Charger, electrical, placards, etching, SWX |
This is all your fault, you know who!
...
Way back, when working on the new layout for switches on the panel, I was thinking about how to re-label them.
I had a nice Brady label maker, and was thinking about just printing and sticking some tags over existing, painted, lettering, on the switch placards.
One of the nights, when I was tired enough to do anything useful, I was playing with the stickers, and posted this picture here:
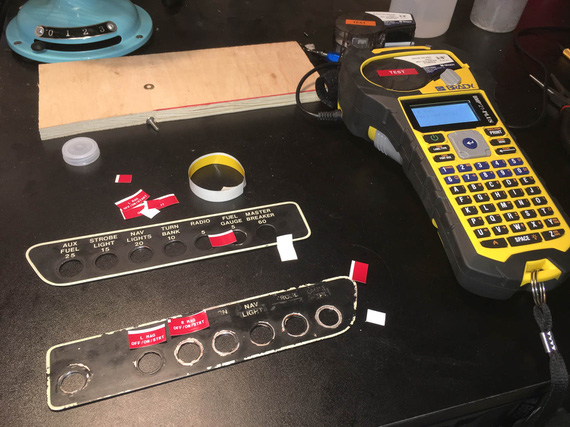
Playing with placards
The you-know-who-you-are, of course, wasn't happy (this gentleman is an actual friend of mine, not a silly voice in my head). "They will fall off", he said. "Can't you do something a bit more professional"? "Can't you draw them up, and order them to be custom made"?
Order?
Ha!
No. This whole exercise in airplane handling is to put yourself thru as much misery as possible. So the placards had to be made, not ordered. I mean, I could've ordered my electrical redone too, right? :)
I recalled that I read somewhere on Vintage Machinery that someone figured out a neat way to restore old data plates on old lathes and such. Looking it up, I remembered.
Etching!
The idea is basic - make a mask, transfer it to a piece of metal, soak it in acid, paint, sand - your recessed (etched) areas will keep paint, while the elevated (masked out) areas will sand out. This way, you get metal-on-paint look, and it's nice and pretty.
So, it has been decided - I will etch out my switch placards!
First, though, I had to figure out...
The Process
Obviously, SolidWorks would be instrumental in making the actual pattern. I wanted to make the placards out of brass, so that lettering would be yellow, and I'd paint them black, for the yellow on black final result.
First, the mask.
Searching around, it seemed that the most reasonable way to go about it would be to use Toner Transfer technique. Laser printer toner (at least on a good subset of laser printers) is basically powdered plastic. Printer warms it up, which makes it sticky - and toner then fuses itself to paper. It can be re-softened (and made sticky again) by a normal household iron or a laminator. I had both - an iron, obviously; but we also had a great "office grade" laminator in the office.
A lot of folks had success with glossy paper (glossy paper doesn't absorb melted toner, it sticks, but stays on top), but I, looking around, found a lot of good reviews of the PCB Fab in a Box system.
Not only the guy makes a very nice toner transfer paper which "releases" the toner when soaked in water (it works just like your model decals in plastic models, you soak the paper, and the top layer comes off), he also seems to have researched and cleaned up the process to minutia. For example, the toner itself is porous (indeed!) so he uses an extra layer of plastic to "fuse" the micro-gaps between toner granulas as transferred with another layer called "TRF Foil". He also did a lot of research into printers, toners, application techniques and such - and published a great handbook. Just for that alone, I wanted him to have my money.
So, I ordered the transfer paper (the one you print your mask on), and tried the first step - transferring it to a small strip of brass in a laminator.

Laminator with envelope with the workpiece

Transferred!
What's wrong with that picture? Riiight! I forgot to mirror the pattern :). Damn.
I messed around quite a bit with density, too. Just default settings were crap, obviously. Bumping up the density to max didn't help much. I installed a new toner cartridge, and that improved the density dramatically - while not perfect, it would've been workable, hopefully, with the addition of the TRF foil (and, if I saw any obvious holes, I could fill them with a sharpie).
Okay. But the basic test worked! The pattern transferred nicely.
Second time, I threw together another test mask with a couple of different fonts about the size I'd want on the placards - I was gonna transfer those to a small chunk of brass bar stock, and try etching.

Second pattern
With the help of child labor, patterns were cut out, and transferred successfully to the brass bar stock. I then applied the green TRF foil (that stuff that fuses the pores between toner's grains) to it.
Side note: the process manual from PCB Fab in a Box notes explicitly that Brother printers have a kind of toner that requires much higher than usual laminator's temps to melt. I have a Brother printer, but since I was able to do my first transfer successfully, I kinda decided to not bother - it worked, so I must be the lucky one right? Though I admit, I did entertain an idea of a new printer... ;)
On one of the evenings, I had a block of a few hours, and the weather was nice. I had all my chemicals (ferric chloride PCB etching solution and boxes of baking soda to neutralize it afterwards), so I decided to try the actual etching process.
I hooked up the test plate to a piece of closed cell foam (to float it on top of acid)...
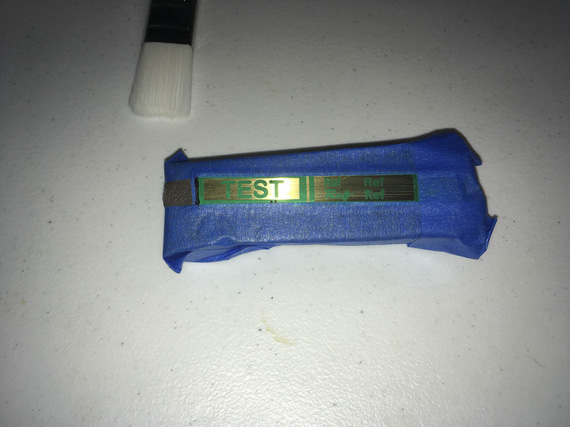
Brass with mask hooked up
...set up a small plastic table outside the hangar...
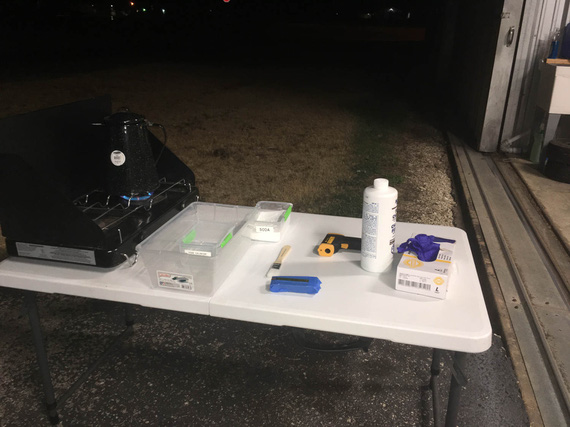
The setup
...and went to town.
The idea was to try to get the ferric chloride to about 100 degrees F to speed up the process, so I did a hot water tub (hence, the little camp stove in my setup).
I'd have a large tub with hot water, and a small tub with etching solution in it, with the workpiece floating on top, hooked up to the foam.

Etch, etch away!
It took about 40-50 minutes, I think, till I was comfortable with the depth of etching. Every 10ish minutes I'd pull the piece out, and brush it with etchant to clear the debris that, I thought, would collect in small nooks and crannies (I saw a guy do that on one of the videos I watched).
After a decent etching depth was achieved, I pulled it out, and dunked it in soda to neutralize the acid.
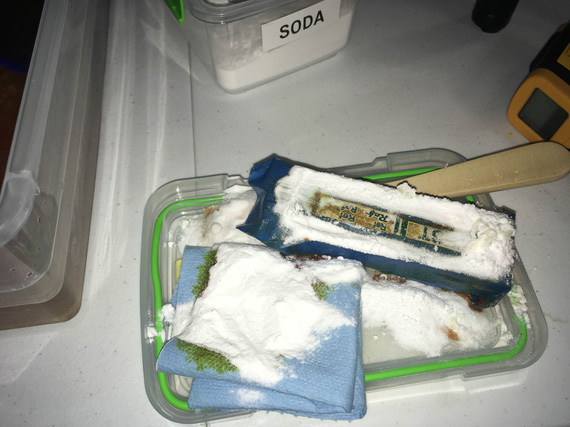
Neutralizing
Then, lots of rinsing, while catching water into a tub. Acid, even neutralized, will contain dissolved copper, and just dumping it is not good. I was planning to keep the tub and let water evaporate, at which point I could just wipe off the powdery residue.

All cleaned up
After that, a rag with acetone wipes off the mask, and...
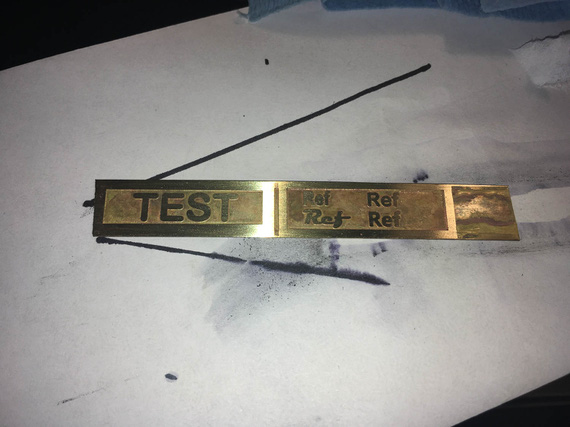
Etched!
The edges on the letters (basically, the edges of the mask) are very rough there. On these test ones, I started with a maroon pad, but quickly went to a 120 grit non-woven deburring wheel, which cleaned it up nice (and of course, messed up the letters - well, lesson learned, I won't use that aggressive a method on the real thing).
Later, when painting, I noticed that the mask was still porous, letting some acid in (I had some tiny "cavities" in random spots). It looked pretty good when applied. This would become obvious later, when I started adding color. I suspected the old drum, and decided to get a new drum for the printer - though in hindsight, I think this is, after all, the problem of me having the Brother printer (read on ;) ). Meanwhile, I ordered a new drum and a new cartridge.
And then, the paint.
I wanted "golden" letters on "black" background. I wanted to make the whole piece black, and then sand it on a flat surface - everything that was masked would have the black sanded off, and the rest would keep it, achieving the effect.
I wanted to try a couple different "make it black" approaches. One would be forced oxidation with something like a gun blueing acid, and the other would be plain paint. I had two test areas, which would allow be to try both at the same time.
So I blued one side....
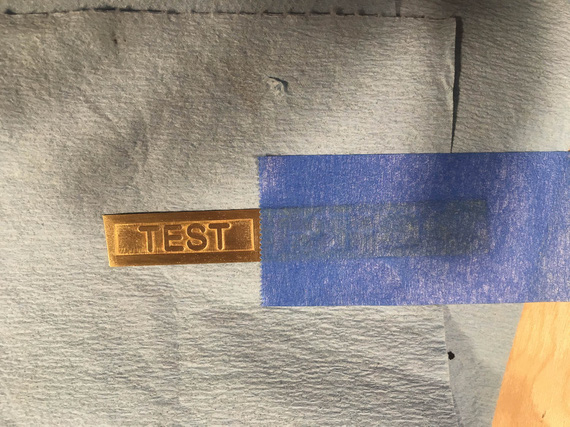
Masked
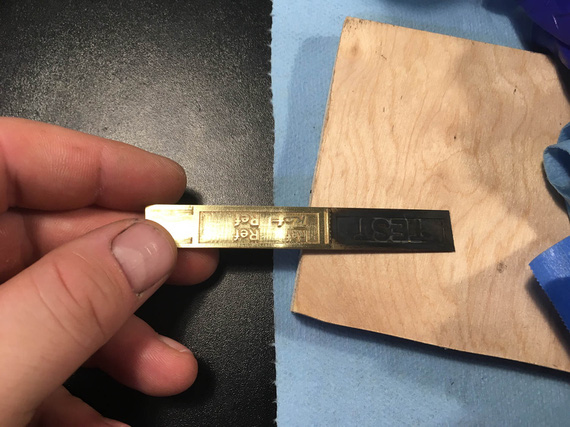
Blued with Brownell Oxpho-Blue
... and sanded it down.
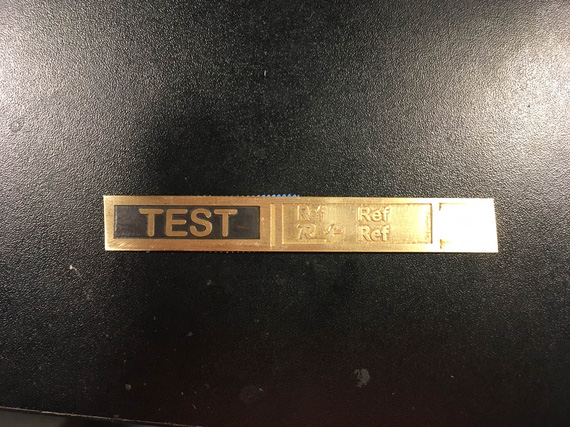
Sanded down
Couple notes on blueing. I tried Brownells Oxpho-Blue, and then later Birchwood Casey Brass Black. Both produce a layer of black oxide on the brass. There are a couple of problems, though.
First of, the etched surface is not perfect - and those imperfections are not really hidden by oxidizing, obviously. Second, and bigger, problem, is that that oxide is powdery, and can be rubbed off easily with even a paper towel, given enough elbow grease. I was afraid I'd have adhesion problems with the top coat (I was gonna coat the whole thing in clear to prevent tarnishing of letters), so I decided against it.
The other side I decided to put just your basic schedule of Rustoleum - primer, and flat black.
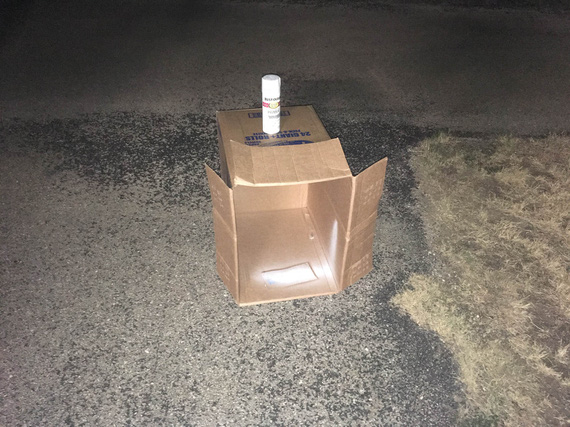
My kick-ass paint booth
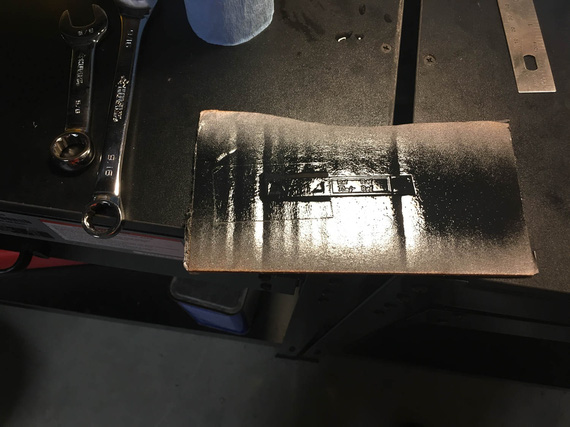
All done.
I waited for about a week with the Rustoleum side, and then sanded it down.
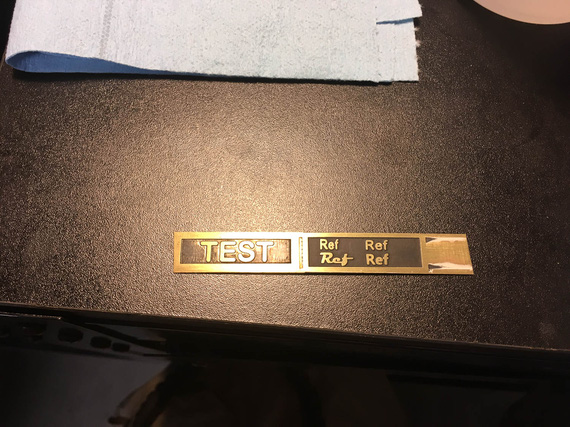
Rustoleum sanded down
I liked that side much better. However, the primer, being white, would show in between the paint and the letters, being noticeable. I decided to find some black primer - and meanwhile, coated the whole thing in lacquer, which I decided to use as a top coat.
Mistake! A few weeks later, lacquer started flaking off. Yeah, I learned the "no lacquer on top of enamel" rule. But it was flaking off on plain brass too, so.. lacquer was no way to go.
Just typing that, in hindsight, maybe there was some acid residue after blueing... but acid was dried, and I used acetone to clean up the blued side. But again, clear brass had lacquer coming off as well.
Worse part is, the enamel lifted and was coming off in pieces.
So instead, I did something that in hindsight I think was a mistake. I decided to look for a better paint solution, and very quickly arrived at epoxy, specifically, Klass Kote. It seems to be used by a lot of RC builders very successfully, I saw successful reports of brushing it, and talked to them, too. I was sold. Again, in hindsight... I think this was a mistake. But, read on. :)
The Actual Mask
To make the actual mask for the actual plates, I used my scan-and-draw-around-it Solidworks trick. I scanned the old placards, and sketched around them.
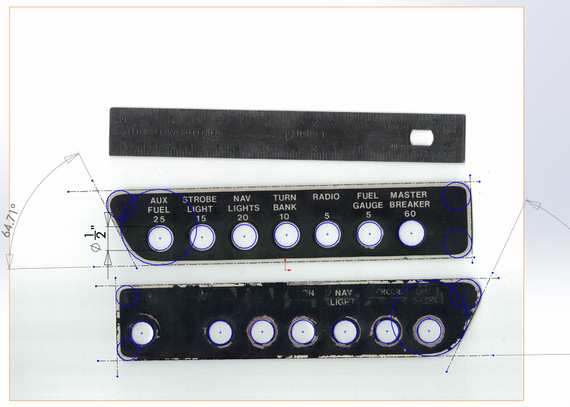
Sketch
I very quickly discovered that on one of them, the sides were not parallel; and the holes were all not on one line, and not evenly spaced! :). So, I made two versions - one all nice and even, and the other just like the old placards.
Using a bit of cardstock, I tried each of them on to make sure the holes are okay and such...
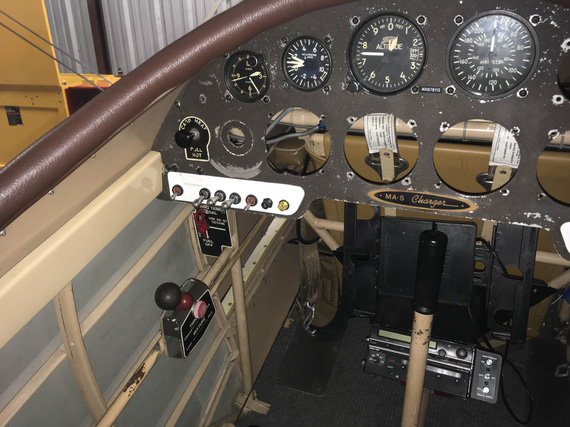
Trying on the pattern
Guess which ones fit better? Yep, the crooked ones! Straightening them out made holes not line up with holes in the panel, and one of them would interfere with some screws on the panel. Oh well.
Then, came quite some hours (that I didn't log to be honest) fiddling with the font and the layout. I decided to use "Magneto", the kick ass italic font out of the four I tried on my test etch.
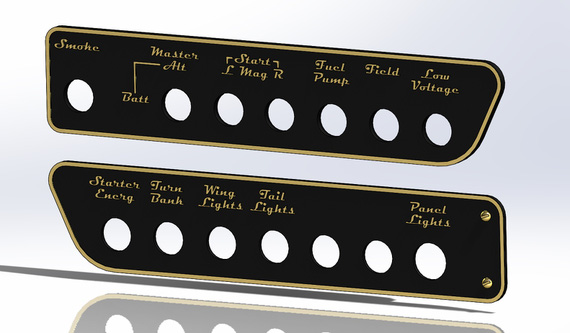
Plates with the cool font
But, the same gentleman who made me undertake this endeavor, argued that while these would look grand on a Cadillac, they have no place in an airplane. "Use standardized fonts!" he said. He did have a point. If it was not me in the back hole, and it was an emergency, readability, not style, is a prime factor. So, I had to remake them.

Plate with the boring font
Before actually committing to etching them, I wanted to do the final size and looks check with actual metal. So, I printed the things on regular paper, spray glued that paper to some scrap aluminum, cut them out, and drilled the holes.
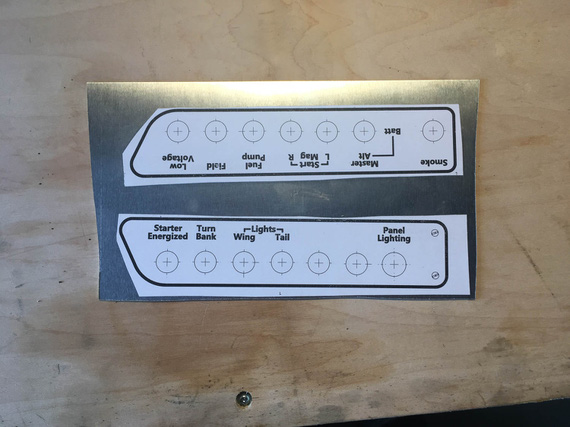
Test pieces
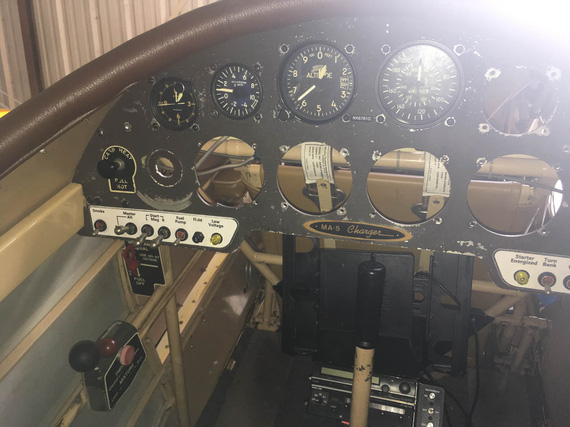
Left side
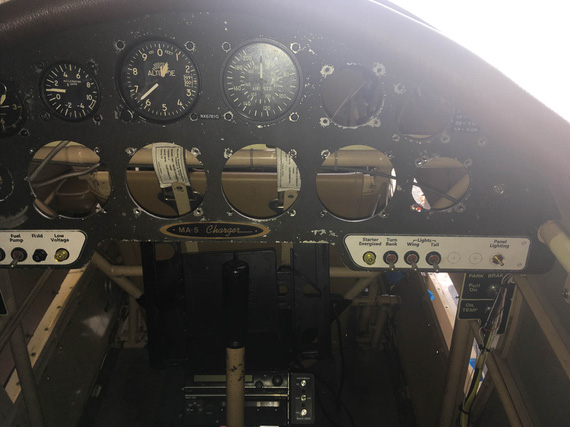
Right side
One thing became readily apparent - the lettering was too high up and rows were too close. Well, that was an easy fix on the model, I just moved the bottom row a bit down.
The hour X was quick approaching. I now had the twice tested model that fits, and all the kinks were worked out.
Applying the Final Mask
For material, I picked up a sheet of brushed "Marine-Grade" 464 .032" thick brass from McMaster (remember this, "brushed" - one side is brushed, the other is not).
On the final drawing for the mask, I replaced hole outlines with little "donuts" - thinking that those will make nice initial "center punch" marks for the holes.
When printing it, the toner flaked off the transfer paper immediately. "Bad sheet of paper", I thought. I also found the "Improve Toner Adhesion" setting, and enabled it. That made a nice print-out.
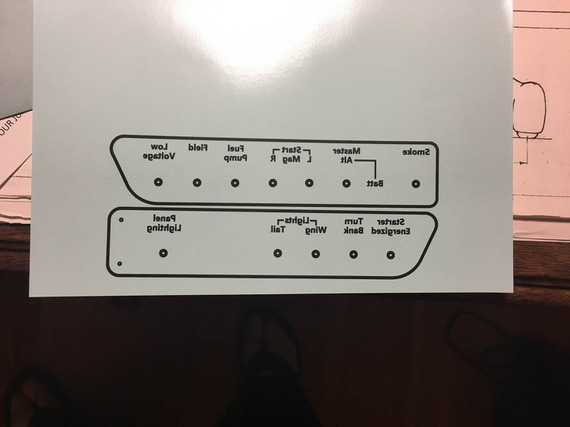
The final mask
Prepped my brass with good clean and acetone wash...
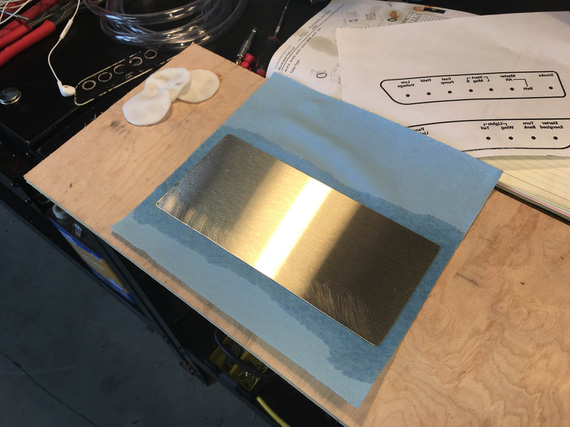
Prepping the brass
..made a nice pouch for feeding it thru the laminator..
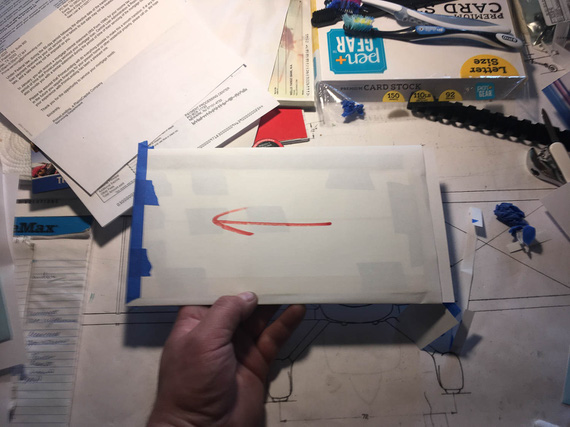
Pouch
..drove to the office, and started feeding the laminator with it.

Food for the laminator
On my test piece, I did 10 passes, so I did the same here. Pulled off the pouch, and...
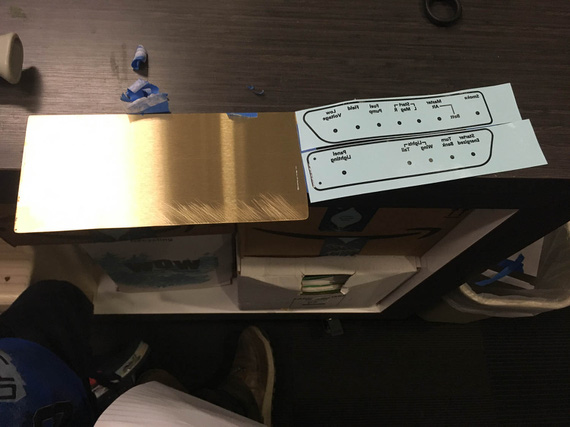
!??!??!?!?
What?! It worked before! A bunch of thoughts went rushing thru my head - more metal? Not getting it hot enough (but it was hot!)? Bad toner? Wait! YES! This time I used a completely new toner cartridge and new drum unit - to make sure my pattern has as little of those pinholes as possible (remember, I ordered a new drum and toner after my initial test etch?)
I went home, and compared the serial numbers on the toner I had success with with the new toner. The first few letters were different, as well as the few digits in the tail, which made me think it was a different brew of toner, and toner problem. So, I printed the mask again with the toner that worked before.
I also started thinking that the "Improve Toner Adhesion" setting I used might've caused mayhem. I also read a bit about that setting, and it seems that Brother recommended using it if the toner flakes off and if setting the paper type properly (ie, "plain", "card-stock", "thick", etc) does not help. So to prevent flaking off, I set the paper thickness to "thick", removed the "Improve Toner Adhesion" setting, printed it again using the toner cartridge that worked before, and went back to the office...
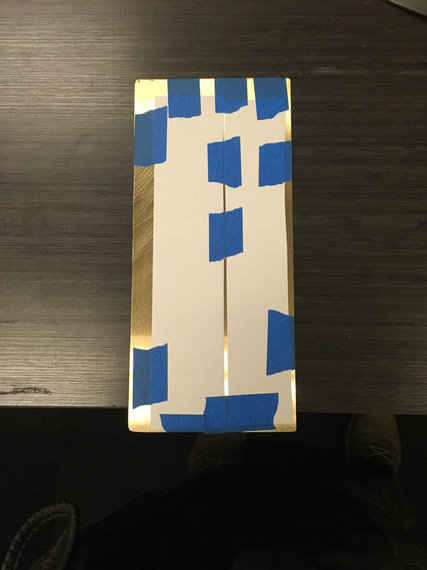
Second attempt
This time I didn't use the "pouch" of paper I typically wrapped around to protect the brass and help the laminator pull it thru (the laminator I was using had a problem with feeding first 2-3 inches of brass - it wouldn't pick it up - so I used paper as the "carrier", which alleviated the problem). I thought that maybe paper was preventing some heat from being transferred well, and got rid of it this time.
Same problem!
What the hell?
I took the laminator home, determined to run a bunch of tests (it was Sunday ;) ).
I had a couple of old masks left (I printed double the amount then, in case first try didn't work - so that would cover the toner/drum combo that I know have worked). I printed a couple of new ones - new drum/old toner, and new drum/new toner.
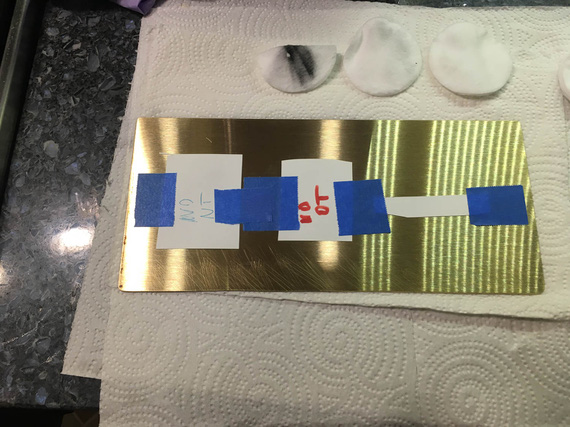
Test pieces
I also changed the settings again, for the two new prints I made.
As I mentioned before, when first printing the final mask (the one that didn't transfer), I had it's toner literally flake off the paper in some spots. "Hmm, I thought", and re-printed it, using the "Improve Toner Adhesion" setting enabled. That made the paper go thru the printer much slower, it came out much hotter than usual, and the toner adhered well.
On the second try (the one that didn't transfer either), I read a bit about the "Improve Toner Adhesion" setting, and decided to instead try to change the paper type to a more appropriate one - so blaming whatever "Improve Toner Adhesion" did for not transferring of toner, and blaming "thick" not being set on the first try causing toner to flake off, I set "thick" for paper type - which, again, caused the same effect - slow feed, hot paper, good adhesion.
And then, when finally doing a systematic attempt to figure out what's wrong, I remembered that on the very first test masks (the ones on the test piece of brass buss bar stock), I didn't tweak any paper settings at all.
"Slow Feed", "Hot", vs "Fast Feed", "Colder". This time, I started guessing that maybe, higher temp did something to the toner that would then prevent it from being re-melted when fed thru the laminator. I decided to try my luck with "plain" paper type (fast, cold feed), and count on my luck in the toner adhesion department.
I lucked out - test pieces came out fine, and, with three test masks, thru the laminator we went again.. And again... 10 times total, as before.
This time, things definitely changed! First of, all three transferred equally, but they transferred equally... crappy.
So, we knew that we were onto something with the feed/temp settings of the printer affected by the "Improve Toner Adhesion" and paper thickness settings.
But, transfer was still crap.
And then, I realized one more thing.
I was transferring to the "brushed" (remember, I had a "brushed" brass sheet?) side of brass? Those "brush marks" are noticeably deep when you drag your fingernail across them. I suspected that, effectively, whichever pieces of the mask were above the marks, wouldn't touch any of the metal, and therefore won't stick.
OKay, but I can use the other side! It was cruddy, but a bit of the deburring wheel...
Wait. Go to the airport to polish the other side? Ugh.
Found a piece of steel wool we use to scrub dishes. Phew. That, under water, made the other side of brass nice and clean on short order.
OK, the moment of truth. Printed the pattern again, using the new toner/drum, now, when we know that toner/drum aren't causing my transfer problems, but rather, the temp and the feed rate of the printer are.
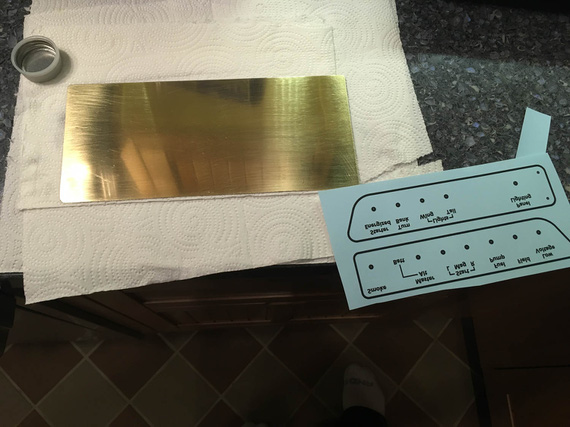
Will this be final?
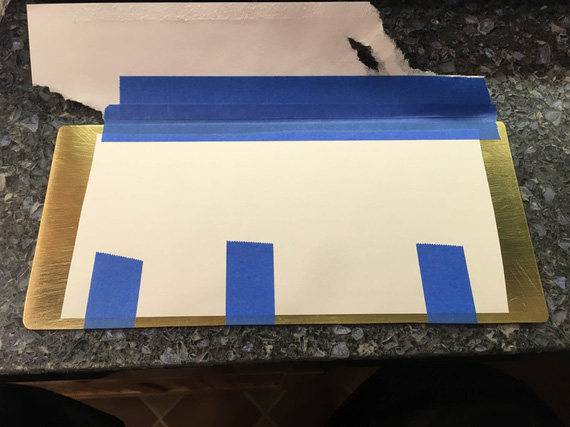
Attached to brass
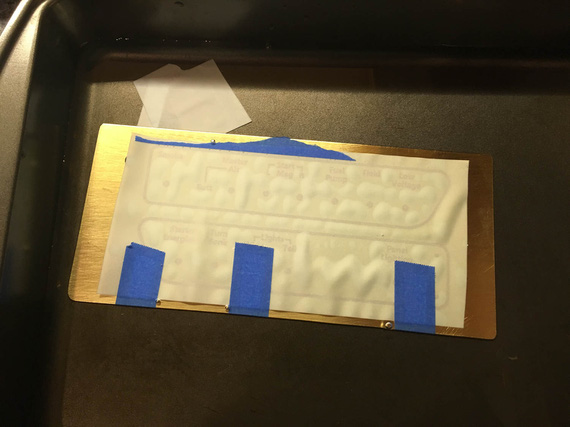
Soak after the laminator to remove the transfer paper
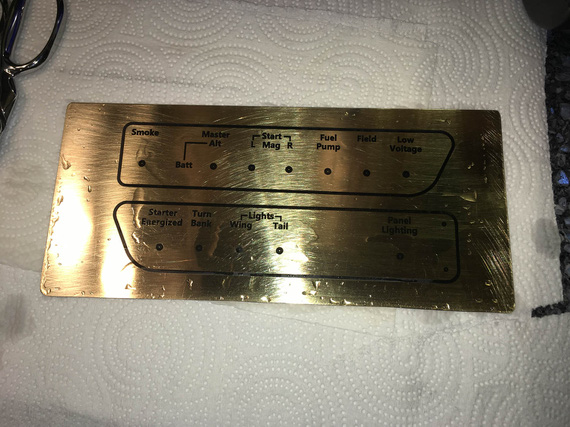
Transferred!
Phew. Okay. So, I guess, after all, Brother toner is finicky, just like the Fab-in-a-Box guys tell you, and mine is not special. I don't know why fast feed / low temp would even keep it transferable.. but... Well, the lesson I take from this is that I will be carefully considering the toner type when buying a new printer, when that time comes.
And then, the foil. I'll admit, I did a couple attempts with the foil. Yeah, and when I didn't like what happened on the first attempt, I had to re-do the mask (toner transfer, that is) yet again!
My laminator has serious feed issues. The foil is very finicky, and keeping it straight requires laminator to feed nice, smooth, even, and straight. My laminator needs to be "helped" sometimes with pressure pushing the plate "in".
Oh, well. After the second attempt, I realized that I probably won't achieve ideal results on such a big piece, and instead, used Sharpie to fix as much holes in the foil as I could find.
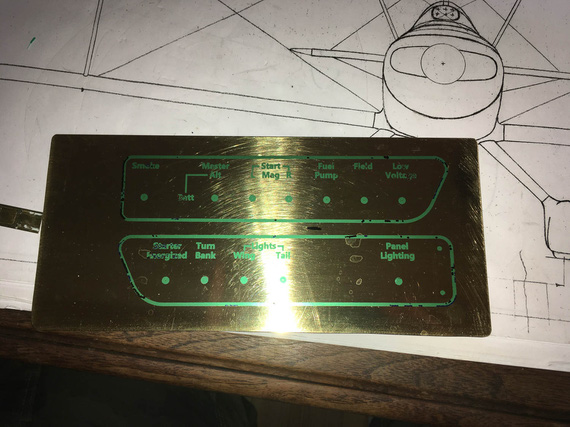
Final mask, and lots of Sharpie.
So, bottom line. If I want to make perfect, non-porous etches, I need to get me a good printer that will do what I need, and a good laminator that actually feeds things nicely. Later, later :).
I was planning to etch the following morning.
The Etch
The weather was great, and I relocated to the airport, setting up my "camping setup" outside the hangar...
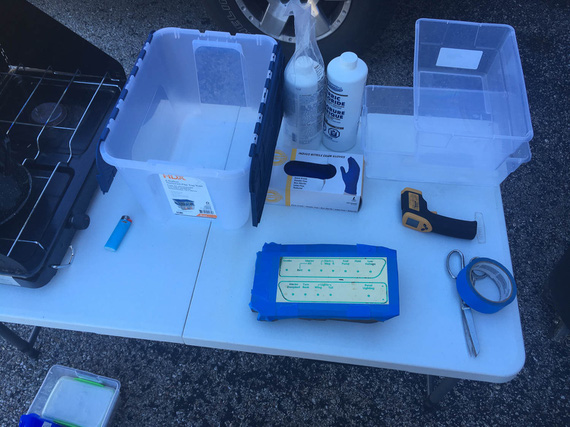
The setup
..put the plate attached to the foam into the tub, and went counting my 10 minute chunks..
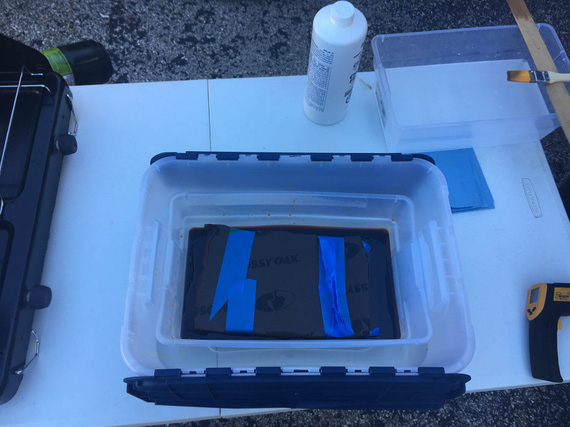
Plate in the tub of etchant
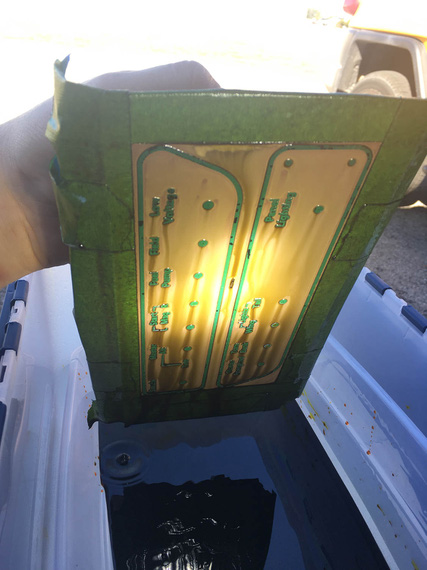
Etching is visible here
..it took about 90 minutes at 100F etchant temp to get about .010 depth.
To neutralize, this time I used soda with water, to make it get into all nooks and crannies better.
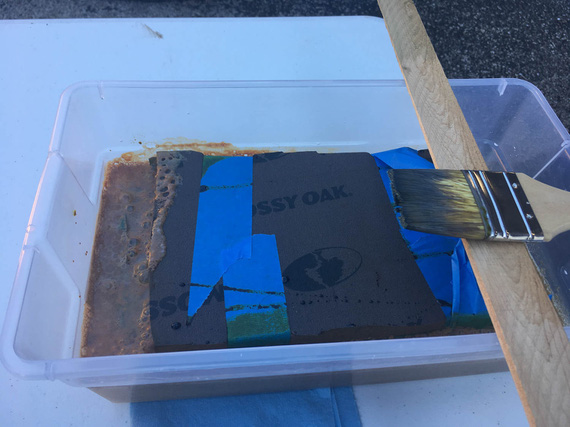
Neutralizing
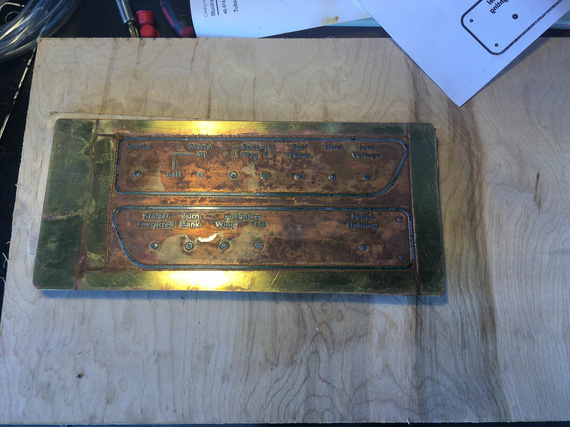
Pulled out
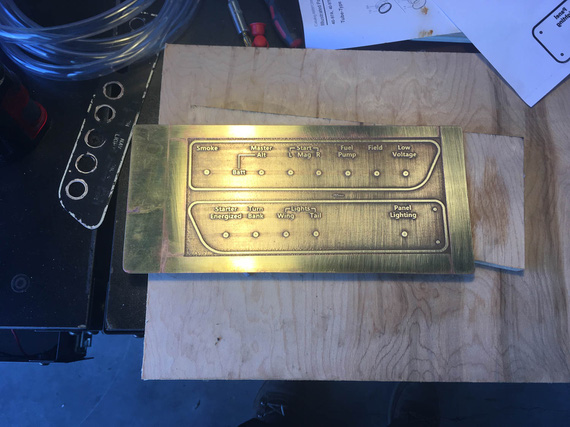
And cleaned up!
Nice! I liked it! The etched sections ended up a bit too thin, but workable still. I cleaned them up with maroon scotch brite by hand this time.
Next day, I cut them out, drilled the holes, and tried them on.
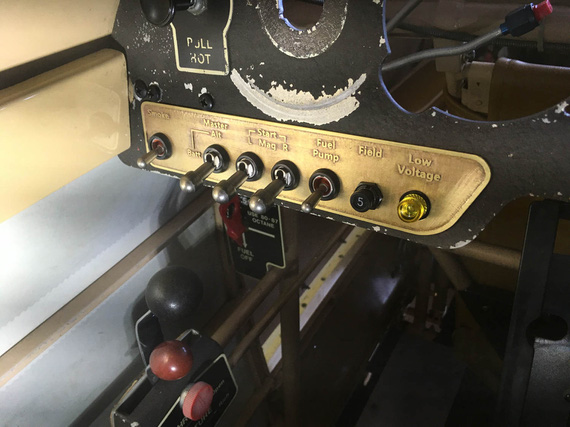
Left
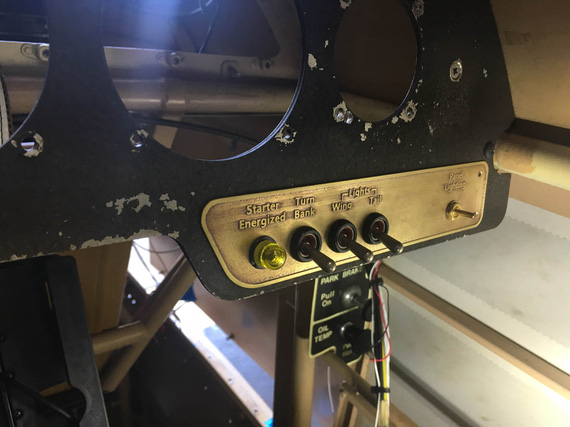
Right
I liked them! The only step left was the paint. But first,
Paint
I touched on the subject a bit already.
I was afraid of Rustoleum now, even learning that I messed it up myself with lacquer - it peeling off the base in sheets didn't give me confidence. Rustoleum has clear enamel; but my reasoning was that if it peeled off with primer, clear enamel without primer on relatively sharp edges of lettering will just come off almost immediately, given that my hands will always be around the switches when operating them.
I settled on epoxy. It made sense. Klass Kote had good reviews from RC guys, and folks reported it brushable.
I completely stripped my old sample with brass wire brush and acetone. Wire brush cleaned it out nicely and smoothed some roughness still left, so I wire brushed the new plates too. It helped, and seemingly worked better than the maroon pad! Noted.
And then, I set up in the kitchen.
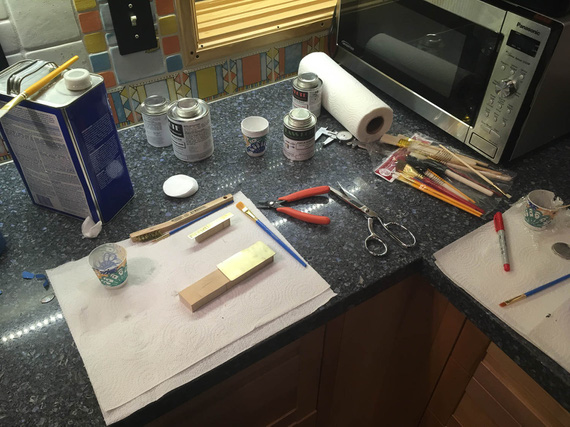
Set up for painting.
Klass Kote needs to be mixed, and reacted for at least 30 minutes prior to application. My plan (approved by Klass Kote) was to do base in black, then bake it after initial flash off for 30 minutes at about 100 degrees Celsius. That will cure it enough to make it sandable, after which I'd sand down the letters, and clear coat it. I won't need to bake the clear, 'cause I'm then done for the night, and it can take it's sweet time curing.
Klass Kote is really thick when mixed!
Trying it straight on my test coupons left horrible brush marks.
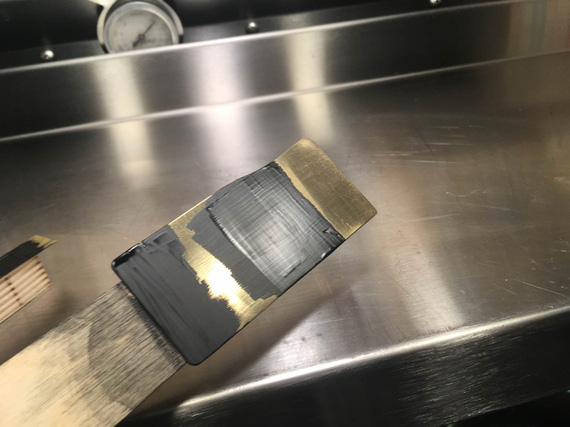
Straight Klass Kote black
I tried it on my test plate as well - just to play with the baking process.
Meanwhile, mixed up a new batch and wanted to try it reduced with a lot of reducer to see if that would make it flow better.
Nope. That left the same brush marks, but just watered down, if you will. Multiple coats just made it uglier.
Hmm... Meanwhile, I had a batch of clear mixed too, and tried to see how the clear would look over my test plate that was now baked and ready to be sanded down. Maybe, the brush marks would get better / a bit more hidden with extra brush marks of clear?
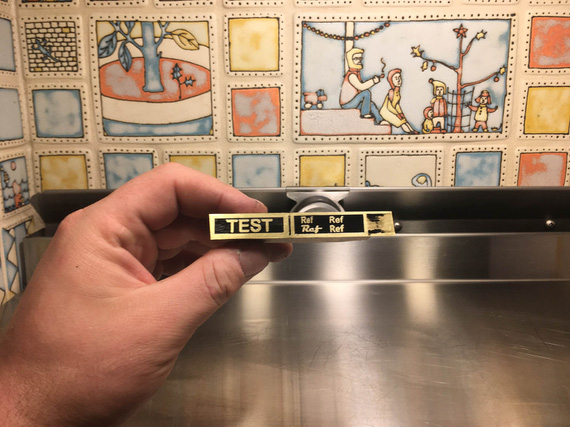
Test plate
Not bad, right? Well, you're not looking at it right.
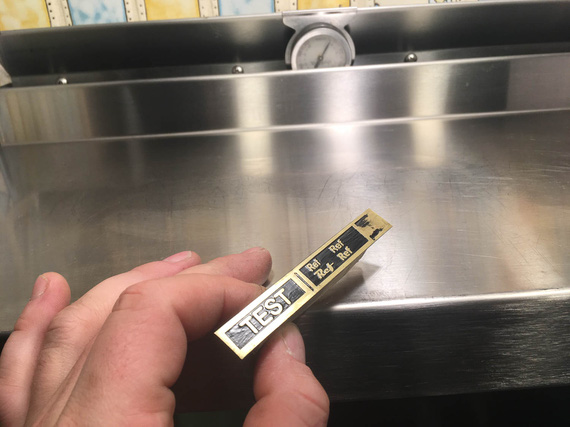
With light
See?
That's horrible.
Frustrated, I dumped my thinned batch of black into the tray I was using for garbage, and sat down thinking. My eye fell on a foam brush I had in the set of brushes I bought. I mindlessly picked it up, and started smudging the dumped paint around the tray.
It flowed! Very nicely!
I then remembered how much I hate brushes in general. I was never able to get anything remotely approaching good with brushes. When I built my kitchen cabs, I used cotton pads over foam brushes and achieved very smooth, mark-less results.
I think, this random act might've just worked!
I cleaned up my other, flat, coupon (the one that wasn't baked, so the epoxy would still come off with some wiping with the reducer).
I was now planning to mix the final batch of black I'd reduce. I'd try it on the coupon first, and then, if I liked the results, on the actual pieces...
...it went on smooth, but fish-eyed a bit. I thought that that was due to some crud on the coupon (I wasn't cleaning the coupon too good).
So, I put it on the actual plates.
It fisheyed! A lot of eyes flowed together, but some big ones stayed. I quickly dabbed them out with the corner of the brush with some paint on it - too late, damn it! It didn't flow out. The whole thing was also rough-ish... thinned paint was flowing around imperfections of the etched surface, as well as my dabs were messing with it, probably. There were also areas that had visible marks of me lifting the brush.
At this point, I should've stopped, dunked it into the reducer, washed the whole thing off, and called it a nite.
But, I was too focused on getting there.
I thought, I might be able to get a uniform "rough" look.
Solvent was flashing off, and paint was getting thicker.
More paint, but this time gently, not to rub old paint off. Then, dab-dabbidy-dab the foam in and out.
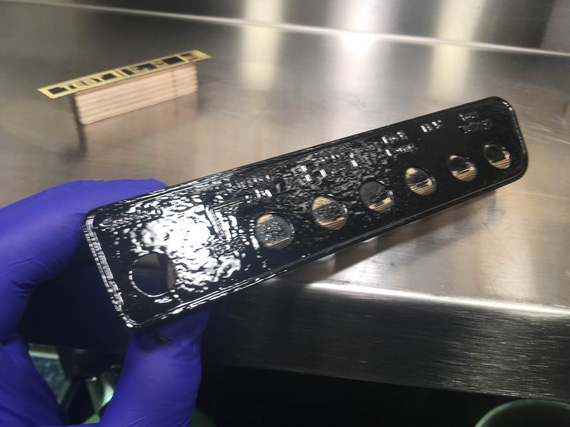
Rough look
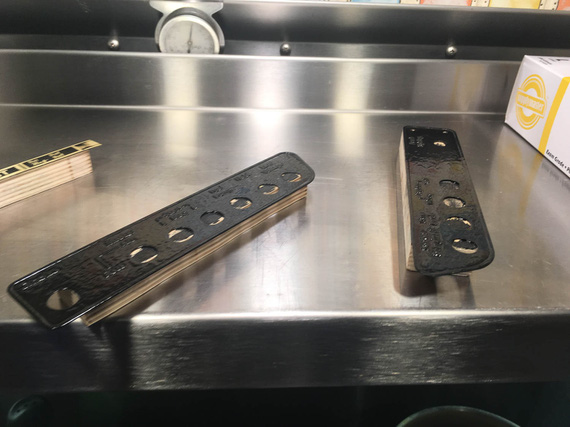
..on both
That looked acceptable, and I decided to let it flash off the solvent. Meanwhile, went to Walmart for more foam brushes (I only had two in the set).
Got back, mixed a batch of clear and left it off to react. It was looking good, with "rough look", and I was thinking I might just be able to pull it off.
After the paint stopped being tacky, put the whole thing into my oven.
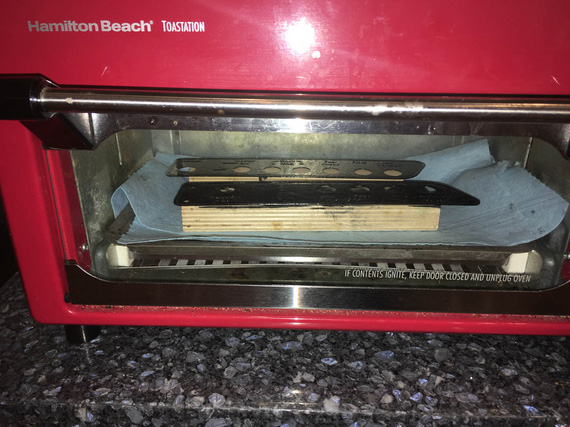
What's for lunch, ma?
Yep, that's my toaster, repurposed as epoxy bake oven, and calibrated at 100 degrees Celsius :).
I forgot about solvent pop.
See, when you have too thick a layer of paint (which I did, when doing my "rough look" pass), and the top of it skins off, some solvent might get trapped under it. What happens then is the trapped solvent tries to evaporate, and can't: pressure builds, and it "pops" the paint, making a tiny little pinhole.
So after 30 minutes, I pulled the plates out of the oven. Yep, I got the pop a-plenty. Some areas of paint that were especially thick got a ton of them.
I decided to stop then. Screw it. Rustoleum it is, as much as I hate the idea. This epoxy stuff is great (no, really, it is); but I need to spray it. So, I took a rag, wetted it with the solvent, and tried to rub the paint off.
Nope! It cured enough to no longer rub off with the reducer! Crap. Now, the only way to get it off is with Methylene Chloride stripper... :(
Oh well. What's the best second option for a frustrated guy who failed at a paintjob at around 2 in the morning? Stop? Go to bed? Strip and start anew?
Nope! I thought, "well, I had a batch of clear right here. I can see if I can rub out the worst uglies with something, and try to clear it to see if it'll hide the rest".
Admittedly, it did hide pretty neat.
I rubbed out the worst popped parts with maroon scotch brite, and sanded down the lettering.
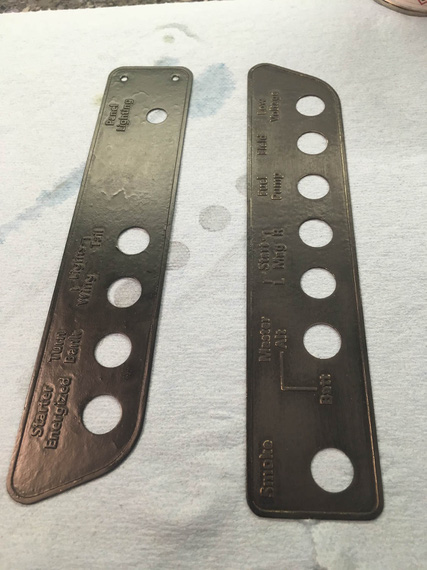
Left's not rubbed, right's rubbed
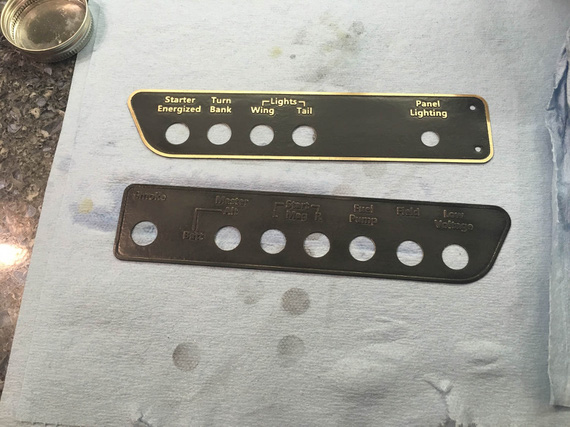
Bottom's rubbed, top's rubbed and sanded
And then, I clear coated them with two coats, cleaned up, and went to bed.
So, did they come out okay?
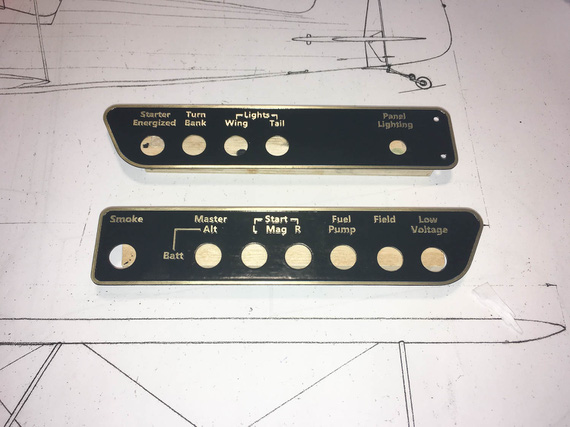
Finished
They look okay if looked at like that. I don't know. They're ugly, if looked at in the right light.
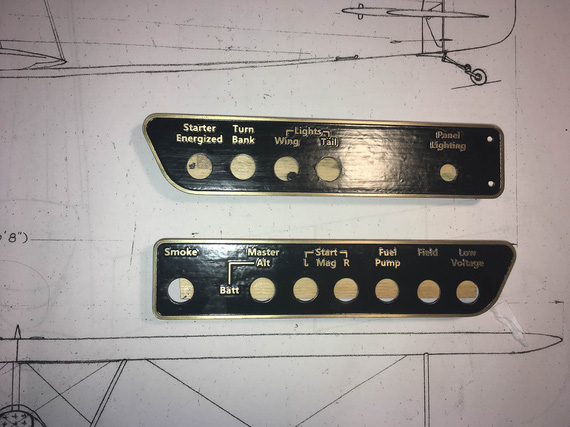
With the right light
On the other hand, it matches the "rough style" of the old school plates. I really don't know.
What I should've done from the get go is either used Rustoleum, or got myself an airbrush. With an airbrush, it would've worked much nicer.
Maybe, I will strip them and re-do the paint. Maybe not - that kind of light is unusual in a cockpit. Maybe I will file this under the "don't be an idiot / don't rush a paintjob / use the right tools" section, and keep them as a reminder - until I have to make another set.
I don't know. We'll see.
Meanwhile, the Chairman says, "Come Fly With Me!"
Good judgment comes from experience and experience comes from bad judgment.
Up ↑
Brakes and Wheels
fixin' and bleedin'
| On: | Nov 04, 2019 |
| In: | [Chickenhouse Charger] Electrical Rebuild |
| Time logged: | 23.1 |
| Tags: | 6781G, MA5 Charger, Annual, brakes, wheels |
So this one turned into a month long project, give or take. Sure, sure, I was doing other things, too: last one of which was completed October 9th... after which I was finishing this one exclusively, pretty much.
Damn. One month to finish putting the brakes together. Granted, I had a hiatus for a week and a half, dealing with fixing up bad (non-aircraft) plumbing and cutting (non-aircraft-grade) trees.
Regardless... Shall we?
...
After having finished making the new brake line, I naturally wanted to install it and call brakes done.
Some of the disassembly work documented here actually happened prior to the new line being bent up, but hey. Putting it all in one place makes for a better narrative in one context.
First, the Calipers
... one of which was cracked due to someone having overtightened the bleeder adapter. Oh well.
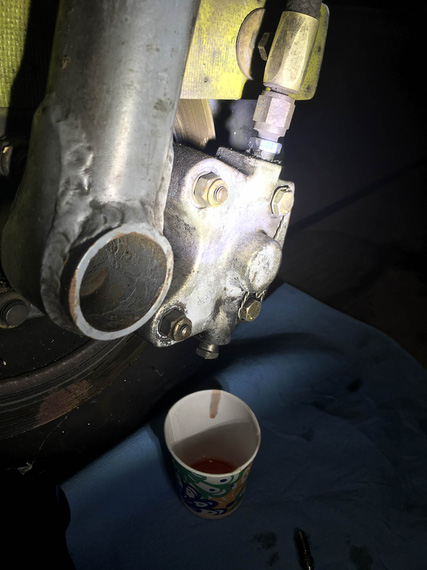
Drain
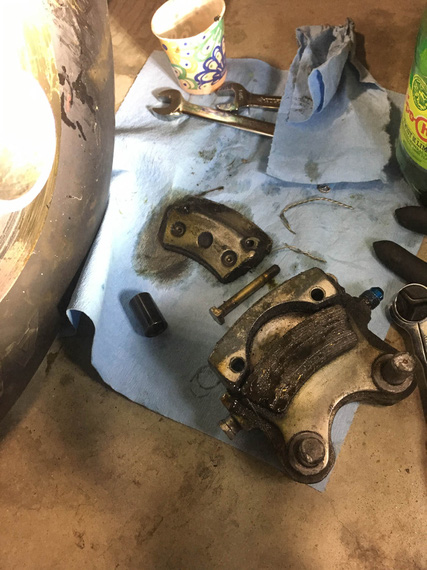
... and pull
Brake pads were soaked in brake fluid. For that matter, the disk was covered in brake fluid that hardened to molasses-like consistency (which mineral milspec fluid does, apparently).
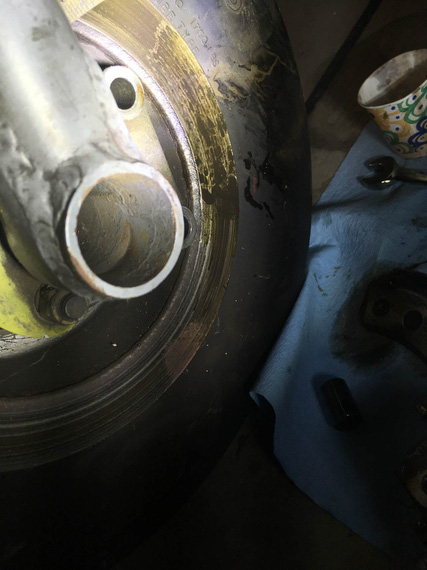
Ugly smudge
Intermission. By the way, it seems that this smudge didn't come from the dripping bleeder, but rather, judging by how the pads were soaked, from under the brake piston. Probably the o-ring was bust, and it was weeping from between the caliper and the piston. It seems that it had been a feature of the plane for a while.
Jumping a bit ahead of myself, on the other side, I discovered the brake disk somewhat dirty with oil - crankcase breather hoses are routed into the _left_ side wheelpant and terminate near the disk - clearly, spraying a bit of oil on and around it. You'll see those hoses on the pics of the left wheel below.
I think Remo's idea was to prevent oil on the belly from the breather. My friend's Ben contention was, this was a brake lock-up prevention measure; and when he brought it up, I immediately realized... leaking piston on the _right_ caliper was a lock-up prevention measure as well - to make sure both brakes are equally slippery - right one with brake fluid, left one with motor oil... At any rate,..
I will admit, this was my first caliper job ever, and anchor pins presented a bit of a problem. They're press fit in the caliper, and I didn't have an arbor press. Well, I used an old 1/4 nut that I banged on (gently!), and finished with a drift punch....
Tappy-tap-tap!
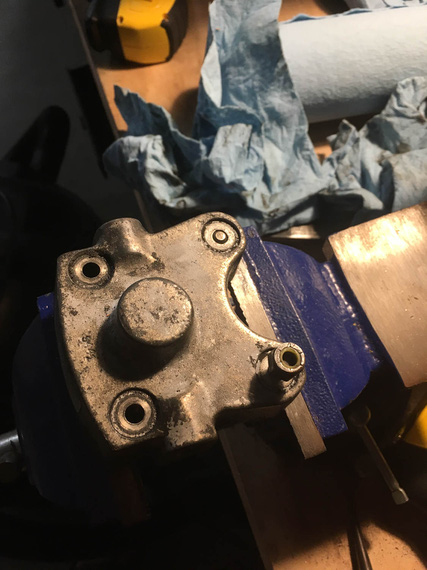
Tapping out the pins (aka anchor bolts)
With the caliper put apart, I tossed the old body, and took maroon scotch-brite to the rest of the pieces to clean them up.
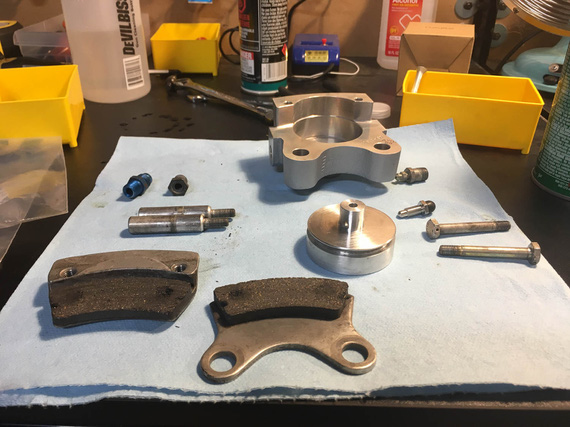
Cleaning up the parts
Now, I tried tapping the anchor pins back in, but was too afraid to mess them up. Finally, that was an excuse to go get me an arbor press!
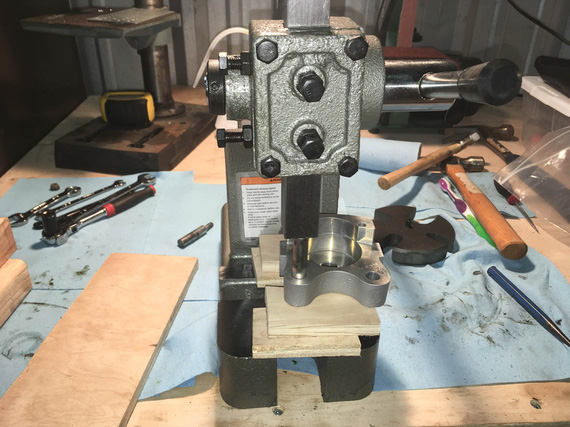
Pressing the pins back in
One final bit was to put the nuts back on.
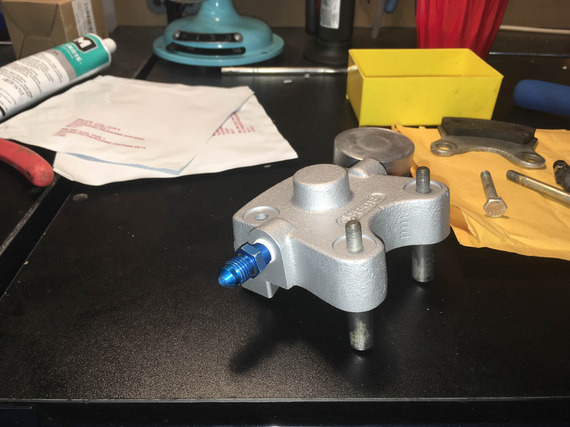
Ready for nuts
Question: how many wrenches does it take to put on an aircraft grade nut properly? Answer: three.
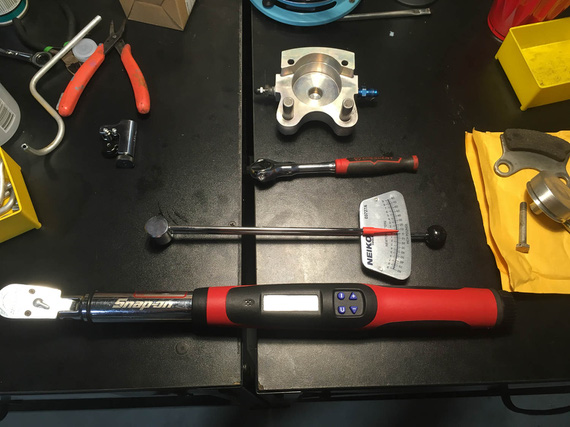
Wrenches!
Answer: three. Ratchet to work the nut before it's torqued. Small torque wrench to determine the free torque. Large torque wrench to torque to spec.
I pulled off the other caliper, and cleaned it up, too.
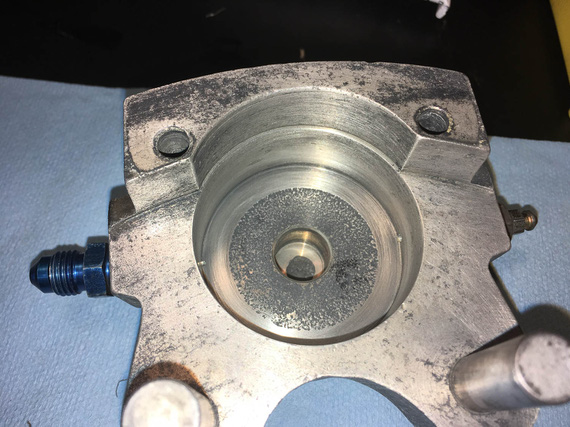
Left caliper, cleaned
Put in new piston o-rings, cleaned up AN flare adapters, put the calipers back together, and put them away.
Next step was,
The Parking Brake Valve
That little doodad was leaking for a long time, too. It seemed it was leaking from the little cam arm that rotates, but I wasn't sure, so I decided to put it apart and rebuild it completely, too.
It's under the passenger's seat on the Charger.
Pulled it off
On the bench
First, I pulled the "cam arm" out - the little arm pivots, and pushes valves open (or lets them close) inside the box.
Cam actuating arm
O-rings were in reasonable shape, but looked a bit.. old. I decided to change them and disassemble the rest of the contraption, to change all the other o-rings in it.
Now, the middle two "straight" fittings are straight threads and o-rings under them. No problems there.
The two 90 degree elbows on the sides are NPT. One came out just fine. The other... Well, the other decided to leave a chunk of itself inside the valve body...
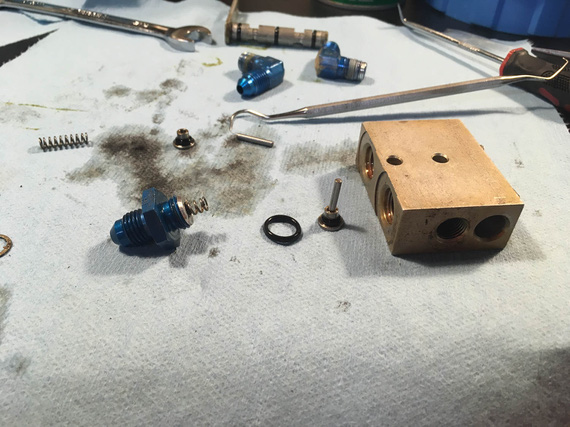
Bits and pieces - valves, springs, and actuator plungers
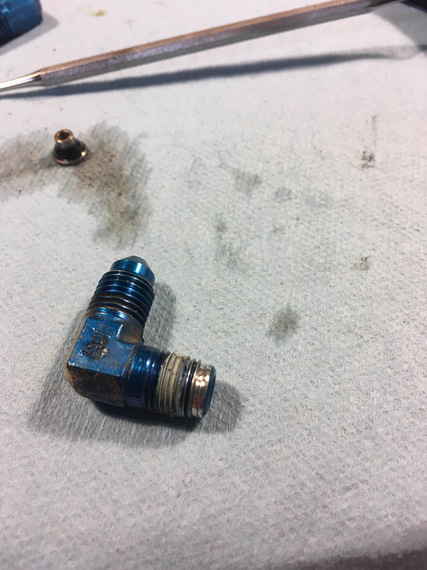
Busted elbow
You can see the chunk of the male thread galled and stuck in the female NPT hole of the body.
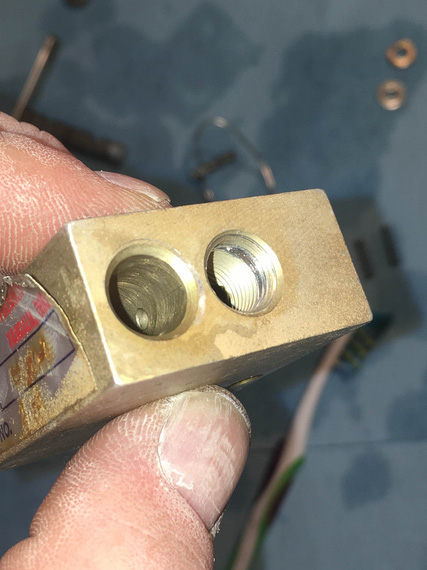
Chunk of thread
Damn damn damn! I need a new parking brake valve now?
That new valve is how much (search.. search.. six hundred and sixty five!?!?!?!?! $#*@(&(2@@#!). No way I'm paying that.
There are alternatives. Cheapest one is like what, hundred fifty bucks; and I'll have to work around it's plumbing (which is different than mine); and the "direct fit" "homebuilt" cheapest one is over $300? No way. No way in hell until I try to fix this.
What is the hole? 1/8 NPT? McMaster sells taps for $25, two new fittings are what... under $30, and a handful of o-rings, which of course I didn't have (I have a bunch of o-rings in a ton of sizes for fuel applications, but not for brake applications).
We'll try to re-tap that hole; hopefully braking the piece of the thread left in there by the fitting while keeping the female thread intact...
... the tap and the o-rings got delivered a few days later. Made myself some nice soft jaws for the vice to hold the thing without scratching it.
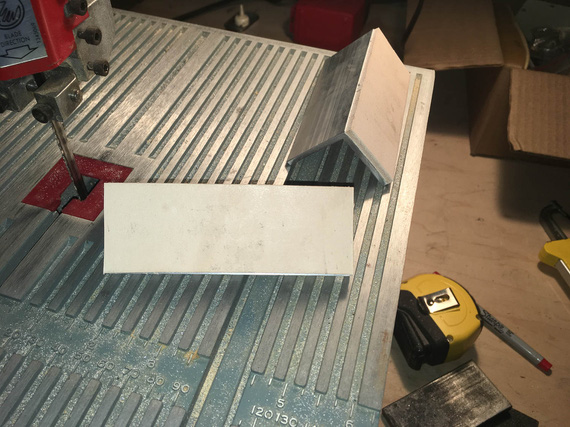
Soft jaws
That's aluminum angle and leather.
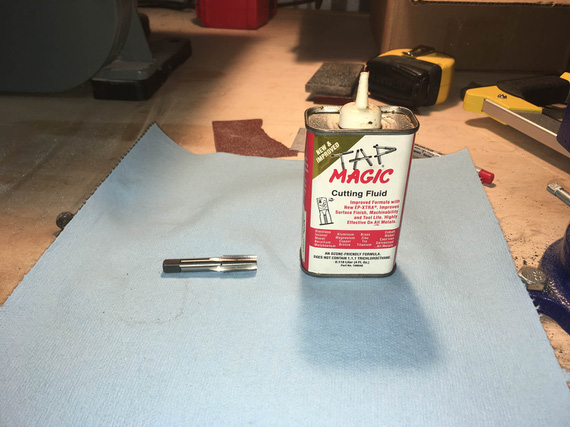
Weapons ready!
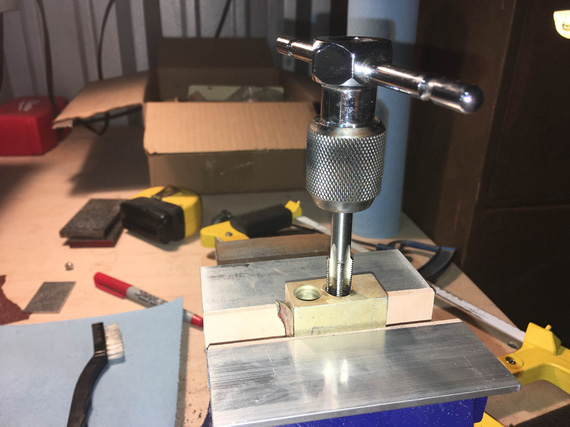
Tap, tap, tap (not that kind of tap!)
Slowly, slowly and gently, breaking the chip every 1/4 turn and adding cutting fluid. It worked out great! The hole was deeper than needed, so I tapped the threads a bit deeper, arguing that if the female portion of the threads got chewed up a bit, I'd put a fresh surface on them too.
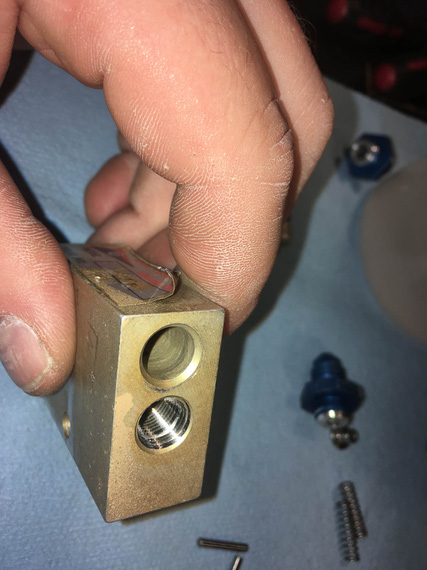
Done!
Well, we'll have to wait to see how well this works out. If it doesn't leak, I just saved me a boat-ton of money.
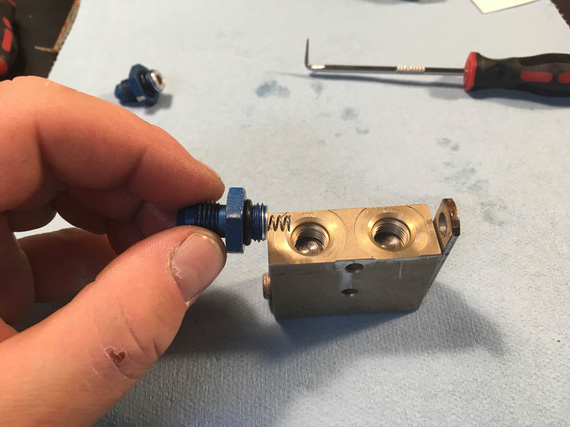
Putting it back together
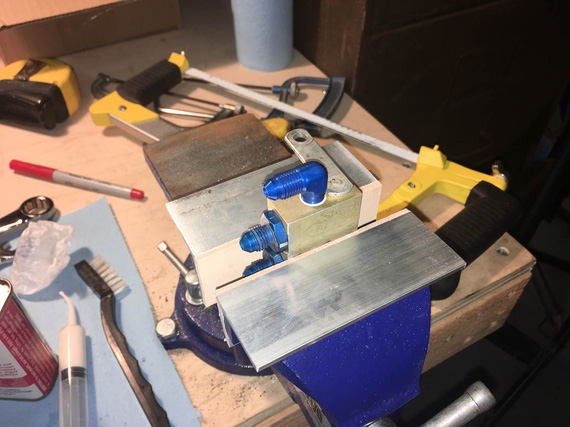
All done
New o-rings, new elbow fittings, re-tapped hole. Threads on the busted hole felt good, no hesitation and "catching". We'll see how that works out...
Next,
The Pads
Pads on the right brake (the one with leaking piston o-ring and busted caliper) were soaked in brake fluid. Cleveland says contaminated pads are a cause for replacement, so I decided to do it, since I was already in there. Besides, excuse for another tool - this time, the brake rivet set!
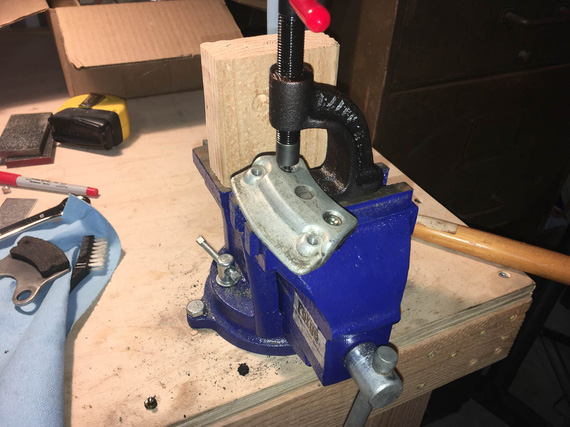
Punching old rivets out
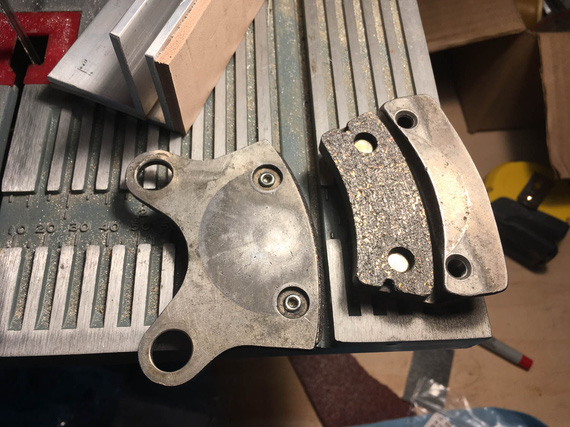
... and putting new ones in
And with that, the last bit before we could put everything back together was,
The Wheels
Again, since I was already there, I decided to do the wheels at this time too - re-pack the bearings, that is, and give the disk contaminated with brake fluid a real good cleaning.
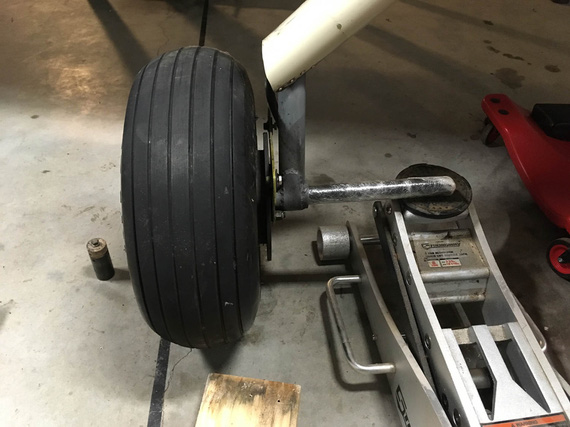
Jacking the plane
The axle nut comes off with finger pressure
I admit - I made a mistake here. I did not remember what kind of resistance I felt when spinning the wheel on the axle before I took off the nut and took everything apart. It would've been important, especially since this was my first time doing these wheels, and wheels in general....
Temp "wheel"
Cleaning bearings
All the grease seals (and bearings)
Crap! What, the felt seal is bust!?.. Looks like it is. Okay, not finishing this part quickly (because of yet again, another "order parts / wait" cycle).
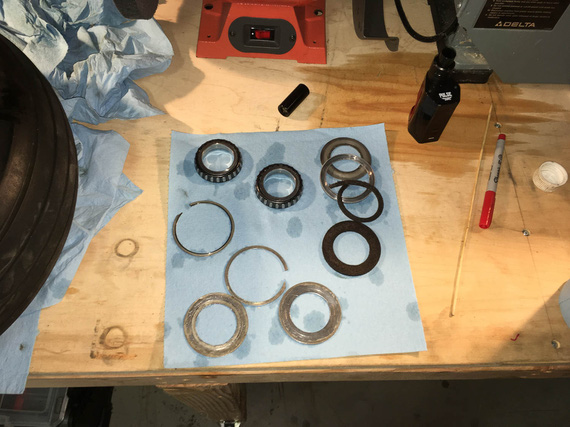
Flushed, and drying
Do you see the other mistake I made? Yep. I mixed up the bearings ("front" and "back"). Bearings should always stay with their races...
Oh well. After some research, seems that the worst that will happen is wear will get accelerated.. since the bearings and races looked squeaky clean, I decided to keep them as is.. for now. And just Hail Mary the position (since I have a 50% chance of getting it right :)).
I decided to replace all the felts because I was changing grease from I didn't know what kind but likely red Mobil grease to Aeroshell 22.
Ironically, I apparently didn't take a single picture of the bearings being greased - probably because my hands were too greasy doing them :). Oh well.
The new felts came, and got coated in grease.
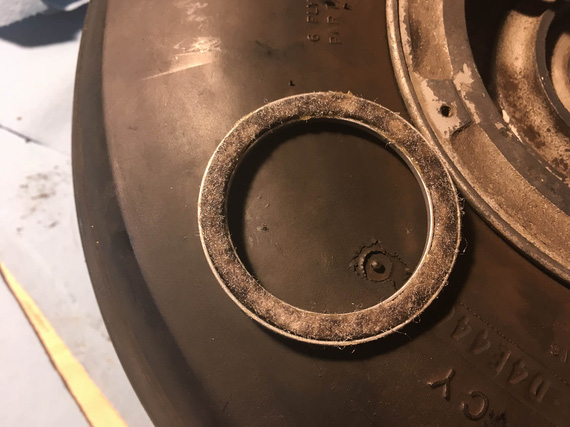
One of new felts
And, I put the wheel back together. And then... And then, I couldn't tighten it back right. I have to align the hole in the axle nut for the cotter pin... I could either get it under-tight (with perceptible play in the bearings - not good), or a bit over-tight (so that the wheel will spin, but with some measure of resistance). Remember, I said that my mistake number one was not checking how freely this wheel spun prior to pulling it off? Now, I was paying for it.
I tried flipping the bearings around (because I didn't note their original positions), thinking that maybe that will help. Nope. No change at all.
Oh well. I couldn't do anything about that at that point, so decided to settle on "a bit tighter" option.
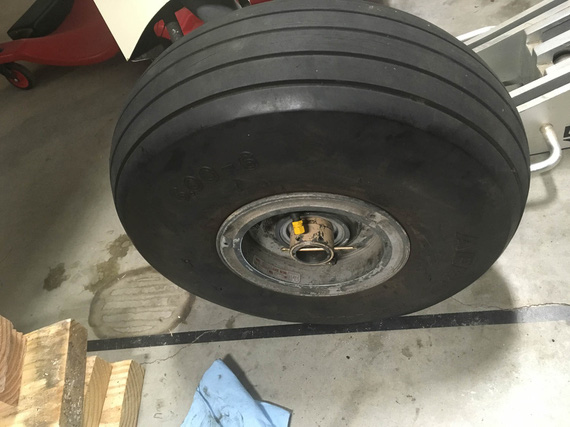
Cotter pin
With the other wheel, things went much smoother (the second time you do the job, it takes you 10% of time it took you to do it the first time, right? :) ). It came off, was cleaned, and got back on, with new felts and bearings in the original positions. Nut got tightened to super tight, loosened, and tightened to finger tight - and the wheel was perfect. No play, and no "drag".
Le double sigh.
So finally, it was the time to put things back together!
Putting the Brakes Back On
That was almost pleasant, after all the mess-aroundary with bearings. I cleaned up the pins' glide bushings, and lubed them with Dri-Slide (graphite + moly) lube Parker recommends.
And then... Calipers on, slide the bolts in, torque.
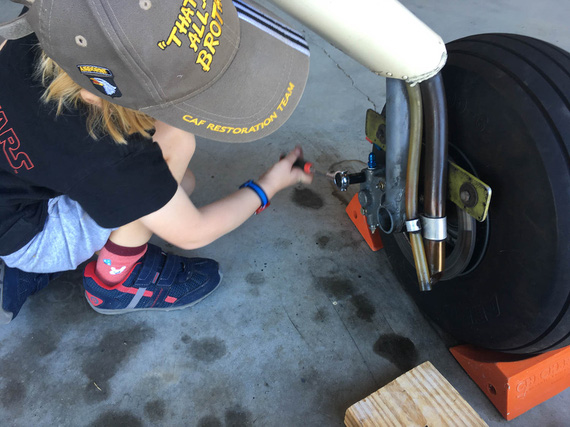
Putting calipers back on
Even a child could do it! By the way, that's the left wheel - remember I was mentioning the breather hoses routed to that wheel? There they are, in their awesome oil-spraying glory...
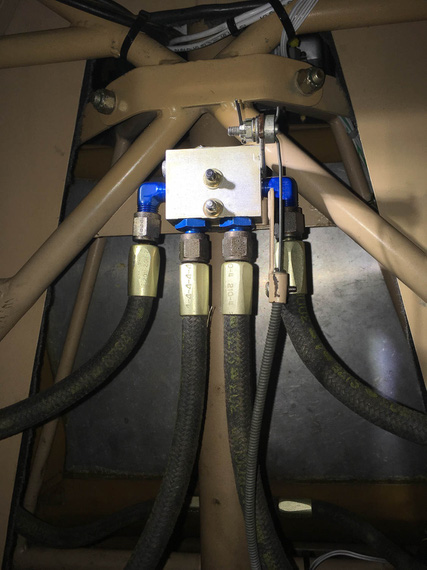
Parking brake back on
Put the parking brake back on.
Phew. Now, finally, we can bleed and test!
Bleeding
Now, there are two approaches to bleeding brakes - either bottom up (push fluid up thru the bleeder valves), or top down (sit in the plane and squeeze the pedals while the other guy opens and closes the bleeder). Bottom up is inherently simpler.
Some time ago, my buddy Dick was showing off his fancy bleeder he got from ATS.
ATS Brake bleeder
Hmmm.. What is that reminding me of? Aha! Bug sprayer! That's right
Bug sprayer
Now, a few minor modifications, and...
DIY brake bleeder
Pump it with air, open the valve, and the brake fluid gets pushed out thru the line that attaches to the bleeder valve on the caliper. Child's play.
For bleeding, I dragged my good friend Nick S. to give me a helping hand. I could've done this by myself, but having someone watching over the "other end" (it either being the end that pushes the fluid in, or the end out of which the fluid comes out) makes the job much more pleasant.
Now, the way brakes are plumbed on the Charger is, each side goes from it's caliper up the gear leg to the parking brake valve, then to the Master Cylinder, and from there both Master Cylinders are plumbed into a tee, from which the single line (the one I was re-making earlier) goes to the reservoir on the firewall.
We decided to bleed each side up to the tee first - to minimize the amount of air ending in the "common" line between the tee and the firewall. After bleeding each side up to the tee, we'd attach the "common" line and bleed each side up to the reservoir, letting at least a cup of fluid to flow thru, ensuring that we push all the air out.
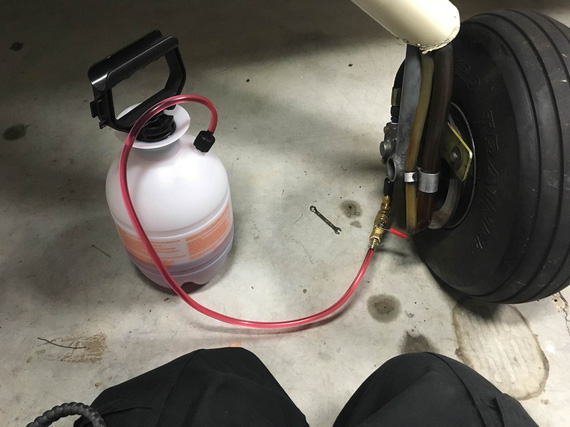
The setup
The plan went without a hitch, aside from the fact that I initially forgot to open the parking brake, and was trying to figure out why the hell the fluid won't flow. Hehe. Nick called it, too!
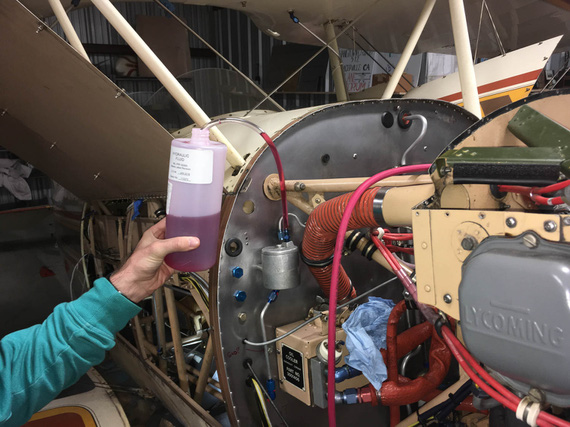
Nick holding the fluid line from reservoir
Finally, the moment of truth. The brakes were firm and nice, held well, and no leaks nowhere! Now, I need to double-check this - next time I'm in the hangar for a good few hours, I'll set the parking brake to keep the pressure in lines, and see what happens - but initially, everything held just fine! Phew.
So finally, the last bit was left.
Finishing the New Line Install
Now, the new line was finally in place, and all that was left was to install some ADELs to hold it.
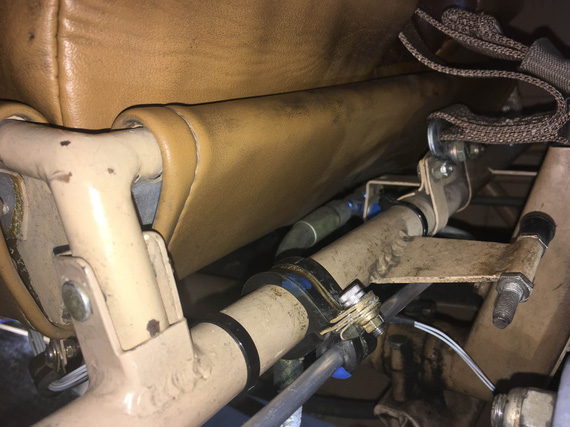
ADEL One
That one took ... an hour! Very nasty spot and hard to get to. I had to find a better way...
Now, there are fancy mods to ViceGrips (or you can buy them for sizeable chunks of cash pre-made) to hold ADEL clamps together while you're inserting the screw and starting the nut. I don't have them.
Some people use safety wire.
I decided to try...
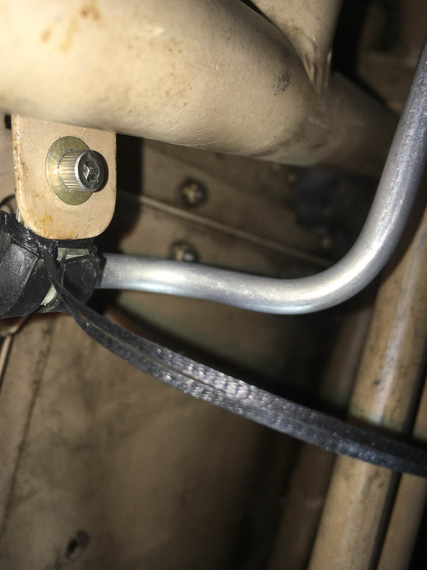
Lacing cord!
It works great, too! Just double up and "noose" it around - it holds a clamp like a charm in the "closed" position while you fiddle with the nut! Even Jack came out to see that.
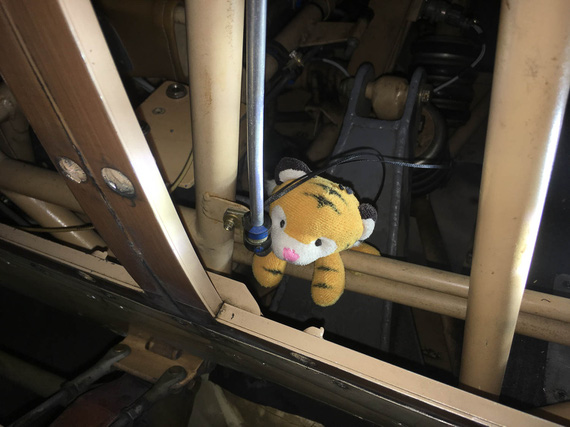
Jack inspecting the work
With those clamps installed, I had to tie a bundle of wires going across the tube to the front stick's PTT switch. That one was one hell of a contortion exercise, under the front seat's front edge and behind the stick, but I managed after a couple of tries.
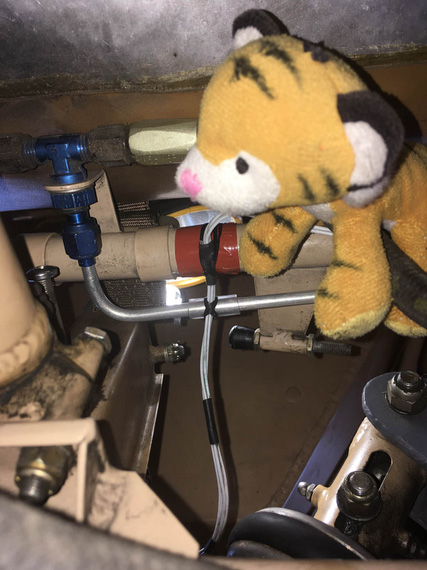
Lacing the wires to brake fluid line and structure
And finally, a couple more clamps along the length of the line on the fuse to hold it in place there. Some TorqSeal, and we're done!
I worked out a method to these, finally, I think. I use a long (~2 inches) AN3 bolt first to "thread" the clamps on, and then close them with a wrap of lacing cord using the "noose" method ("Method 2" here). I then remove the long bolt, install the final bolt, and start the nut. When the nut brings clamps almost to a close, I cut off the nooses, and tighten the nut. Works like a charm!
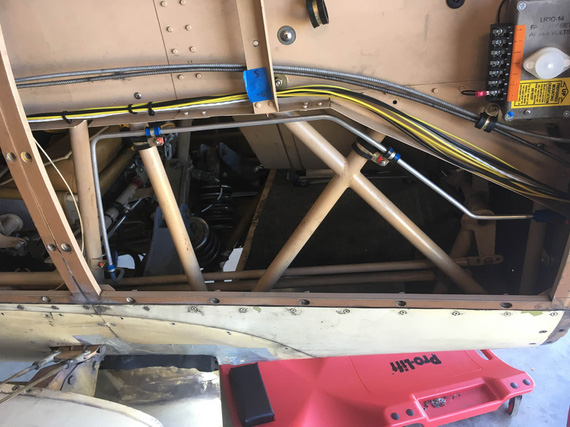
All done!
So, there. A pretty big job now complete - brake system rebuilt, re-bled, and ready to go.
PS: I was considering where to put this - under "2019 Annual" or "Electrical Rebuild" category... decided to pile it into the "Electrical Rebuild", because basically as a part of this rebuild I'm doing a bunch more stuff.. This is basically becoming a "minor restore" project... But still, the main theme is "Electrical Rebuild", and I'm keeping it under this section.
"you're gonna have to key the mike. I can't see you when you nod your head."
-ORD ATC
© Copyright "79FT". All rights reserved. Feel free to cite, but link back to the pages cited.
This website only shows how I did things in my various projects. These pages are for information and personal entertainment only and not to be construed as the only way, or even the perceived correct way of doing things. You are responsible for your own safety and techniques.
