[79FT]: Building Things |
 |
Carb Controls
...finished!
| On: | Feb 21, 2020 |
| In: | [Chickenhouse Charger] Electrical Rebuild |
| Time logged: | 15.95 |
| Tags: | 6781G, MA5 Charger, carb, throttle, mixture, cables, controls, engine, fwf |
Quite a while back I have measured the control cables and ordered them.
They took a long time to show up, and then I was working on this amongst other things. Just finished now :).
So, right to it, shall we?
First things first was to get thru the firewall. I had these fancy penetration trims for cables called 'CableSafe' from Spruce
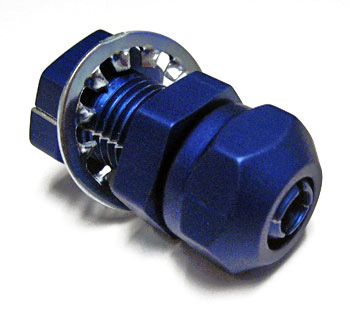
Cable Safe
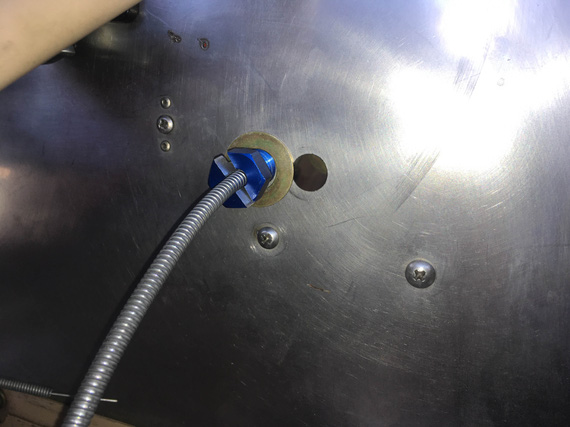
Throttle cable with it
Hmm... problem one. Washers clearly won't fit given the old holes in the firewall (Remo had grommets there, but I wanted something a bit more substantial).
No worries - we'll make me a special washer!
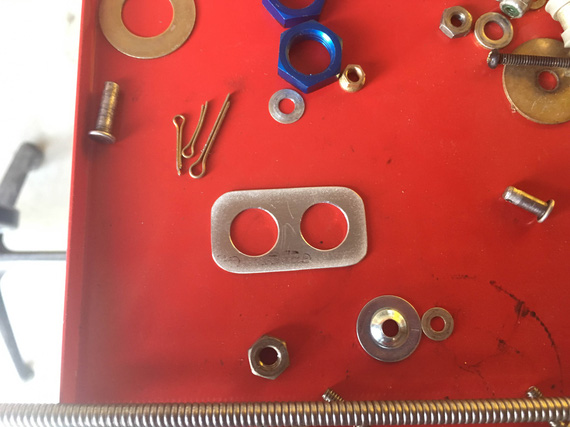
Special washer
Here's how this looks from the "airplane" side (ie, opposite the motor side of the firewall).
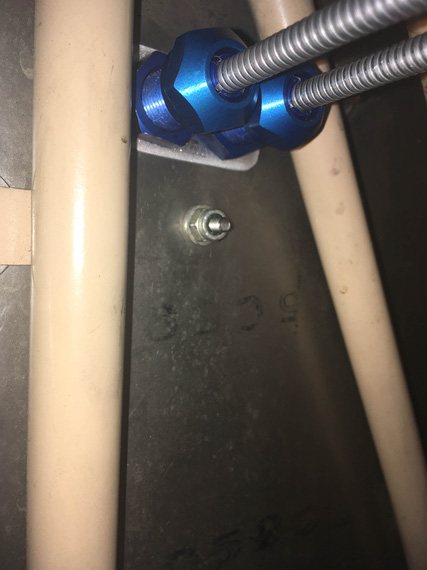
Cabin side of the firewall
And then, came fiddling. Most of it was done before ordering the cables, but I still wanted to check and re-check everything.
Hooked the clevis ends to the control cables, and the cables to the carb to verify everything.
When measuring, I figured I'd need a rod end for the mixture arm due to misalignment of the cable rod and the control arm. And the damn bushing, too - because the hole in the carb is 1/4", and the bolt is #10. I got some bushing stock from McMaster, but it was too long - had to shorten it with some creative sanding.
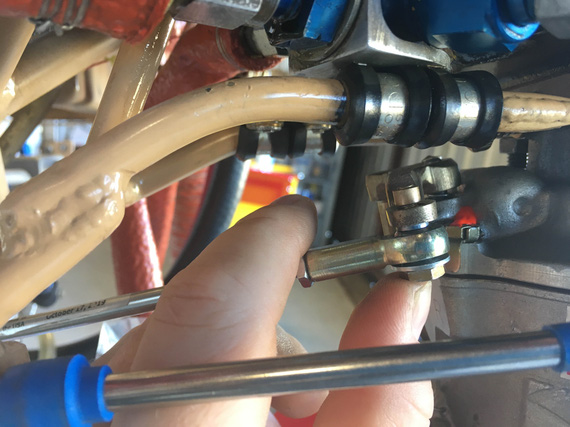
Mixture rod end hardware stack
Fun hardware stack, isn't it?
Bolt -> Large Washer -> Rod End -> Shim -> Bushing (inside control arm) -> Washer -> Shear Nut + Pin
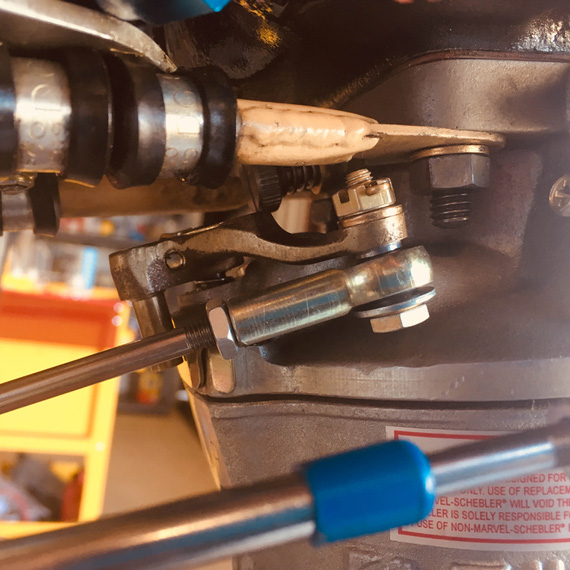
Bolted together
Throttle's clevis looks way more dull.
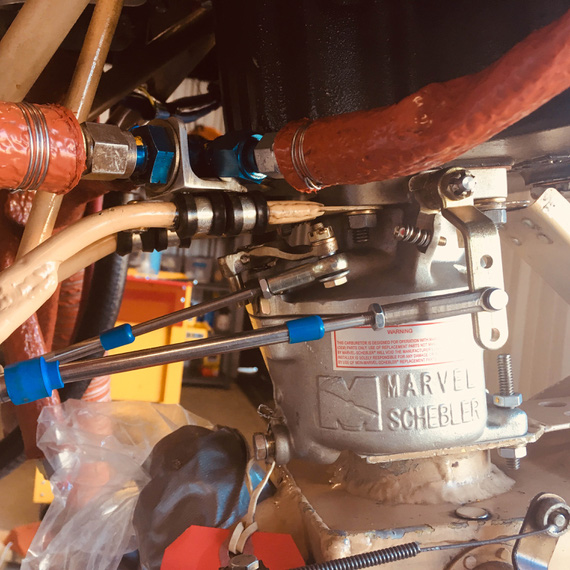
Throttle arm
Then, the airbox went on and I noticed something.
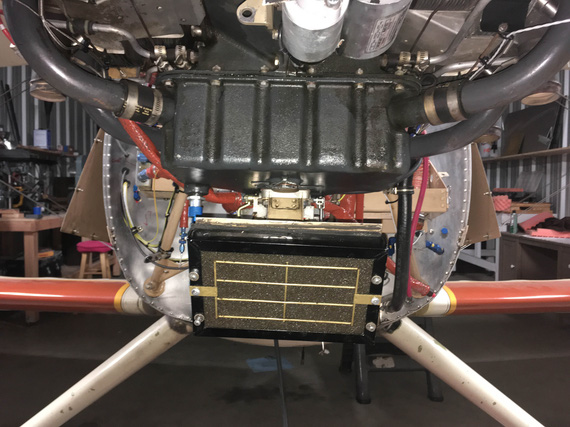
Airbox - do you see it?
See how it's tilted to the right (clockwise)?
I spent quite a bit of time there trying to figure out what's wrong. I put the cowling back on!!
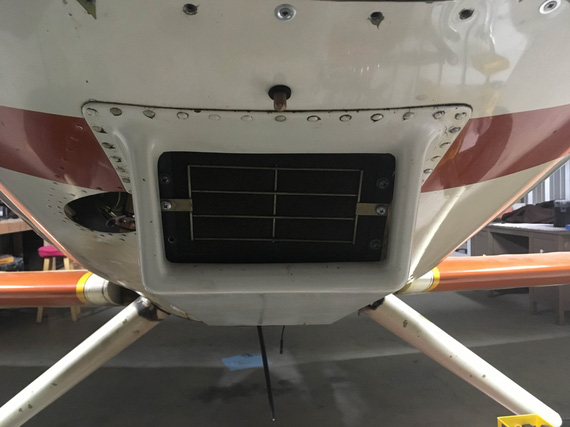
With cowling
Still crooked.
I kept thinking and thinking. It's motor -> oil sump -> carb -> airbox -> filter. That's how everything's bolted together. The first three are not "home buit", so I didn't think they were off. So it must've been the airbox and / or the filter mount.
Upon closer examination, I realized that the airbox was welded together way off, and is crooked itself. And the filter is mounted even more crooked in the same clockwise direction.
To confirm, searched all the pics I could find online of the plane prior to my having it (and disassembling the front).
It was hard to tell, but.. I think it was like this from the very beginning.
Phew.
--
Meanwhile, we had a night of a kind of weather when it rains without actually raining - you know, as if you are in a cloud with large droplets. Everything in the hangar got soaked, obviously. Including my clevis ends.
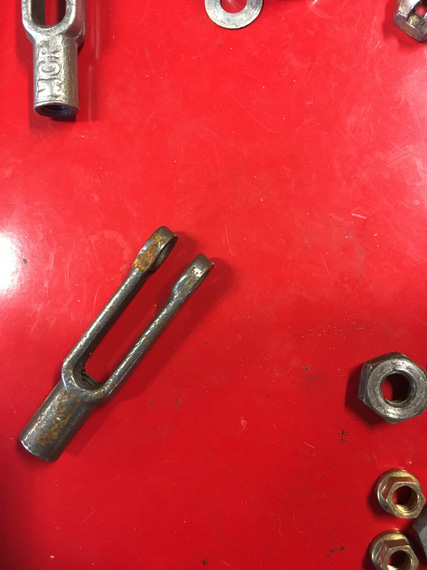
Rust on a new rod end?!
Aren't they supposed to be cad plated? Oh; and that was the first time I really noticed how cad plating sacrifices itself to prevent rust on steel - a lot of my hardware was covered in little white stains, which were cadmium having corroded and saved steel.
At any rate, I double checked the order paperwork. "Cad plated". Hmmmm. They definitely were not.
Called Spruce. She checked and doublechecked - and confirmed that indeed, their vendor stopped doing cad plated clevis forks specifically in that dimension - #10 end, #10 rod. They refunded my money, and let me keep the forks.
Called SkyGeek, asking about the clevis forks they sell. The lady goes, "yep, plated". I ask her to triple-confirm.
She takes about 10 minutes, and gets back to me - nope, not plated. She's sorry. No longer made.
John F., a local IA, confirmed. Only plain steel now, seems that cad plated forks are unobtanium. Crap! Oh well, I guess, paying attention and making sure to put oil or something similar on them from time to time is in my future.
--
Glenn had a carb temp probe in the Rotec TBI I am replacing, and I decided to try to keep it. Wire was cut way too short for how everything's on the carb (vs. the TBI), so I spent a bit of time pondering if:
- The probe was a thermistor, or a thermocouple
- If latter, could I successfully extend it
Pouring thru (mostly AeroLectric Bob Nuckoll's) notes on thermocouples, realized that some are magnetic. Let's see.. score! Magnetic indeed.
Got some multi-strand thermocouple wire of the same kind (red/yellow - I forget which metals those are :) ), and did some "back-bench" testing.
- Hook up the probe direct to the gauge
- Pour solvent onto the probe tip, watch for rate of temp change and lowest point
- Extend the wire now, do the pour again
- Subjectively decide if the indications were "roughly matching"
They seemed to have been indeed matching, so I decided to attempt to keep the probe.
But, problem. It'd interfere with the airbox'es mounting bracket (and for some reason, I didn't take a picture of that :( ).
So first, let's cut a slot that will let that bracket clear the wire.
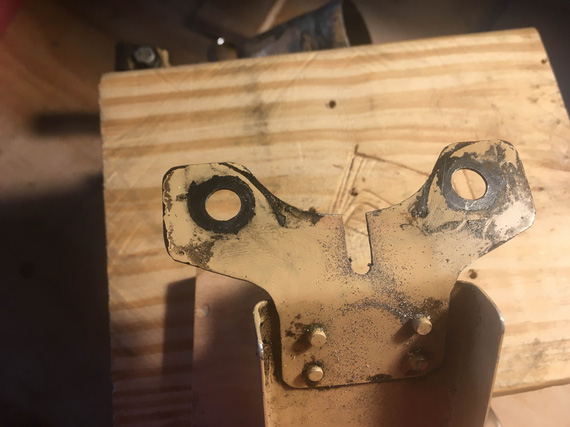
Slot
A bit of drilling, a bit of hacksawing, and a bit of filing.
Then,
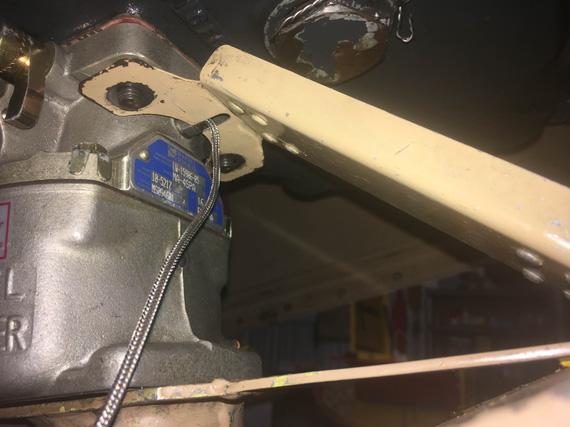
Trial fit
Nope, still not good. The carb temp probe there is the little thing that looks like a bolt with a wire sticking out of it - and it's hex was interfering a bit. But we cleared the wire now.
So, a touch more cutting was in order.
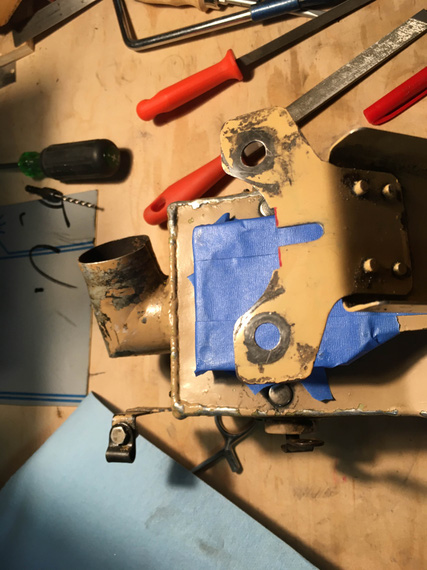
A touch more cutting
... and it fit.
---
Since I was messing with the airbox, needed to finish one last thing on it.
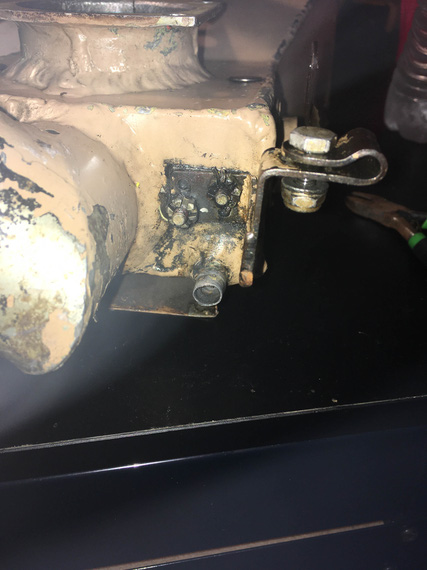
Carb heat bowden bracket
That bracket holds the carb heat bowden cable. Notice something weird? Yep, castellated shear nuts and pins. And, no, they weren't tight either, so the whole bracket business was wobbling around.
I spent quite some time pondering why would it be set up like that. Castellated, pin, not tight, wobble - all of that adds up to "he wanted that bracket to move around". It adds up really well too! The setup makes total sense if he wanted to have this arm move around - but there is absolutely no reason for it to do that! In fact, it's not good at all - steel bracket with steel bolts moving around holes drilled thru aluminum airbox - that would elongate and tear up those holes!
I decided that no. It should not move around, in fact. So,
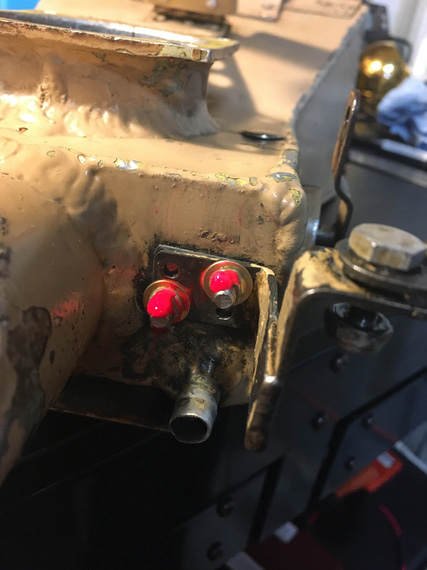
Hardware replaced
--
And then, the final hookups of everything after a long break. Routed the cables, and hooked them up with adel clamps where necessary (doing that conforms them to their final shape, which causes some changes in positions of the cable and controls and the range of motion).
Then, fine-tuned positioning of the controls, and tightened the pivot bolt on the bellcranks. Clevis pins might still need to come out - and that's why cotter pins aren't bent yet - just in case I'll need to unhook them again.
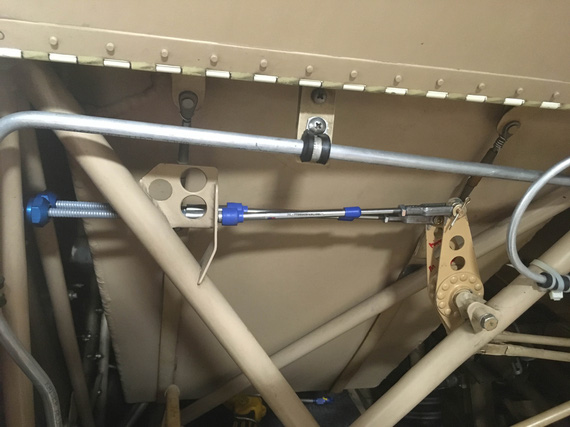
Bellcranks all done
Then, the penetrations.
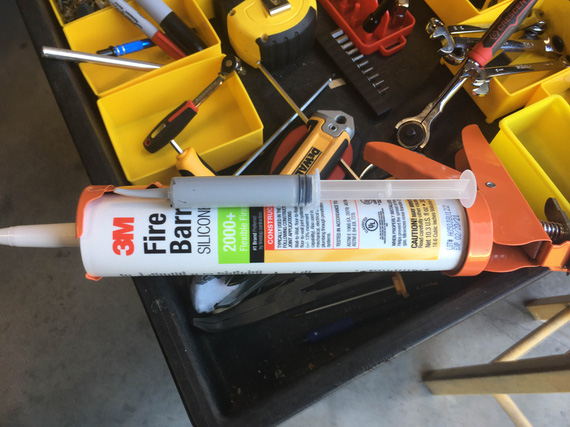
Fancy caulk!
Who said caulk guns have no place in aviation?
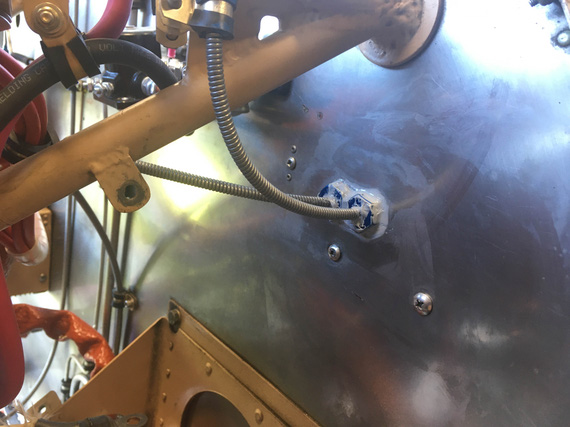
Sealed the big gaps
I wanted to stuff all the gaps with as much of this stuff as I could. I'll probably come back later with much more of the FireBarrier to put a good layer of it around this and other firewall penetrations.
And then, and then... Oh yeah! I could torque the throttle arm nut, and pin that in place!
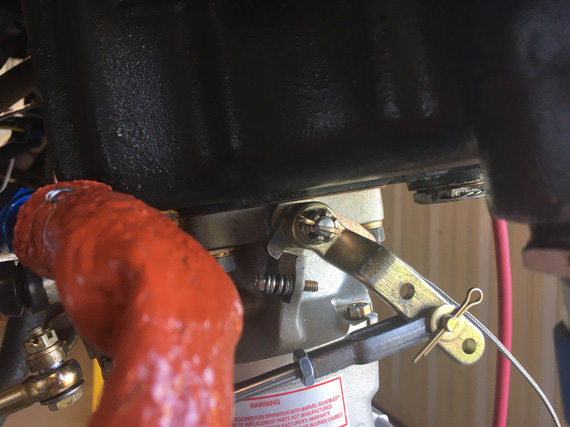
Throttle arm nut pinned
And finally, add more light machine oil to the carb bowl, so that all the rubber stuff won't dry out - all that moving of throttle back and forth pumped most of it out by now via the accelerator pump, I bet.
"Approach, what's our sequence?"
"Calling for the sequence I missed your callsign, but if I find out what it is, you're last."
-ORD ATC
Up ↑
© Copyright "79FT". All rights reserved. Feel free to cite, but link back to the pages cited.
This website only shows how I did things in my various projects. These pages are for information and personal entertainment only and not to be construed as the only way, or even the perceived correct way of doing things. You are responsible for your own safety and techniques.