[79FT]: Building Things |
 |
Exhaust...
...full circle
| On: | Feb 17, 2020 |
| In: | [Chickenhouse Charger] Electrical Rebuild |
| Time logged: | 17.25 |
| Tags: | 6781G, MA5 Charger, exhaust |
So finally, The Thing That Took Since November and That is Finally Done. Done?
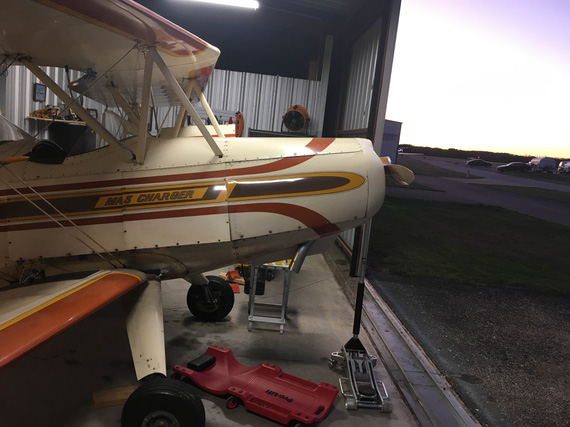
Tadaa!
Wait, what? The cowling's back on? Am I.. am I.. done?
Ha!
Nowhere near.
You see, one of the things I wanted to fix prior to putting the plane back in the air was this.
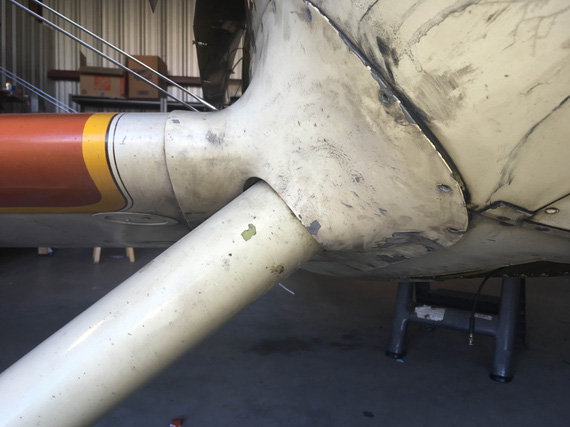
Wing root fairing
You're looking at the bottom right wing root fairing, all oily and burnt up, with paint flaking. It is bad. Really bad.
Why?
Because it is bathed in the exhaust, and because Glenn added the smoke system on top of that.
Here's the best couple pictures I have to illustrate what's going on.
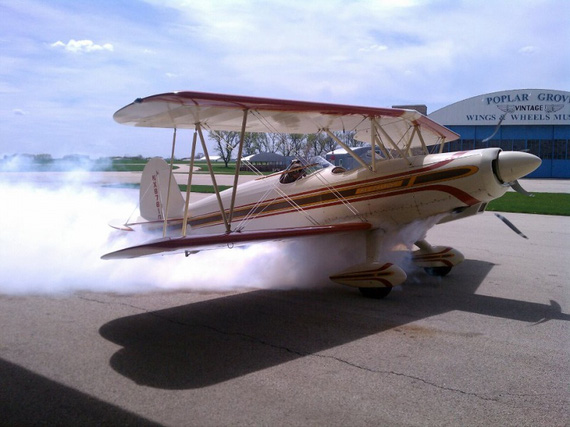
Glenn's "Smoke On" picture
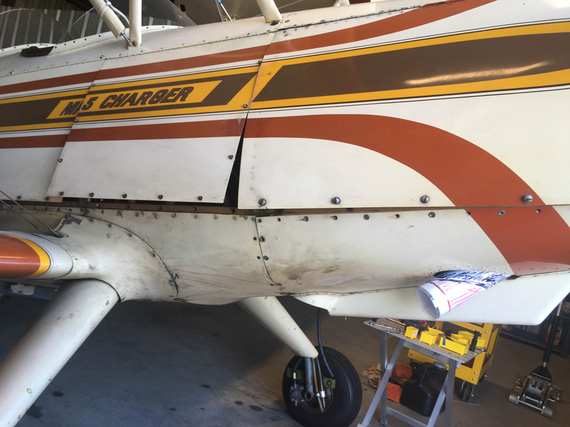
Old exhaust tailpipe
You can visualize what happens using the second picture. Black shading on the paper shows the original tailpipe. You can see how in the slipstream this will hit the wing root and the side, which is very much evidenced by the stains, oil streaks, and, well, burnt up paint on the fairing.
I wanted to fix this very, very, very much.
Research
As much as I am absolutely not afraid of electrical systems, I am very afraid of exhaust systems (and a few other things). I just don't know enough or have enough experience.
What turned up to be even worse was trying to find someone who does know what they're talking about. I poked around, and couldn't find anyone around or in our Chapter that knows this stuff well to be able to tell me "do this, and I got a TIG machine in the corner to weld up whatever you need".
So, I did the second best thing I could.
A couple years back, I met a gentleman at Oshkosh at our Biplane Forum gathering, Mr. T., who wrote a series of articles on motors, including exhaust.
He agreed graciously to listen to me (well, "read", technically) rant, and maybe guide me a bit.
So, to the drawing board!
I had to put the system back on, and hang the cowling back on the airplane as well, so that I could check everything in place.
When I took the exhaust system off, I plugged the stubs coming off of cylinders with duct tape. Big mistake!
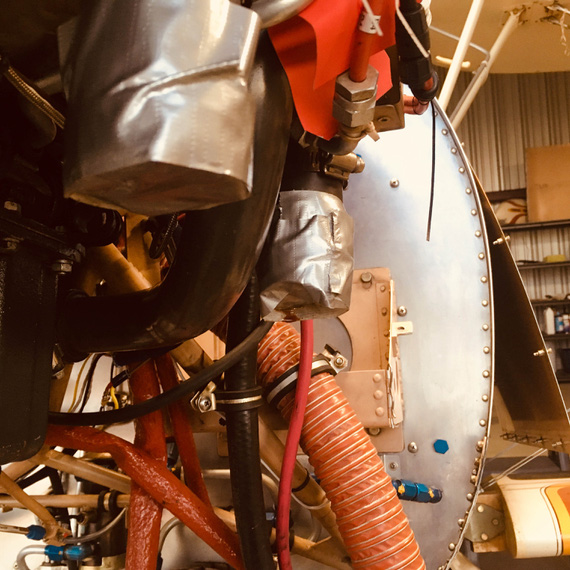
Duct tape on the stubs
Cleaning that crap off took GoofOff and about an hour.
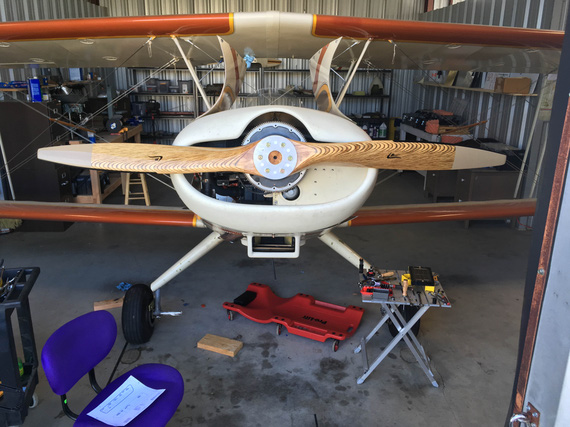
Old tailpipe
That's the head on picture of the old stub.
The first and the easiest possibility was, what would happen if I just extended it straight out?
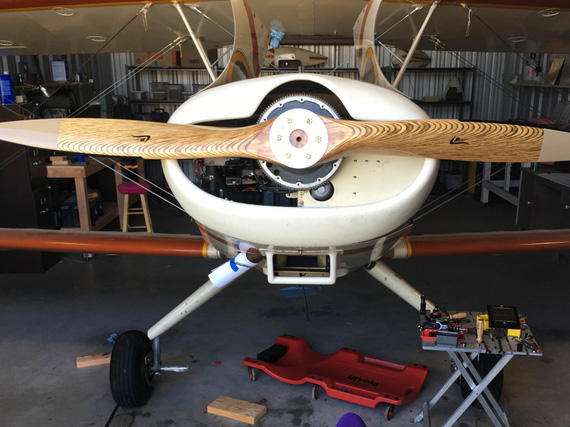
Straight extension - head on
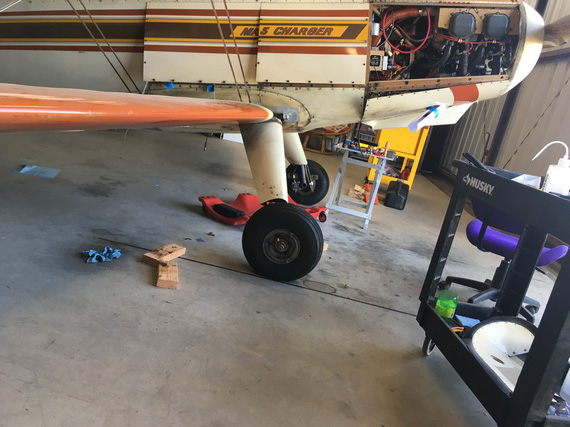
Straight extension - side view
I used a piece of paper to mock that up. Mind you, that'd be about a 10" extension! Lots of pipe, considering that the original tailpipe was maybe 16 inches long total.
It was obvious that doing this would move the exhaust outboard way more than moving it down. Why is this bad? Well, the bulk of it was hitting the aluminum side of the fuse and the plastic (okay, okay, fiberglass :) ) root fairing. Moved out this way, it would be hitting the fabric-covered leading edge. Somehow, that didn't sit well with me, and Mr. T. concurred.
So, I went on a scavenging run, and borrowed a nice piece of exhaust grade 3" SCAT from Mr. Dick G., my friendly neighbor, and attempted to mock something up with that.
Now that went way better!
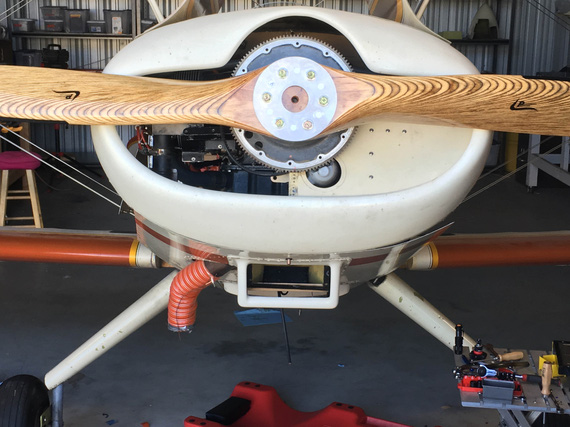
Approx 45 degrees
That moved the exhaust point downward, and I realized that I could play with it even more by bringing it closer to the airbox via cutting progressively more off of the old tailpipe (at this point with SCAT I haven't yet cut anything, because I was just playing and wasn't committed).
That seemed like a way to go. So, next step was to mock this up with a real 45 degree bend.
I got the cheapest slip-on 45 degree mandrel bend from Summit.
At this point, I had to commit, because using this slip-on would require some cutting.
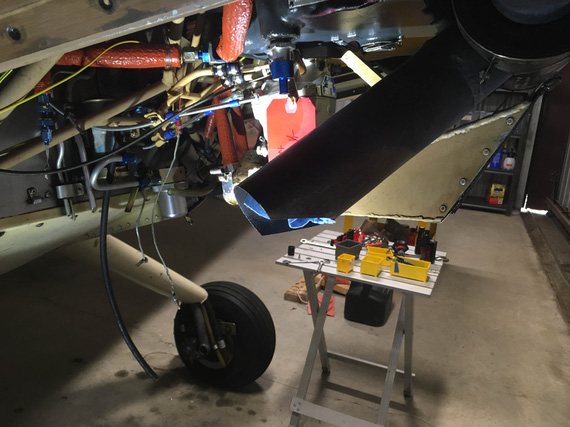
Some cutting
I was committed!
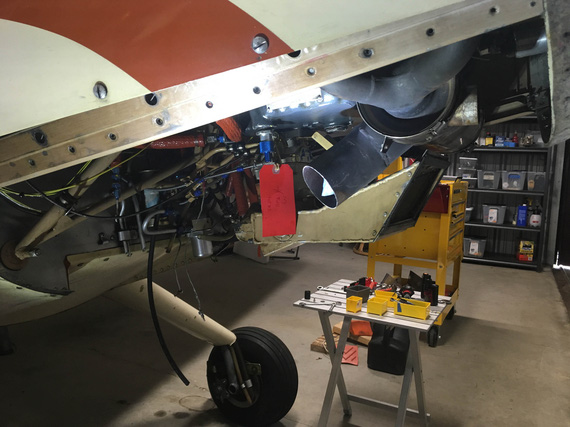
And some more cutting
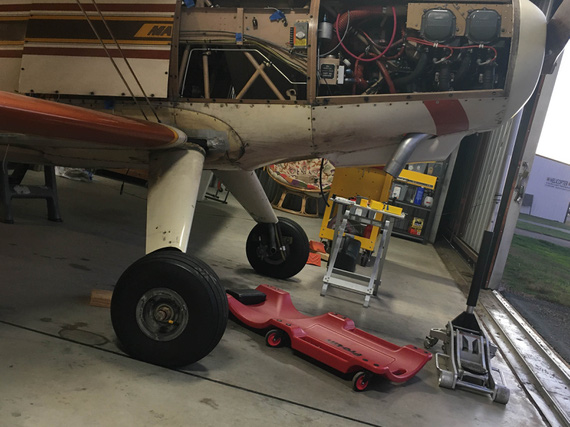
And then, the fit with the bottom cowl on.
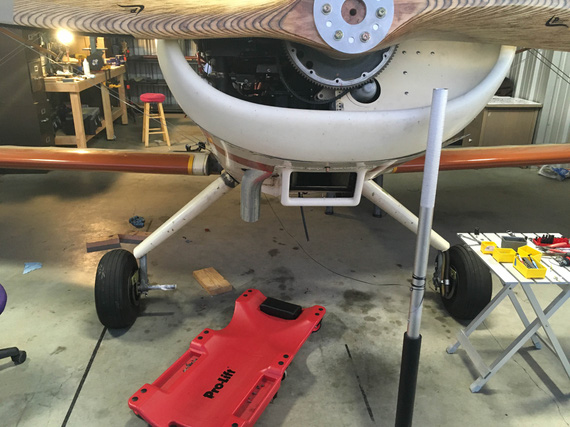
Front view
Side view
That looked just perfect! A total of about 8 inches of tube added overall, and the exhaust actually moved inboard, and way down into the slip stream.
All that was left to do was to buy the actual 45 degree bend I'd be using, and find a welder.
Unobtanium
I was looking around for welder who'd be willing and able while playing with the geometry. Asking around the airport didn't yield much.
Backup plan was Seth from Marioshop - the guy I take my cars to (his boss is a dragster, and Seth welded a lot of tube and exhaust - although, automotive, much thicker kind, with MIG).
I contacted folks from another EAA Chapter, the Waco 59, a great and dynamic EAA Chapter which I am also a member of, and scored - their very experienced Tech Counselor and metalworker Mike M. agreed to help me with the project. He welded himself, and also knew a gentleman that was "very artistic with his welds", as he put it.
I just had to get the material, jig it up to position it, and come over to weld everything up.
My tailpipe was 3 inches in diameter (jumping a bit ahead of myself, unusual for a motor of my size - too big). I measured .049 with my dial calipers, which translated into 18GA, and ordered the nicest shiny new bend from Summit. When it came, I realized...
It was the wrong thing.
Way thicker than what I had.
I think I mis-measured. Maybe I was asleep when I did it, maybe there was a lot of crud on the old pipe and I didn't pay attention, maybe .. but I needed 0.035 material. 20 gauge.
Quick Internet search - nothing.
More Internet searching - nothing.
I could buy all kinds of bends in smaller diameter tubing with 0.035 wall thickness. I could buy 3" tubing with 0.049 wall. I could not find 3" 45 degree bend in 0.035.
One company offered to sell me a straight piece. That was a good backup - we could've mitered and welded up the 45 degree bend in sections, but I wanted to see if I could find a bend. That same company offered to make me one - at a low price of about 600 bucks. Yikes!
Attempting to Hail Mary again, I posted on the Biplane Forum. Guys came back with a bunch of phone ##s of their contacts, and I started calling around!
Nope, nope, nope. I don't remember who it was, but one of the guys I called suggested contacting Custom Aircraft Parts.
A nice lady answered. "You gotta talk to Clint", she said, and transferred me.
Clint
Clint picked up. I asked if they could sell me the bend. Clint asked, "What are you trying to do"?
I explained.
He asked for pictures. A bit weirded out, I sent them over.
"I have two things I wanna tell you", said Clint.
"Buy yourself a bottle of soap and a nice rag".
"Be careful what you wish for".
Clit knew this 4-into-1 setup with a muffler in between very well. He told me that even with me trying to keep the extension as short as possible, I was running a risk of it cracking off at the muffler. Would it for sure? He didn't know. But the risk was increasing a lot.
I called my old friend and a Grumman aficionado Ben the same night. Grummans have this style mufflers (mine didn't by the way because it was sporting Powerflow - a very different system).
"Hey, do you recall welding cracked off tailpipes?"
"For sure".
Damn! Damn damn damn.
More mulling over ensued. I did not want to risk a tail pipe cracked off at the muffler. No way. That puts hot exhaust into a very tight cowling. On a biplane. With my having elevated fear of any in flight fire. Remember, I embarked on the electrical rebuild because I judged this airplane to be a flying fire hazard.
I talked with Ben more. I talked with Mike from Waco 59 more.
The attempted fix solidified.
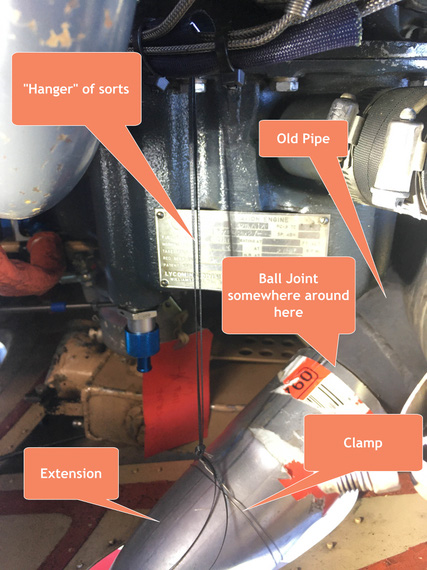
Exhaust hanger
I would put a ball joint somewhere close to the muffler, with one end on the old pipe, and one end on the new extension that includes the bend. That ball would isolate the extension from the existing system, and allow them to move relative to one another.
I would then hang the new extension to the oil sump on some kind of hanger with a clamp - likely, a kind of tube with ends flattened and bent as required.
I sent this schematic to Clint. Well, no, not this one. This is a nice one I did when writing this post, over a picture I took when mocking up this solution. The one I sent to Clint was this. But, same idea.
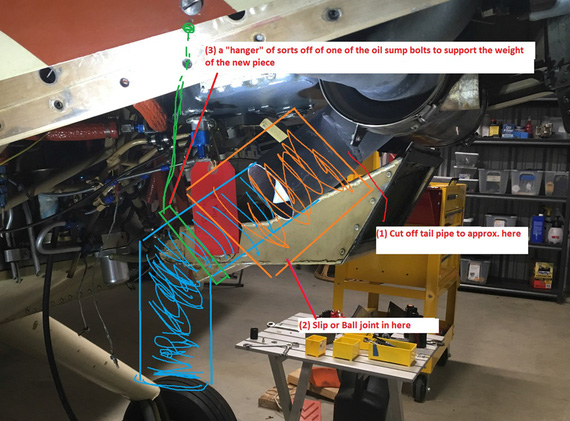
Schematic I sent to Clint
Clint's response? Verbatim:
Adding a ball joint and brace solves all of my concerns, you are free to do anything you want to the tailpipe. If you weld the bend on as your latest drawing shows, looks more reasonable. When adding a support brace it is imperative that it stabilizes the tailpipe to the engine, they must move together.
WOOT! Did I find a way to do what I wanted?
One thing to absolutely ensure was that the ball joint would fit.
We went back and forth a bit, me asking about dimensions. Then, I threw together a quick drawing of the widest part of the ball joint - the clamp holding it together - and tried it next time I was in the hangar.
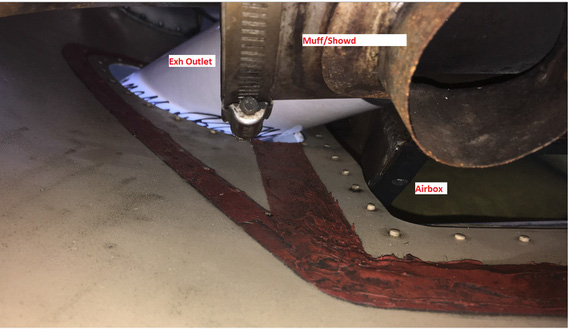
No way. No way it hell it would fit. Airbox would get in the way.
Here's probably the best picture I have of why.
Clearances
That little triangle of "air" in between the cowling (bottom), exhaust pipe, and airbox is probably 1 inch on sides. No way a ball would fit in there. No freaking way.
So, what am I left with?
Putting it Back Together, the Way It Was
I gave up.
Called Clint on the way back from the airport, and asked him to sell me a straight length of pipe with a slip fit on one end.
Got it a week later.
Called Mike, got a contact for his welder, and went there.
The gentleman didn't like the fit - too loose - and wanted to make sure I pinned it exactly where I wanted (and actually, I should've done that in the first place, because the opening in the cowling is very tight, and just a degree of being off would make it interfere with the cowling). He also wanted me to clean all the gunk off.
So, back to the hangar, and fun fun fun with a die grinder, deburring wheel, wire brush... This 40 year old exhaust is gunky!!!
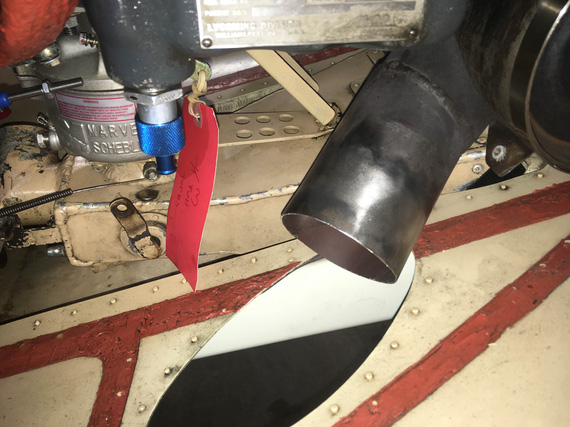
Back on for tailpipe fit
Put new section of pipe on, clocked it just right, drilled a couple of holes thru, and put in a couple screws.
Putting a nut on the inside of a 3" pipe about 10 inches "in" is .. exciting!
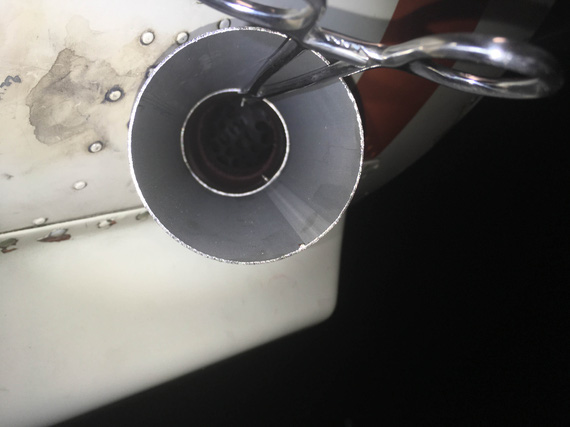
Nuts on the inside of the pipe
Then, pulled it off and put in more screws, to be absolutely sure that if it had to come apart, it would come back together in the exact clocking I needed.
Mike's welder fell thru, and that cost me a couple weeks at least. I focused on some other work - panels, compass, etc.
One of those days, I was on the phone with D. when a gentleman I didn't recognise walked over from the hangar next door housing a PT-19, and asked to borrow a hex key. When I hung up, I walked over to introduce myself.
"Hi, I'm M."
M.?! The M.?
Yep.
He's somewhat of a local celebrity, having built a ton of airplanes, and having worked on more. I met him on a couple occasions in passing, but not really, and I didn't remember his face when he walked over. He's a sheet metal and generally a metal guy. He was working on the PT-19's electrical (ha, fun coincidence, eh?)
A lot of hangar flying ensued.
He looked over the biplane. He told me of his building a replica Hughes H-1. Of his own design basically.
When parting ways, I asked, "Hey, do you have a welder by any chance?" Asking doesn't hurt right? "Yep, I got a TIG machine".
Ha! Of course :) I meant to ask if he knew a welder. But he was one. I should've thought of that myself.
He agreed to help me weld the damn thing back on, of course. He asked for me to clean the insides. It kinda made sense, too - you want full penetration when welding, and you don't want all that crud on the inside of the tube to "float up".
So, lots more of a die grinder time, with flapwheels, with a compressor barely large enough to run the damn thing for a minute straight.
Then, drove to M's shop, drooled over the H-1 and the MP-14 that he had on it.
And then, the final fit of the tailpipe to put it where it was when I cut it off.
We put the exhaust back on the plane,..
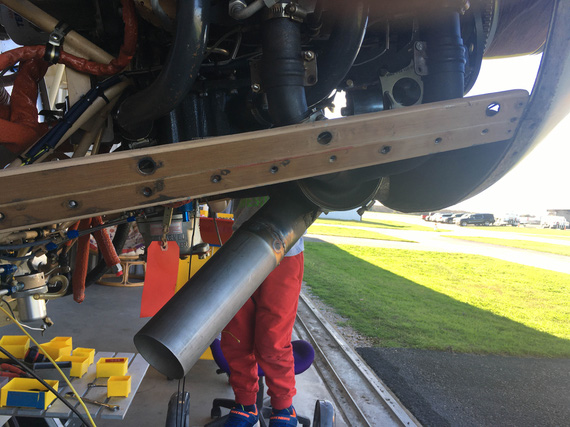
Back on the plane
...put the cowling back on, and I started fiddling around with things to try to figure out how to mark an even line to cut it off on.
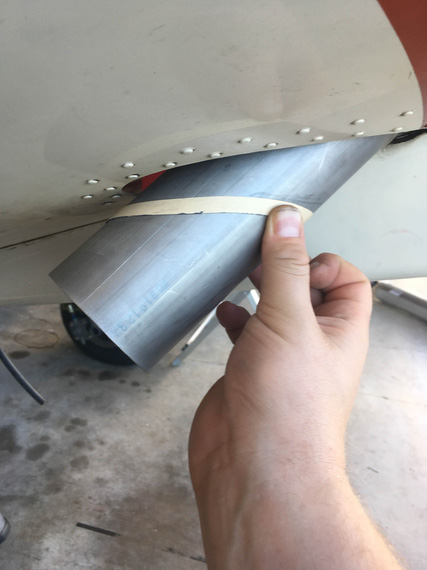
Rubber band maybe?
Rubber bands actually worked quite well. The kind I had was too tight, and I was playing with it trying to make it work and considering running to a nearby Office Depot, when I was offered a schematic to help guide me.
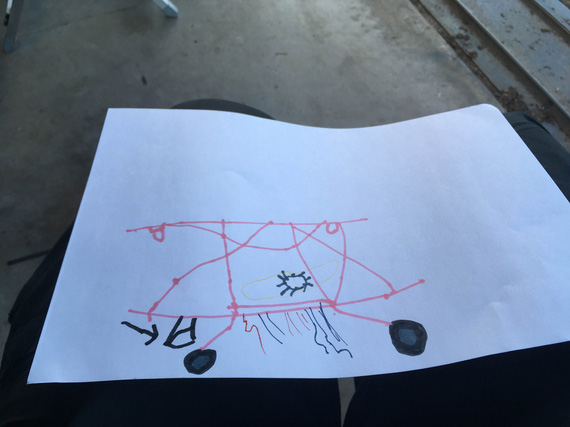
Exhaust cutoff schematic
But prior to emptying local stationery stores' rubber band supplies, I tried something else - pieces I cut off from the old pipe. Had to trim them a bit more to fit them over the new pipe, but that worked quite well in the end.
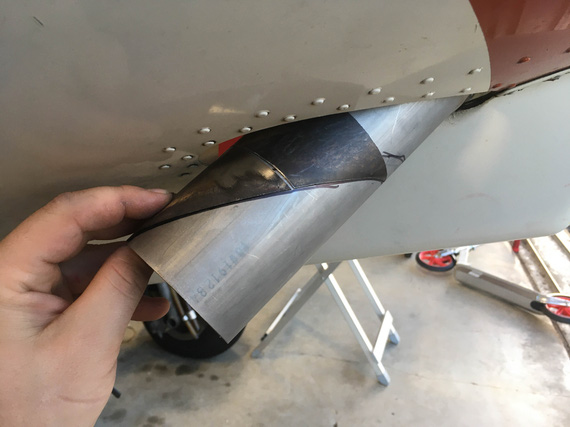
Using chunks of old pipe
Starting the hacksaw at this shallow an angle is... annoying? Is that the right description?
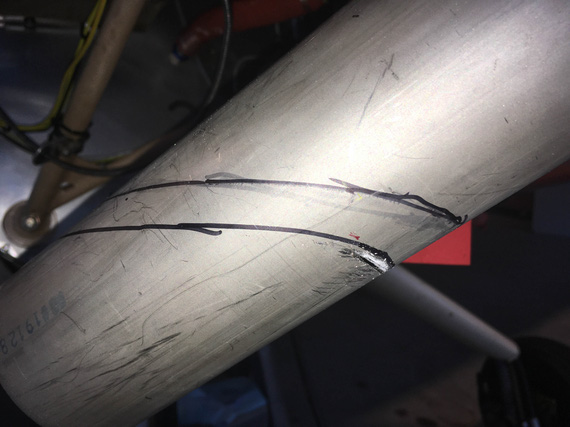
Starting a cut
I suck at hacksawing.
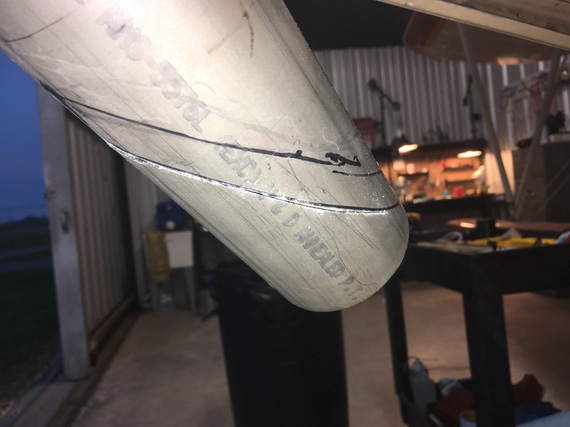
Ugly cut
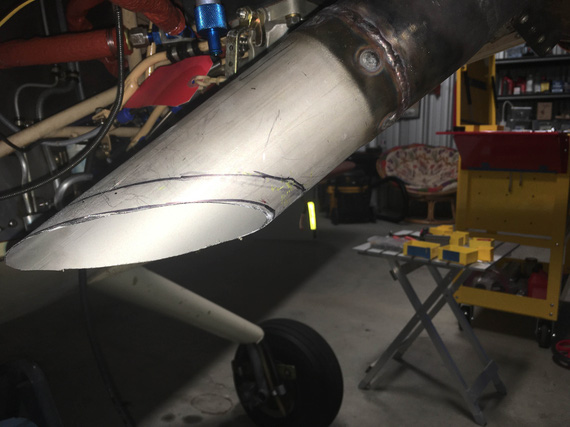
Ugly edge
My punishment? 30 minutes of grinding.
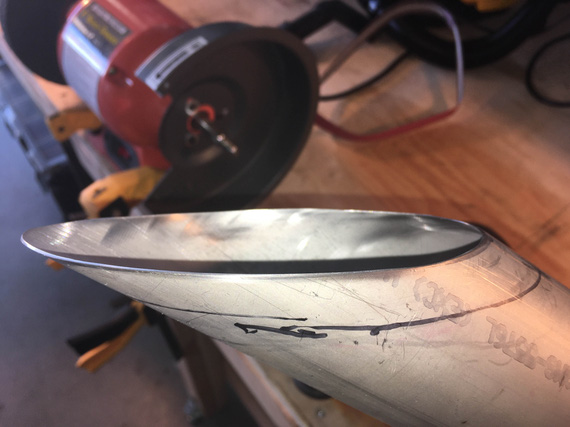
Finished edge.
And so, I am back to where I have started with this little project. My supply of rags is large, and my soap came in a 5 gallon pail (okay, okay, I do have some old stock is all :) ).
But, on the other hand, I think this is the Hump. It's when in a project, there are no more unknowns. You now just have to finish doing everything you've started.
Truly superior pilots are those who use their superior judgment to avoid those situations where they might have to use their superior skills.
Up ↑
© Copyright "79FT". All rights reserved. Feel free to cite, but link back to the pages cited.
This website only shows how I did things in my various projects. These pages are for information and personal entertainment only and not to be construed as the only way, or even the perceived correct way of doing things. You are responsible for your own safety and techniques.