[79FT]: Building Things |
 |
Fitting Lower Wings To The Fuse
in search for missing bends
| On: | Jun 17, 2014 |
| In: | [Skybolt] Fuselage |
| Tags: | CAD, fuselage, lower wings, fittings |
Today, ended up messing around with putting the lower wing and the fuselage together...
Lower wings are set up at 1.5 degree incidence, 1.0 dihedral.
Started with that I realized that I mis-positioned the hole on the front spar and gear fitting. Simple fix :)
Next, came a lot of thinking and reading. Here's the problem.
The plans position fittings perpendicular to the longeron.
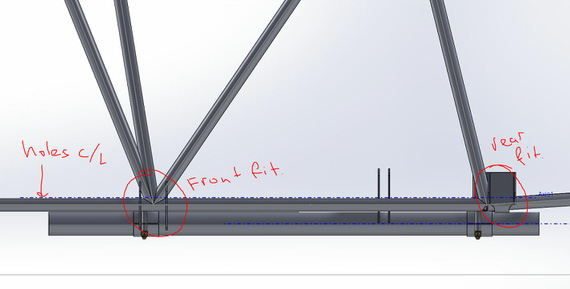
Fittings on the lower longeron
Holes are co-linear, and incidence is achieved because of the stagger in the attach holes on the spars. Airfoil chord, tilted up 1.5 degrees make these holes come together.
The problem is that spar sides then become non-coplanar with the fittings' faces; possibly introducing bad fit, play, misalignment, and whatever problems I can't think of.
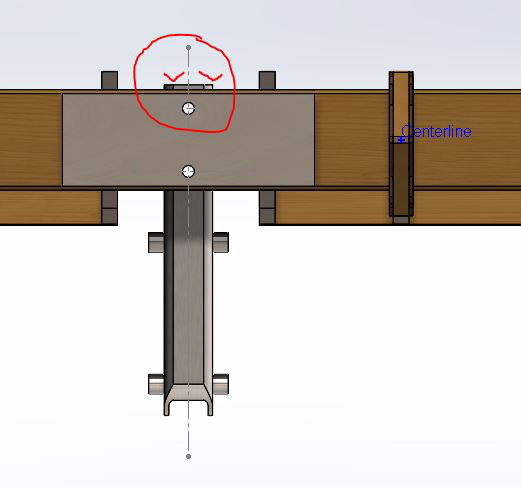
Here's how the spars go 'into' the fittings. I circled the rear spar, since Ill use that for illustrating the problem.
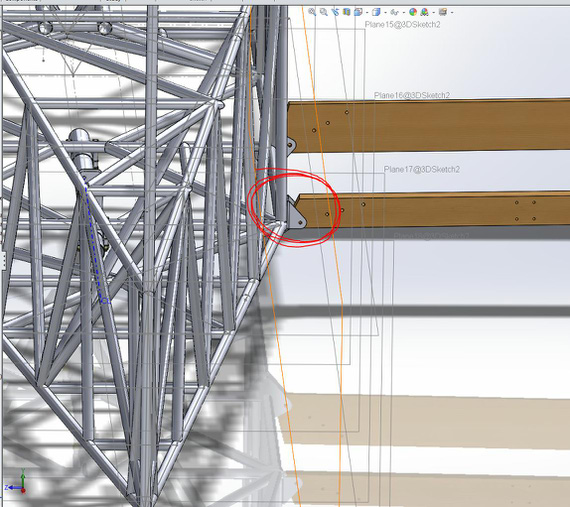
Spars on fuse (rest of wing hidden from view not to obstruct
Now, looking at it from the tip of the spar towards the fuselage, you can see the angle between the fitting and the spar. That's because of 1.5 degrees of incidence.
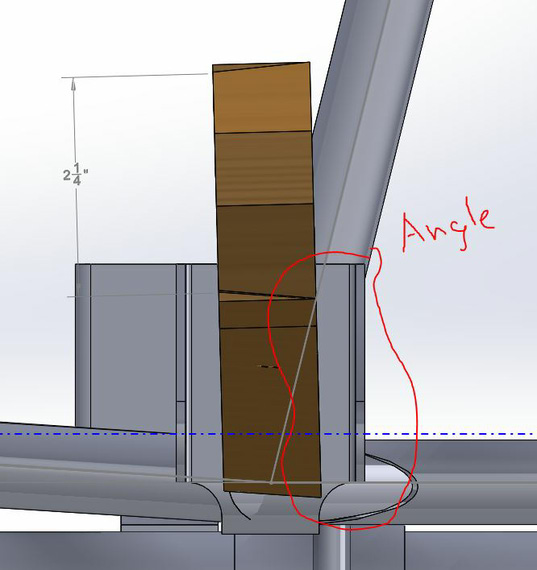
Angles don't match == no fit.
This problem caused about an hour and a half worth of research with no results...
Firebolt and Pitts plans explicitly state either bending, or welding fittings to longerons at correct angles. Not Skybolt though...
Ended up posting on the Forum. Let's see what the folks say....
On a more positive note; I can see an outline of an airplane in this now ;) Made some virtual, mental airplane noises :)
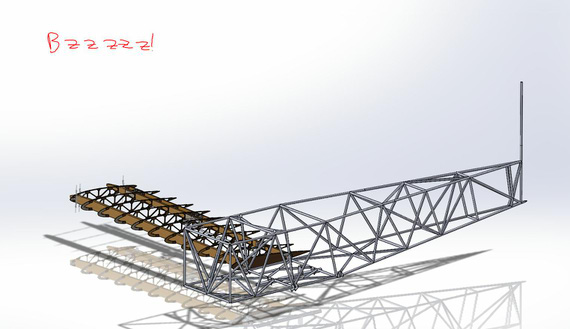
Airplane!!!!
"You got him on TCAS? Great. When you're seven in trail, resume normal speed and call Chicago Center on 120.12."
-ORD ATC
Up ↑
Lower Wing Fittings and Torque Tube
cleanup, and more bending
| On: | Jun 16, 2014 |
| In: | [Skybolt] Fuselage |
| Tags: | CAD, fuselage, torque tube, control system, ailerons, elevator, lower wings, fittings |
For starters, cleaned up the torque tube; added all the hardware (thanks cwilliamrose again for AN hardware models!) and proper mates. Was a nice warm-up, and came out real well.
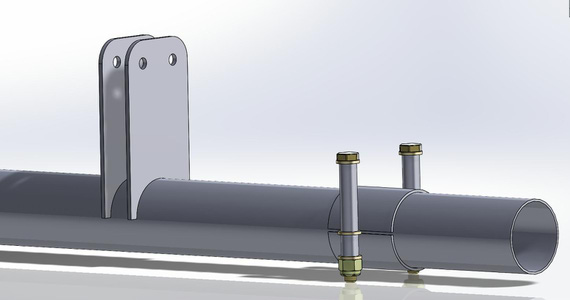
Torque Tube, Cleaned Up with HW
After that, added the lower wing front fittings to the fuse. Piece of cake! :)
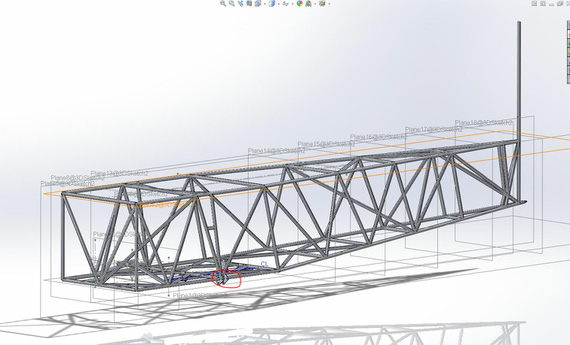
Lower wing front and gear rear fittings
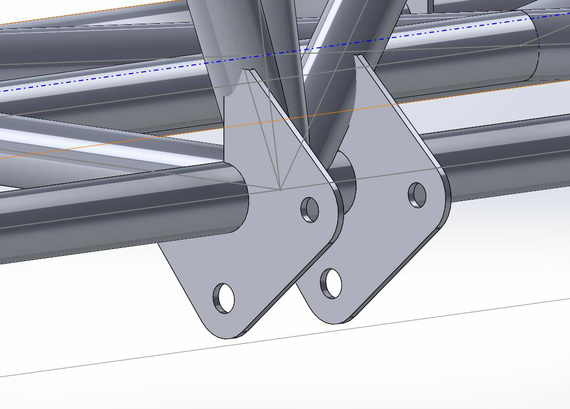
... and zoomed in.
Notice on the above picture how they interfere with the tubes of the fuse truss (geometry penetrates one another). There are a couple ways to fix that; plans just call for 'trimming in place'. Note to self: figure out if the weld should only be around the bottom longeron; or if to weld the top of the fitting to the vertical too?
The cool thing about SW is that I can "cut" in place; add a bit of margin on the real pattern for the fitting, and make it to fit without constant trial and error.
And then, lower wing rear fitting.. that one is tricky due to the way it's dimensioned on the plans (it makes sense plan-wise, since it maintains clearances between longerons and spar butts, etc; so hole positioning takes metal thickness into the account). Can't believe it took me 2 hours and a few tries to figure out how to model this right. Learning curves be damned :)
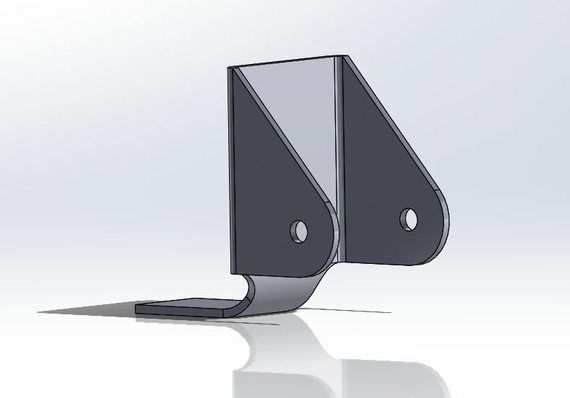
Lower wing rear fitting
Now, the reason for all that trouble is that getting the flat pattern out of that is just 1 mouse click!
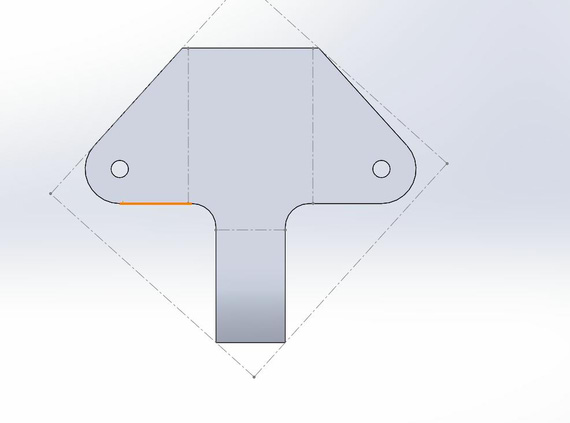
Lower wing rear fitting
I think this was a great day. :)
It only takes two things to fly, airspeed and money.
Up ↑
Torque Tube Basics
for now, just the bare minimum
| On: | Jun 15, 2014 |
| In: | [Skybolt] Fuselage |
| Tags: | CAD, fuselage, torque tube, control system, ailerons, elevator |
Started modeling just the very basics of the torque tube. The idea is to hang it on the fuse, attach the aileron pushrods to it, and check clearances in the wings (and finally get to start making them! :)).
Just a few screenshots today. Lots of time spent reading plans (haven't paid as much attention to Fuselage / Control Stick setup as I did to the wings).
Gladly, I had the truss model from way back when (I did it to learn SolidWorks Weldments feature).
Anyways, pretty pictures below.
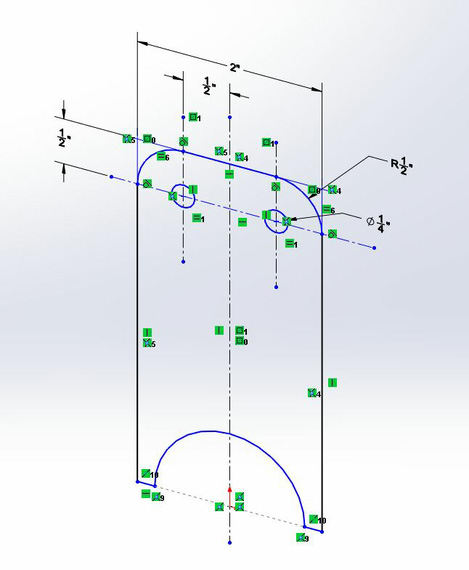
Aileron Actuator Arm Sketch
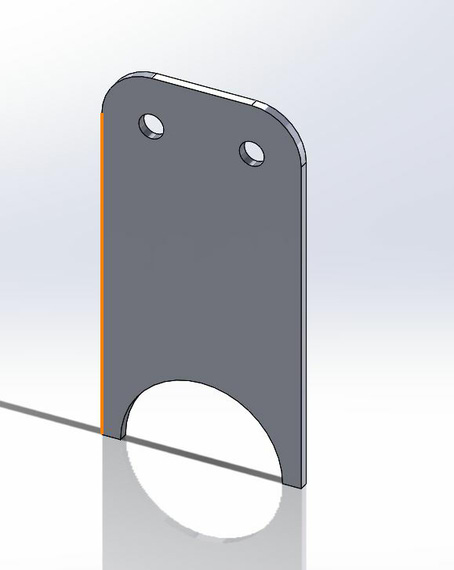
... and model.
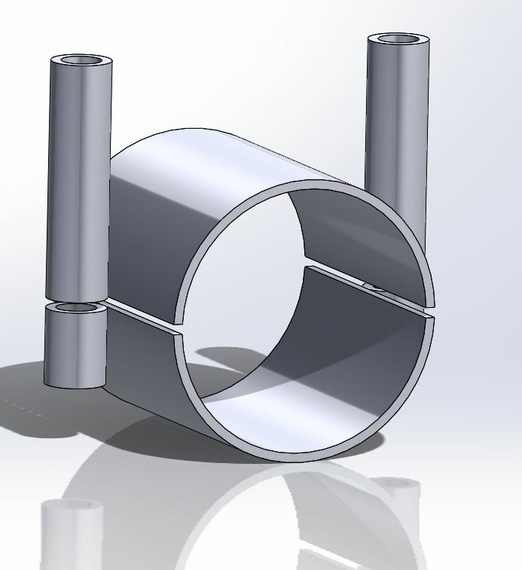
Torque Tube Collar
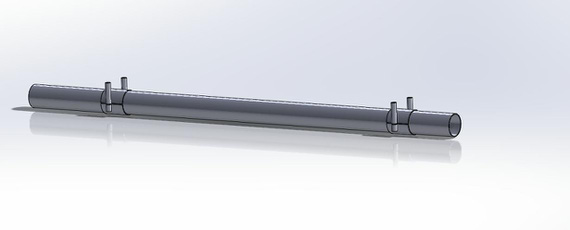
Very basic model of the Torque Tube (but all I need right now, minus the aileron arms)
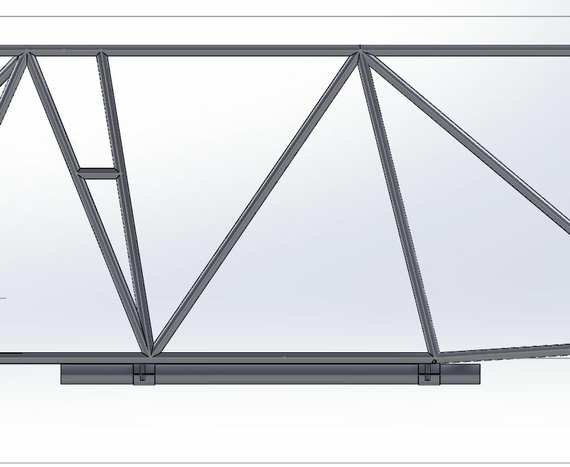
Torque Tube on the Fuselage
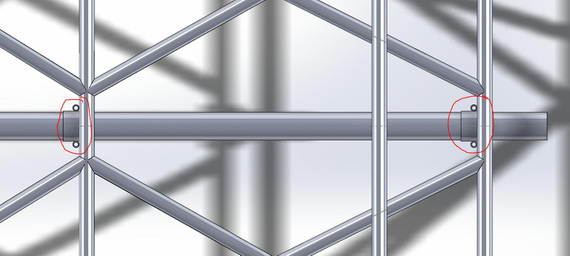
And eyeball alignment check - fits!!! :)
Remember, you’re always a student in an airplane.
Up ↑
Pushrods, bearings, and clearance
slowly getting there
| On: | Jun 09, 2014 |
| In: | [Skybolt] Wings |
| Tags: | CAD, lower wings, control system, ailerons |
In the past couple of evenings; have continued hanging virtual control system on the virtual wings.
Thanks to CWilliamRose from Biplane Forum, I now have quite a bit of models of AN / MILSPEC bearings.. REP3H5 included, but he didn't have REP4H6, so that had to be done first..
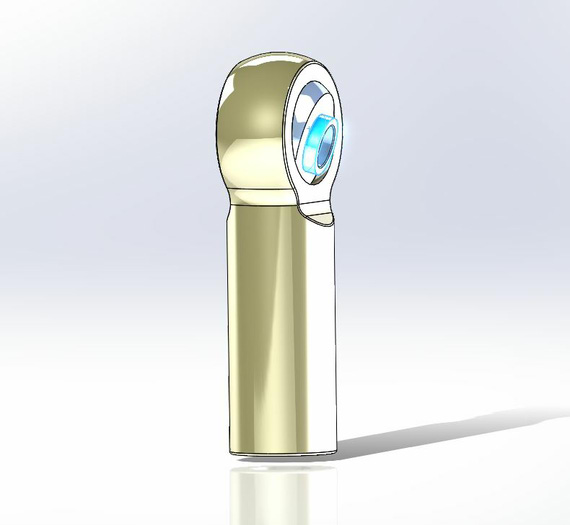
REP4H6 bearing model
Couldn't find a few dimensions; but my rationale is as long as the basic eye height / bore / shank are there, and the ball 'rotates', that's good enough for the purpose of my alignment checking, for now at least. Ill revisit if I start getting into tight corners.
Next, hung the Idler, bearings, cleaned up the model (funny, lower wing assembly is technically my first serious SolidWorks model, so I keep cleaning it up as I go, killing stupid things I did back when I didn't know any better).
Sigh... I will need to hang the wing onto the fuselage model to make sure the pushrod doesn't hit verticals -- clearance is there, but might not be enough.
Here's the wing model with the pushrod:
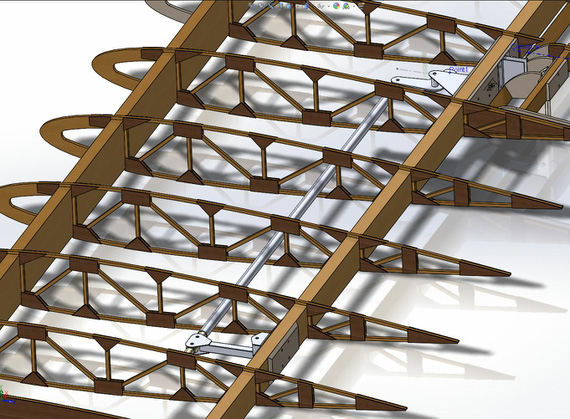
Idler, bellcrank, and pushrod -- there is clearance, but is it enough?
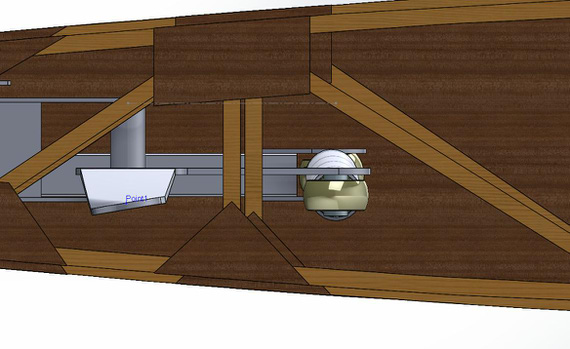
Here, it's looking at the rod from the tip, the rod is that white thingie right of the rib verticals
So, I guess, to the wing fittings and control stick assembled with fuse models tomorrow.
And to finish today off, here's the full zoomed out picture of the lower wing, as it is right now.
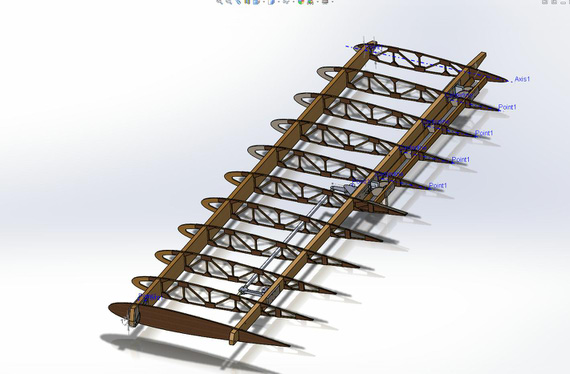
The wing
Unofficial grading standards for low level navigation:
You can't be lost if you don't care where you are.
Up ↑
The Shop Day
... and how it turns into two weeks
| On: | Jun 07, 2014 |
| In: | [Blog] |
| Tags: | tools, shop |
So, originally it was supposed to be the shop day. I was gonna clean and put together the compressor I picked up off a gentleman on Craigslist, and set up the air hoses, filters and such - and then, back to CAD. And then..
See, I was looking for a bandsaw. I wasn't in a rush, so I was gonna pick up a good used one; so I was watching Craigslist and such, waiting and waiting. After doing that for about 6 months and after I got tired of not having one; I finally said "screw it" and bid on one on Ebay.
I won it on Friday around 4pm; paid, and went home. Well; there, in my Gmail's Inbox, was a notification from CraigWatcher saying that yet another bandsaw ad was posted... I opened it up; and couldn't believe my eyes.
Someone was selling.. an 18 inch Grizzly saw for 250 bucks! I couldn't pass on it; and next morning was driving back with a 300 pound beast in the back of my car....
... and then, spent a week and a half cleaning it up. I polished the rust out of the table; changed some bearings, re-cut threads on the blade tensioning rod, added a 4 inch dust port (for whatever weird reason, Grizzly decided not to put a dust port on this particular model).
It also ran on the 220, so I had to add a 220 outlet to the shop... Decided to go all out; and added a 6 gauge run with 50 amp breaker, so that I can run a TIG welder off of it when I get one.
So now; I own two bandsaws :).
Here's the perpetrator:
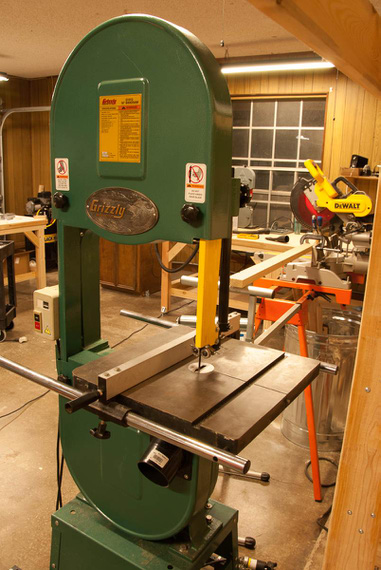
The Bandsaw
Since we're talking shop....
Right now Im set up in the garage of the old house we bought about half a year ago. Dash (my beautiful wife) is working on designing a new house we're gonna build; and that one is going to have a good sized shop. We will build that house first and then demo the old house; so I could start setting up earlier than I thought I would be able to; which is certainly nice.
But; Im dealing with 40 year old electrical; and other fun stuff..
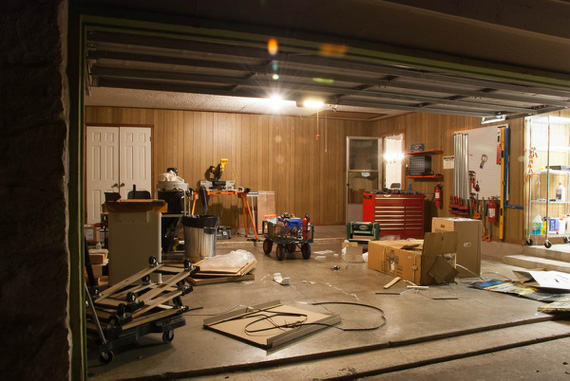
Here are some pictures of that garage, ordered historically, as I was setting up.
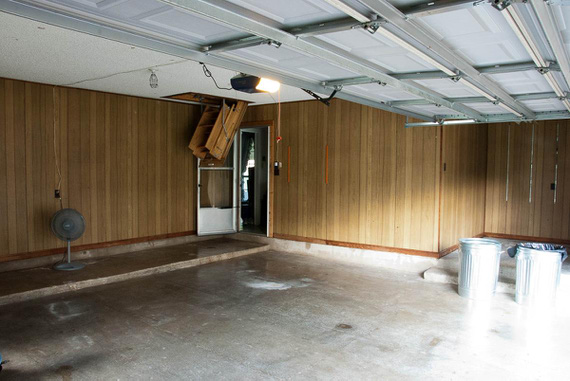
Just after washing everything with a pressure washer...
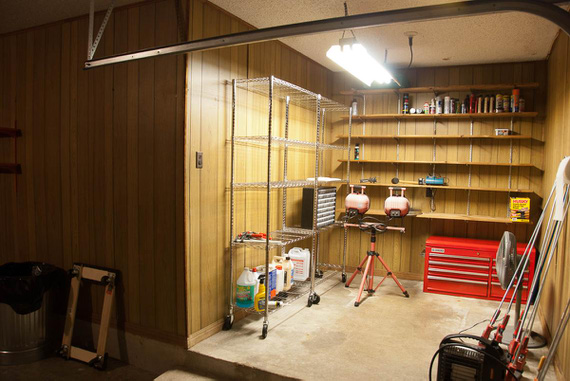
The beginnings of the storage spot
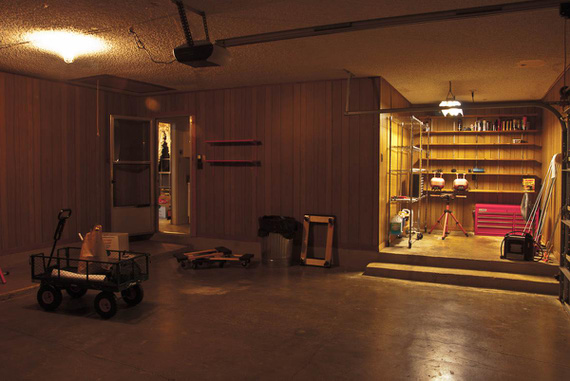
.. all that empty space :)
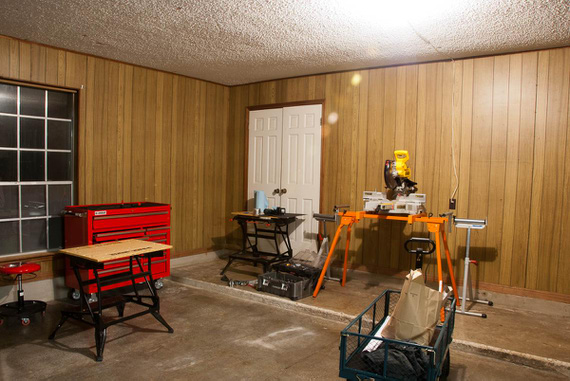
That's pretty much all my tools before I moved (the big red chest is new)
First batch of stuff - table saw, jointer, planer, drill press. Excited!
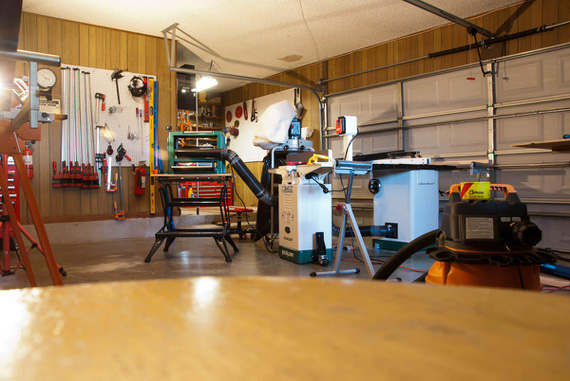
.. and set up!
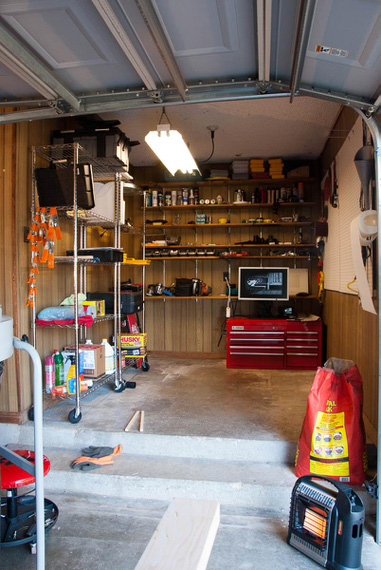
Storage's getting a bit more crowded
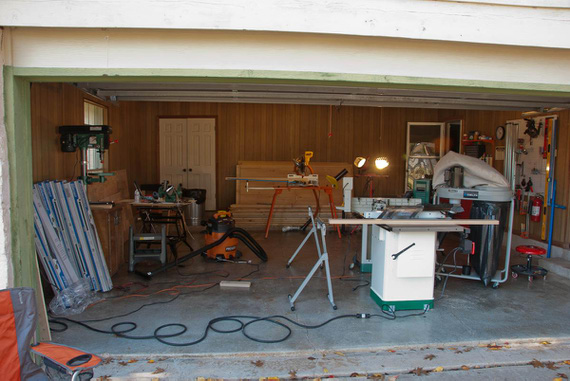
Setting up lighting. All that wood is for the benches.
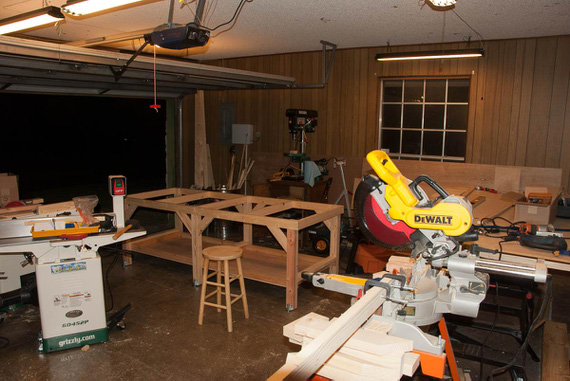
First bench - the frame is ready.
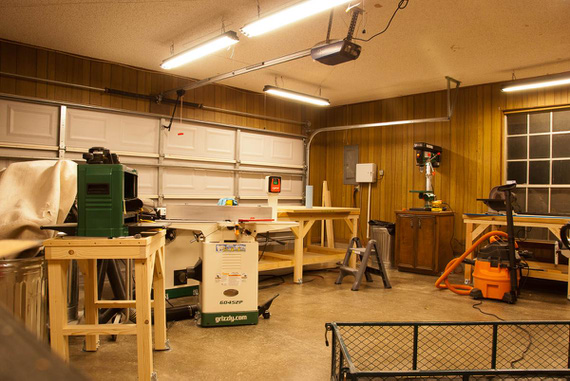
The benches are up - and this place is starting to look like a shop!
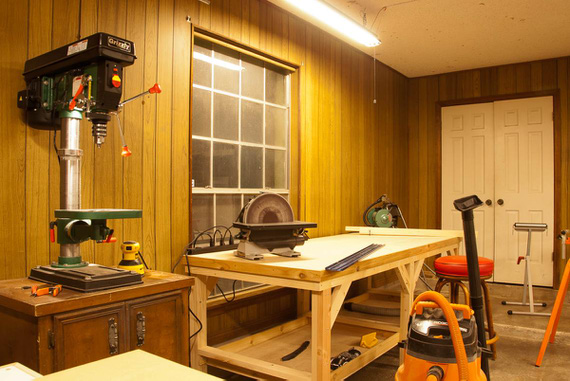
.. yep
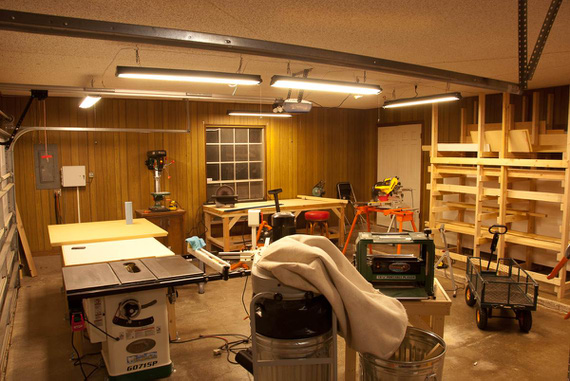
Next, some 2x4s put together into a material rack. Cleared a lot of space!
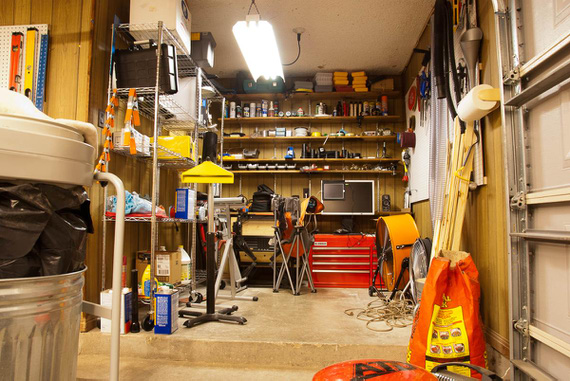
Storage again
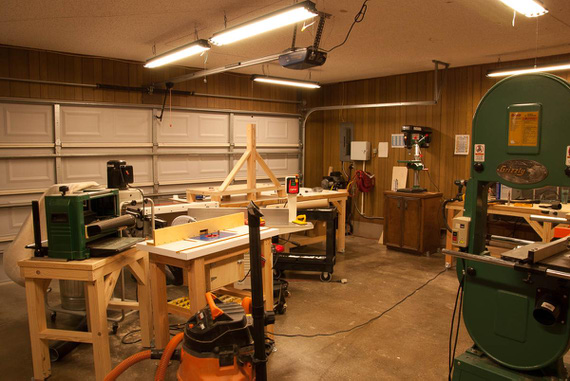
Air setup, router table, and The Bandsaw
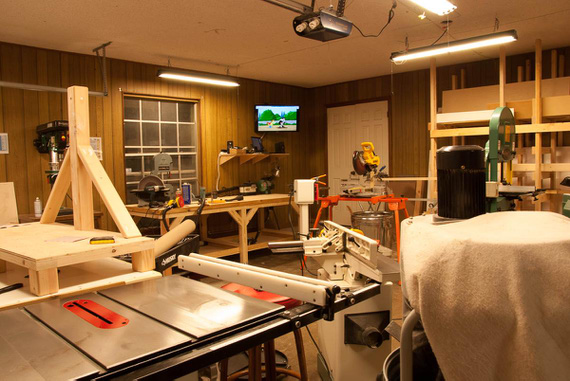
Added some entertainment :) Also, the little Delta bandsaw on the bench
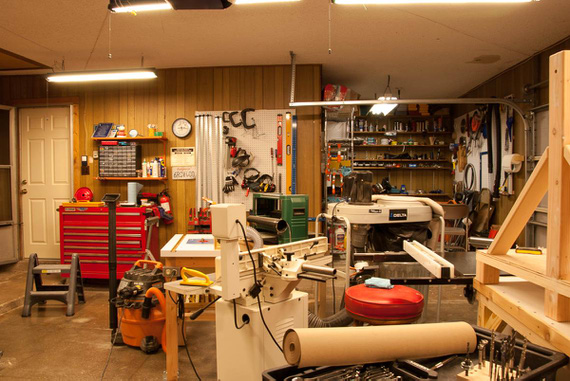
I like how this looks!
And here are a couple pictures of the tools...
Air setup is very simple, a compressor with a shutoff directly into an air filter, regulator, and 25 feet of hose on a reel. That reaches pretty much everywhere.
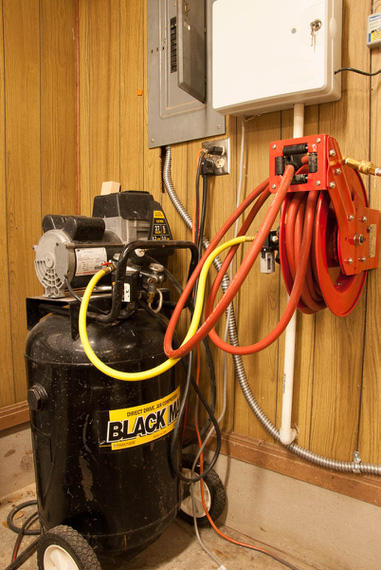
The Air Setup (very simple for now)
At some point; I measured the runout on the drill press -- got around 10 thousandths - no wonder why it was all vibrating when drilling deep holes!
Grizzly includes very cheap chucks and arbors with their presses... Gladly, the bearings have no play though. I ended up picking up a used Jacobs chuck on Ebay, and boy, what a world of difference! Used a SouthBend arbor picked up on Amazon.
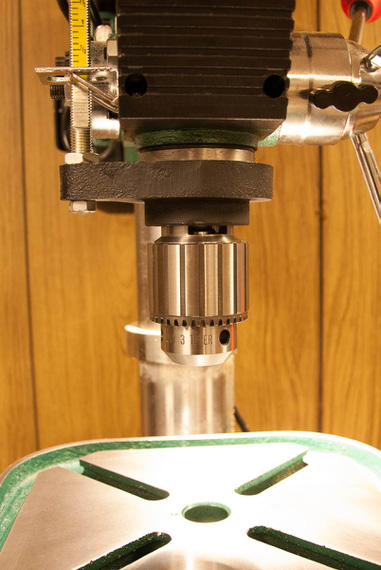
The Jacobs Chuck
I wanted a router table; but didn't want to pay around a grand for the one I like (and cheap ones are just.. crap, honestly); so I built one.
Top is two sheets of 3/4 MDF, laminated together. White Formica is laminated on top, bottom, and sides. All done with DAP Weldwood contact cement.
I bought the insert plate (though in hindsight, I should've just bought a hunk of aluminum and made it myself).
It still ended up being a bit out-of-flat, so I built a leveling system into the base (two bolts on each side are pulling the top "down", screwing into holes in the top with threaded inserts; and there are two screws pushing up on the top in the center of each long frame side. All that allows me to work out any non-flatness out of the top.
Fence is 3/4 ply; and the router sits in the box under the table. The box has 4 inch dust fitting epoxied on it on the other side (and the fence dust collector feeds into that fitting too).
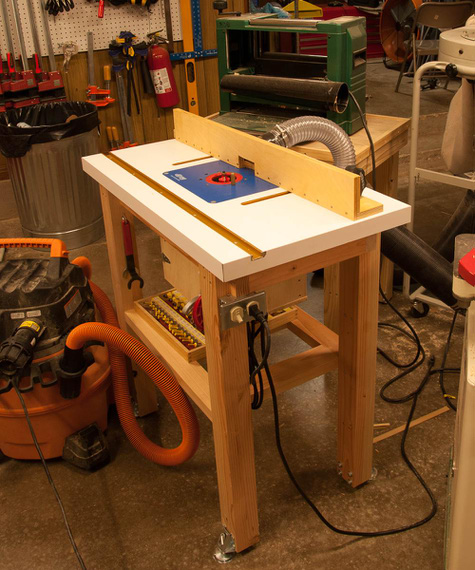
The Homebuilt Router Table.
"Sure you can have eight miles behind the heavy...there'll be a United tri-jet between you and him."
-ORD ATC
Up ↑
Bellcrank and Idler
Bending and twisting virtual metal
| On: | May 22, 2014 |
| In: | [Skybolt] Wings |
| Tags: | CAD, lower wings, control system, ailerons |
It's almost 5 am and Im finally done with the bellcrank alignment! Phew.
By the way, sheet metal stuff in Solid Works is amazing! You give it the bend lines, radii, and a couple more parameters; and it automatically creates both the bent item; as well as the flat pattern. Print the pattern, glue, and start bending -- it will show you which line, how many degrees, and in which direction to bend. Ill post one of those final drawings later, when I get around to printing them and bending some actual metal :).
Anyway...
The night started quite jolly with me whipping out the idler arm with it's bracket. Looks pretty neat, eh?
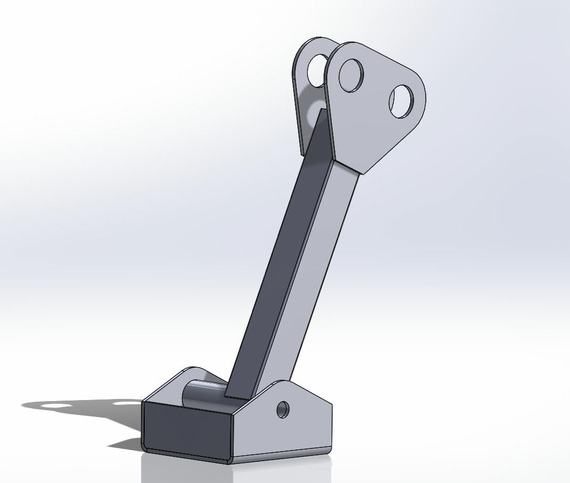
Aileron Idler Arm and Bracket
And then, back to the bellcrank hell. I had it modeled back in the days, and the "jog" bend 1/2 inches down made. Here's how busy the sketch with all the radii and holes looks BTW; pre-bending.
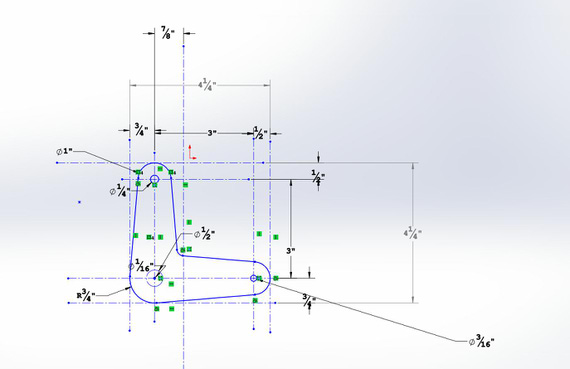
Bellcrank layout
Anyway, with all the sheet metal awesomeness SolidWorks doesn't know how to twist. You can twist a model by using deformation, but at that point all kinds of shenanigans begin to happen. For example, all faces of the model stop being planar faces (meaning nothing can be sketched on them, and sketch is how you start defining a feature (part of the model)); for some reason I wasn't able to put a reference point into the center of one of the holes, etc. (I ended up drawing that point finally by projecting that hole's centerline onto one of the faces; that did work for whatever the weird reason Solid Works gods must have).
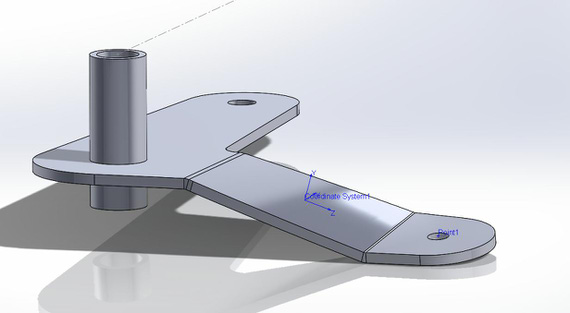
Bellcrank, bent and twisted
And after fiddling with it for about an hour, I was finally able to position everything. The plans don't specify where the bracket should be, so my educated and logical (yes, mr. Spock?) guess was that it should be so that the aileron pushrod connecting bellcrank to the alieron hinge is aligned and straight in the "aileron neutral" position. So I used the aileron hinge center as the reference; squared the bellcrank and aligned it that way. Note the blue line (that's actually a plane bisecting the aileron hinge), and the Point1 (that's that wretched point on the twisted surface that took me so long to figure out). That's what I used for alignment.
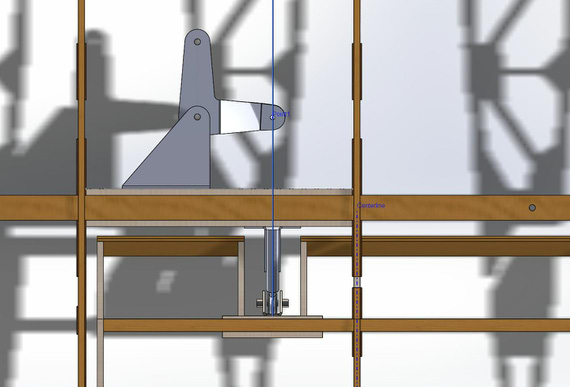
Bellcrank mated and aligned with aileron hinge
Coming up, putting in the idler, all the pushrods, and checking clearances with rib truss throughout the full range of motion. I strongly suspect that I will need the control stick's model on the fuse to do that, since that's what the other end of that pushrod attaches to. Oh man... gotta love those dependencies. That just means that I will have to do that model earlier than planned. Oh well. I like Solid Works anyways...
Tomorrow's the Shop Day! Gotta clean and put that compressor together.
OK 5:11 AM; time to go get some sleep :)
Flying is the perfect vocation for a man who wants to feel like a boy, but not for one who still is.
Up ↑
Aileron-To-Rib - Alignment
Fixed mis-alignment in ailerons
| On: | May 21, 2014 |
| In: | [Skybolt] Wings |
| Tags: | CAD, lower wings, ailerons |
Today, got only about an hour and a half for CADing. Re-opened my Lower Wing model, 50% thru or so, and started remembering things and checking things around.
I was right at a point when I hung the ailerons on the wings, and this time was re-checking the alignment again, only to find that they were off! Looked like they were lower than the rest of the wing ribs, by about 1/16th. Clearly visible on the screenshot below.
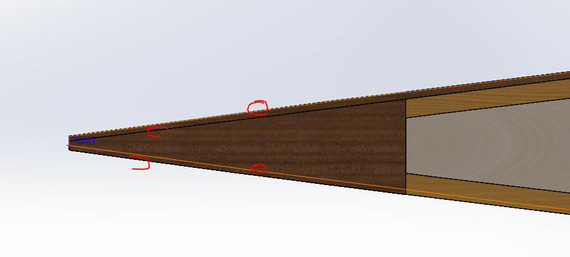
Black lines are aileron outline, orange lines are wing ribs
Started digging around and re-checking the hinges, holes, etc, with plans. The 'spar' side hinges are the most complex ones, and they were fine.. When checking the aileron assembly though, noticed this, which struck me as odd (and a bit illogical):
Aileron hinge sticking a bit 'above' the spar
Notice it sticking up? 3/32nds! Close to 1/16th. Arguably, there will be the filler there, but it still seems illogical (yes, mr Spock? :) ).
Anyways, moving the spar attach holes on the hinge up by 1/16ths (plans call for 3/8ths between the top of the hinge and the top hole center), so 5/16ths it is. That moved the whole aileron up on the hinge, and therefore, relative to the wing, and voila - a perfect match!
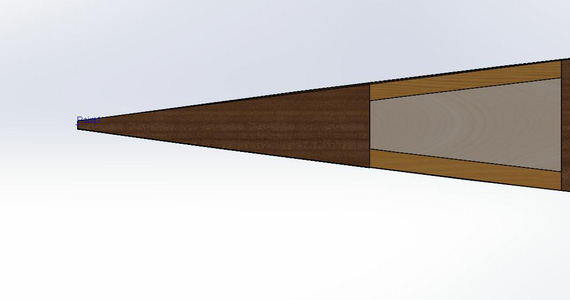
Match!
Yay! A perfect match.
Now, I know that in reality I will be drilling holes in spars in place based on the pilots in the hinges (or the other way around, hinges based on holes in spars (damn.. Im yet to decide.. :) ); but I'd rather start 'clean'.
Remember when sex was safe and flying was dangerous?
Up ↑
B-Log, The Nerd's Builder's Log
How I went about b-logging
| On: | May 20, 2014 |
| In: | [Misc] B Log |
| Tags: | tools, software, website |
Note: this article was updated in 2018 to reflect changes I did in version 2 of B-Log. I want to have a single article to link to in case people are interested...
Notes on the update are here.
The Problem
... was that I needed something to organize my builder's log. Being a software engineer by trade, I didn't want to go old school with paper logs and pictures, and whatever-random-collection-of-stuff-on-a-computer I could do. I wanted something that's easy to add entries to, calculates everything automatically, and allows me to publish it on the Web. Plus, I find it pleasant to view HTML as opposed to .doc, .pdf, or whatever.
Being a nerd, I just had to make it as nice for myself as I could...
The KitLog Pro
Many-a-builder is using this apparently successful piece of work. Apparently, as of writing this, they have over 1100 logs published on their mykitlog.com.
I have played around with it quite a bit. The program is trivially simple; but I can't stand the way it's architected.
- Windows only
- Uses Access database for storage (sic!!)
- Only three pictures per entry (really???)
Oh, the Access databases. Basically, what this means to me as a user is if it ever .. erm.. decides to stop working, I will loose all my data. "Revert to a backup", you say.. Yes, but if the problem is that I can't add my N+1st record because the DB just corrupted itself, no backup will help -- I'm stuck.
On top of that if, god forbid, KitLog ever goes out of business, I am stuck with the data that I can't export w/o some serious reverse engineering.
No thank you. :)
The Early Attempts
So, I was toying around with other stuff.
BlogSpot
Really cool (probably, second best to WordPress) blogging platform. Plus, links very nicely with Picasa, making image inserts a breeze.
The problem? How do I track time spent?
Also, the "going-out-of-business" problem was still there...
Moving on...
A CMS (Drupal or Joomla or whatever) + custom plugins
Now, that was better. Those are open source, good content entry and organization tools, and I can export it all out of a MySQL DB should I need to.
But, they require a server (which means either I'm running a server, or require hosting). And frankly, I believed that there must be a better way...
Sphinx
Close, but no cigar. Sphinx is the documentation framework used by Python and many others (including the company I work for).
It takes a bunch of ReST files as input (more on that later), and runs them through a converter, producing whatever you want (there are writers for html, txt, doc, pdf, and so on). The parser and converter is called docutils.
The problem with Sphinx is that it's geared towards writing documentation, and frankly, felt a bit too heavy to me for writing a builder's log.
While googling about yet-another-thingie-I-wanted-to-figure-out-about-Sphinx, I stumbled upon an article that talked about static site generators. There lied the Holy Grail....
Mutilation of the Pelican
The Pelican. I fell in love with this thing almost immediately. Here's what it does:
- Takes a directory with a bunch of ReST, Markdown, or ASCIIDOC
- Parses all those files into internal state, obtaining metadata from both files and paths (ie, if you organize your files in category/<date>/name way, you can tell it to properly parse that path and populate the metadata)
- Uses Jinja templates for generating a bunch of HTML output
- Allows plugins and custom templates
- Is all Python!
I did the initial version in 2014 (the date of this article). Then, I've spent about a week tearing it to pieces and figuring out how it works, and adding a few plugins to add things that I needed for the B-Log that it didn't have. I added time tracking, changed layout, got a Bootstrap-based template and modified it, etc.
In 2018, I fixed some suff and added a few more things.
You be the judge of results :).
Here's what I've done, in the end:
- I'm writing text in ReST, so I've added the custom directive to it allowing for 'figures'. Problem is, ReST image directive produces HTML that wasn't much useful to present images the way I wanted them. Instead of modifying core Pelican code, I elected to add a custom 'Figure' directive. This is done as a Pelican plugin. This plugin also automatically adds thumbnails for images. This is the figure_process plugin. It also requires the image_copy plugin.
- Another plugin I've written is image_copy. It enables sane handling of images placed next to the entries (pages and articles). Back when I started in 2014, Pelican wanted you to separate images and text (and it's internal mechanism of not separating them was broken back then). Pelican guys might've fixed this in the last 3 years, but hey, my setup worked for me - and I kept it.
- And most importantly, the plugin that allows the bulk of functionality - the
b_log plugin. It does a lot of stuff:
- Generates the project structure ("Project / Section" concept with multiple projects)
- Enables a special metadata tag to track time in an article
- Loads and parses logfiles that don't have articles associated with entries
- Calculates totals
- Creates internal data structures for theme templates to use
- Renders log pages
- Then came theming. Pelican is geared towards bloggers, so I had to tweak a lot of things to be better suited for B-Logging (build logging, remember? :) ). In the process, I've switched to Bootstrap, since it makes it very easy to organize content on a webpage. I added theme templates to produce the build logs with totals, etc, etc. Also integrated FancyBox - a really cool JavaScript image overlay.
- I added a couple of extras for myself - like silly QuOTD messages at the bottom of each entry - but that's not strictly related to B-Logging...
I like the end-result. I enjoyed hacking at it, and this was the first time I touched Python (so had to learn that on the way). Pretty neat (though I still prefer Perl (now, why do you need lists and tuples and sets again? :) ).
The only drawback is that it's regenerating everything every time. You can easily see how that might become a problem when you get a lot of entries, but I'm feeling like I'm ways away. 30 pages take about a second. I think I will need a lot of records before this becomes a problem; and at that point I will rewrite the whole damn thing to cache stuff.. probably :)
The code is here. The repo includes my theme, plugins, some tools, and sample content. It requires Python (I used 3.6 and did not test anything else), Pelican (which is checked into the repo in pelican/, along with it's dependencies), and Pillow (pip install pillow). Oh yeah, and pelicanconf.py's PATH_METADATA will likely require tweaking of slashes on Windows.
Read the config file (pelicanconf.py); and read thru Pelican docs to get the idea. sample-content/ contains my sample generated content that I was testing with. content-gen/ contains the simple Perl script that generates as much sample content as you want.
How it Works
To me as an end-user, it looks like this.
My source files are organized in directories like so:
/project-one/section-one/

        2001-01-01-entry-one/
                    entry-one.rst
                    picture.jpg

        section-one-log.log

/project-one/section-two/

        2001-01-02-entry-two/
                    entry-two.rst
                    picture.jpg

        section-two-log.log

/project-two/section-one/

        2002-01-01-entry-one/
                    entry-one.rst
                    picture.jpg

/project-two/section-two/

        2002-01-02-entry-two/
                    entry-two.rst
                    picture.jpg
and so on. Note the text *.log files - those are just log entries without the articles. They are optional, as you can see in Project Two.
Text log files look like this:
2011-01-01 | Some Summary Here       | 1.02
2011-01-02 | Some Other Summary Here | 2.02
Note the separator - that's configurable :).
There can be as many log files in a "Project/Section" as one wishes, they will all be parsed, and all entries will be properly sorted by date.
There can be entire sections without articles - but a project must have at least one article to be properly displayed. Yeah, you got to at least declare your intentions :).
This directory structure will get parsed into two Projects (Project One and Project Two) with their separate logs. Each project will get it's own menu on the left. To display the menus, B_LOG_PROJECTS_MENU config var should list them.
If there was any time logged in a project (either in article entries, log files, or both), that project's menu will get an extra "Log" entry, which will neatly display all log entries, and some totals.
There are a few special directories I use, pages (configurable in PAGE_PATHS) for static pages (ie, About section of this site is a static page), and blog, for blog entries (they don't show up under any projects).
If I want a new article-type entry, I just add a directory in the project/section path, and start writing the article in my favorite text editor (VIM!!). If I decide to log time, I just use my special logged metadata entry at the top of the article. I drop images into article's directory, and use my figure ReST directive to reference them.
If I just need to log some time without polluting the Internet too much with useless text, I add it to an appropriate .log file, or create a new one.
If I don't want to log time, I don't have to - I can just post an entry into the project w/o time logged.
After I'm done, I run Pelican, which generates the full website (html, images, everything!) into an output directory. Voila! I can stop right there, and I will have a fully working local version of my log, since it's all static HTML, but we want this online, don't we? So, the only thing left is...
Hosting
This was another revelation. Apparently, GitHub hosts static pages! 'Uploading a site' is a git push, and it transfers only deltas, so no fiddling with FTP, rsync, or whatever! They allow custom domain names instead of username.github.io, all you need is to set your A records in your DNS to point to their servers. It's awesome!
And So,
I am very happy with this so far. I have all my logs in practically plain text format, parser for which is open source and available. I have it nicely organized, and I can back it up as I please (to GitHub, anyone? :) ). I can re-write the programs that parse and produce final .html. I can extend the generator and change the theme to produce a printable version of the log, styled for paper rather than web. The list goes on!
A grease-job landing is 50 percent luck; two in a row are entirely luck; three in a row and someone's lying.
© Copyright "79FT". All rights reserved. Feel free to cite, but link back to the pages cited.
This website only shows how I did things in my various projects. These pages are for information and personal entertainment only and not to be construed as the only way, or even the perceived correct way of doing things. You are responsible for your own safety and techniques.